- Home
- Product Categories
- Button
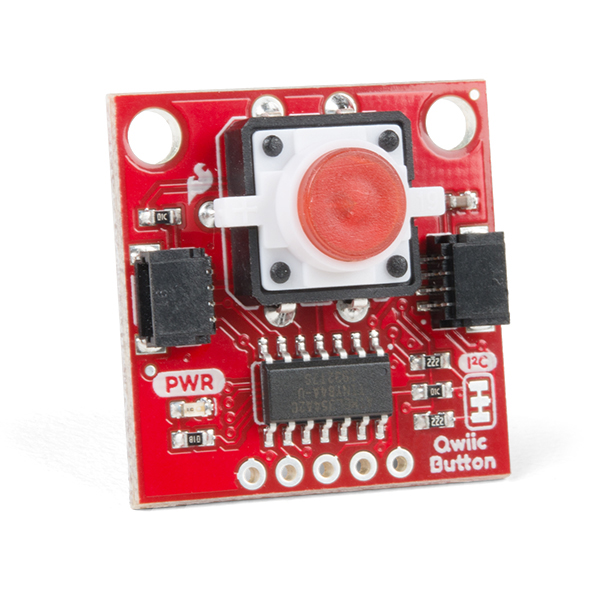
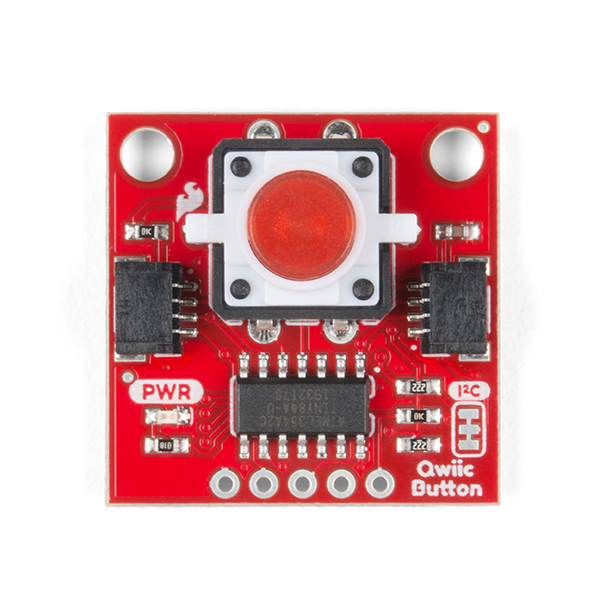
- SparkFun Qwiic Button - Red LED

Buttons are an easy and tactile way to interface with your project, but why would you want to deal with debouncing, polling, and wiring up pull-up resistors? The Qwiic Button with built-in red LED simplifies all of those nasty worries away into an easy to use I2C device! Utilizing our Qwiic Connect System, using the button is as simple as connecting a cable and loading up some pre-written code!
If you need multiple buttons for your project, fear not! Each button has a configurable I2C address, so you can daisy-chain multiple buttons over Qwiic and still address each one individually. We've got an example in our Arduino library that provides a super-easy way to configure your Qwiic Button to whatever I2C address you desire. You can download the library through the Arduino library manager by searching 'SparkFun Qwiic Button' or you can get the GitHub repo as a .zip file and install the library from there.
In addition to handling blinking and debouncing, the Qwiic Button has configurable interrupts that can be configured to activate upon a button press or click. We've also taken the liberty of implementing a FIFO queue onboard the Qwiic Button where it keeps an internal record of when the button was pressed. This means that code on your microcontroller need not waste valuable processing time checking the status of the button but instead can run a small function whenever the button is pressed or clicked! For more information on interrupts check out our guide here!
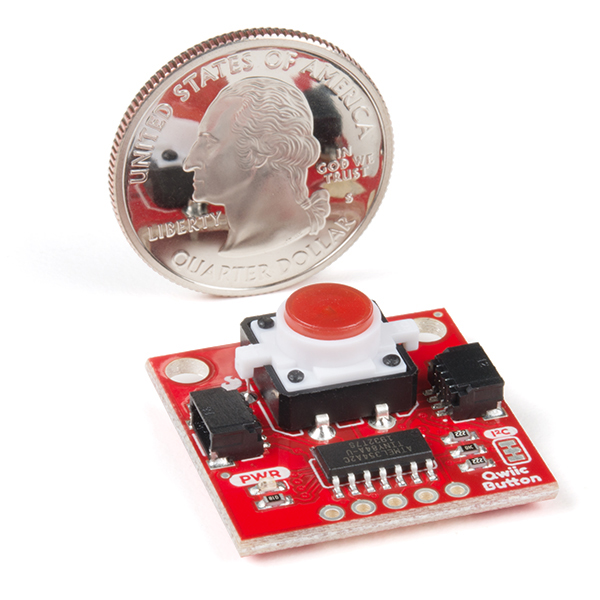
The SparkFun Qwiic Connect System is an ecosystem of I2C sensors, actuators, shields and cables that make prototyping faster and less prone to error. All Qwiic-enabled boards use a common 1mm pitch, 4-pin JST connector. This reduces the amount of required PCB space, and polarized connections mean you can’t hook it up wrong.
- 12mm Red LED Button rated for 50mA
- Built in LED can be configured for your desired level of blinkiness!
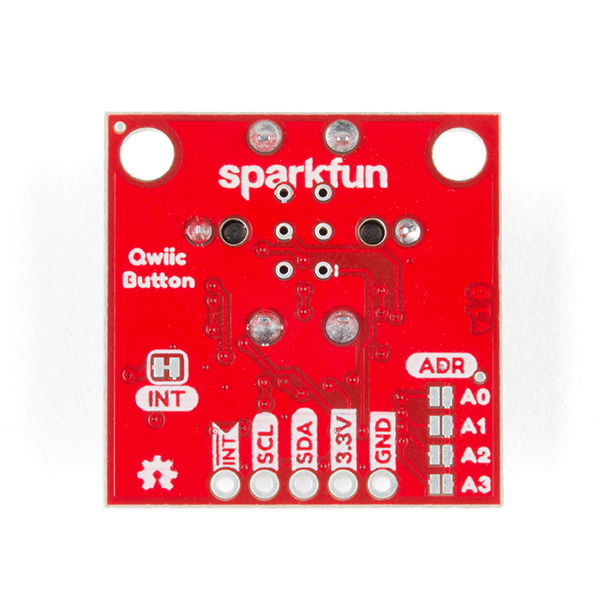
- Each button has a configurable I2C address
- Configurable interrupts - check out our guide here!
- FIFO queue
- Don't like the color red? Check out the SparkFun Qwiic Button Breakout and add another colored button!
SparkFun Qwiic Button - Red LED Product Help and Resources
SparkFun Qwiic Button Hookup Guide
January 23, 2020
A Hookup Guide for the SparkFun Qwiic Button (Red) and SparkFun Qwiic Button Breakout. Goes over connecting the Qwiic Button to an Arduino microcontroller and using it with the Qwiic Button Arduino library.
The ClockClock Project
October 8, 2020
Tell the time with this fantastic Alchitry project using clocks to make a clock!
SparkFun Arduino UNO R4 WiFi Qwiic Kit Hookup Guide
July 11, 2023
The SparkFun Arduino UNO R4 WiFi Qwiic Kit is a great way to get started with Arduino and the Qwiic-connect system - use this guide to get started!
Core Skill: Programming
If a board needs code or communicates somehow, you're going to need to know how to program or interface with it. The programming skill is all about communication and code.
Skill Level: Noob - Programming will be limited to basic drag and drop interfaces like ModKit or Scratch. You won't be writing code, but you will still need to understand some basics of interfacing with hardware. If you?re just using a sensor, it's output is analog.
See all skill levels
Core Skill: Electrical Prototyping
If it requires power, you need to know how much, what all the pins do, and how to hook it up. You may need to reference datasheets, schematics, and know the ins and outs of electronics.
Skill Level: Rookie - You may be required to know a bit more about the component, such as orientation, or how to hook it up, in addition to power requirements. You will need to understand polarized components.
See all skill levels
Comments
Looking for answers to technical questions?
We welcome your comments and suggestions below. However, if you are looking for solutions to technical questions please see our Technical Assistance page.
Customer Reviews
5 out of 5
Based on 1 ratings:
Good idea but needs a project
This is perhaps the best use for these illuminated buttons. The connectors make it easy to use with an Arduino, I used the Red Board Edge to confirm it arrived okay, or even with a Raspberry Pi. For that the user would need to write their own libraries and the rest. Now I need a project for it, and that Red guy.
It seems that the register map for Pressed Queue Status and Clicked Queue Status has the bits wrong if I compare to the firmware source code.
I've also just now noticed that the pressed and clicked queue status registers have the bits in the wrong order. In addition, the order of operations is wrong, confirmed by looking at the Arduino and Python firmware: the user pops from the queue and then sets the pop request bit, not the other way round. This has sat for over a year now without being fixed. Can we please get an update so other folks don't lose so much time debugging?