- Home
- Product Categories
- Other LEDs
- BlinkM - I2C Controlled RGB LED

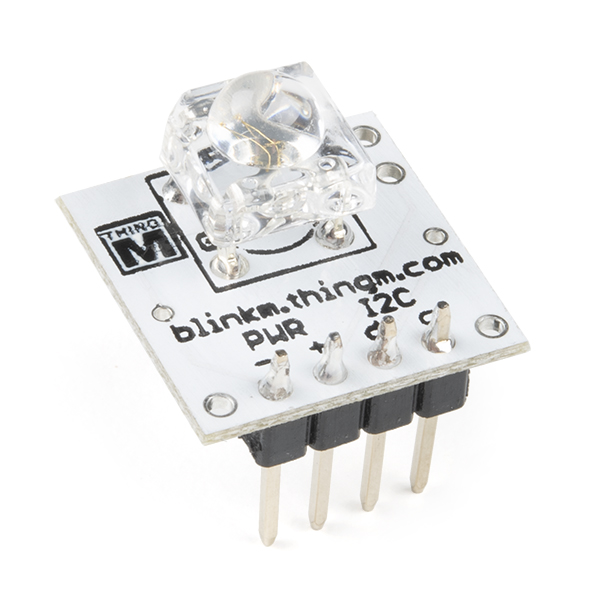
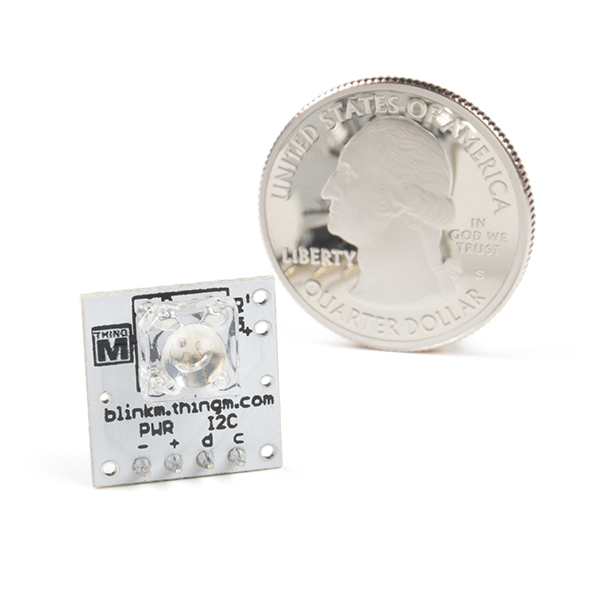
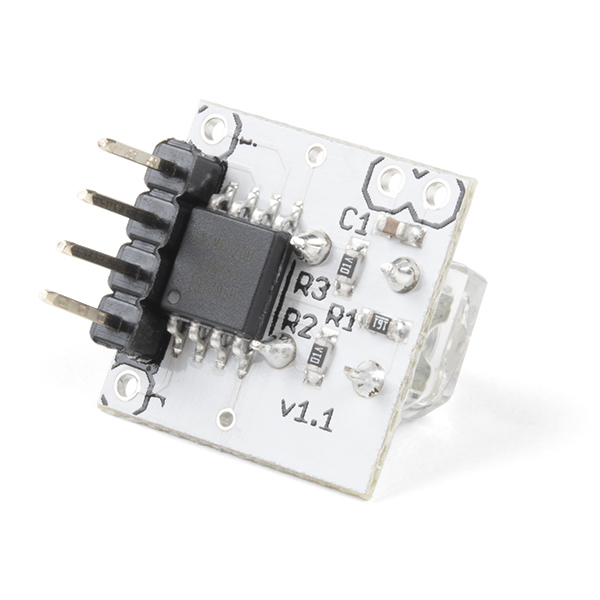
BlinkM is a “Smart LED”, a networkable and programmable full-color RGB LED for hobbyists, industrial designers, prototypers, and experimenters. It is designed to allow the easy addition of dynamic indicators, displays, and lighting to existing or new projects. If you’ve used up all your microcontroller PWM channels controlling RGB LEDs and still want more, BlinkM is for you. BlinkM uses a high quality, high power RGB LED and a small AVR microcontroller to allow a user to digitally control an RGB LED over a simple I2C interface. Multiple BlinkMs can be stranded together on an I2C bus allowing for some amazing light displays.
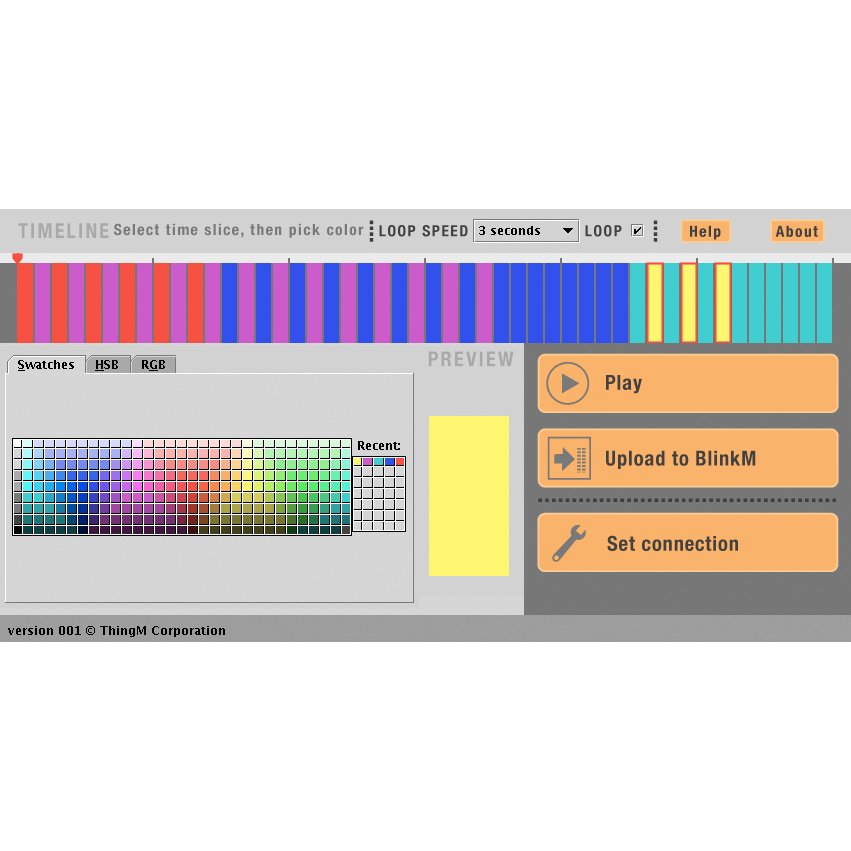
BlinkMs are also programmable! With ThingMs sequencer software, you can create a mix of colors with different time slices, upload that sequence to the Blink, and then let it rip.
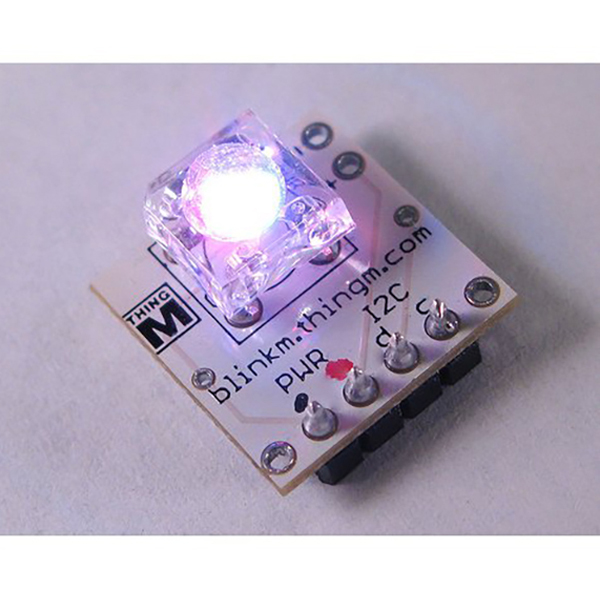
- 8000mcd 140º full-color RGB LED with 24-bit color control
- Specify colors by 24-bit RGB or HSB
- Fade between colors with variable timing and fade speeds
- Randomized color selection, with ranges and based on previous color
- 18 built-in light scripts (sequences)
- Create and save light scripts of up to 49 commands long
- Stand-alone operation: No microcontroller needed for light script playback
- Can plug directly into Arduino, no wiring or other components needed!
- Two-wire (aka “I2C”) interface
- Up to 127 BlinkMs on a single two-wire network
- Responds to “general call” broadcast for simultaneous commanding
- Reconfigurable network address
- Firmware upgradable
- 5-volt standard TTL inputs
- Low power consumption
BlinkM - I2C Controlled RGB LED Product Help and Resources
Core Skill: Programming
If a board needs code or communicates somehow, you're going to need to know how to program or interface with it. The programming skill is all about communication and code.
Skill Level: Competent - The toolchain for programming is a bit more complex and will examples may not be explicitly provided for you. You will be required to have a fundamental knowledge of programming and be required to provide your own code. You may need to modify existing libraries or code to work with your specific hardware. Sensor and hardware interfaces will be SPI or I2C.
See all skill levels
Core Skill: Electrical Prototyping
If it requires power, you need to know how much, what all the pins do, and how to hook it up. You may need to reference datasheets, schematics, and know the ins and outs of electronics.
Skill Level: Rookie - You may be required to know a bit more about the component, such as orientation, or how to hook it up, in addition to power requirements. You will need to understand polarized components.
See all skill levels
Comments
Looking for answers to technical questions?
We welcome your comments and suggestions below. However, if you are looking for solutions to technical questions please see our Technical Assistance page.
Customer Reviews
4 out of 5
Based on 3 ratings:
Had trouble adding the blinKMfuncts.h lib To my ARduino lib but the device works fine Need to get the blinKMfuncts.h lib and save it for future.
Excellent start working with I2C
Excellent to introduce I2C with Arduino or Raspberry Pi because of easy handling and effect
n.b. do this before you start trying out colors
void stopScript () { // issue a stop script command Wire.begin(); Wire.beginTransmission(0x09); Wire.write('o'); Wire.endTransmission(); }
Could someone please verify whether or not this device returns an I2C ACK when being addressed? I think this is usually a given for I2C, but I didn't see anything in the datasheet that specifically states that it does.
The description and links should be fixed. Thingm's web page does not point to the latest libraries and such. It is all on github in todbot's repository. A real current library and such. Start your search there. I wish I had found this the other day and not spent a day dealing with this.The links are confusing. I do not know which links I grabbed, but they are not as current as the github. Also what is in 'master' is not the same as in 'blinkm-arduino' even on github. Still cannot get the reflash program (the newest one on github) to work, yet.
The github is here: https://github.com/todbot/BlinkM-Arduino
Lectric is right. All the software is junk. About 4+ years out of date. WIndows java tool is buggy, Windows CLI tool does not work, Processing script does not compile or work (at lease under 2.2). No easy way to figure out how to program it from a mega or other board (BlinkMCommunicator.ino). The BlinkMuino project (http://todbot.com/blog/2011/03/22/blinkm-smart-led-as-the-smallest-arduino/) is also out of date. This would be a pretty cool thing if it worked, at least easy to push a sequence to it easily. Someone that knows what they are doing should make it so we can add this board from the boards manager and program it from the arduino environment and be done with it. All the rest of the software is just other ways of getting it done.
Spent a day figuring out the blimkM. It is a cool little thing Too bad the documentation is so out of date. My description: RGB LED can be run as a slave i2c device with a uP sending commands to it to flash or fade or run a sequence. In addition, it has built in sequences which can also be triggered to run over i2c. The first sequence is user programmable (sequence 0) by the scripting language in the data sheet. This is the sequence which runs when powered up. Once this script is programmed, merely connecting voltage to the blinkM will cause it to run that sequence. You can ignore the processing scripts in the downloads, these do not run any more. Look through the Arduino sketches for examples on how to send the i2c commands. The one sketch called BlinkMScriptWriter2.pde is an arduino sketch which gives an example on how to send a user programmable sequence to the blinkM. the BlinkM_funcs.h file must be in the same folder as the sketch
the 1 is 1 'tick' (timing 1/30 of a second according to the data sheet) the rest of the command, in the brackets, are the commands as listed in the data sheet. If you want to turn it on and stay on for 15 'ticks', try:
for commands which do not require a time, use 1 tick (i.e. fade time). Make sure the number of lines in the sequence agrees with the script_len variable in the sketch. When you burn this to the arduino, it will then load the script to the blinkM. Cycle the power and you will see it has 'stuck'.
HTH
I used this for a CheerLights project, you can find the tutorial at: http://llawlor.github.io/2015/12/24/cheerlights-particle-photon.html .
The software is junk. not in synch, cant upload. Stack errors galore. Mod the code to get it to work, and it wont communicate at all.
The soldered joints are full of dried flux, they didnt take the time to even clean the boards. Two cold joints on a BlinkM and 4 on the BlinkM Blaster
Returning these pieces of crap. YES I even followed their quickstart guide. ALL HYPE
big thumbs down.
The code works great for me, my joints are dried with flux, but they work.
Lectric, I am sorry you experienced problems with our products. Please send a note to blinkm@thingm.com and we will replace your BlinkM and MaxM Blaster.
For the software errors, please see our forum on Get Satisfaction:
http://www.getsatisfaction.com/thingm/products/thingm_blinkm
If the problems you had are not addressed there, please post them there or email us at blinkm@thingm.com and we will look into it immediately.
- Mike Kuniavsky, ThingM co-founder
Anyone have trouble reading data out of the BlinkM? I'm trying to read the firmware and just get back 0xFF, 0xFF, where I should be getting back 'a', 'a'. I am using the broadcast address 0x00, and sending the 'Z' command, then reading back two bytes.
Please ignore my previous comment - was getting a bit frustrated after three hours of looking for a solution - have now worked out that both of the files for the communicator were not in the same folder. Hope this helps any others Noobs out there. David.
Glad to hear you figured it out! Sorry for the frustration on that. If you do have any other questions moving forward, you can always email techsupport@ and they'll be able to help you out quickly.
Hi One & All, can anyone tell me what to do with these. I have just received two and downloaded the latest arduino software and the BlinkM sequencer but am getting lots of compiling errors - as below. Do I need a different library of files for WIRE or something. I can only find vague references from a year ago or so to similar issues, and would have thought these would connect easily??? Thanks David.
linkMCommunicator.ino:36:26: error: BlinkM_funcs.h: No such file or directory BlinkMCommunicator.ino: In function 'void setup()': BlinkMCommunicator:65: error: 'BlinkM_beginWithPower' was not declared in this scope BlinkMCommunicator:68: error: 'BlinkM_begin' was not declared in this scope BlinkMCommunicator.ino: In function 'void lookForBlinkM()': BlinkMCommunicator:91: error: 'BlinkM_findFirstI2CDevice' was not declared in this scope BlinkMCommunicator.ino: In function 'void loop()': BlinkMCommunicator:124: error: 'BlinkM_scanI2CBus' was not declared in this scope BlinkMCommunicator:143: error: 'BlinkM_sendCmd' was not declared in this scope BlinkMCommunicator:148: error: 'BlinkM_receiveBytes' was not declared in this scope
I made a RGB LED dog harness with these: http://www.youtube.com/watch?v=6aXk2gZiHwo
Just received mine. The site has been down though. I can't get sample code or a datasheet.
The site is still down. Try http://www.jameco.com/Jameco/Products/ProdDS/2123637.pdf
Can these be programmed with a ftdi cable? I'd like to get one cable that can do both Arduino and Blinkm programming. If so which one would be best?
Thanks in Advance
What frequency does the PWM flash at? Will I see "horizontal blinds" in captured images using a simple CCD at partial brightness?
BlinkM's PWM rate is 120Hz. You will probably see artifacts unless you can control your shutter speed.
Is the source code for the BlinkM available, or is it closed source?
BlinkM firmware is closed source. Everything else is open source: http://code.google.com/p/blinkm-projects/.
There's an open source clone project here: http://code.google.com/p/codalyze/wiki/CyzRgb
What is the name of the package type of the LED? Do we have a datasheet on it?
It's a piranha RGB LED. It's not from a manufacturer that publishes data sheets, but if you search Ebay for "piranha RGB LED" you will find many like it, and the auctions have a lot of the same information you'd find in a formal data sheet.
I will say that you need to power up the BlinkM and the device your using at the same time or it will not talk at all. I could not figure this out at all but a forum post help me get on the right track. hint Only thing I can say is a beef is to be very careful to watch how you power off your BlinkM/device or you will brick it. I think I did this by mistake to one of them since the Mini does not have an 5v out. Read the PDF fully before hooking it up. Software worked great on my Pro Mini and board does not have flux issues or cold joints like said before.
Talking with my brother about the Max he said he does not see any issues with his device other than it's real freak'n bright. :)
A while a go I made this simple lamp using a blinkM module. Easy and cool.
http://www.natnlabs.net/2009/12/blinkm-illuminator.html