- Home
- Product Categories
- Monochrome
- Serial Enabled 16x2 LCD - Red on Black 5V

Serial Enabled 16x2 LCD - Red on Black 5V
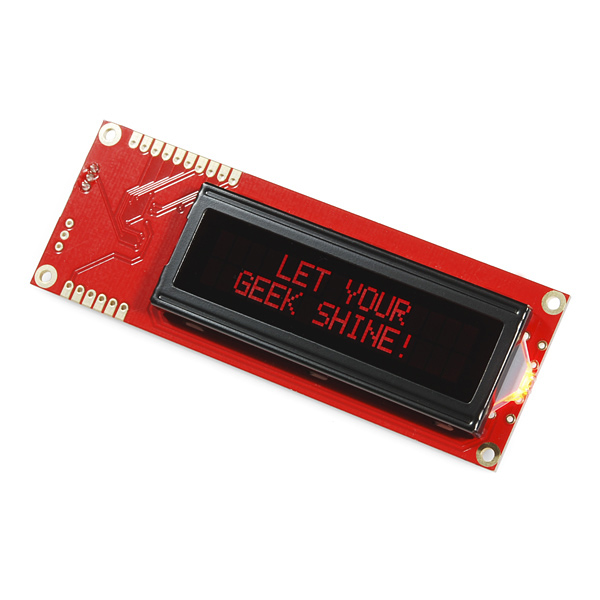
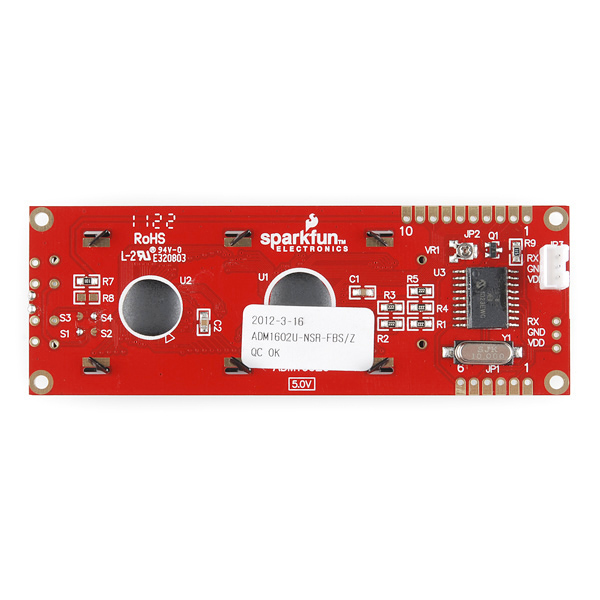
This is the latest evolution of our serial LCD. Included on a single board is a 16x2 LCD and an embedded circuit based around a PIC 16F88. The on-board PIC takes a TTL serial input and prints the characters it receives onto the LCD. The installed firmware also allows for a number of special commands so you can clear the screen, adjust the backlight brightness, turn the display on/off, and more.
Communication with SerLCD requires 5V TTL serial at a default baud rate of 9600bps (8-N-1). You can adjust the baud to any standard rate between 2400 and 38400bps. The power (VDD), ground (GND) and RX pins are all broken out to both a 0.1" pitch header as well as a 3-pin JST connector.
SerLCD has the ability to dim the backlight to conserve power if needed. There is also a potentiometer on the back of the display to adjust the contrast.
This LCD makes for a great gift, because it can be used for so many different projects! For more gift ideas check out the SparkFun Gift Guide!
- Embedded PIC 16F88 utilizes onboard UART for greater communication accuracy
- Adjustable baud rates of 2400, 4800, 9600 (default), 14400, 19200 and 38400
- Operational Backspace
- Greater processing speed at 10MHz
- Incoming buffer stores up to 80 characters
- Backlight transistor can handle up to 1A
- Pulse width modulation of backlight allows direct control of backlight brightness and current consumption
- All surface mount design allows a backpack that is half the size of the original
- Faster boot-up time
- Boot-up display can be turned on/off via firmware
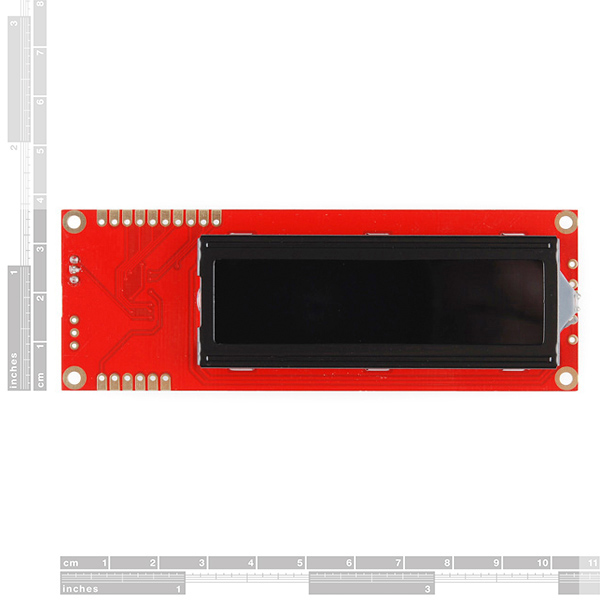
- User definable splash screen* PCB: 103x36mm
- LCD: 71.4x26.4mm
Serial Enabled 16x2 LCD - Red on Black 5V Product Help and Resources
PIC-Based Serial Enabled Character LCD Hookup Guide
May 29, 2018
The PIC-based serial enabled character LCD backpack is a simple and cost effective solution for interfacing to character Liquid Crystal Displays (LCDs) based on the HD44780 controller. The backpack simplifies the number of wires needed and allows your project to display all kinds of text and numbers.
Core Skill: DIY
Whether it's for assembling a kit, hacking an enclosure, or creating your own parts; the DIY skill is all about knowing how to use tools and the techniques associated with them.
Skill Level: Noob - Basic assembly is required. You may need to provide your own basic tools like a screwdriver, hammer or scissors. Power tools or custom parts are not required. Instructions will be included and easy to follow. Sewing may be required, but only with included patterns.
See all skill levels
Core Skill: Programming
If a board needs code or communicates somehow, you're going to need to know how to program or interface with it. The programming skill is all about communication and code.
Skill Level: Rookie - You will need a better fundamental understand of what code is, and how it works. You will be using beginner-level software and development tools like Arduino. You will be dealing directly with code, but numerous examples and libraries are available. Sensors or shields will communicate with serial or TTL.
See all skill levels
Core Skill: Electrical Prototyping
If it requires power, you need to know how much, what all the pins do, and how to hook it up. You may need to reference datasheets, schematics, and know the ins and outs of electronics.
Skill Level: Competent - You will be required to reference a datasheet or schematic to know how to use a component. Your knowledge of a datasheet will only require basic features like power requirements, pinouts, or communications type. Also, you may need a power supply that?s greater than 12V or more than 1A worth of current.
See all skill levels
Comments
Looking for answers to technical questions?
We welcome your comments and suggestions below. However, if you are looking for solutions to technical questions please see our Technical Assistance page.
Customer Reviews
4.5 out of 5
Based on 2 ratings:
make sure you get some spacers
good screen, the only thing is if you want to mount it flush you'll need to clip the ends of the JST connector and use spacers or several washers to prevent the thing shorting out on your chassis.
I like the display
I found that it was very easy to get running using the example code. I need to use some graphics in my display for my most current project so I may not use this one. I am sure that it will be useful in the future. I need to point an arrow in any of 16 directions. I do not think that the character/symbol set supports this.
There's some sort of bug with this LCD and using the serial interface for creating custom characters. Tried serLCD as well as writing my own both using SoftwareSerial and HardwareSerial. Some patterns become corrupted but not all of them. Switching to the 4bit interface and using LiquidCrystal works fine.
Just a helpful note to anyone who might run into this later: I connected the serial lcd to my arduino and wrote a sketch to cycle through the brightness settings on the backlight. Somehow in my infinite wisdom I managed to turn the backlight off where it would NOT come back on. I tried the 0x7C followed by 0x9D to set to full brightness with still no luck. I finally realized to look through the firmware and noticed there is another command that turns the backlight on and off (with no mention in sparkfun's quickstart guide). You still send the 0x7C but you follow it with 0x01 (0x02 turns it off!). I just thought I'd share that with anyone who might be puzzled as I was.
What size mounting screws work with this? Looks like 4-40 are too big? I'm about to enlarge the holes, but I'd thought I'd ask what others use.
I have ported LiquidCrystal library for use with the serial LCD you can look at my code here. Still working on finishing all the documentation. But putting up for now hopefully someone will find it usefull.
http://arduino.cc/playground/Code/SerLCD
-Thanks
I have a problem. my serial LCD display put the only one character on each line. The symptom is every one character is sent to new line. If I send the word "new". w e How do I solve this,anybody help me.
I recently got one of these and I've noticed that the screen for me seems to be perpetually scrolling to the left, regardless of the position I direct the cursor, almost like the buffer on the SerialLCD is overrunning for some reason? I've used the second tutorial on the quickstart guide, and the RPM and TEMP lines will scroll right to left, disappear for a few refreshes and then appear again to scroll right to left. Has someone else experienced this?
EDIT: Nevermind, powercycling the Arduino and LCD fixed the issue. Seemed to be a first boot issue.
Hi! Does anyone know how to create a menu with 4 buttons?¿? Any good web or something¿? thnks
I've created a new splash screen for the Serial LCD, now I want to save it to the Serial LCD memory. So, exactly how do I write a "control-j" to the Serial LCD. I've put in the required line to transmit special character 124, but I can figure out how to format the "control-j" line of code. I've Googled this for about an hour and can't find an explanation or sample code anywhere. Here's my code...
Instead of getting "NEW" on the first line and "SPLASH_SCREEN" on the second line, I get "ntrol>NEW" on the first line and "SPLASH_SCREENco" on the second line. Naturally you might leave off the quotation marks from around "< control > j", but that just generates multiple errors. Any suggestions?
More Please!
I can't understand, why adding just some cheap sub-1$ MCU to an LCD mandates doubling the price? I feel, it's a ripoff for Arduino guys ;) Besides, converting UART to some commands isn't exactly a rocket-scientist job.
15 $ would be a fair price, considering raw HD44780 LCD modules are in 2-3 $ price range.
Engineering Cost, spending time preparing to sell, setting up documentation, paying workers, paying vendors... Sparkfun has to pay bills too, not to mention make profit. 25 isn't unreasonable for saving me a bunch of pins
i have a few questions:
do you need to solder headers to connect that cable?
do you only need 3 wires(+,-,UART)?
can you just send data to the thing without having to worry about cursor posisions and that weird stuff? (Serial.println("stuff4line1");?
if it does do that, and you go over 4 lines, does it clear the screen or shift up all the text?
Jack;
would you kindly share where do you find enclosures with LCD display windows? I've to build a few, LCD-enabled pieces of equipment, and actually carving a nice window out of a plastic enclosure has been my biggest headache.
It appears that this device does not have the standard mounting hole pattern for the 16X2 displays. Some handheld enclosures with a built in display window depend on the standard hole pattern. That makes this display unsuitable if you intend on using it with such an enclosure. If Sparkfun makes this unit maybe a design change to fix this issue could make this LCD usable in a wider range of applications. I am using the 3.3 volt version with your serial backpack and this works great. If Sparkfun is planning on offering the 3.3 volt unit in an itegrated package please maintain the mounting dimensions of the original display.