- Home
- Product Categories
- SparkFun
- SparkFun Window Comparator

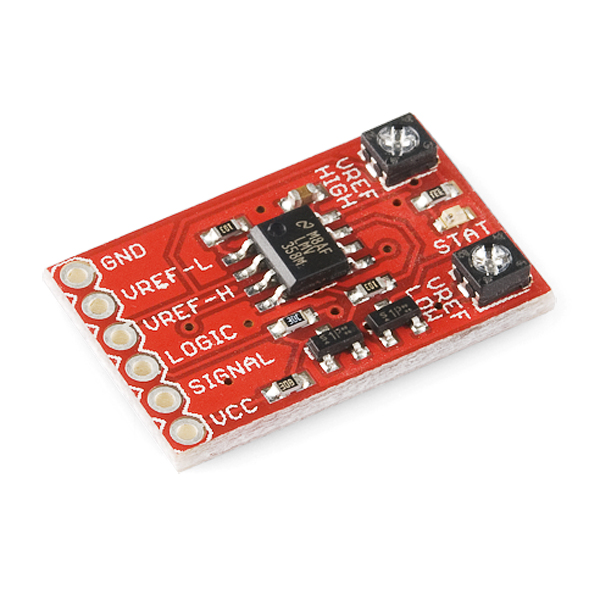
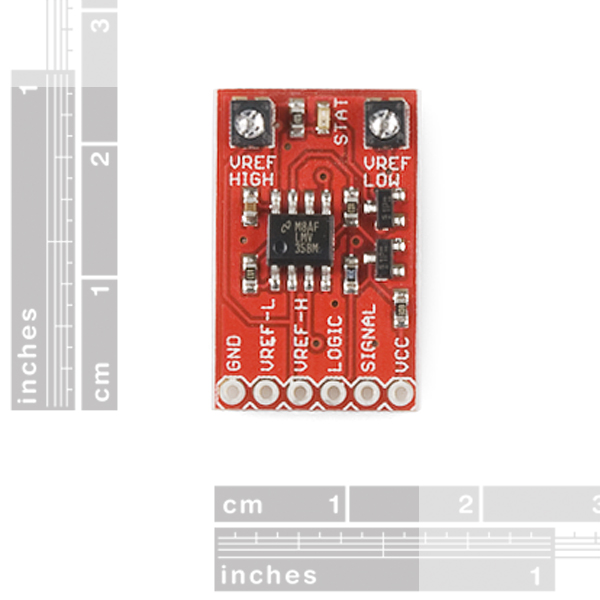
SparkFun Window Comparator
Have you ever needed to know if a voltage coming from a sensor is within a specific voltage window? This little breakout board allows you to hook up an analog signal, define your voltage window, and it will tell you (digitally - HIGH or LOW) if your input is inside or outside the window.
You can define the upper and lower limits of the voltage window by adjusting to trim pots on the board. Power it up with 5Vs, set your limits, and you'll be ready to go! It accepts voltages from 0V to 5V. Now you don't need to set up thresholds in code.
This also frees up an ADC for another sensor that may require more than a voltage threshold or window. Another advantage to this little guy is that it's analog, so that means it's virtually instant (10 microseconds). It is also useful in audio applications when you need to define peaking voltages on an AC signal and you want to analyze peaks on both the top and bottom sides of the sound wave.
SparkFun Window Comparator Product Help and Resources
Core Skill: Soldering
This skill defines how difficult the soldering is on a particular product. It might be a couple simple solder joints, or require special reflow tools.
Skill Level: Noob - Some basic soldering is required, but it is limited to a just a few pins, basic through-hole soldering, and couple (if any) polarized components. A basic soldering iron is all you should need.
See all skill levels
Core Skill: Electrical Prototyping
If it requires power, you need to know how much, what all the pins do, and how to hook it up. You may need to reference datasheets, schematics, and know the ins and outs of electronics.
Skill Level: Noob - You don't need to reference a datasheet, but you will need to know basic power requirements.
See all skill levels
Comments
Looking for answers to technical questions?
We welcome your comments and suggestions below. However, if you are looking for solutions to technical questions please see our Technical Assistance page.
Customer Reviews
No reviews yet.
Ah, learning to use op-amps and build logic gates with resistors, are we?
Ya know you could just use a single quad comparator (e.g. LM339) to construct a window generator that will give you low, high, in-window and out-of-window indications. It's cheaper, uses fewer parts, and works over a wider power supply voltage range.
Google books has a nice explanation of some example circuits here: http://books.google.com/books?id=STzitya5iwgC&pg=PA11&lpg=PA11&dq=lm339+window+comparator&source=bl&ots=Ld8sIxiQtN&sig=Ql_0yVfn6zZnY0WqOluhnZvClyM&hl=en&ei=nO_ITInzFYT6sAPpnajSDg&sa=X&oi=book_result&ct=result&resnum=5&ved=0CCgQ6AEwBA#v=onepage&q=lm339%20window%20comparator&f=false
I am a novice trying to put together a Flexiforce pressure sensor activated piezo buzzer. Would it work to tie the sensor to signal and positive side 5v. Set VrefH to slightly less than 5v and VrefL to grd. When no pressure applied, voltage across the signal is 5v. No sound. When pressure applied to sensor, voltage drops, logic goes high driving the buzzer with 5v.
I received this comparator this week but the output is ALWAYS high no matter what the input is and how the potmeters are turned. Does this mean the comparator is broken or am i missing something?
This is definitely a useful product, but your choice of op amp is a bad one. The LM358 can only drive the "HIGH" level to about 3.5 or 3.6 Volts, which I believe is barely hovering around the threshold for the Arduino HIGH level. You might instead replace the LM358 with a rail-to-rail op amp like the MC33202, which is also available in the SOIC package. This could avoid some potential snafus when the logic is not working as it should...
Perhaps they updated it since your reply, but the opamp is an LMV358, a rail-to-rail output version of the venerable LM358. It doesn't really matter though, as the output appears to be buffered by a transistor for logic level. The fact they didn't use an old LM393 is odd, as its faster (its an actual comparator, designed for open loop gain, not closed loop), has the same input specs, and can be powered by > 5V. Does the job though! As majority of window voltage events an arduino is likely to measure won't be ultra short.
is there anyway to invert the logic? meaning it acts as a normally closed switch? thanks
Here is a good tutorial how these things work... http://www.facstaff.bucknell.edu/mastascu/elessonshtml/interfaces/convcomp.html
@sparkfun Hey so I have one of these ordered to interface with your mic break out and a lilypad mcu to control ws2801 led string I have... any input on the use of these eg any bumps you can think of?
HOW CAN I CONNECT AND AUDIO SIGNAL? Basically I need to detect audio with a microcontroller. I guess connecting a mono audio output one wire to SIGNAL and Ground to GND, may work?
Does anyone who has one of these know if you treat vref low as vref high and vica versa, will the logic be inverted???
It will not. If you invert the vrefs, then it will always be out-of-window.
Would this still function properly if supplied with just 3.3v?
Just get one on my hand, but I have problem to turn the trimpot.
Eye glass screw drivers generally work well on turning the trim pots
Those surface mount trim-pots look very useful, is there a part number or source for them?
Since i went looking for them as well i might as well put there up. These are the closest i found:
http://www.jameco.com/webapp/wcs/stores/servlet/ProductDisplay?langId=-1&storeId=10001&catalogId=10001&productId=854284&
http://search.digikey.com/scripts/DkSearch/dksus.dll?Detail&name=3314R-1-103ECT-ND
Sorry, but we don't sell them. They are just a standard 10k SMD trimpot.