- Home
- Product Categories
- Arduino
- SparkFun Danger Shield

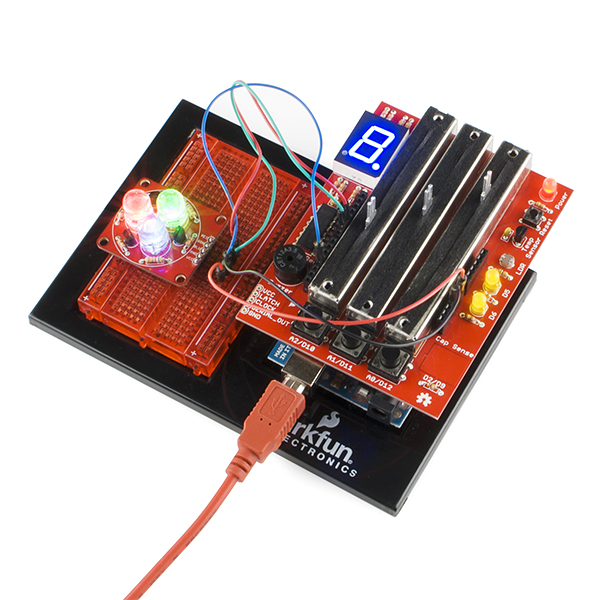
SparkFun Danger Shield
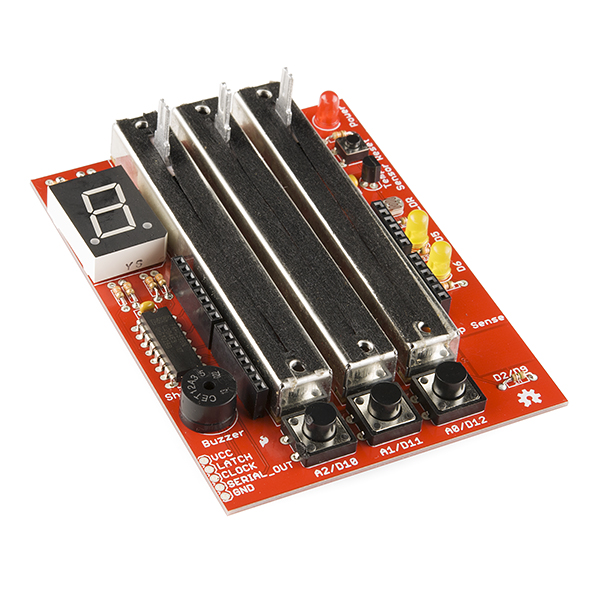
The SparkFun Danger Shield mounts on top of your Arduino or Arduino Pro and equips it with a variety of fun and useful inputs and outputs. The Danger Shield has so much potential; we can't wait to see what you're able to do with it! The shield's features include:
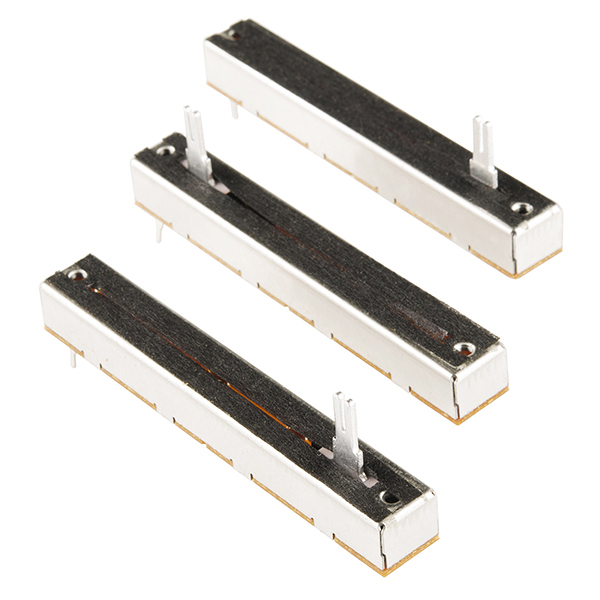
- Three linear slide potentiometers connected to the Arduino's analog pins 0 through 2.
- Red and yellow LEDs connected to digital pins 5 and 6 - PWM pins - so you can easily vary their brightness.
- Three momentary push buttons connected up to the Arduino's digital pins 10 through 12. Those lines will go low when the buttons are pressed.
- A photocell and a temperature sensor, both with analog outputs, are connected to the analog pins 3 and 4, respectively.
- An 8-bit shift register set up to control a blue 7-segment LED.
- A buzzer - so you can get sound out of your Arduino
Capacitive Touch pad - Using the CapSense library to sense touch.
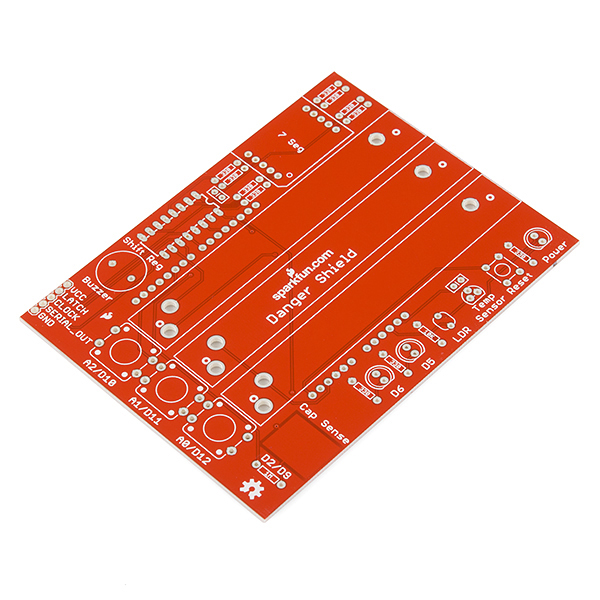
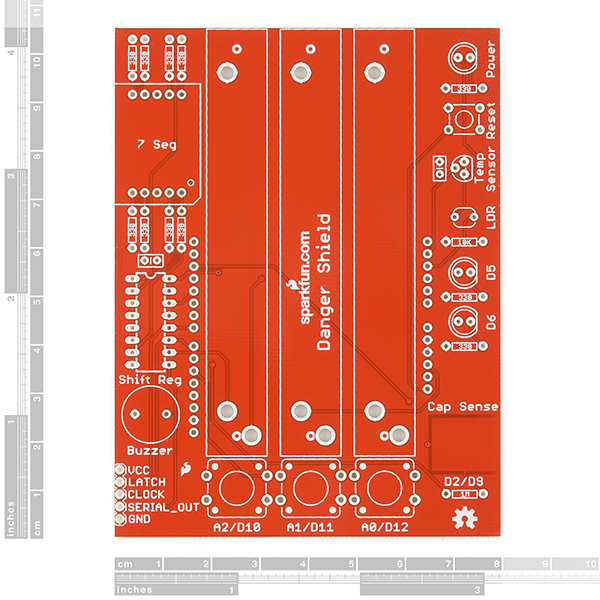
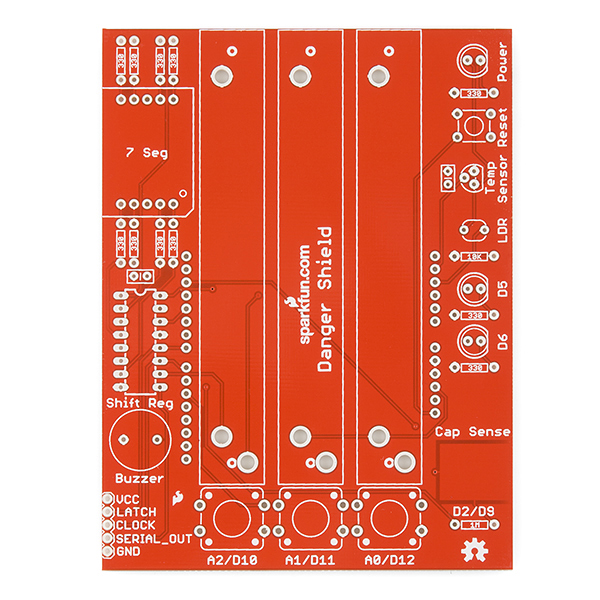
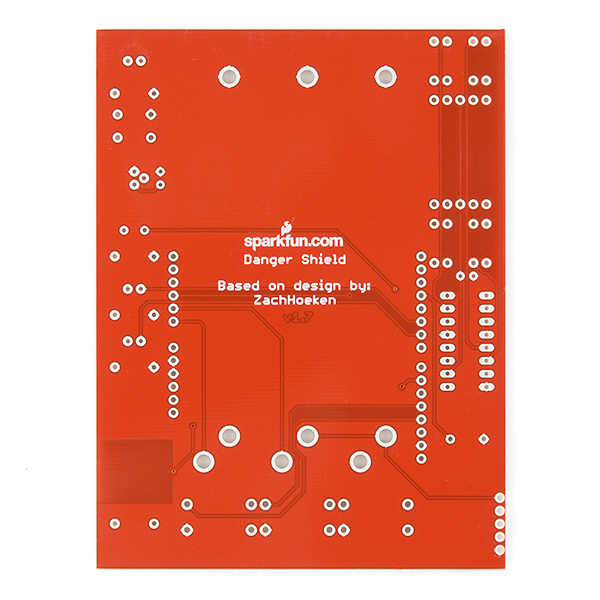
This product comes as a kit of parts, which you'll have to solder into the included PCB. All parts are through-hole so it should go together relatively easily; but always check your component orientation before soldering!
- 1x PCB Danger Shield Kit
- 3x Slide Potentiometers - 10K
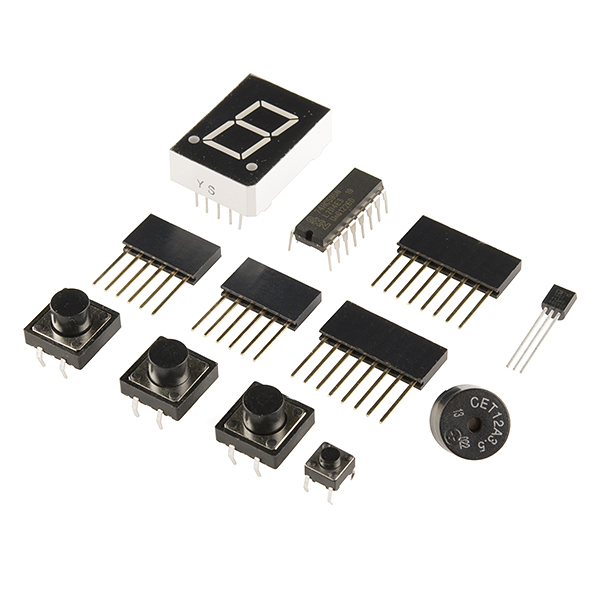
- 1x 7-Segment LED - Blue
- 1x 8-bit Shift Register - 74HC595
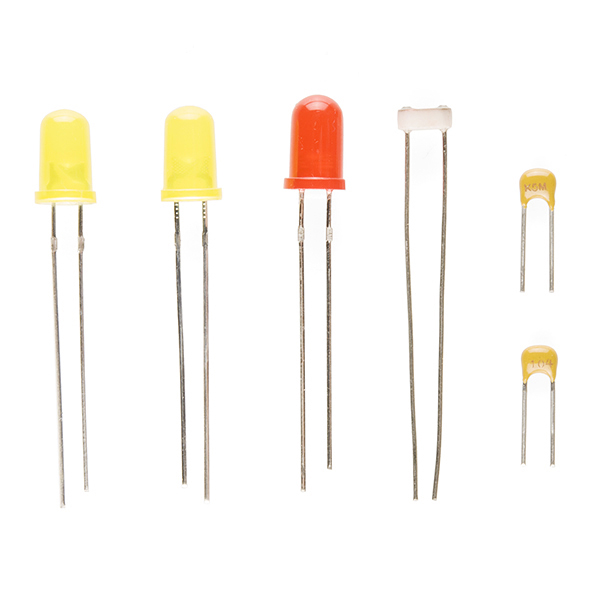
- 1x Temperature Sensor - TMP36
- 1x Miniature Photocell
- 1x Piezo Speaker
- 1x Basic LED - Red
- 2x Basic LEDs - Yellow
- 1x Mini Push Button
- 3x Momentary Push Buttons - 12mm Square
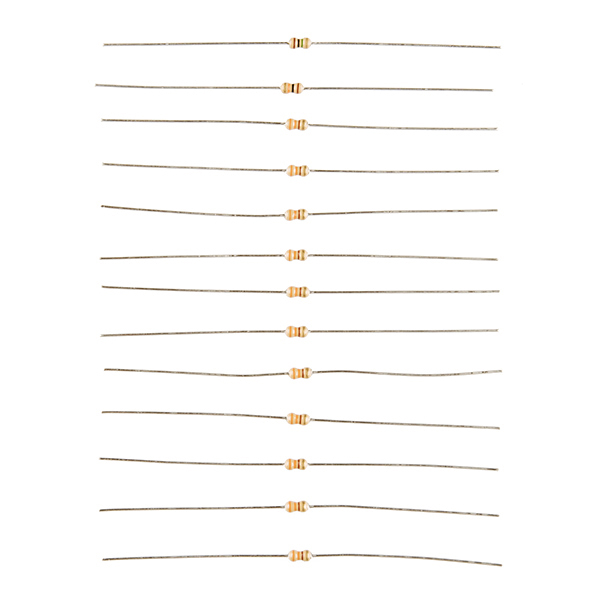
- 11x Resistors - 330 Ohm
- 1x Resistors - 10K Ohm
- 1x Resistor 1M Ohm 1/6W
- 2x 8-pin Arduino Stackable Headers
- 2x 6-pin Arduino Stackable Headers
SparkFun Danger Shield Product Help and Resources
Core Skill: Soldering
This skill defines how difficult the soldering is on a particular product. It might be a couple simple solder joints, or require special reflow tools.
Skill Level: Rookie - The number of pins increases, and you will have to determine polarity of components and some of the components might be a bit trickier or close together. You might need solder wick or flux.
See all skill levels
Core Skill: Programming
If a board needs code or communicates somehow, you're going to need to know how to program or interface with it. The programming skill is all about communication and code.
Skill Level: Rookie - You will need a better fundamental understand of what code is, and how it works. You will be using beginner-level software and development tools like Arduino. You will be dealing directly with code, but numerous examples and libraries are available. Sensors or shields will communicate with serial or TTL.
See all skill levels
Core Skill: Electrical Prototyping
If it requires power, you need to know how much, what all the pins do, and how to hook it up. You may need to reference datasheets, schematics, and know the ins and outs of electronics.
Skill Level: Rookie - You may be required to know a bit more about the component, such as orientation, or how to hook it up, in addition to power requirements. You will need to understand polarized components.
See all skill levels
Comments
Looking for answers to technical questions?
We welcome your comments and suggestions below. However, if you are looking for solutions to technical questions please see our Technical Assistance page.
Customer Reviews
4 out of 5
Based on 1 ratings:
No LEDs on the sliders
This is an expensive shield, and I don't quite feel like the quality matches the price. The original danger shield had LEDs built into the sliders, but this one does not.
If you are willing to get a non-RoHS version, check out the one from Seeed studio. It has a smaller 7-segment LED and no capacitive touch space, but it does have LEDs in the sliders.
Thanks for the review. There are many other versions of this product out in the world. I believe you may be thinking of someone else's board. Ours have never had LEDs in the sliders.
Hello, I am disappointed because in this version there is no pull up resistances for the 3 push-buttons... The plan that I seen had these resistances and it is much better. How to make now?.
Are there any knobs available for those sliders?
Getting errors while trying to upload the sketch Please help!
Sparkfuns video of the Dangershield and 4D Systems uLCD-43PT display module: https://www.youtube.com/watch?feature=player_embedded&v=L1TPs6dI11k
Updated code available for download for Arduino, display along with an Application Note in pdf format. http://www.4dsystems.com.au/downloads/Application-Notes/4D-AN-P4025_ViSi-Genie-Arduino-Danger-Shield_R_1_00.zip
This one is WAY More Dangerous.
Previous Danger Level: steven seagal
Current Danger Level: jean claude van damme (whilst doing a split)
hello, do you sell that kind of foam that can be seen on those sliders? if I buy the sliders and not the whole kit, I get that foam?
The sliders themselves come assembled with the foam. We don't sell it separately. You should be able to find something equivalent at a craft store though.
thank you, so those sliders are not the same you sell separately on this page: https://www.sparkfun.com/products/9119
Actually, they are the same sliders. The individual sliders pictures simply show them with the foam peeled off.
"Hey. Hey Lana. Lana. LAAANAAAA." "WHAT" "Danger shield"
If you build this, don't install the 10k resistor immediately along the flat side of the temp sensor. It is a pull up on its output and, at least with the TMP36 sensor included with my board, will lead to malfunction. It may be needed with some other part. So build everything else, try it out. If you are satisfied with the results then it's all good. If not, investigate further. It took me some hair pulling to figure this out, so be warned. The resistor also does not appear in the schematic posted on this page.
Just FYI for everyone:
There are two versions of example code. The one in the link above is from V1.6 and it is the one with the outdated CapSense Library and the infinite loop that doesn't let you cycle back to the top of the 7 test states. I went to fix those on the GitHub repo, but discovered there is actually updated example code for V1.7 that SparkFun did. It is an improvement on the old example code, if not a little different. Be sure to read the code comments to know what it is doing.
On my Uno, the legs of the buttons D10 and D11 can just touch the USB connector, if the board is pushed all the way down. If the buttons were moved 1/16" ( say 1/8" to be safe) in the direction of the faders, and the faders moved appropriately, then there would be no issues.
There is a bug in the demo code, which is supposed to cycle through all seven tests as you hit the D10 button to change state from one to the next. Problem is the last test, the seven segment display, has an infinite while loop, so you can never get back to the loop that detects the key stroke. Not a biggie, since it's just an example, but I like to pick nits. :)
list of resistors above list 14 resistors, 11 x 330 Ohm + 2 x 10K Ohm + 1 x 1M Ohm. The package I bought, the image of the resistors above both have only 13 resistors. Both are missing a 10K Ohm resistor. The board shown has a component near the temp sensor which looks a lot a resistor should go there but it isn't labelled as such on the board, ie. there is a small rectangle with two holes in it, but no "10K" label.
The LAST danger shield I bought had no 1M Ohm resistor included.
I look forward to the day I can buy one of these and have 1) all the components listed actually present 2) have either the board or the package list a version number so that I might know which of the (now 4 versions) of this product are listed on this site.
Maybe someone from SparkFun will read this and reply....
Sorry to hear about the issues with this board. The current version we are sending (v17, as the schematic and GitHub pages both show), actually only require 1 10K Ohm resistor, which connects the light sensor to gnd, if you look on the schematic. So as long as you received one of them, then you do have a complete set. It looks like the product description never got updated with the new version release, so we'll get that fixed to avoid any additional confusion. The component near the temp sensor that isn't labeled is actually C1 (or 0.1uF cap). I'll make sure we get a bug in for that to get fixed on the new revision of the board. Apologies again for the confusion, and if you do ever end up missing a part in one of your kits, contact our technical support team and they'll get the proper replacement parts sent out to you ASAP. Thanks!
Yeah I figured that out. There are actually two 0.1uF caps, so do miss that. I put my new (2nd) danger shield together, shortly after I made this post. I have yet to test it but am hopeful that all aspects/components will work fine.
Please note that along with the parts list above which appears correct now (THANK YOU) your danger shield tutorial (called the Danger Shield Landing Page) needs updated to reflect the changes in the new Danger Shield version: DEV-11649: https://www.sparkfun.com/tutorials/274.
I still think it'd be a good idea to print the version number on the board itself and update the web site to show the various versions and the differences between them.
I love this product and your other products as well and THANK YOU for being prompt with your reply to my post!
What is the proper orientation of the buzzer? Should the positive lead be near the outside of the board or inside? While the component is marked, the board is not.
The buzzer is non-polar, so like the buttons, can be mounted without concern for direction: https://www.sparkfun.com/tutorials/274.
Danger Shield? Danger is my Middle Name! Literally.
Paul Danger Kile
the example code does not work as the capacitive sense library has been updated
I had the same issue. Is a revision of the sample code coming?
Y'know, I'd pay an extra $20 to get one of the Motorized Potentiometers on here.....
What is the difference between this and the last version? I can't tell.
EDIT: Temperature sensor was changed.
And a cap added near the shift register.