- Home
- Product Categories
- Other
- Robotic Claw Pan/Tilt Bracket - MKII

Robotic Claw Pan/Tilt Bracket - MKII
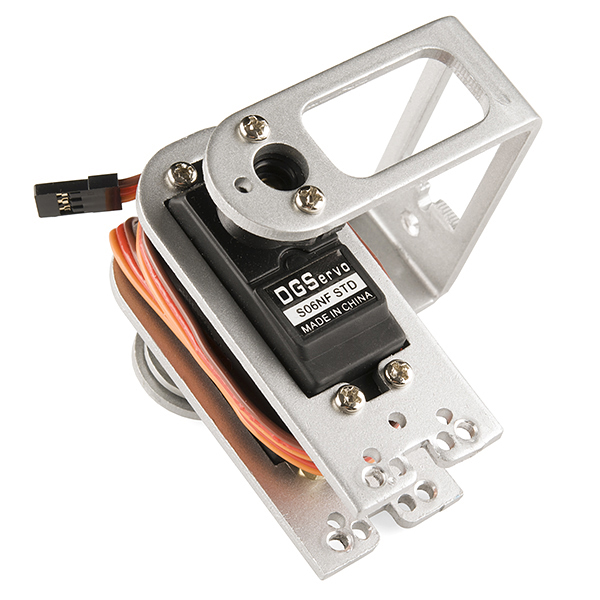
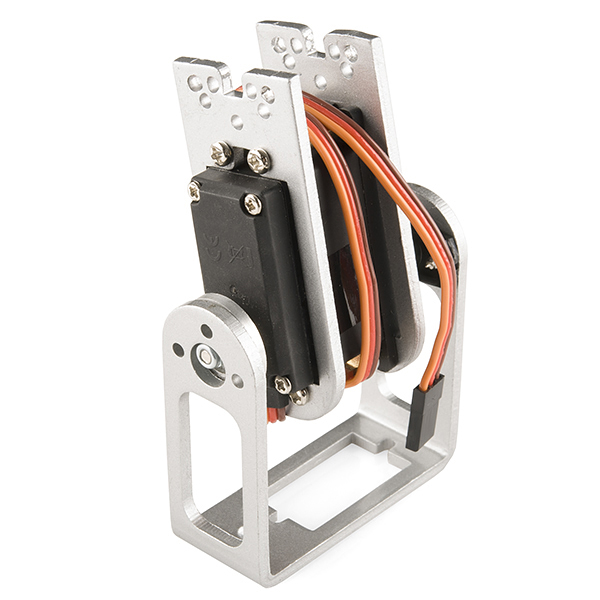
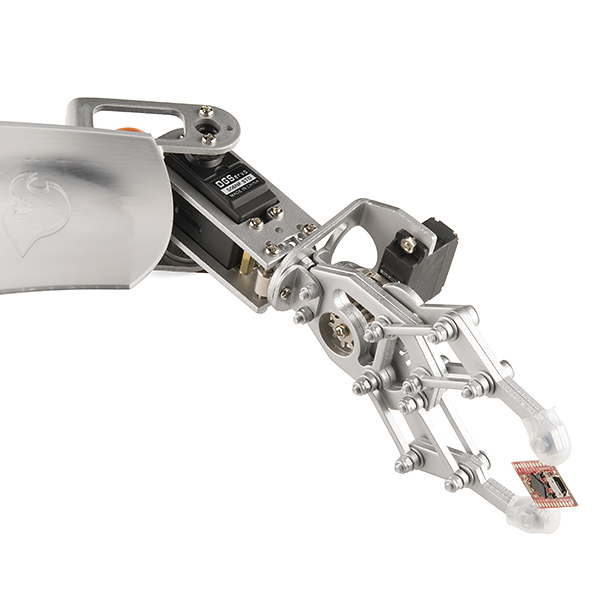
This is a pan/tilt bracket designed specifically to work with the robotic claw MKII that we sell. It comes with all of the hardware you need to connect it to the claw and even includes the 'tilt' control servo. Panning can be controlled by attaching a medium servo to the bracket milled into the base of the arm; it's the same size servo that fits the robotic claw, you can find it in the related products below).
Note: This does not include the panning servo or the robotic claw MKII, you will need to buy those separately. Check the related products below.
- 4" long at full extension, 1 x 2.5" footprint
- [Assembly Diagram](http://cdn.sparkfun.com/datasheets/Robotics/RA-001-U update.pdf)
Robotic Claw Pan/Tilt Bracket - MKII Product Help and Resources
Core Skill: Robotics
This skill concerns mechanical and robotics knowledge. You may need to know how mechanical parts interact, how motors work, or how to use motor drivers and controllers.
Skill Level: Competent - You may need an understanding of servo motors and how to drive them. Additionally, you may need some fundamental understanding of motor controllers.
See all skill levels
Core Skill: DIY
Whether it's for assembling a kit, hacking an enclosure, or creating your own parts; the DIY skill is all about knowing how to use tools and the techniques associated with them.
Skill Level: Noob - Basic assembly is required. You may need to provide your own basic tools like a screwdriver, hammer or scissors. Power tools or custom parts are not required. Instructions will be included and easy to follow. Sewing may be required, but only with included patterns.
See all skill levels
Core Skill: Electrical Prototyping
If it requires power, you need to know how much, what all the pins do, and how to hook it up. You may need to reference datasheets, schematics, and know the ins and outs of electronics.
Skill Level: Noob - You don't need to reference a datasheet, but you will need to know basic power requirements.
See all skill levels
Comments
Looking for answers to technical questions?
We welcome your comments and suggestions below. However, if you are looking for solutions to technical questions please see our Technical Assistance page.
Customer Reviews
4 out of 5
Based on 1 ratings:
The claw itself is significantly more complex but is less than half the price of this. 30 is a bit steep.
the claw doesn't come with a servo, this one comes with a metal gear servo ..
Does anyone know if this has any way to connect to any Actobotics equipment?
This is a truly a great product. However, I only have three, albeit minor, problems with such a wonderful product. * The datasheet or the attached servo motor isn't provided. A direct link in the Documents would be nice. A quick search on the Internet shows that the S066NF STD DGServo is a good 56 gram $30+ servo motor rated at 6V/7.2V with torque 13kg/cm (6V) & 13.5kg/cm (7.4V) and speed 0.18 sec/60 degrees (6V) & 0.16 sec/60 degrees (7.2V). * The attached assembly diagram is a bit unclear in how to attach the claw to this product. It did take a while, but it did attack nevertheless. An assembly tutorial would have been perfect. * Although I am unsure whether or not anybody else had the same problem, but the bottom holes that hold the two screws M3 * 30 with two M3 Nylon nuts weren't perfectly drilled. As a result when attaching my claw, it was slightly angled, not perpendicular. I did find a quick fix by using a small metal plate and extra screws and bolts. Overall a wonderful product combo for anybody looking a robotic claw set. Highly recommended!
That's some expert troubleshooting right there, You realize you're supposed to slide the collars to adjust the angle, right?
Hi! Just confirming, I can use the Servo (ROB-10333) for the panning of this Pan/Tilt Bracket MKII?
I just received my order and it appears mine came with the two servos. I ordered 2 claws (ROB-11525) and 2 medium servos (ROB-10333), the pan/tilt bracket (ROB-10335) for the head and 2 small servos (ROB-09065), and 2 claw pan/tilt brackets (ROB-11647) and 2 more medium servos, same model as mentioned above. The 2 claw pan/tilt brackets (ROB-11647) came with what appears to be two large servos pre-installed. Number on the installed servo shows "SO6NF STD" by DGServo. My medium servos (of which I now have two extra) were marked "SO5NF STD" also by DGServo. The small servos are 9g micros marked A0090. I'm not sure what servo they're referring to in the description when they state it is not included and must be purchased separately. I'll find a use for the two extra medium servos but wouldn't have ordered them had I not needed to. I could have missed something somewhere too, that happens :)
The bracket comes with the servo to move up and down. I think I'd call that "tilt." For the claw, you bought a servo to open and close it. But if you also want to move from side to side (i.e., to pan), then you'd install another servo in the rectangular hole on the bottom of the pan/tilt bracket. How to do it is not shown anywhere here but I suppose you'd attach the horn to something immovable and then the servo and bracket would move together. I wonder how much force that medium servo for panning can take with the tilt bracket and claw hanging off of it? Even though the brackets themselves are metal, a lot of the mounting hardware is plastic.
The horn is clear, but how does the hinge attach to the back of the servo? Thanks.
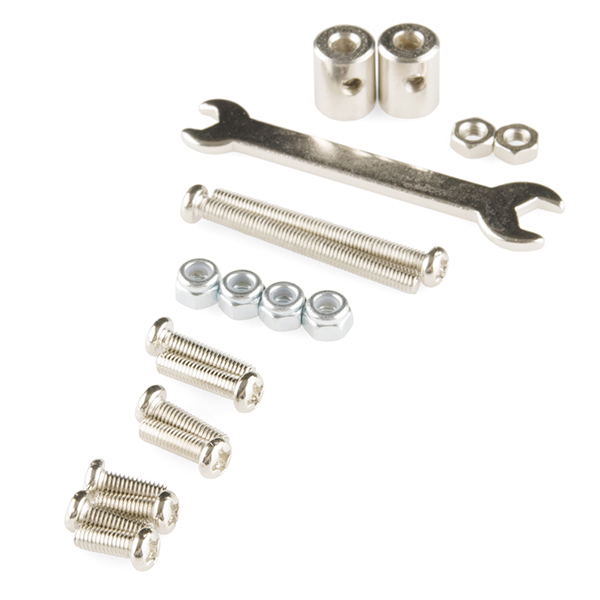
The screws used to screw the claw to the tilt/pan bracket (M3*10 in the diagram) are way too long for me. Before you ask, there's nothing else on my desk, everything else seems to have a place and would be even longer or too short if I tried to switch them around. And, yes, I did use the M3 nuts. Judging from the comments and the images above, I guess they packed the wrong screws in my case.
EDIT: I am now confident of this as I have two sets of identical screws, four each. That's not what they show in the image. However, I ordered M3*30 screws from another place and they are just a tiny bit too short so now i can slide the claw at will. This is annoying. What a trash product.
How is this meant to be mounted to the claw, do you sell this part?
nice claw, probably buy this withiin next months
This looks like a nice jump into robotic arms. However, I would have liked it to mount the heavy, metal geared servo to the 'C' tilt bracket rather than on the wrist side an decreased the weight on the wrist considerably, and also decrease the torque on shoulder or elbow joints. It would also leave room for a wrist rotate motor or servo. Of course, with rotate in-line you really should use an axle shaft with bearing supports at both ends before attaching to the servo, and a thrust bearing wouldn't hurt. That way you can simulate all the motions of a human wrist, the flexing, and the rotation. If you used the 'pan' mount point for a servo to give the wrist a rotate function, you would have a lot of force hanging off the servo output gear, unless you added essentially a 'lazy susan' ring bearing to take all the side loads and let the pan servo do just rotate. The bolt patterns on the output end look like you could mount a wrist rotate there between this tilt-pan and the claw, but that would REALLY put a lot of weight towards the tip.
what is the weight?
Assembly of this is not clear. The "assembly diagram" gives no detailed view of the critical part of assembly: attaching the claw. I ordered this with the MKII claw. I assembled the claw first, but then I had to dissemble what I had done and remove the servo mounting bracket from the claw so I could use the longer screws that came with the Pan/Tilt to attach the claw to the tapped bushings.
I have no idea if this is the intended method of assembly....if it is I have no idea why the Pan/Tilt bracket is designed this way.
Does anyone have any insight for me?
this thing is a huge pos, they make the piece that attaches to the servo gear out of plastic and it takes about the weight of the claw plus a butterfly to strip it out. whats the point of charging 10 extra dollars to put in a metal gear servo when the elbow joint is made out of plastic
it is possible to join two Robotic Claw Pan / Tilt Bracket? I want to leave the longer arm, so I thought I'd buy two Robotic Claw Pan / Tilt Bracket and join them, you have to join the mechanism?
I couldn't figure how to mount the Robotic Claw MkII to this (the instructions show the old MkI claw), so I designed a part for 3D printing. Files available on Thingiverse. /K
Can you build a 6-DOF arm using this?
how does the "pan" servo mount? what are the specs of the included servo? is there room to upgrade to a larger servo?
I have the same question, beluga asked. Thanks.
I have, sitting among my piles of parts, a pair of the older robot claws(ROB-10332). Is this compatible with those, or should I snatch up a couple of the earlier pan/tilt brackets while you still have a few?