- Home
- Product Categories
- Capacitive
- SparkFun Touch Shield

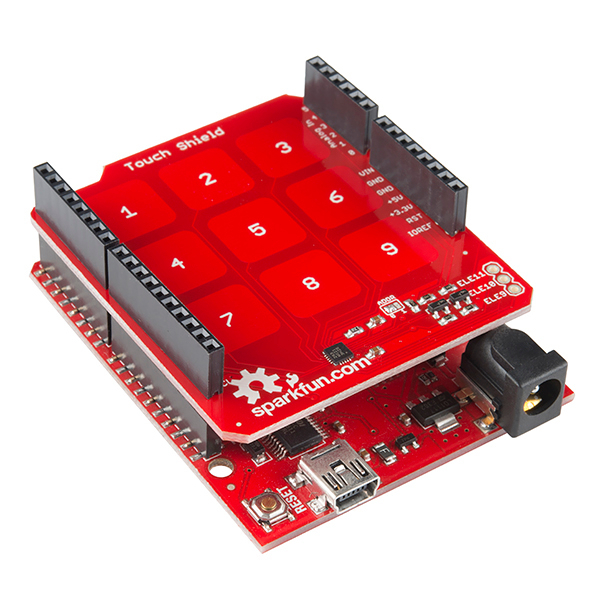
SparkFun Touch Shield
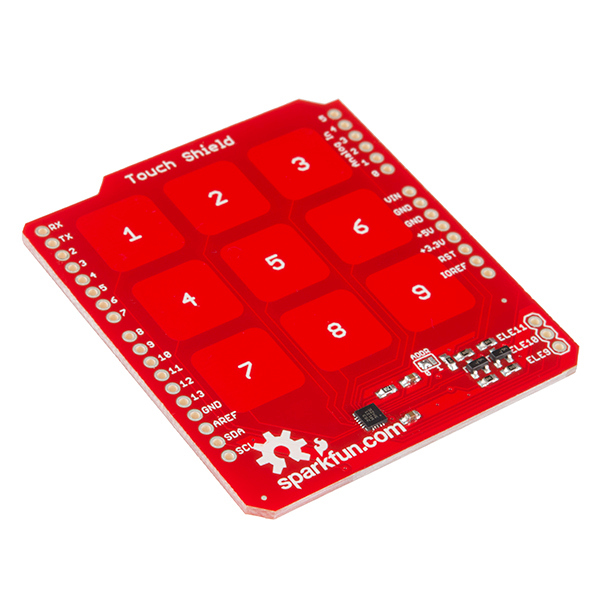
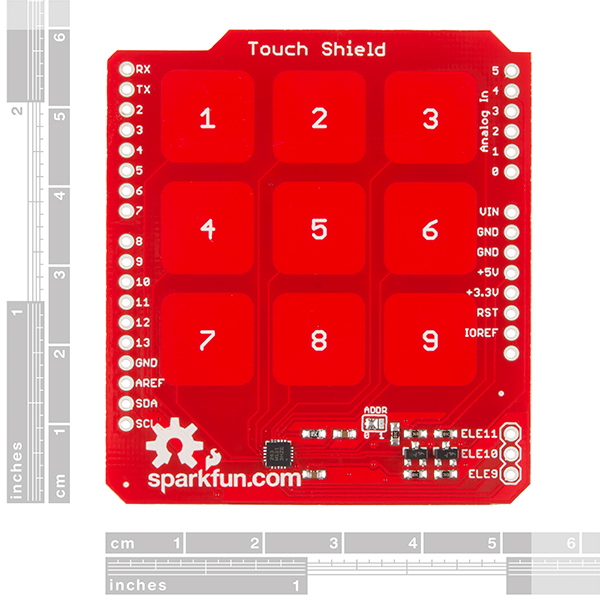
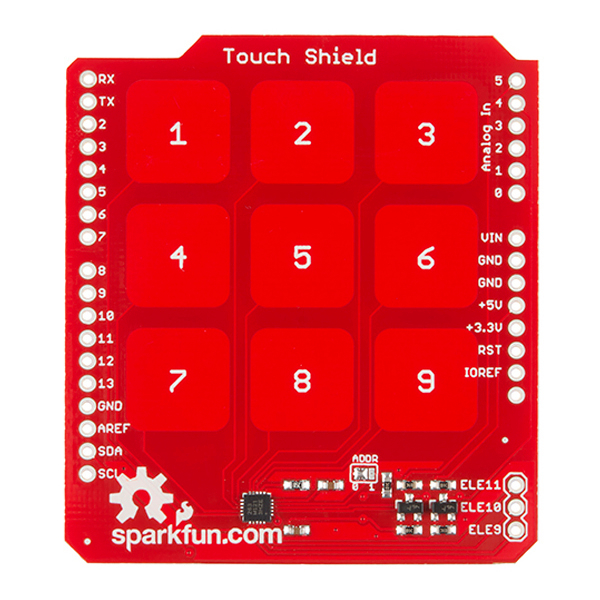
The MPR121QR2 IC is a great way to build simple capacitive touch interfaces, and now it's even easier to incorporate into your Arduino projects with the touch shield. The SparkFun Touch Shield has 9 capacitive touch pads, with headers for the remaining 3 electrode connections. With this shield you can have a total of 12 touch sensitive buttons. An on-board logic level converter allows it to work with 5V and 3.3V Arduino boards. Simply solder on some header pins and stack it on to your Arduino for a convenient input device. Check below for some example code to get you started.
- Schematic
- Eagle Files
- Datasheet (MPR121QR2)
- Hookup Guide
- GitHub (Design Files & Example Code)
SparkFun Touch Shield Product Help and Resources
Core Skill: Soldering
This skill defines how difficult the soldering is on a particular product. It might be a couple simple solder joints, or require special reflow tools.
Skill Level: Noob - Some basic soldering is required, but it is limited to a just a few pins, basic through-hole soldering, and couple (if any) polarized components. A basic soldering iron is all you should need.
See all skill levels
Core Skill: Programming
If a board needs code or communicates somehow, you're going to need to know how to program or interface with it. The programming skill is all about communication and code.
Skill Level: Competent - The toolchain for programming is a bit more complex and will examples may not be explicitly provided for you. You will be required to have a fundamental knowledge of programming and be required to provide your own code. You may need to modify existing libraries or code to work with your specific hardware. Sensor and hardware interfaces will be SPI or I2C.
See all skill levels
Core Skill: Electrical Prototyping
If it requires power, you need to know how much, what all the pins do, and how to hook it up. You may need to reference datasheets, schematics, and know the ins and outs of electronics.
Skill Level: Rookie - You may be required to know a bit more about the component, such as orientation, or how to hook it up, in addition to power requirements. You will need to understand polarized components.
See all skill levels
Comments
Looking for answers to technical questions?
We welcome your comments and suggestions below. However, if you are looking for solutions to technical questions please see our Technical Assistance page.
Customer Reviews
No reviews yet.
I released the TouchShield library that is designed for the Sparkfun Touch Shield and runs on the Arduino Uno. With the library, you can easily make a sketch to handle the Touch Shield. You can download it at the following URL:
https://synapse.kyoto/en/lib/TouchShield/page001.html
I'm curious, is there a reason you tie the Output Pullup resistor to 5V and not IOREF? Then it could be used with 3.3V CPU boards also?
It is written that I2C address is 0x5a because address pin is grounded. But in code address used is 0xb4 and 0xb5?
Followed the instructions here, with the code provided here, using several different UNO (and similar compatible devices) and this shield (possibly my specific unit) simply doesn't work. Any tips to troubleshoot?
Check your solder connections between the headers and the shield. That is usually the first (and most obvious) culprit. Otherwise, if you've been getting error codes in Arduino when trying to run it, or if it gets very hot when you attempt to use it, please contact techsupport@sparkfun and they'll help you troubleshoot much more in depth.
Thanks for the follow up.
I eliminated this as a cause of the problem.
I went back to the store this morning and purchased a second device, assembled and tested: everything ok with this one, so I will chock it up to a faulty device. Thanks again!
Glad to hear you were able to get a working board. Sorry about the trouble!
I want this module in black collor, is that possible?
Sorry, we can't do custom PCBs, but the board files are available. Feel free to order your own PCB and build one though.
Ok, my turn to ask a "that guy" question...
Are there also breakouts for buttons 1 through 9?
I'd like to mount copper plates behind an acrylic (or wood) panel so so as to have a "more finished" appearance for my project.
Not on this shield. If you want to go that custom with mounting this inside something, you'll want to use the basic MPR121 Breakout, and you will need to make your own custom number pad at that point.
While I well and truly hate to be "that guy" I need to ask: Where's zero?
I can understand * and # being dropped from a standard 12 key keypad in favor of breaking out the chip's spare contact pins, but anyone trying to use this for typing is going to need that missing digit.
It is indeed based on size for the shield. If you're looking for a 12 key pad option, then I recommend checking the Touch Keypad.
Don't worry, the numbers are just for reference. Grab a sharpie: * Draw arrows for up, down, left, right and the diagonals. Now you can enter directions for your robot. * Change the "8" to "0" and "9" to "Return". Now enter the numbers in octal. (Is that right or am i on dope again?)
Looks like that is driven by shield size more than anything. You can still break that out if you want. Otherwise look at the capacitive touch keypad: https://www.sparkfun.com/products/12017