- Home
- Product Categories
- Audio Boards
- SparkFun Proto Pedal

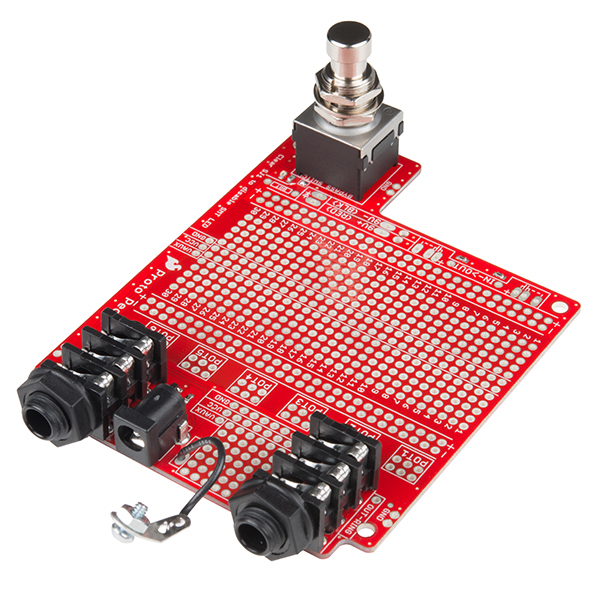
SparkFun Proto Pedal
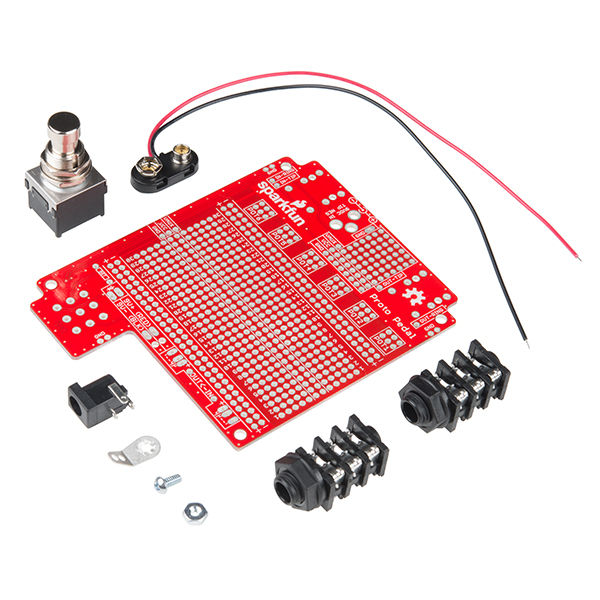
The SparkFun Proto Pedal is an easy-to-assemble kit that makes building guitar effect pedals easier. Let's face it, most guitar pedals start with all-too-similar circuitry – you need the input and output jacks, the bypass switch, and a barrel jack for power input. In some pedals, there may be as much wiring involved in the jacks and switch as there is in the effect itself. The SparkFun Proto Pedal takes care of the hard part and provides you with a simple infrastructure; all you need to do is decide what simple circuit to make to gain your desired effect, and you'll be ready to rock!
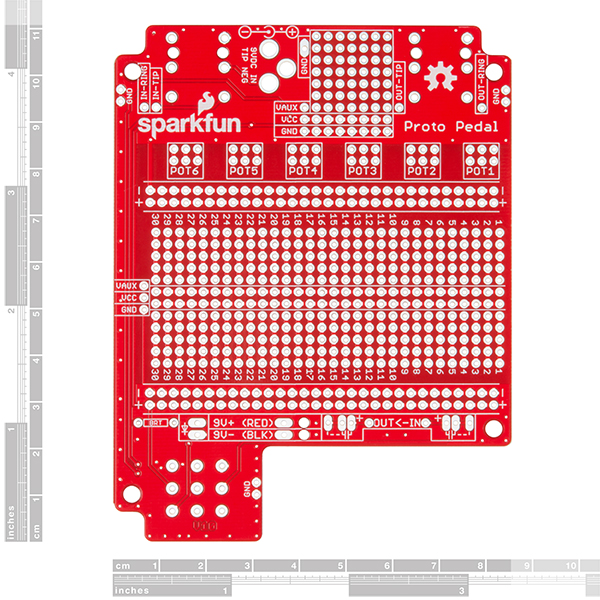
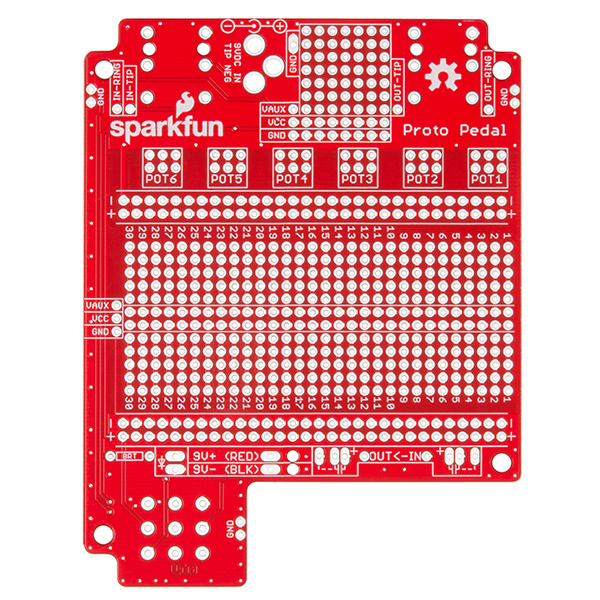
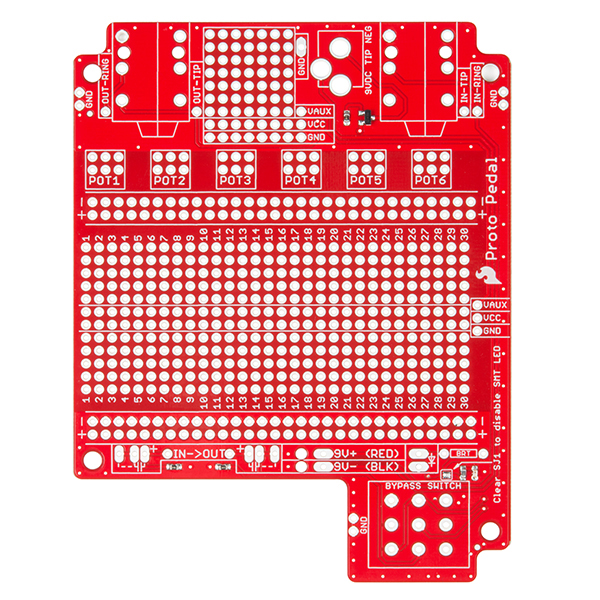
With the SparkFun Proto Pedal you'll find all the problems of a guitar pedal's complex framework solved with true bypass and LED switching; a large, open prototyping area equivalent to a standard solderless breadboard; a small prototyping area for power regulation or reference voltages; and six positions to help organize potentiometer wiring. To make your life even easier, not only have we written a complete assembly guide for the Proto Pedal; we have also written two effect circuit guides that utilize the board's large prototyping area. All of these guides can be found in the Documents section below.
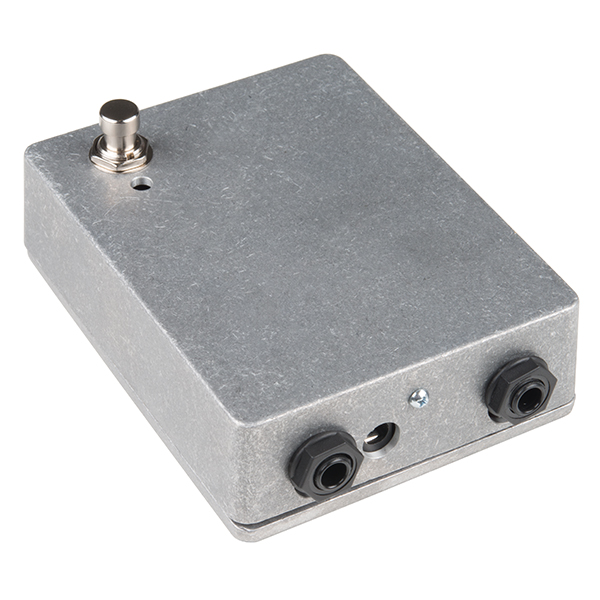
Each Proto Pedal comes as an easy-to-assemble PTH soldering kit, and it’s up to you to solder it all together! Additionally, we highly recommend using the Proto Pedal Enclosure with this kit. It’s a standard-size cast aluminum box, which does double duty as an assembly jig to help get the jacks and switch aligned correctly. We did NOT include the enclosure with the Proto Pedal to help keep the kit affordable -- and in case you already had an enclosure you wanted to use or create yourself.
- 1x SparkFun Proto Pedal PCB (with SMT work completed)
- 1x Stomp Switch
- 2x Stereo Audio Jack - 1/4"
- 1x 9 Volt Battery Snap
- 1x DC Barrel Power Jack/Connector
- 1x Each 4-40 Nut, Machine Screw, & Star Washer Ground Lug
SparkFun Proto Pedal Product Help and Resources
Proto Pedal Chassis Hookup Guide
September 22, 2016
Prepare the Proto Pedal Chassis by drilling holes for controls and painting it.
Proto Pedal Assembly and Theory Guide
September 22, 2016
Getting started with the SparkFun Proto Pedal. We'll assemble the board, then discuss some of the details of the circuit.
Proto Pedal Example: Analog Equalizer Project
September 22, 2016
Building a gyrator-based analog equalizer using the Proto Pedal.
Proto Pedal Example: Programmable Digital Pedal
September 22, 2016
Building a pedal around the Teensy 3.2 and Teensy Audio shield. Changing the effect in the pedal is as easy as uploading a new sketch!
Core Skill: Soldering
This skill defines how difficult the soldering is on a particular product. It might be a couple simple solder joints, or require special reflow tools.
Skill Level: Rookie - The number of pins increases, and you will have to determine polarity of components and some of the components might be a bit trickier or close together. You might need solder wick or flux.
See all skill levels
Core Skill: DIY
Whether it's for assembling a kit, hacking an enclosure, or creating your own parts; the DIY skill is all about knowing how to use tools and the techniques associated with them.
Skill Level: Noob - Basic assembly is required. You may need to provide your own basic tools like a screwdriver, hammer or scissors. Power tools or custom parts are not required. Instructions will be included and easy to follow. Sewing may be required, but only with included patterns.
See all skill levels
Core Skill: Programming
If a board needs code or communicates somehow, you're going to need to know how to program or interface with it. The programming skill is all about communication and code.
Skill Level: Rookie - You will need a better fundamental understand of what code is, and how it works. You will be using beginner-level software and development tools like Arduino. You will be dealing directly with code, but numerous examples and libraries are available. Sensors or shields will communicate with serial or TTL.
See all skill levels
Core Skill: Electrical Prototyping
If it requires power, you need to know how much, what all the pins do, and how to hook it up. You may need to reference datasheets, schematics, and know the ins and outs of electronics.
Skill Level: Competent - You will be required to reference a datasheet or schematic to know how to use a component. Your knowledge of a datasheet will only require basic features like power requirements, pinouts, or communications type. Also, you may need a power supply that?s greater than 12V or more than 1A worth of current.
See all skill levels
Comments
Looking for answers to technical questions?
We welcome your comments and suggestions below. However, if you are looking for solutions to technical questions please see our Technical Assistance page.
Customer Reviews
4 out of 5
Based on 1 ratings:
1 of 1 found this helpful:
Best thing I ever owned!
And here's why...it's because it is awesome!
I demand to know who came up with this product. It is beyond exactly what I need, and ingenious. Can't wait for it to arrive
On Sparkfun images, there is TWO nuts for switch to tight it up correclty to proto case (https://www.sparkfun.com/products/13967). But I ordered two of these kits, both switch packs has just ONE nut. So? What is going on on these?
We had a mistake in our packaging process that caused the first 50 units to go out with only one nut. We are working to proactively contact and send out replacement nuts to everyone that is effected. Thank you for bringing this to our attention.
Does Sparkfun sell this footswitch by itself anywhere? I can't find it.
Any plans for a 125B sized proto?
Too bad it only has 1 stomp button, would be great if it supported 2 or 3
My colleagues and I have spitballed the idea of adding an extra degree of control by putting an accelerometer in the chassis, maybe something like the ADXL345, which offers tap detection. You could just tape the box with your toe, rather than requiring another switch.
It would be fun to build a 'spring reverb' clone that twanged when you kick it, just like the real thing.
https://www.sparkfun.com/products/retired/11151
There's the part if you want to look elsewhere. Then it's just solder and drill a new hole in the enclosure. You can add pots and switches and LEDs galore!
Intranet link in the 3rd paragraph :) EDIT: You fixed it