- Home
- Product Categories
- CNC Accessories
- SparkFun Stepoko


SparkFun Stepoko
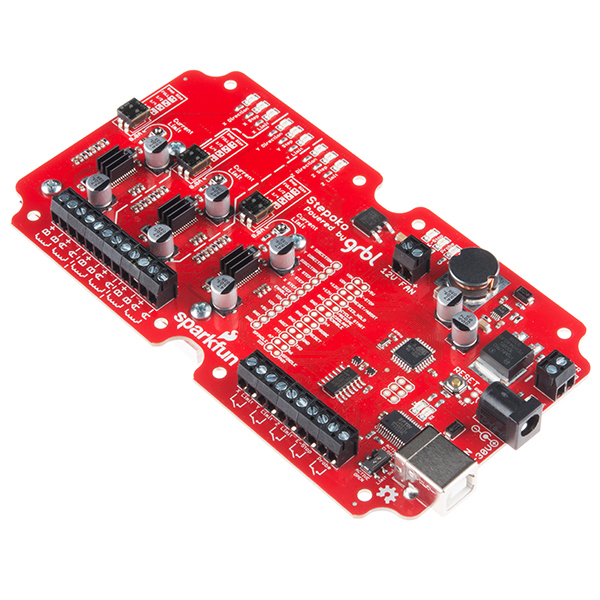
The SparkFun Stepoko is an Arduino compatible, 3-axis control solution that runs grbl software and is able to connect to your computer to accept stepper motor commands. The Stepoko's design and firmware are completely open source and it works with an open source Java based cross platform G-Code sending application to translate commands. By just looking at the pictures this board may look daunting but the simplest installation of the Stepoko consists of just plugging the stepper motors in, connecting it to power and to your computer! To top it off, we've designed the SparkFun Stepoko to fit and be secured inside of our Big Red Box as an effective enclosure option after a bit of milling to support the boards connectors and heatsink.
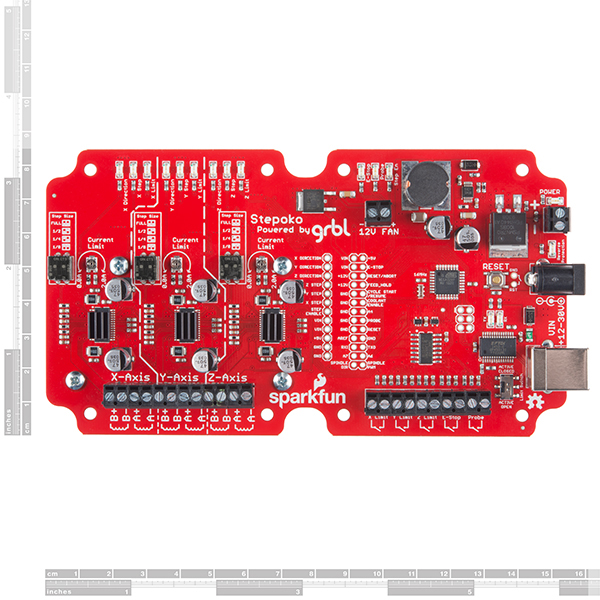
When looking at the SparkFun Stepoko it will be very easy to differentiate the two "hemispheres" of the board. The right side of the board has been dedicated to supplying power and system control. At the heart of the Stepoko is an Uno compatible ATmega328p. We’ve broken out all of the pins that are associated with the microcontroller and power supplies and an included chart in silkscreen on the back of the board that matches the grbl pin functions to the Arduino pin naming convention. Apply 12-30VDC to either the barrel jack or screw terminals (not both) and the Stepoko can supply up to 2.0A! Additionally, you will find a rail of screw terminals that function as Limit, Probe, E-Stop, etc connections.
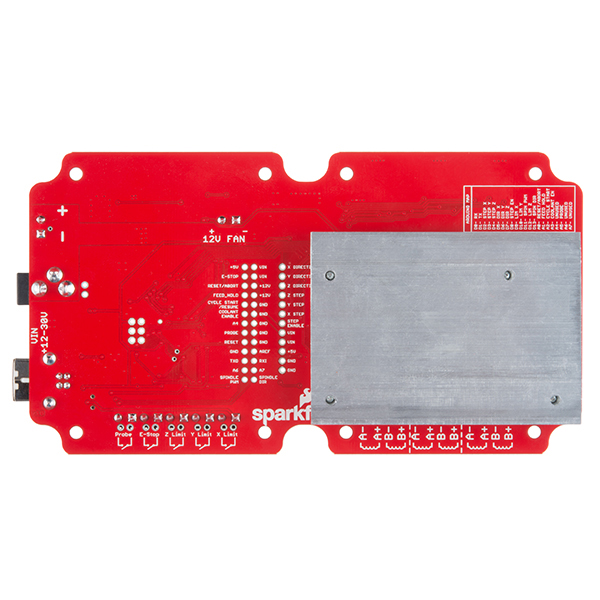
Meanwhile on the left side of the board we can find all three of the stepper motor drivers for the SparkFun Stepoko. Each of the three axis drivers are controlled by a DRV8811 IC. The ATmega328p on the right side of the board talks to the 8811 by digital control signals that are able to set direction, enable the motor, and enact a step. Internally, it has a state machine that matches the states of each motor necessary to get it to perform. Modifying the Microstepping Control switches on each driver provide you to finely tune each array to your specified likeness. All the work that each stepper motor driver provides is contributed by the grbl software that comes pre-installed with each Stepoko. This new revision updates the firmware to the latest version (0.9j). We've also added a piece of thermal gap filler to help electrically insulate the board from your chassis and prevent problems from ESD.
Whether you are using the SparkFun Shapeoko on your own rig or on one our Shapeoko CNC Machine platforms you should be able to utilize this board to its full functionality without breaking a sweat!
- 3 Stepper Connections
- Full to 1/8 stepping
- Comes with Heatsinks Installed!
- Comes with Thermal Gap Filler
- Options for input and feedback include E-Stop, Reset, Feed Hold, Cycle Start, Homing Location, and Probing.
- Has option for Spindle Direction and PWM Control.
- Can be powered from 12-30V.
- Independent axis current limiting adjustments
- Schematic
- Eagle Files
- Hookup Guide
- Datasheet (DRV8811)
- Thermal Gap Filler Datasheet
- Universal G-Code Sender
- grbl Wiki
- GitHub (grbl Repo)
- GitHub (Stepoko Design Files, Library, & Example Code)
SparkFun Stepoko Product Help and Resources
Shapeoko Coaster Project
November 20, 2015
A step-by-step guide to cutting and engraving a coaster with the Shapeoko.
Shapeoko Assembly Guide
April 21, 2016
A guide for attaching the Stepoko Add-on kit to a Shapeoko Mechanical kit.
**Arduino pin map**
Here is the Arduino pin map:
D0-  RX
D1-  TX
D2-  STEP X
D3-  STEP Y
D4-  STEP Z
D5-  DIR X
D6-  DIR Y
D7-  DIR Z
D8-  STEP EN
D9-  LIM X
D10- LIM Y
D11- SPIN PWM
D12- LIM Z
D13- SPIN DIR
A0-  RESET/ABORT
A1-  FEED HOLD
A2-  CYCLE START
A3-  COOLANT EN
A4-  UNUSED
A5-  PROBE
A6-  UNUSED
A7-  UNUSED
Core Skill: Robotics
This skill concerns mechanical and robotics knowledge. You may need to know how mechanical parts interact, how motors work, or how to use motor drivers and controllers.
Skill Level: Experienced - Your experiences should include working with stepper motors and feedback system. You may need to understand how encoders and more complex control systems work.
See all skill levels
Core Skill: DIY
Whether it's for assembling a kit, hacking an enclosure, or creating your own parts; the DIY skill is all about knowing how to use tools and the techniques associated with them.
Skill Level: Noob - Basic assembly is required. You may need to provide your own basic tools like a screwdriver, hammer or scissors. Power tools or custom parts are not required. Instructions will be included and easy to follow. Sewing may be required, but only with included patterns.
See all skill levels
Comments
Looking for answers to technical questions?
We welcome your comments and suggestions below. However, if you are looking for solutions to technical questions please see our Technical Assistance page.
Customer Reviews
3.5 out of 5
Based on 6 ratings:
Awesome board, great service
This board is very versatile.
Works great
I've got two of these now, not for CNC, but as a general purpose motor controller. The documentation is nice and clear. Board quality is good, and the forums were helpful.
Good product BUT.
I think this is a very good product but is a bit expensive when you have to replace it. A more modular design would have been better for the customer. I say this because the first unit I had took a static charge and died so I had to replace it. To counter act the static issues I have tied everything on my Shapeoko to earth ground which has helped keep this guy alive for now.
Things that could be better:
- Connectors are too small. If they were removable it would be better but larger ones would be nice as well.
- The Y-Axis could have been broken out into two inputs to make hookup on the Shapeoko easier
Overpriced. Not that Great
I got the Stepoko as part of a full Shapeoko kit. It may be a fun board for experimenters because of all the switches and LEDs, but for just doing CNC its less that desirable. Mine blew a channel in the middle of a job after about 2 months of fairly light use. Repair took 4 weeks (with shipping) because they actually have the tech hand solder new parts on the board because it doesn't use pluggable drivers like a lot of controllers. I got the impression that having to repair driver chips on this board was a fairly regular event--it runs very hot.
The worst part is the support. Most of the techs at Sparkfun don't know CNC so their replies to questions are usually a long diatribe about the board "not being designed for that" (which actually translates to "I have no clue"). It took me a couple of weeks of back and forth to get it to do homing which is a primary function of grbl. Not a great user experience for a high priced part.
Replaced my sparkfun board with a sparkfun board.
Recieved my second sparkfun shapeoko 2 board 2 days before scheduled, and installed it in 20 minutes, powered up and edited the grbl settings to what I was using and ran parts the same day. Made my own bust boot for the Makita router, should have made this long ago works great, now iam making cup coasters, and pot trivets. Iam a 23 year cnc operator and programmer currently doing hvac work, really glad I bought this machine, thanks spark fun.
Horrible
I’ve had two of these boards fail in the last three years. Each time it has been the driver IC for the y axis. After this last one failed I’ve decided I’m done replacing it and went with another option.
The power section of the schematic shows a 12V regulator (U10). Whats the part number for this and for the N-channel mosfet used in reverse power protection (Q2)?
any thoughts on controlling the stepoko with a raspberry pi? Would be better then having a laptop connected all the time.. cheaper...
Glad to see the addition of isolation from the frame. Carbide needs to do the same thing on their board that they are shipping with the Shapeoko 3 machines. Instead, they have added an embarrassingly kludgey oversize filter capacitor. I suspect it would have been adequate simply to have not shared the controller's ground with that of the router motor/spindle, although I admit that I have not tested this hypothesis. Perhaps they did, and I am wrong.
But there are several things that don't thrill me about their controller, so I am considering switching to this one. It probably means that I can't use their software any more, but I think I can live with that.
For what it's worth, the "kludgey oversize capacitors" work perfectly. I got a ShapeOko 3 from Carbide3D in October with version 3.2 of their board and got drop-outs half the time I powered down the router. I even tried plugging the router into a differnt outlet and breaker than the ShapeOko, but it didn't help. As soon as the new board came out they FedEx'd it to me and ever since I have never seen it disconnect.
I have a brand new Shapeoko 3 with the Stepoko controller. I am using the thermal gap filler but I still get a lockup every single time I shut down the spindle. It happened with my Dremel and still happens with the new DeWalt router. I may be trying an "embarrassingly kludgey oversize filter capacitor" myself.
Can this drive a laser as well ? And if so, how do you hook it up ?
Here's the link M-Short is talking about: Stepoko Laser Cutter.
The long answer is, the mill's parts are sized to support a lateral load for pushing a bit through material. The laser has no lateral load aside from the momentum of the laser itself, so it doesn't make a lot of sense to put a laser on a shapeoko, though I do admit it would be fun.
The method Epilog uses to make their laser cutters, in which the have 10s of watts of power (and subsequently large immobile laser tubes), is to fly a lightweight first surface mirror around on belts, similar to timing belt. This way the mirror can locate quickly.
The other half of the problem is getting the laser to be on and off at the right times. The stepoko controller has a PWM out intended for spindle speed -- but it could be re-purposed to control the laser power. Special gcode would have to be created, though there may be a program for this.
Check the grbl repository for source and documentation. It looks like the M3, M4, M5 commands are supported with spindle speed being set with an S word, but I haven't used the feature.
Hope this helps
The board just drives 3 stepper motor channels. Assuming you connect it to a 3 axis gantry like the Shapeoko you can connect anything you want (Sharpie, router, laser, 3D print head, pick and place head, etc.). Check out the video for Marshall's tiny DIY laser cutter (doesn't cut much more than paper because of the laser he used, but it works).
What does the change to electrically isolate the heat sink from the chassis mean to those of us who own the original Shapeoko/Stepoko combination? Is the thermal gap filler available and should we be adding it to our machines?
I believe the plan is to contact original owners about getting them thermal gap filler. Check your spam folder for SparkFun emails and if you don't see anything email customerservice@sparkfun.com and they should be able to help you out.
I received the email from customer service 4 days ago and I had completely missed it. Thanks.