- Home
- Product Categories
- Monochrome
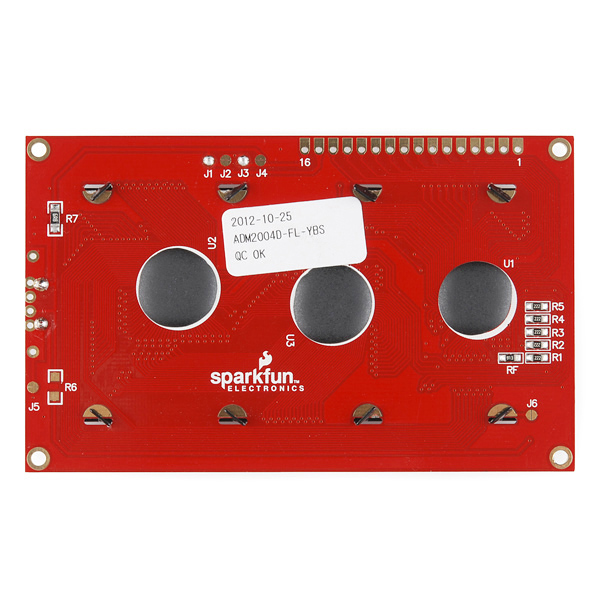
- Basic 20x4 Character LCD - Black on Green 5V

Basic 20x4 Character LCD - Black on Green 5V
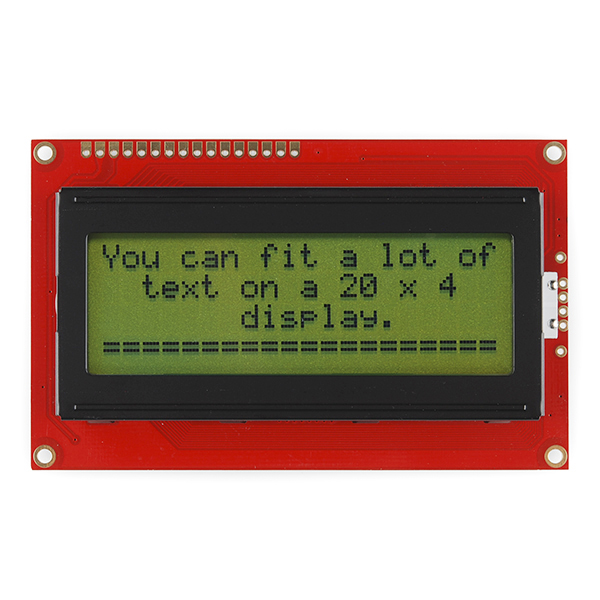
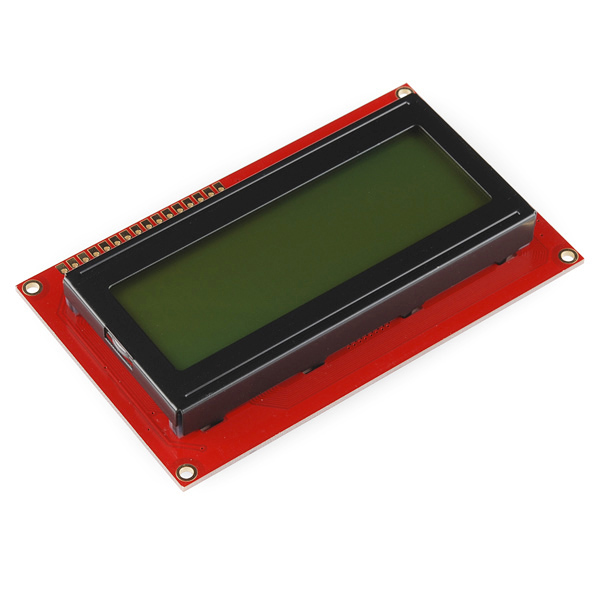
This is a basic 20 character by 4 line display. Utilizes the extremely common HD44780 parallel interface chipset (datasheet). Interface code is freely available. You will need ~11 general I/O pins to interface to this LCD screen. Includes LED backlight.
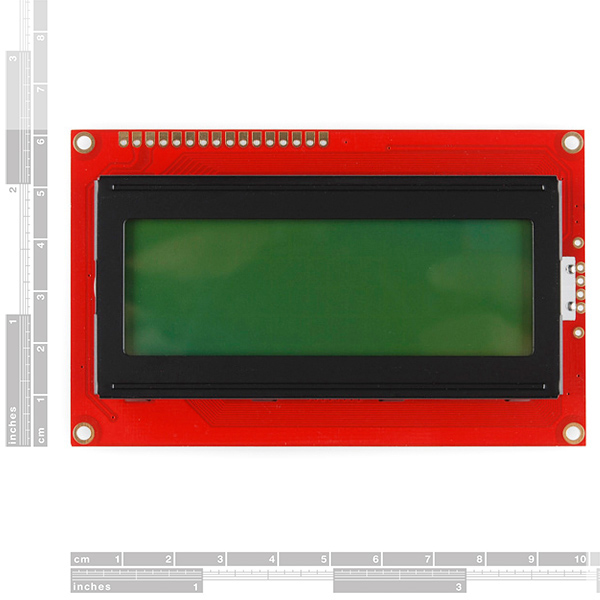
- 3.86 x 2.36 x 0.55"
Basic 20x4 Character LCD - Black on Green 5V Product Help and Resources
Basic Character LCD Hookup Guide
May 28, 2019
Liquid crystal displays (LCDs) are a great way to output a string of words or sensor data to a display for visual feedback. In this tutorial, we'll learn about LCDs, how to print a string of words to a 16x2 basic character LCD and create custom characters.
Core Skill: Soldering
This skill defines how difficult the soldering is on a particular product. It might be a couple simple solder joints, or require special reflow tools.
Skill Level: Noob - Some basic soldering is required, but it is limited to a just a few pins, basic through-hole soldering, and couple (if any) polarized components. A basic soldering iron is all you should need.
See all skill levels
Core Skill: Programming
If a board needs code or communicates somehow, you're going to need to know how to program or interface with it. The programming skill is all about communication and code.
Skill Level: Rookie - You will need a better fundamental understand of what code is, and how it works. You will be using beginner-level software and development tools like Arduino. You will be dealing directly with code, but numerous examples and libraries are available. Sensors or shields will communicate with serial or TTL.
See all skill levels
Core Skill: Electrical Prototyping
If it requires power, you need to know how much, what all the pins do, and how to hook it up. You may need to reference datasheets, schematics, and know the ins and outs of electronics.
Skill Level: Competent - You will be required to reference a datasheet or schematic to know how to use a component. Your knowledge of a datasheet will only require basic features like power requirements, pinouts, or communications type. Also, you may need a power supply that?s greater than 12V or more than 1A worth of current.
See all skill levels
Comments
Looking for answers to technical questions?
We welcome your comments and suggestions below. However, if you are looking for solutions to technical questions please see our Technical Assistance page.
Customer Reviews
No reviews yet.
Do you have an ETA on when this will be available?
How do I go about putting a header on it?
Adding to what N1VG posted, you can indeed control this module, or any other HD47780-based character LCD module for that matter, with six lines. If you're using an Arduino as the brains for your project, the LiquidCrystal library that comes with the Arduino IDE will run a HD47780-based module from six pins without having to manage things like passing nybbles to the module - you can just include LiquidCrystal.h, declare a new object (e.g., LiquidCrystal lcd(2,3,4,5,6,7); to use pins 2-7 to control the module), and just shoot data to it with the print() and write() commands. The library will handle the rest.
Any chances of getting this in other colours like the 16x2s? I'd really like to see this in Red on Black
You can get by with 6 I/O lines for an HD44780. Just keep the RW pin pulled low (assuming you don't need to read from the display) and connect only the high 4 data lines. You'll need to send it a command to put the bus into 4-bit mode, and of course you'll have to write to it one nybble at a time, but that's not hard to do.
why, when i search sparkfun for 'ADM2004D' do i get no results, i found 2 of thease in my stash of bits and bobs and desided i would have a play, so i wonted the data sheet, i searched sparkfun for the part number on the back of the board and got no matches. it took me hours to find this page. sigh
Is there an Eagle file for this LCD? I can't seem to find it anywhere.
Sorry, we don't have the whole board in Eagle yet. You could use a generic 16-pin 0.1"-spaced header for the connector though.
Not sure if this is normal. My LCD, using the liquidcrystal library, wraps to the third line after finishing the first (then it goes to the second, then the fourth), but addressing each line is normal when using setCursor().
I experienced the same. Did you get additional information? I am still trying to find a solution to no avail so far. Keep on posting..
The "solution" I came up with was simply to use the cursor positioning feature to write to the lines I wanted. Since you're writing strings anyway, it's not terribly difficult to do. If you're making a display for a project, just account for what ends up on what line.
I can't help you if you need upward-scrolling text. You could try to modify the liquidcrystal library to handle it all on the arduino, but that seems like more effort than it's worth.
Does anyone know where I can get a pre-manufactured ribbon cable assembly suitable for use with this LCD? Soldering a thru-hole connector or pin header to the panel is something that can probably be done in our shop, but assembling our own cables from scratch may be a bit beyond our ability to do routinely... We just need a 6" cable with (say) female sockets (16x1) at both ends... The other end to plug into a suitable header on an Arduino-based PCB... Thanks for any tips, -Mike
Old post, Always check with Digi-Key. They have flat cable assemblies from Tyco for about 11 bucks each for a 6 inch cable (A9BBG-1606F-ND).
I made a tutorial (in portuguese) about how to use, create custom characters and design menus for the LCD display. Take a look: http://engenheirando.com/arduino/displaylcd/
Can anyone confirm if this works with an Arduino Uno? Following these directions (http://arduino.cc/en/Tutorial/LiquidCrystal), no matter what I do I can only see solid blocks on two of the 4 rows when the pot is turned all the way down. Is this because the Arduino library is for a 16x2 character LCD and this one is a 20x4?
You probably need to adjust the brightness. Sounds like it is set to max.
I got mine to work with the LiquidCrystal library on a Uno and using all 20x4 chars.
I forgot to buy breakaway male header pins for this LCD module. However, I do have spare female headers from a previous project. Would I be able to use the female headers?
How would I use this with the serial backpack?
You simply solder the backpack to the display. Note that we also carry serial displays with the backpack functionality built-in.
can you easily use this with the arduino
Rookie question, what's the difference between this and serial? I plan to just be hooking this up to outputs from my ATMega328. What else do I need to make this work?
This display has a parallel interface, so it will require about 6 I/O pins to run. The parallel protocol is complex, but there are good LCD libraries out there which make it easy to use. The difference between this and a serial display is that the serial display will only require one I/O pin.
If you use straight headers, the clips used to anchor the lcd to the board get in the way when you try to plug it into a breadboard with power rails on the side.
You'll want to use right angle headers or a breadboard with no power rails.
A very useful LCD - and, if you need it to take even less than 6 pins, there's a library (by Chris Parish) for using it with a 74HC595 shift register that reduces it to 3 digital output pins. The library and Chris's tutorial is here - http :// cjparish.blogspot.com/2010/01/controlling-lcd-display-with-shift.html
I would definitely like to have a 3.3v version of this. Other colors (black/white or black/red) would be nice too. The 3.3v is a higher priority for me though.
Any possibility of more colours...? and / or a 3.3v version?
Isn't the LED forward voltage supposed to be the same as the backlight supply voltage? They're different.
And how would you drive the backlight with 150mA?
If you have specific questions about this product, please email tech support directly at techsupport@sparkfun.com.
Can anyone tell me what size resistor to use when using the back light, or is the resistor built-in?
There's one built in, as per the datasheet
@Twiddler: Yes, it's possible to write too fast. Check the write cycle timings in the datasheet. The enable signal can't be cycled faster than 2MHz. Also after each command sent to the LCD, you have to wait until the busy flag is clear, or delay several microseconds to milliseconds (depending on which command).
I am having loads of trouble with these. Is it possible to send data to them too quickly? I am counting pulses and when it really gets going, the screens go crazy. I can't figure it out.
Has anyone got an Eagle or Gerber file for this? Thanks!