
WiFly Wireless SpeakJet Server
WiFly Wireless Talking SpeakJet Server

Goals:
This project started with two goals. First, to demonstrate the capability of the WiFly module, and second, to interact with hardware from a browser in a unique way. We already had the Tweeting Kegerator tutorial, which allows the hardware to post metrics over a wired network connection, so for this project I instead wanted the network side of the project to affect the hardware in some interesting (and of course wireless) way.
With that in mind, let me say up front that up until now I had no experience with either the SpeakJet chip or any sort of embedded network/wifi devices. In this tutorial I'll lead you through my thought process as this project developed. I also include four, count-em four, example Arduino sketches. Each one is a different milestone in the project, so you can pick-and-choose examples without unnecessary code. The sketch for the whole project is at the bottom of the page.
Files:
- WiFly Transparent Terminal Sketch
- WiFly Autoconnect Example Sketch
- WiFly Page Host Example Sketch
- WiFly SpeakJet Server Sketch
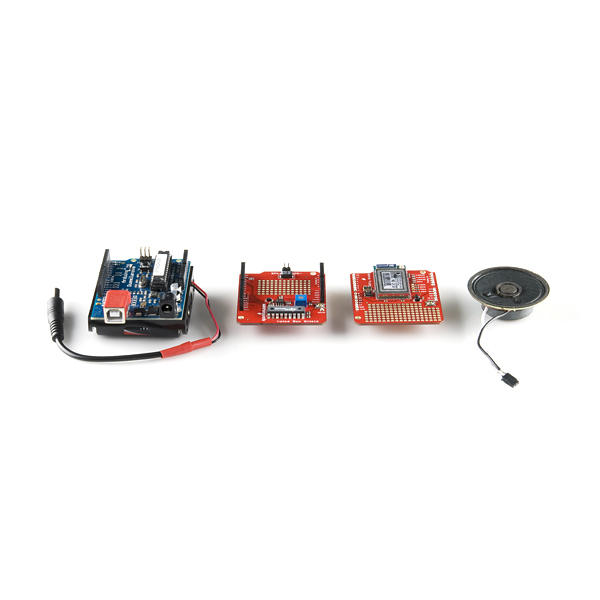
Project components - the Arduino main board with 4 AA battery pack, VoiceBox shield, WiFly
shield, and speaker.
shield, and speaker.
Goal the First: Get Talking to the WiFly
The WiFly GSX Serial Module from Roving Networks has a very simple serial command interface. To access most of the features of the device, all one needs to connect is TX, RX, VCC, and ground. For this project I started with a WiFly Shield and an Arduino Duemilanove. The WiFly shield does not actually communicate with the Duemilanove using the UART, but has a SC16IS750 SPI-UART bridge that is more complicated to deal with than simple UART communication, but allows for a much higher baud rate if one wants to communicate with the WiFly at higher-than-115200 baud speeds.
The first task was to initialize the SC16IS750 SPI-UART bridge chip in order to transparently communicate with the WiFly through a terminal. This is a short series of SPI register writes:
SPI_Uart_WriteByte(LCR,0x80); // 0x80 to program baudrate
SPI_Uart_WriteByte(DLL,SPI_Uart_config.DivL); //0x50 = 9600 with Xtal = 12.288MHz
SPI_Uart_WriteByte(DLM,SPI_Uart_config.DivM);
SPI_Uart_WriteByte(LCR, 0xBF); // access EFR register
SPI_Uart_WriteByte(EFR, SPI_Uart_config.Flow); // enable enhanced registers
SPI_Uart_WriteByte(LCR, SPI_Uart_config.DataFormat); // 8 data bit, 1 stop bit, no parity
SPI_Uart_WriteByte(FCR, 0x06); // reset TXFIFO, reset RXFIFO, non FIFO mode
SPI_Uart_WriteByte(FCR, 0x01); // enable FIFO mode
// Perform read/write test to check if UART is working
SPI_Uart_WriteByte(SPR,'H');
data = SPI_Uart_ReadByte(SPR);
if(data == 'H'){
return 1;
}
else{
return 0;
}
This snippet of code configures the SC16IS750 to 9600 baud (the default rate of the WiFly), enables the communication FIFO, and then tests the SPI communication by writing to and then reading from the chip's "Scratch-Pad Register" (SPR). If this test fails, the code will hang the Arduino in a while(1).
With the communication rates set, I wrote a simple polling loop to check the line status register (LSR) of the SC16IS750 and print any characters it receives. If no characters are available, it checks the Arduino Serial buffer for new characters from the terminal and sends them to the SC16IS750. An Arduino sketch of this can be found here:
Download: WiFly Transparent Terminal Sketch
Then it was time to start digging into the WiFly User Guide (more recent version). My first task was to get the WiFly to associate with our wireless LAN at SparkFun. All commands to the WiFly are executed in command mode, which is entered by sending the characters "$$$" to the device. So I fired up the Arduino with the wifly-basic sketch loaded and typed "$$$" into TeraTerm. The output was:
WiFly Shield Terminal Routine
Bridge initialized successfully!
CMD
Auto-Assoc roving1 chan=1 mode=NONE FAILED
Now the device is in command mode, and it looks like the WiFly is automatically attempting to associate to an open network. I need it to associate to the SparkFun network, but all I have is our WPA password which I got from our IT guys, so I use the "scan" command to see information about the available wireless networks:
scan
<2.15>
SCAN:Found 1
Num SSID Ch RSSI Sec MAC Address Suites
1 SparkFunWireless 01 -60 WPA_Mix 00:14:d1:c4:32:3f AES/TKIPM-TKIP 1104
4
Now I know the security type and name of our wireless LAN. By default, the WiFly is not configured for WPA encryption, so I change that with the command
<2.15> set wlan auth 3
AOK
This changes the Authentication Mode of the device to Mixed WPA1 & WPA2-PSK. I use a similar command to set the password:
<2.15> set wlan phrase
AOK
Now, since I know the name of the network, I can associate using the join command:
join SparkFunWireless
Auto-Assoc SparkFunWireless chan=1 mode=MIXED SCAN OK
Joining SparkFunWireless now..
<2.15> Associated!
DHCP: Start
DHCP in 1234ms, lease=86400s
IF=UP
DHCP=ON
IP=10.0.0.116:2000
NM=255.255.255.0
GW=10.0.0.1
Listen on 2000
Great! Now I have the device associated and listening on port 2000 so I can test it using Telnet. Using a laptop that is also on the SparkFunWireless network, I open a command prompt and type
telnet 10.0.0.116 2000
This will attempt to connect to the device on port 2000. After pressing enter, the command prompt displays the message "*HELLO*", the default string sent to a connecting client by the WiFly. On the local terminal, I see the message "*OPEN*" indicating that a connection has been opened. Now I can type in either window and have it appear on the other end like some over-engineered instant messaging program. It's a good start, but now I want to be able to host HTML on the Arduino, which means communicating on the HTTP port (port 80). So I disconnect from telnet and set the local port with the command
set ip localport 80
Now I telnet once again using the command
telnet 10.0.0.116 80
Now I'm connected to the device over the network on port 80 and communicating over telnet as before. I know that an HTTP connection from a browser will attempt to communicate over port 80, so in Firefox I type
http://10.0.0.116
and press enter. The terminal that the WiFly is connected to displays this:
*OPEN*GET / HTTP/1.1
Host: 10.0.0.116
User-Agent: Mozilla/5.0 (Windows; U; Windows NT 5.1; en-US; rv:1.9.0.14) Gecko/2
009082707 Firefox/3.0.14
Accept: text/html,application/xhtml+xml,application/xml;q=0.9,*/*;q=0.8
Accept-Language: en-us,en;q=0.5
Accept-Encoding: gzip,deflate
Accept-Charset: ISO-8859-1,utf-8;q=0.7,*;q=0.7
Keep-Alive: 300
Connection: keep-alive
This is great! Now, on the Arduino, I can wait for an open connection and attempt to respond properly. I'd like to see if the WiFly is responding at all, so I download a Firefox add-on called HTTPFox which catches incoming and outgoing packets and displays their data. I fire up HTTPFox and attempt to connect to the WiFly again through the browser.
In HTTPFox I see the same "GET" request as the browser attempts to connect, but now I see that the Response Header from the WiFly is
"HTTP/0.9 200 OK"

meaning that the WiFly is responding properly, but the browser is waiting for the connection to close before displaying anything. The activity icon on Firefox is spinning waiting for data. With this in mind, I can attempt to send the browser some characters and then enter the command mode and close the connection. In the terminal window connected to the Arduino, I type "hello world". This doesn't echo in the terminal, but every time I hit a character I can see the red LED on the WiFly light up, indicating UART communication. Next, I type "$$$" again to enter command mode, and then type "close" to close the connection. The Firefox browser then displays a page that says
*HELLO*hello world
and states "Done" in the status bar. This means that everything that is sent to the browser after the connection is opened is interpreted and then displayed when the connection is closed.
Now instead of sending "Hello World", I'd like to send some HTML to be interpreted as a web page. However, I do not want to display the "*HELLO*" message automatically sent by the WiFly, and I'd also like to get the device to connect to the SparkFun Wifi automatically. Now that I know all of the commands I need to send to configure the device, I can send them to the WiFly at startup so it autoconnects after boot. Also, the user guide specifies that WiFly commands can be shortened, so
set wlan auth 3
becomes
set w a 3
This autoconnect routine simply sends all of the commands I would have typed anyway, without worrying about a printed response. For example, to set the authorization level to three, the code is
SPI_Uart_print("set w a ");
SPI_Uart_print(auth_level);
with "auth_level" delcared as a global variable.
After the join command, the device attempts to associate with the specified network. I need to be able to detect if the device is associated. To do this, I send the join command, delay for a set amount of time (5 seconds) to give the device time to associate, and then send the command
show c
which is short for "show connection". This command responds with 8130 if connected and 8103 if no IP address has been assigned. So by reading in and checking the one's digit of this response I can see if the device has associated. If it has not, I send the "reboot" command and attempt to autoconnect again. This goes on until the device is associated. Once that happens, the device goes back into the polling loop from the previous example. The Arduino sketch that auto-connects is found here:
Download: WiFly Autoconnect Example Sketch
As I mentioned before, I do not want the WiFly sending connection messages that will get in the way of HTML, so in the autoconnect routine I disable them using the commands
set c r 0
set c o 0
set c c 0
c is short for comm, and r, o, and the other c are short for "remote", "open", and "close" respectively. This tells the device not to send anything when a connection is opened or closed.
With the autoconnect in place, I can now attempt to send an HTML page when a connection is opened. Right now, to detect a client request, all the device has to do is wait for characters to be sent after autoconnecting. So in the main loop, the device continuously queries the SC16IS750 until characters are received, and then sends the HTML lines to the WiFly, and closes the connection with the "close" command. Here's a code snippet.
while(1)
{
while(!Have_Client()) // Wait for a client
{
SPI_Uart_println("");
SPI_Uart_println("Hello World");
SPI_Uart_println("
SPI_Uart_print("$$$"); // Enter command mode
SPI_Uart_println("close"); // Close the connection
SPI_Uart_println("exit"); // Exit command mode
}
}
I connect to the device with Firefox, and it works! I now have a web page that says "Hello World". Now I can send a page that actually does something. The first thing I try is displaying an image with a reference link. The title of the page comes up, but the image wont load. I take a look at the source code that the browser is acually receiving, and I can see that the connection closes before the full page is sent. So I try adding a short delay after every line of HTML I send, and this allows the whole page to be received proplerly. I make a function called HTML_print that is essentially SPI_Uart_println with a short delay (30ms) immediately following. Is it a lazy-kluge-jury-rig-thereIfixedit solution? You betcha. But it works, so I stick with it. Once the HTML is done, I now have a device that wirelessly serves up an image and a button. The sketch for this can be found here:
Download: WiFly Example Page Host Sketch
Goal the Second: Get the WiFly Talking Back:
With the Arduino serving up a page over the WiFly, it's time to start interacting with the hardware over the LAN. At this point I have tons of ideas running around in my head, but then I remember that the Voice Box Shield just came out, so how about making this server talk? The Voice Box Shield operates by accepting phoneme commands and "saying" the corresponing phoneme. SpeakJet includes a dictionary applet called Phrase-A-Lator with about 1400 words spelled out in phoneme form, so I have a good start on a basic lexicon for this server. Before any words come into play, however, I have to figure out how to get a phrase from the web page onto the Arduino in an understandable form.
I already have a page that hosts a button, so I need to turn it into a submit field. My HTML is rusty/nonexistent, so I get on W3Schools and find some example HTML for a submit field. I code it into my page, type "hello world", press submit, and see this pop up in my terminal.
GET /html_form_submit.asp?user=hello+world HTTP/1.1
Host: 10.0.0.116
User-Agent: Mozilla/5.0 (Windows; U; Windows NT 5.1; en-US; rv:1.9.0.14) Gecko/2
009082707 Firefox/3.0.14
Accept: text/html,application/xhtml+xml,application/xml;q=0.9,*/*;q=0.8
Accept-Language: en-us,en;q=0.5
Accept-Encoding: gzip,deflate
Accept-Charset: ISO-8859-1,utf-8;q=0.7,*;q=0.7
Keep-Alive: 300
Connection: keep-alive
Referer: http://10.0.0.116/
This HTML code is looking to submit this data to the file "html_form_submit.asp", and it is a "get" request. Since I don't have that file on the Arduino, and since this just needs to be a one-way transmission, I change "html_form_submit.asp" to simply "/" and "get" to "post". When I type in "Hello World" and submit again, I see this in the terminal
POST / HTTP/1.1
Host: 10.0.0.116
User-Agent: Mozilla/5.0 (Windows; U; Windows NT 5.1; en-US; rv:1.9.0.14) Gecko/2
009082707 Firefox/3.0.14
Accept: text/html,application/xhtml+xml,application/xml;q=0.9,*/*;q=0.8
Accept-Language: en-us,en;q=0.5
Accept-Encoding: gzip,deflate
Accept-Charset: ISO-8859-1,utf-8;q=0.7,*;q=0.7
Keep-Alive: 300
Connection: keep-alive
Referer: http://10.0.0.116/
Content-Type: application/x-www-form-urlencoded
Content-Length: 16
user=Hello+World
Well this makes things easier. The typed message is sent at the end, right after the word user. If I change "user" in the HTML to some unique character, I can easily parse the message to be used with the Voice Box. I change the word "user" to "%" (a symbol not found in either the GET or POST messages) and write a parser, creatively called Parse_Request to put the sent message in an array and split it into separate words.
Now that I have all the data I need coming from the web page, it's time to get the SpeakJet talking. All I have right now is the dictionary applet provided by the SpeakJet Phrasealator. This has 1400 words, but it lists them as phoneme strings like so
airplane = \EYRR \PO \FAST \LE \EYIY \NE
This means nothing to the SpeakJet, so I'm going to have to translate the strings into SpeakJet codes. I dig around in the PhraseALator folder and manage to find the file PhraseALator.dic which is the plain-text file for the dictionary. Using VIM and some creative find-and-replace, I replace all of the phonemes with their SpeakJet codes and format each string to be hosted in program memory. So the old "airplane" string is now
prog_char sj_airplane[] PROGMEM = {150,199,7,145,154,141};
I also put all of the string addresses and words into a lookup table for easy access. The reason for the "sj_" in "sj_airplane" is that the dictionary includes words like "long" and "while" which are interpreted as keywords and not string names, so I added a general prefix to avoid confusion. The library and it's lookup table can be found here.
Even though this data is hosted in program memory, 1400 strings is still too much data to fit into the Arduino memory, so I'm going to have to pick some choice words and build an abridged dictionary for this project. To choose these words, I used a "Refrigerator Poetry Magnet" example wordlist that I found. I went through and copied the first hundred-or-so words from this list into my Arduino sketch, and built a symbol table and a lookup table. Now when I receive a phrase from the web page, I can compare the individual words against the words in the lookup table, use that index for the symbol table, and copy the referenced SpeakJet command string from program space into a local buffer. Once there, I can just send the string to the SpeakJet and the device should say the word. I put the lookup code into my Parse_Request function (an O(n) linear search, because I'm lazy and I need the code space), fire up the device, and surf to the IP. I type in a phrase that includes several words in the abridged dictionary, and the SpeakJet says them! Unfortunately, when the SpeakJet gets to the last word, it keeps talking. And talking. And talking. It seems as if it's continuing on through the memory, grabbing the next word and saying it. I check my parsing function and SpeakJet strings, but I can't get the SpeakJet to stop talking when I want it to, after RTFM (again) and some guess-and-check work with the device, I find that if I end all the word strings with the commands "0,0,255", the SpeakJet will stop speaking at the desired time. The code "0" translates to a pause of 0ms in the SpeakJet, and the code "255" translates to "end of phrase". I find that the desired behavior is only achieved when two "0's" and a "255" are included, not one or the other. So, back to VIM. I format the dictionary so that the strings all end in these commands, so the original "airplane" string goes from
prog_char sj_airplane[] PROGMEM = {150,199,7,145,154,141};
to
prog_char sj_airplane[] PROGMEM = {150,199,7,145,154,141,0,0,255};
I test the device again, and now it works great! The only thing left to do is to get the device to display the dictionary when the page is loaded, which is easily accomplished with a loop in the HTML send section. Now the device waits for a client, serves up the page, and waits for a GET or POST request. If a POST request is received, it parses the sent data, "says" the phrase with the SpeakJet, and then refreshes the page and closes the connection.
Everything I do after this point is just gravy. I add a AA battery pack so I can walk around with the device. I also get the SpeakJet to say its IP address when the device associates in case the DNS decides to give me a different IP on association. At this point the project is done. The final code can be found here:
Download: WiFly SpeakJet Server Sketch
And here is a video of the device in action:
Recent WiFly boards have a 14.7456MHz crystal connected to the SCI16IS750 SPI-UART on them instead of the 12.288MHz crystal found on the board this tutorial was written for.
If you're using the old baud rate setting of 0x50, when you connect the serial console to the transparent terminal sketch, you'll see:
WiFly Shield Terminal Routine
Bridge initialized successfully!
?WG????77???@'?7o??w??@774??a???G??y??6??@g???????0?
and the line of gibberish will be repeated every about every 10 seconds. Change the DivL value in the UART configuration struct (or code) to use the value 0x60 instead of 0x50 in order to get it to work at 9600 baud.
Aha, now it works, thank you :-)
Chris,
I am getting this error:
"Could not initialize bridge, locking up."
Would you have any ideas what might be wrong?
Or what I could do to isolate the problem?
I have the same hardware setup, but for some reason SPI_Uart_ReadByte is failing to read.
Thanks in advance.
hello just starting to interact with shiel voicebox, but I need your help to have a code that tells the full alphabet await your response
I updated the Transparent Terminal sketch to work with arduino 1.0, using the SPI library, and I cleaned up the initialization so it looked better (to me, but maybe not to you!). You can try it out: www.holdentechnology.com
Thanks so much for posting that!!
Would you mind uploading this code to github and then updating the tutorial to link to it? That way the community can fork it and keep it up to date for you.
Hello, Does this tutorial also work with the Arduino Uno? I'm having a lot of problems with uploading even the first sketch (transparent terminal). Of course, I'm also using the new version of the software. I realize this tutorial was written 2 years ago, so I'm wondering if you can have a update version? Something else that would be helpful is a visual sketch of the electrical connections.
The errors that I'm getting are compilation errors where some parts of code can't be referenced. Has anyone else had that problem?
Thanks in advance.
I'm brand new to all of this, but I just got an Arduino Uno and the WiFly shield. I see that the WiFly shield holes match the one on the Uno, can I just solder this directly on to the Arduino on the pins that I need, and then the rest are not connected to the WiFly shield electronics and work as a hole to attach other things?
Hi everybody. I have the same problem as Chris. I am getting the error “Could not initialize bridge, locking up." When i am tryng to connect to Wifly by WiFlyTerminal sketch. The matter is that I have tried 2 diferent hardware devices: Arduino UNO with Wifly Shield that includes a module 2.21 RN-131C Arduino FIO with Wifly module RN-171 I have no idea what is the problem. I think I have tried everything. IDE 0023, IDE 0022, IDE 0019, Wifly Library WiFly-20101217-alpha-2, Wifly Library WiFly-20100519-023939, of course, I have also tried the solution of SoSpartan with Chris. I don't know what more to try. Any idea would be very helpful for me. This is very unhopeful. Thanks.
Hi, I am trying to get the WiFly Terminal sketch working, and it's giving me some errors:
C:\users...\desktop\arduino-1.0\hardware\arduino\variants\standard/pins_arduino.h:41: error: expected unqualified-id before numeric constant
C:\users...\desktop\arduino-1.0\hardware\arduino\variants\standard/pins_arduino.h:42: error: expected unqualified-id before numeric constant
C:\users...\desktop\arduino-1.0\hardware\arduino\variants\standard/pins_arduino.h:43: error: expected unqualified-id before numeric constant
All I changed was: 1. DivL value to 0x60 2. inside void loop(): Serial.Print(incoming_data,BYTE) to Serial.write(incoming_data) for arduino-1.0 "BYTE" no longer supported
I just started playing with arduino about a month ago, any help is greatly appreciated ^^ Thank you in advance!!
Tim
Had the same problem. You need to include SPI.h at the top.
My Solution Process: I commented out the #define statements and the majority of the program till it compiled. Then narrowed it down to the MOSI, MISO, and SCK define statements causing the issue. Google helped me trace it to SPI, then a google on that led to: http://arduino.cc/en/Reference/SPI, then I looked at the example code.
i got mine working up until the telnet part where there seems to be no communication between ma laptop n da device... I typed telnet 192.168.1.9 2000 on command prompt but it gives me error that connection has failed and the device is already connected successfully to my network...help please!!!!.....
Hello! I from Venezuela and I am participate in a project very familiar whit this tutorial except that the received information I send it to a LED screen. I have the next problem: I wrote the IP address in my browser (Google Chrome) and I receive de the page normally, then when I wrote a word and click summit, the page say that lost connection, but when I look where the program is executing, is in the client request waiting for response from de page. In other word, the browser doesn’t send anything to my Arduino. Help me please!! The problem could be the browser?? Thank you very much for any help!
I am new to using a Wifly and have been trying to follow the tutorial. I am getting stuck on the Teraterm part. I am connecting via comp4 (where the Arduino is connected to computer) and while I am seeing the success message, it won't allow me to enter the $$$ command. Same thing is happening in the serial monitor option of the Arduino program; I can't enter any commands at all. Any suggestions? I would really appreciate it!
Same problem with the autoconnect; it goes as far as joining my network and just stops there without any progress. Please advise.
You can really use any terminal program. The arduino serial monitor doesn't play nice. I use CoolTerm on the Mac and it works great. Also make sure you've changed the Divl number as referenced by SoSpartan way up top.
struct SPI_UART_cfg SPI_Uart_config = {0x50,0x00,0x03,0x10};
Should be...
struct SPI_UART_cfg SPI_Uart_config = {0x60,0x00,0x03,0x10};
And now it just hangs at:
WiFly Shield Terminal Routine Bridge initialized successfully!
which sketch are u using?....for me i used da WiFly Transparent Terminal Sketch and did the changes yoonka has suggested and it worked but up until the telnet part. i cannot do anything about it.....
I've been having exactly the same issues as YusifNurizade above. I've tried your patch but get the following error, any idea?
WiFly Shield Terminal Routine Bridge initialized successfully! þLED READY ERR WATCHDOGþ
Has anyone gotten this to work with a RN-XV? Im having difficulties getting a connection to my router.
Help! I'm able to connect to my WIFI at home (airport express WPA2) quickly and easily, and yet at my studio where i have a mixed WIFI (WPA/WPA2), i'm stuck and have no idea why. i've tried your sketches as well as the WiFly library with the same results.
At my studio, I'm able to enter command mode in the serial monitor in Arduino IDE and connect to the ssid that way. All looks good:
set wlan ssid Method
AOK
set wlan phrase xxxxxxxx
AOK
set wlan auth 4
AOK
scan
SCAN:Found 7
Num SSID Ch RSSI Sec MAC Address Suites
1 SmartFi 01 -67 WPAv1 74:91:1a:0f:7e:a9 AESM-TKIP 3104 0
2 MuseGames 02 -69 WPA_Mix 00:24:01:6f:8a:bd AES/TKIPM-TKIP 3104 0
3 shadygoliath1 06 -73 WEP 00:26:62:0d:1a:f6 1104 2
4 M3 Entertainment 09 -69 WPA_Mix 0c:d5:02:1e:42:b5 TKIPM-TKIP 1104 6
5 Method 11 -55 WPA_Mix 00:26:b0:fe:8b:a3 AES/TKIPM-TKIP 3100 0
6 DHAwifi 11 -62 WPAv1 00:21:29:ae:62:8e TKIPM-TKIP 1104 0
7 DHAguest 11 -74 WEP 00:15:e9:1e:d2:f8 3104 0
join # 5
DeAuth
Auto-Assoc Method chan=11 mode=MIXED SCAN OK
Joining Method now..
Associated!
DHCP: Start
However - in the wifly_autoconnect sketch, it gets through the setting of ssid etc, and just hangs before either failing or succeeding at associating. I've been posted on the Forums but no answers yet - any help would be amazing as i'm stuck and frustrated.
Thank you!
Claudia
Can you please fix the link to the sketch?
Thanks...
PLEASE FIX SKETCH LINKS! Thank you!
I keep clicking on the example sketches and it brings me to the home page. Any suggestions?
Great tutorial. To work around the memory limitation, you could put the SpeakJet dictionary in an external Javascript file, host it anywhere (Dropbox is good), include it in the head of the HTML (or just before closing body tag if you know what you're doing), and make it as big as you'd like. The same goes for images and CSS. The only thing you can't do is AJAX requests to domains other than the one the WiFly is on (considered cross-site scripting and blocked by newer browsers).
great tutorial. anyone do this on the Fez Panda or Netuino?
Thanks for the tutorials...
I am glad to day my First Arduino Project is a success!
My WiFly, Speaking, WebBased Bartender is now up and running! 47 drinks from 8 bottles!
Order your drink from any web browser and Octabar is happy to make it for you!
I'll update this post with my website link to show how to build it...
Ok my site is up that reviews my current project OctaBar - the automated bartender that makes 47 drinks, speaks and lets you order from it's web server via wifi wit any web browser (tuned for an iphone)! The site also covers my other upcoming projects!
Overview, the build, the problems I hit, future enhancements as well as the code can be found there...
Razorcontrol.com
Hope there is something there that others can use...
If you are having a problem getting your WiFly shield working you may want to install the WiFly library I have developed and try out the troubleshooting tool.<br />
<br />
Please read the following forum thread for more information: http://forum.sparkfun.com/viewtopic.php?f=32&t=25129
Thanks for your response. I Read tutorial and followed instructions. Connected fine. Before reporting problem I was using telnet I connect to my wireless router without a problem. Suppose I Need help with my web connection. Any suggestions there?
Am I correct in thinking you want to be able to use telnet to connect to your WiFly module on port 80?
The WiFly library I linked to has an example named "WiFly_WebClient" which should work for that.
Oh, also, I have encountered an issue previously where you must specify the port to listen on before you join the network. So this:
set ip localport 80
must come before:
join ...
I had the same problem and this seemed to solve it. I noticed that when I was trying to connect via the 80, it would not allow me but still connected via the 2000 (despite the fact that I changed the port and got an AOK). I restarted the connection and before joining reset the port, worked like a charm. Thanks followr!
Hi YusifNurizade, You discovered that in order for changes to take effect you have to type "save" from the terminal and then "reboot." The unit must be rebooted for any changes in port or whatnot to take effect. Hope this helps others.
Please help, stuck in tutorial on telnet using port 80, works great on port 2000.<br />
In telnet I type 'telnet 10.0.0.9 80'<br />
I get this msg:<br />
"Connecting To 10.0.0.9...Could not open connection to the host, on port 80: Connect failed" <br />
Using Terraterm the 'get ip' command shows IP:10.0.0.9:80<br />
How can I resolve this issue?
Hi,
I bought one of these the other day, but am a complete newbie.
I run Linux, and have no way of knowing how to connect to even get to the $$$ stage. I have taken the first sketch and uploaded it. I don't get any message.
Could you please extrapolate on how to do this. Could I just connect through terminal, or do I do it through Arduino?
Any advice would be great.
Many thanks.
Hi
I'm trying to understand the code you made so I can alter it to do something else. I'm having some difficulty in understanding the Parse_Request function, mainly as to why the line:
message[i-3] = incoming_data
has 'i-3'. It seems to me that this will make the first iterations go out of bounds of the message vector.
What was the idea behind this?
Cheers
"exterminate!!!!"
so dr who!!!!
Hey, Thank you for the terrific tutorial! I ran into a little issue though. I was working with your "WiFly_Page_Host" file and for some reason it would not close the connection to the laptop I was connecting with and would just hang forever. I looked at the code and found...
SPI_Uart_print("$$$");
delay(500);
SPI_Uart_println("close");
delay(1000);
SPI_Uart_println("exit");
delay(500);
Flush_RX();
I took out the "ln" after both _print commands and the code ran perfect, it closed the connection and served up the images. So the code was changed to the following...
SPI_Uart_print("$$$");
delay(500);
SPI_Uart_print("close");
delay(1000);
SPI_Uart_print("exit");
delay(500);
Flush_RX();
Thanks again for the tutorial, have a good one!
oooo disregard my previous post, I was having an issue with the delay loop. Nothing is wrong with the _println! :)
lol sorry guys!
hi,
please i nedd your help.
i configured the Wifly (SSID, IP, ...) and i can ping it from other Clients.
i have to write a code to send the Sensor data wireless to a Database installed on one of the Clients.
i know how can i do it with ethernet-Schield but not with this WiFly Shield (RN131-G).
If you have an exemple of the Code please publish it.
All the examples of Sparkfun dont help me.
Pleeeesese
Maybe someone can make control of a led using web page say ON OFF without USB in arduino it would be so cool
The wifly module can send data packet via tcp to the server without send to webserver to do?
I want to send data packet to any host on the network.
see picture my http://www.10logic.com/images/network.bmp
Please reply thanks.
The wifly module can send data packet via tcp to the server without send to webserver to do?
I want to send data packet to any host on the network.
see picture myhttp://www.10logic.com/images/network.bmp
Please reply thanks.
Hi, nice tutorial. Unfortunately, with my WiFly Shield after "DHCP: Start" nothing happens and no IP is assigned. The same issue is described in
http://forum.sparkfun.com/viewtopic.php?f=13&t=21058
Any ideas?
Regards,
tamberg
Could you add a 16Mbit DataFlash ( http://www.sparkfun.com/commerce/product_info.php?products_id=301 ) and add the whole speakjet dictionary?
any thought to adding the spi button pad and assign words or phrases. Maybe have a button that shifts the rest to a second or third or more different sets of phrases indicated by color?
Hi
Great tutorial!! But some download links are broken.
Fixed. Thanks!