
HAB - Still and Video Cameras
A story of the electronics and logistics of launching a high altitude balloon.
High Altitude Balloon Page:
- HAB Intro
- Sensor system, Flight Computer and Radio System
- Still and Video cameras
- The Balloon, Enclosure, Helium, and Cut-Down
- Enclosure and Heater System
- Weights, Measures, and Costs
- Lessons Learned
Camera System

I had heard about firmware hacking on the Canon series, but I have a Casio. So I jumped on Ebay and picked up a Canon SD400 for $35 and $5 shipping. I also had to order a new battery ($3 each) and a charger ($6.50) off of Amazon. The SD400 is old enough that it doesn't handle SDHC memory cards, but I have enough 1GB SD cards floating around to make do. The beauty of the Canon series is the fact that you can use CHDK.
What is Canon Hack Development Kit? It's this amazing open source effort to create a much more flexible firmware for the Canon digital camera. Where Canon (the parent company) wants to limit the user interface so that you can only change a few controls (thus resulting in usually decent photos), CHDK opens up the camera entirely so that you can do some really crazy stuff - like active motion detection on the camera that is fast enough to photograph lightning! Remember, you don't need the SD400 specifically - many different models of Canon will do. The SD400 is 5 megapixel and decently priced so it worked out well for my first launch.
There are tons of different user submitted scripts, but the most basic (and helpful to ballooning) is the ultra intervalometer. This script allows us to tell the camera to automatically take a picture every X number of seconds. Once CHDK is installed on the camera, and the ultra intervalometer is setup, the camera will start taking pictures as soon as the camera is turned on. In the case of my payload, I setup the SD400 to take a photo every 20 seconds. It's really freaky to have a camera just sitting there snapping away photos. But that's what we want for the balloon!
Anyone remember BASIC? I found a script that is basically an interval timer (set to take a picture) but also turns off the LCD. So simple, but reasonably hard to find. Thanks Vicente Piorno! You can download my entire CHDK zip (it's better to get the right CHDK for your camera from their website), or you can grab just the script.
Testing: Once CHDK is installed, it works very well and will happily run until the camera dies. There are two ways for the camera to cease taking photos: out of memory or out of battery. This test is simple enough - get the camera setup and taking pictures on a clean card, then place it in a freezer for 5-8 hours. The freezer is your friend for balloon testing. While it will not get down to the -50C that the electronics will possibly be exposed to, it will prove to you that electronics work quite happily down to -20C. During some tests, I was able to take ~500-600 photos. With a full, brand new 1200mAh battery, I was able to take 956 images over 5.5hrs.
To conserve the most battery, make sure you disable (turn off) the LCD screen in your CHDK script. I found that this did not work if I had the OSD up when I activated the script, so do lots of testing.
Remember to turn off the flash! I could not decipher a way permanently turn off the flash via the user script or through the Canon menus, so I had to do this every time I turned on the camera. To begin the CHDK script without flash:
- Turn camera on
- Take picture quickly to disable the CHDK script
- Turn off CHDK by pressing the Alt button (blue button that looks like a printer)
- Turn off flash (press right twice, then set)
- Press set again to turn off OSD menu (forgetting this step will keep screen on!)
- Press Alt to get back into CHDK mode
- Take picture to begin script

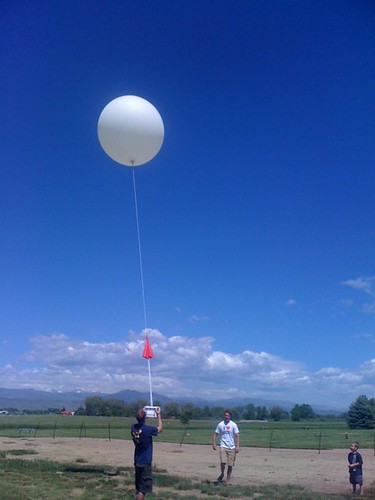
We cut a hole in the side of the styrofoam box and wedged the camera in with a brick of foam. We then had lots of testing to make sure the full extended lens would fit nicely. We also had to increase the hole a bit so that the field of view did not capture the styrofoam walls. You can see the still camera towards the right side of the box. Because we had no idea what we were doing, we cut a window out of acrylic and sealed around the edges of the plastic with silicon. While we knew the box was not air-tight, our intentions where to minimize the air flow in/out of the box. However, the window ended up being way more work then it was worth. It was very hard to get a good seal while keeping the window clear of sticky fingerprints.

Windows could be a bad idea in general. Above is a photo taken at the end of the Spacebridge flight put up by Noisebridge (home of "Time flies like an arrow; fruit flies like a banana" - hah!). David's box used a similar dual-camera setup as my box, but with no window. It worked flawlessly.

Picture is from David's launch. Next time, my payload will probably not have any windows. Instead, the camera and video camera will be tightly fit into the side walls to act as a seal. The lens and camera may get very cold, but the internals of the box should be nice and warm.
Video System
Go big or go home, right? David showed me perhaps the coolest thing to hit extreme sports in the past 5 years. The GoPro HERO HD head cam is not cheap ($260), but just hit their homepage - watch a video or two. The footage these tiny cameras take is amazing! And they come with a waterproof camera case that is good down to 180 ft! You can easily spend $500 just on a good waterproof case - just the case?! The technophile reaction took over and I ordered one. With a 32GB SDHC card ($80 on NewEgg), the camera should be able to take ~4.5 hours of HD video. More freezer testing, more power testing. When powered from a SparkFun 2000mAh LiPo, the GoPro HERO HD uses:
- 57uA when turned off
- 300mA when turned on
- 380 to 400mA when recording on setting r4 (960p, 1280x960 @ 30fps)
With a fully charged battery, I did get 4.5 hours of video. Not bad. But get ready to void the warranty:

A slight power upgrade, taking the battery from ~1200mAh to 2000mAh. If the need came up (if I needed to get the camera back in its housing) I could remove the connect and touch up the spade connectors with solder wick. Soldering on this 2-pin JST connector works very well, but it's not for beginners in soldering. The soldering is not hard, it's just a little touch and go - you won't want to spend too much time heating/touching up the solder on the spade connectors. Get some beer and ask a friend who knows how to solder for some help.

Without the battery, the camera weighs 98.8g. The 2000mAh battery weighs 41g. I forgot to weigh the SD card, but it's just a few grams. Overall, we purchased an HD camera for ~$350, that was capable of recording for nearly 5 hours. Incredible!
Here's an awesome video clip from David (using the same GoPro camera). 2:45 is the time you need to wait for as his balloon bursts and comes tumbling back down to earth. So awesome and petrifying at the same time...
Next page - The Balloon, Enclosure, Helium, and Cut-Down
High Altitude Balloon Page:
There is a connector breakout for the GoPro HD camera here at Sparkfun:
http://www.sparkfun.com/commerce/product_info.php?products_id=8295
Might make interfacing to your projects a little easier. Some hacking still needs to be done to find out what all the pins are doing.
Please look at this link on the Near Space project at Parallax. It has a whole book in pdf format on all the subjects relating to near space exploration. It should save you tons of effort!
http://www.parallax.com/Resources/ApplicationsContests/Science/NearSpace/tabid/567/Default.aspx
Best regards,
Miguel Reznicek
mreznicek@pretensa.com