
Robot Claw Tutorial
Overview
After getting a decent amount of questions about the assembly and compatibility of our robotic claw and medium servo, I decided to write a small tutorial about assembling the claw. In it we will go over the basics for getting your claw up and grabbing as quickly as possible.
Requirements
To begin, you should have everything you see in the picture below:

What we have here is:
- 2, 4/40, 22mm screws with matching nuts used to mount the servo to the claw from the sides.
- 2 smaller 9.5mm screws with a sharp tip used to screw the servo horn (AKA “arm”) to the bottom of the loose claw gear.
- 1 even smaller 4/40 7.6 black screw used to screw the servo horn to the golden servo gear.
- One of the two servo horns that come with the medium servo.
- 1 medium 180 degree rotation servo
- 1 robotic claw.
- An Arduino Uno microcontroller
- A pair of wire cutters.
- A precision screw driver with a PH-1 tip in it
- 3 M-M jumper wires for the servo to connect to the Arduino
How it Works
With the addition of a simple servo motor and a little bit of code, the robotic claw can bring life to any project. Using just gears and the servo, gripping, grabbing and even clamping objects can be easily implemented into your project, be it a robot or a claw game. Setup is easy - as you'll soon find out.
How to Use it
Assembly
First, cut off a decent portion of both ends of the servo horn, otherwise it will bump into the mounting plate on the back of the robotic claw. Cut off as shown below:
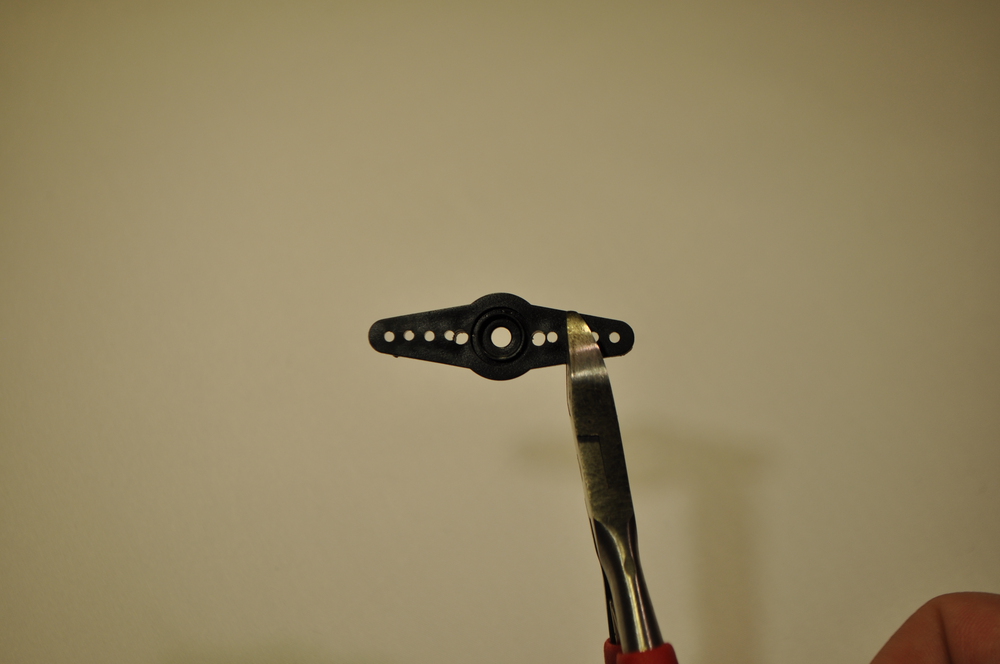
Cut it precisely at the edge of the 3rd hole closest to the center of the horn. This ensures that the horn does not bump into other parts of the claw and allows the servo to rotate freely, which also allows the claw to open and close properly.
Second, screw the altered servo horn to the bottom of the loose robotic claw gear as shown:
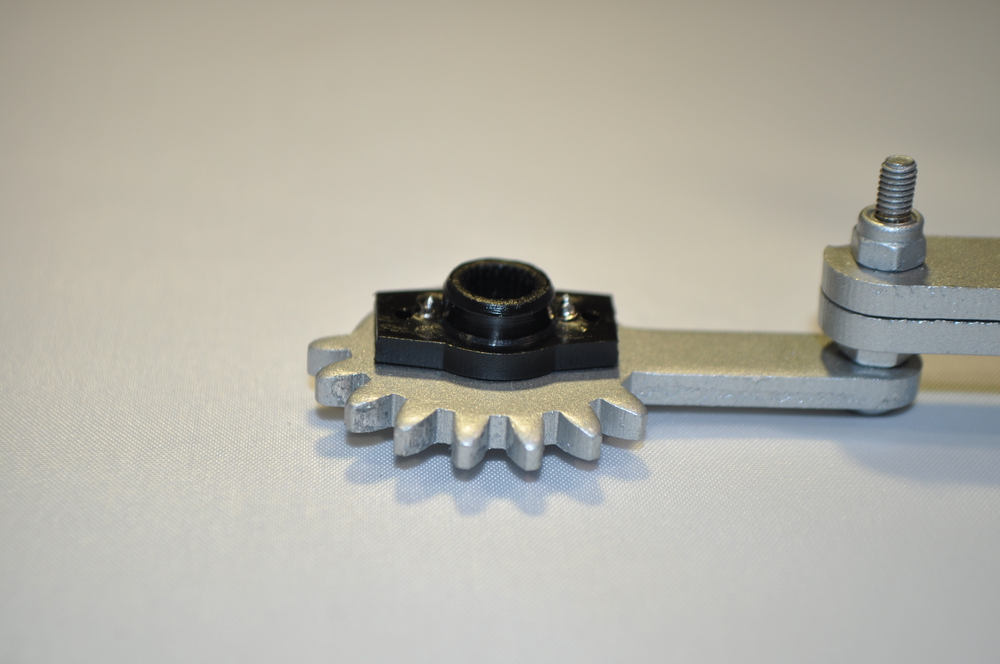
There is a technique to this. Push the plastic servo horn against the robotic claw gear and screw the screw through the servo horn. If you do not apply pressure, the screw will just simply push the servo horn out. Be careful while doing this, the screw might poke your finger.
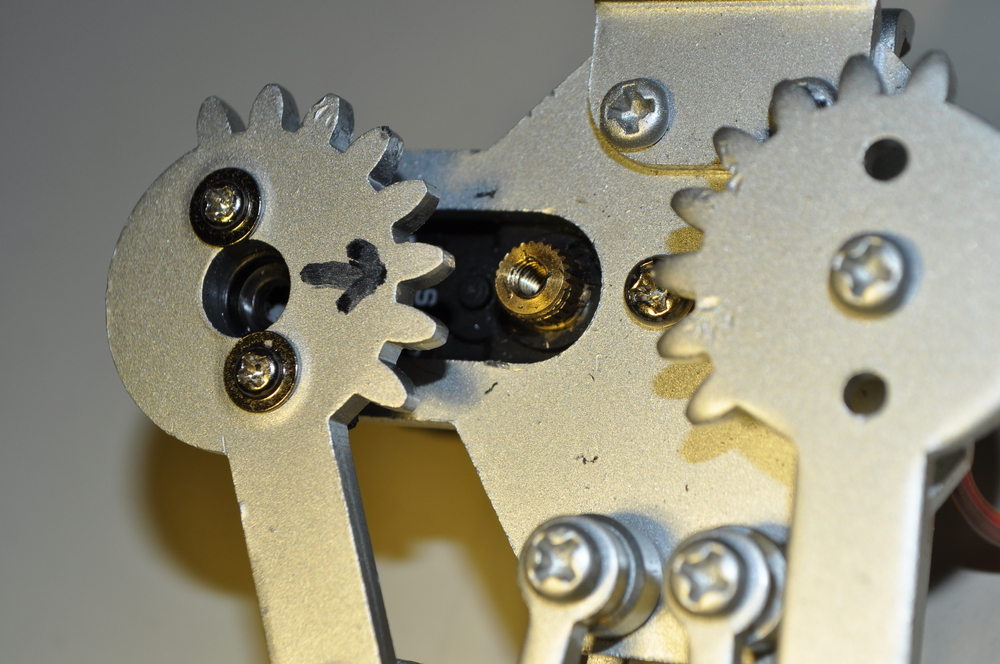
Once the servo horn is screwed on, mount the servo to the robotic claw. Refer to the picture below:

This picture was taken at an angle behind the robotic claw. At the top, you can see the robotic claw's mounting plates. To the right of the servo, protruding from the other side of the robotic claw, you can see the golden servo gear. You want that gear to be parallel with the robotic claw.
I would suggest screwing the opposite (top) screw in relation to the picture through the mounting hole on the side of the servo. Put a nut on the end of the gear and squeeze it with your index finger and your thumb on the other end for stability (refer to picture), then use your screwdriver and thread the screw through the nut. If you screw it too tight, the servo will start to cave in towards whichever side you are screwing and shifts the alignment of the servo gear.
After you get the first screw in and the servo gear looks good, start on the second screw. Apply pressure to the first screw so that the servo gear gets as far away from the mounted claw gear as possible. The reason for this is because if you screw the servo on too close, the two gears will be too tight, not allowing the claw to open and close.
By pinching both of the nuts against the screws (refer to the picture), you can work on both screws to make the servo gear as parallel as possible. You do not have to mount the servo on very tight, just tight enough to keep it in place.
Now that the servo is mounted, slip the loose claw gear with the servo horn over the servo gear, mating the two. Refer to the picture below:
Make sure and turn the servo gear counter clockwise until it stops and make sure the claw is clamped and in the “closed” position. The reason for this is because the servo only goes 180 degrees. If you do not put it in its max counter clockwise position, the claw may not open all the way, or at all.
Hardware
Alright! If everything went according to plan, you should have a assembled, fully functional robotic claw! Now we need to put it on an Arduino microcontroller. Refer to the next picture:
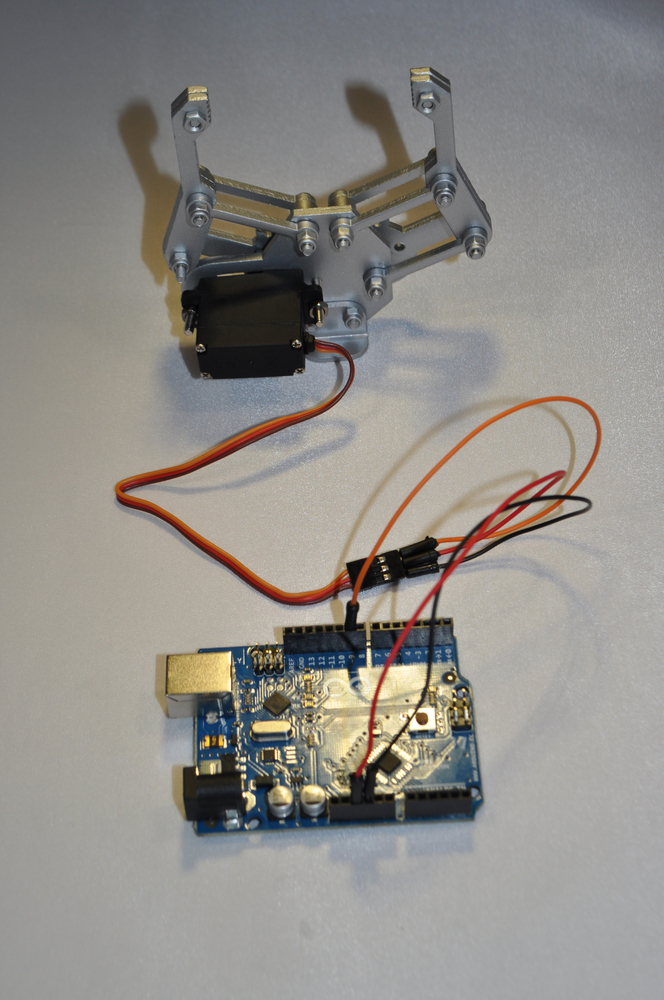
One of the quickest ways to see if your claw is working is to hook it up to an Arduino. I used an Uno, but any 5V Arduino compatible board can be used to control the claw.
The three colored wires from the servo are as follows:
- Brown = GND
- Red = VCC
- Orange = Control
Respectively, hook up the correct colored servo wire to the following Arduino pins:
- Brown = GND
- Red = 5V
- Orange = Digital pin 9
Software
Once you're hooked up to the Arduino, it's time to upload some code. Any version of the Arduino IDE should work. Go to File > Examples > Servo > Sweep. After the sketch pops up, upload it to your Arduino and watch your claw open and close!
Troubleshooting
If your claw is trying to open or close and everything is hooked up correctly, it may be possible that the robotic claw gears are too tense and too close together. You will just have to mount the servo on differently and push it over a bit so the tension loosens up or loosen the mounted servo gear a little to relieve tension
Also, if your claw seems too “loose,” go ahead and tighten the joints. Having the joints too tight will cause too much tension and not allow the claw to move properly, so leave a little slack. To tighten the joints, just get a pair of pliers and a screw driver. Use the pliers to keep the nut in position and use the screw driver to drive the screw through the nut.
Resources
- Robot Claw product page
- Robotic Claw Video
- Instructables Crane Game using the Claw
Conclusion
I hope this helps some folks out there. Feel free to use this tutorial for any of your robotic claw needs. If you have any other questions, please don't hesitate to email us or drop your comments below.
I had my claw and servo come in today. Good instructions, it took about 45 minutes to get everything working. One thing that needs mentioning is that you need to drill your own holes in the servo horn. If you zoom in on the image above you will see it. I did not notice until after I drilled my own as well. My kids enjoyed watching it work and changing some of the code to change the speed.
Good point. The servo horns mounting holes are smaller then the screw threads are, so simply forcing the screw through is something that should be done and is fairly easy.