
Decorative Conductive Fabric Button
These instructions can be used to create a variety of switches- not just the one I've made here. Feel free to change it up and make a button that works with your project, such as a cat button with conductive thread whiskers you can stroke or a guitar button with strummable strings!
The type of switch you're making is called a 'momentary' button or switch. What that means is that you're only momentarily making a connection. When you bring the thread in contact with the fabric, you are creating a path for electricity that lasts only as long as the thread and fabric are in contact. When you take your hand away, the thread will spring back to its original position, and you will no longer have a closed circuit. On a practical level, this means that you can sew the switch into a circuit and use it to turn something on. If the switch is placed, for instance, between a power supply and an LED, the light will turn on while you are activating the switch, and off again as soon as you stop pressing the thread and fabric together.
Materials:
This list is to create the switch pictured; the only real constants if you want to change the style of the switch are conductive thread, conductive fabric, a non-conductive material to insulate between them, and an adhesive.
Stiff, Non-conductive fabric (I used felt)
Non-conductive ribbon
Hot Glue
First, cut about 15 small strips of ribbon, roughly as long as you'd like the longest point of your flower petals to be. Mine were about 2 inches long, but go ahead and customize it to your project. Trim each strip into an oblong with one pointy end and one flat end. I highly recommend having one flat side, as it makes them easier to line up when you're creating your flower, but beyond that, the shape and quantity of the petals is an aesthetic decision- feel free to pack more petals in or change the shape as you see fit!
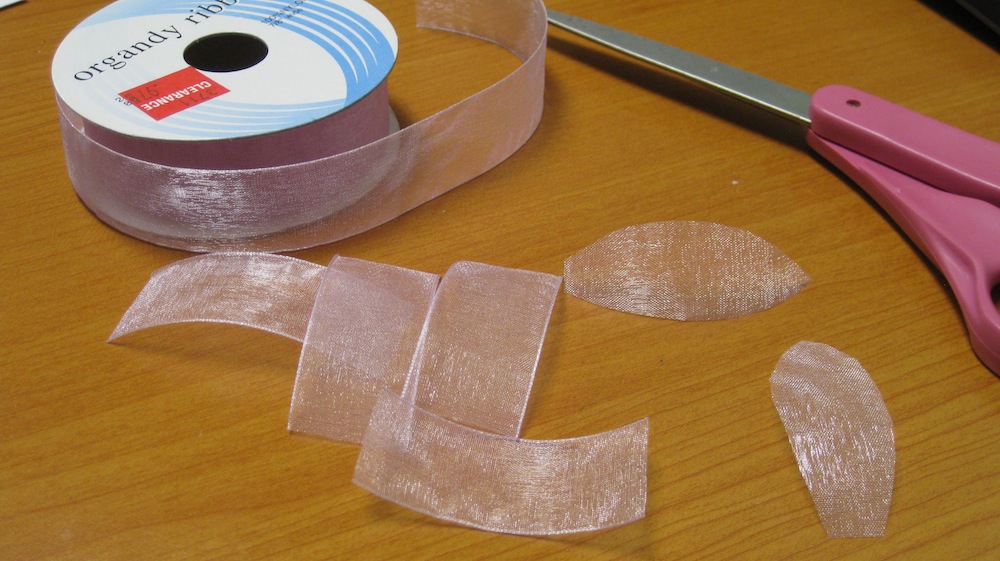
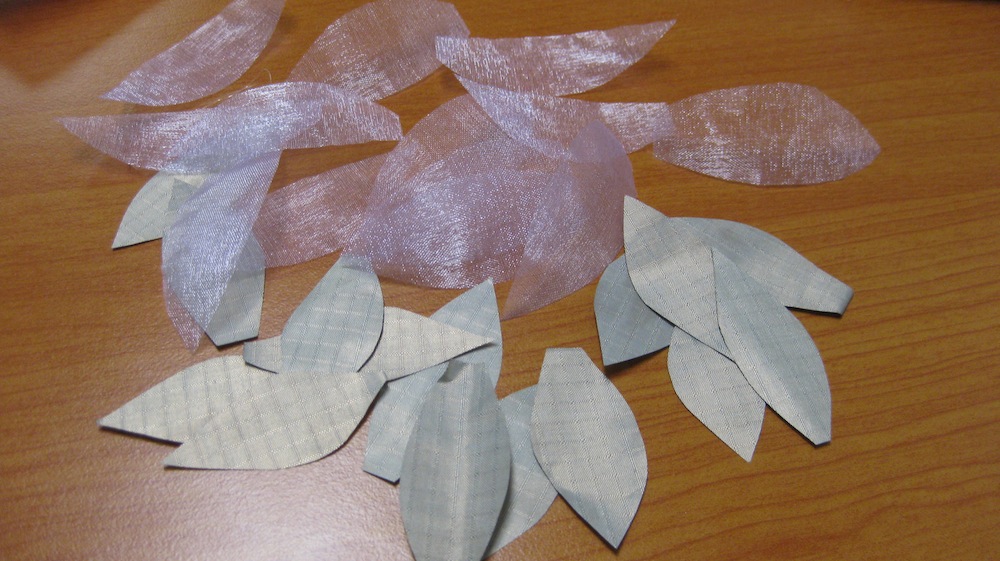
Cut out conductive fabric petals in the same shape, slightly smaller. If you're having problems, try using one of the ribbon petals as a template.
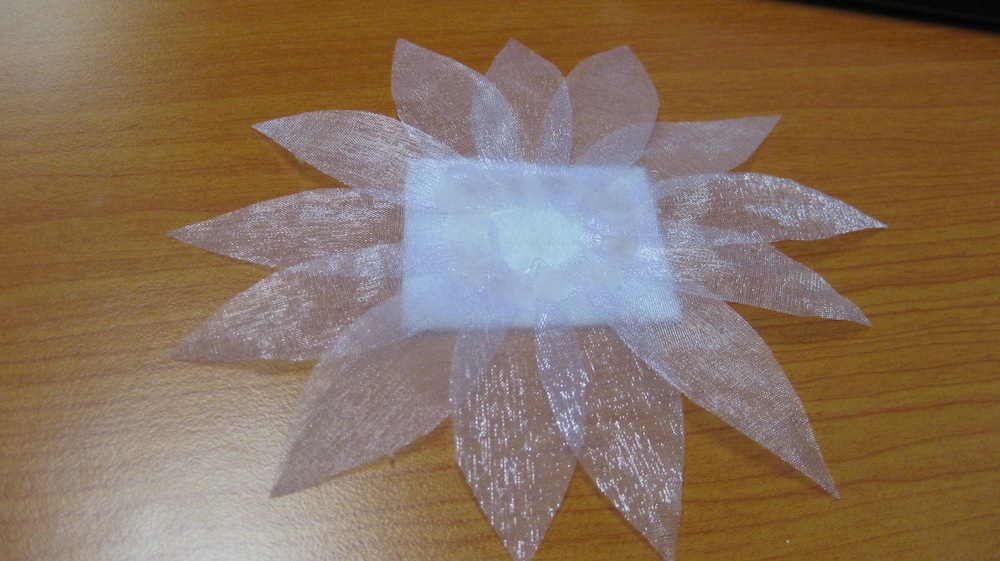
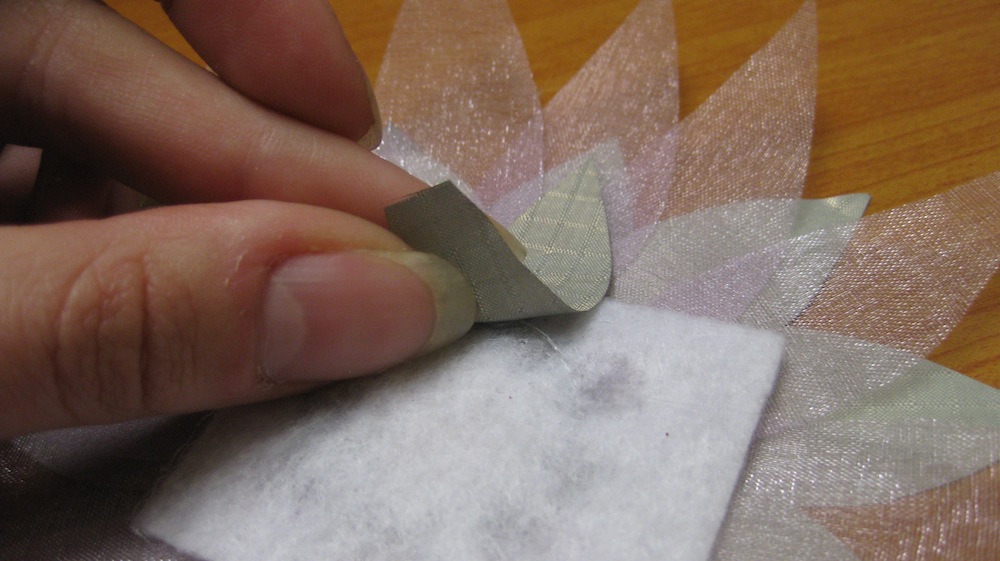
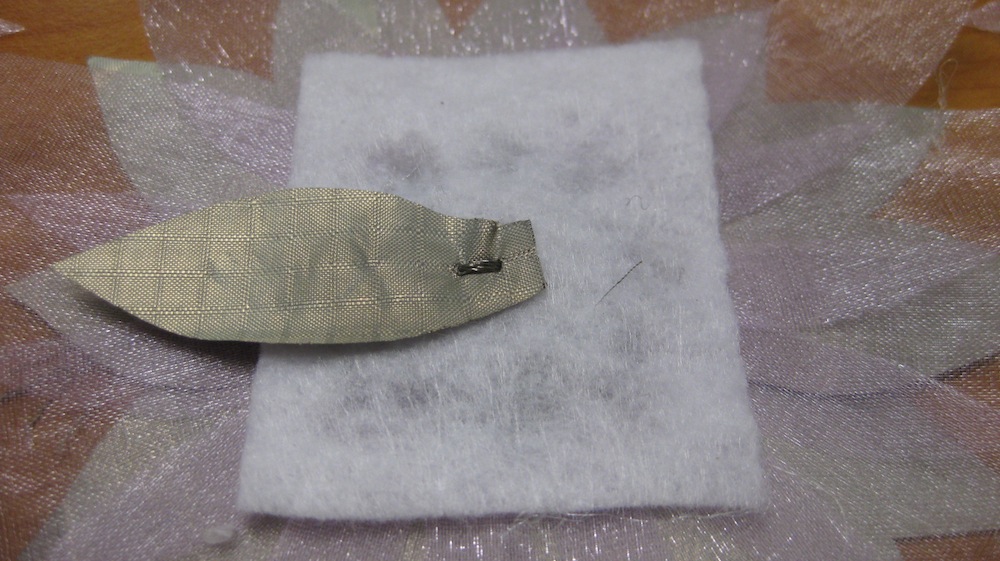
Cut a small piece of your non-conductive fabric. The shape is largely irrelevant, since you'll be covering it with petals, but make sure it's big enough to support two layers of petals and still have room to be sewn or glued to the garment. Glue the non-conductive petals down, overlapping slightly, making sure that you leave a bare circle in the middle.
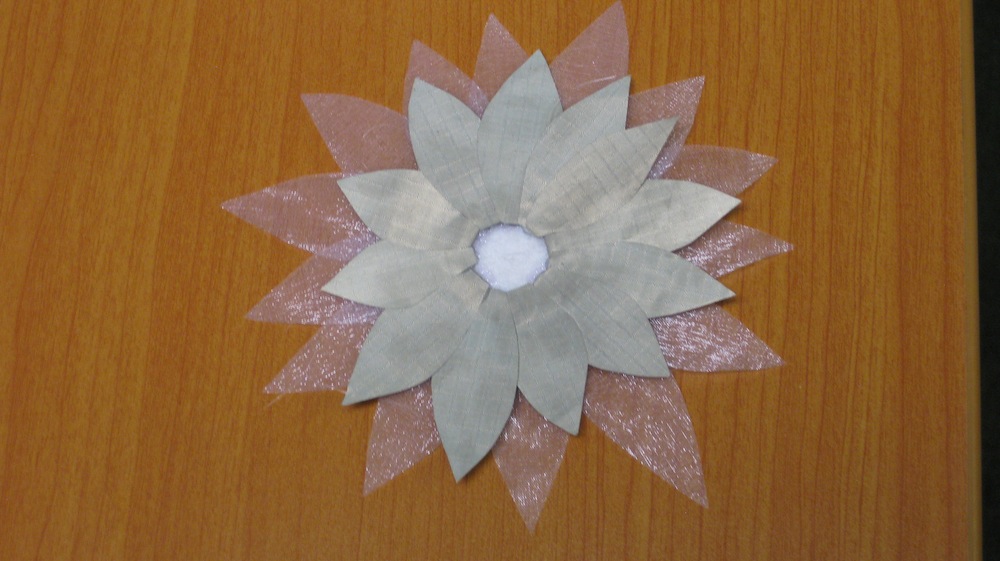
Glue the conductive petals on top of the ribbon petals. Just like the ribbon petals, you want them to overlap, and you want to leave an open circle in the middle. Make sure that you don't use too much glue here- you don't want to insulate the petals. try to make sure that each petal makes uninsulated contact with both of the petals next to it.
Repeat this process until you have as many flowers as you need for your project

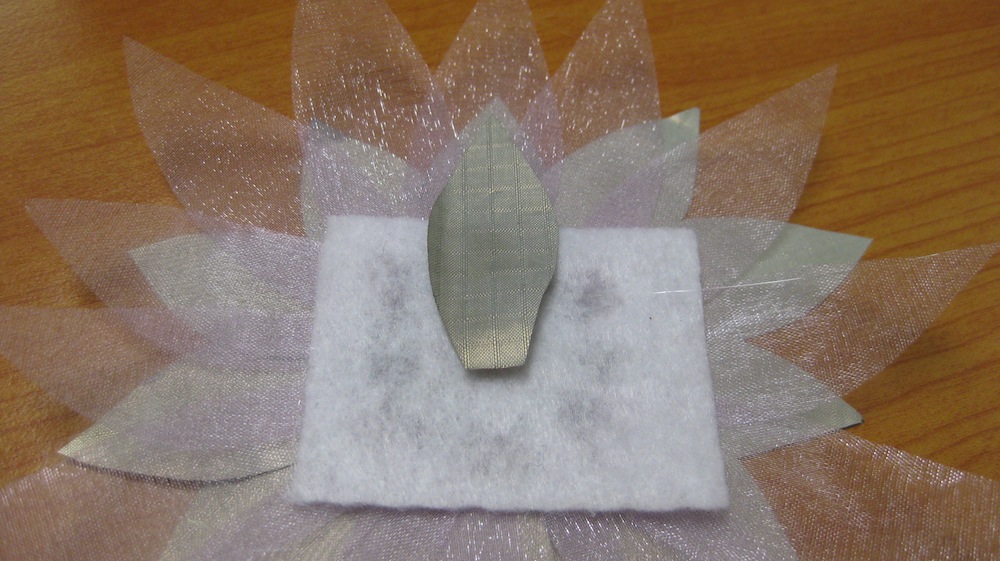
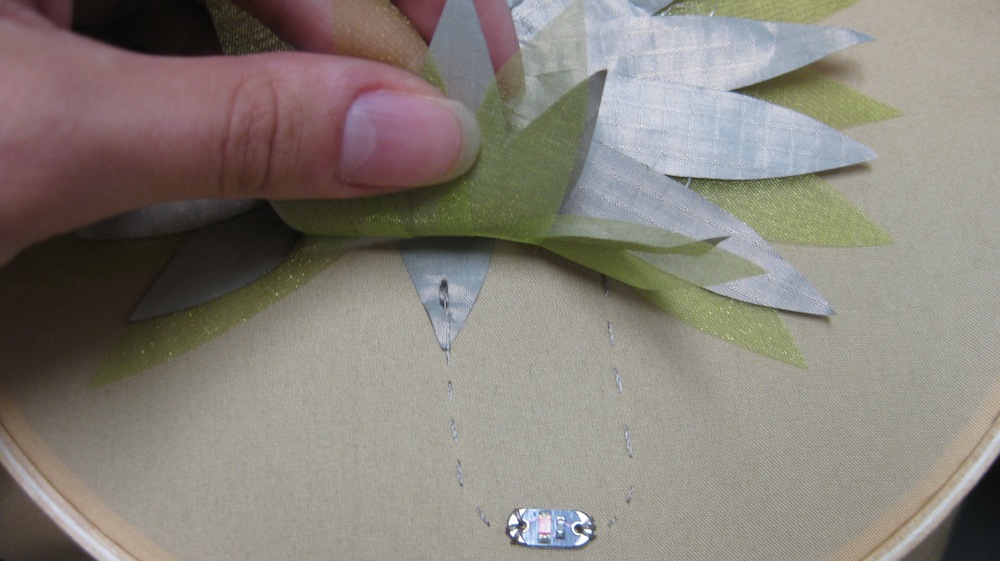
Turn your flower over and glue another conductive petal to the back of the non-conductive fabric, being careful to ensure that the flat edge of the petal overlaps the empty circle in the middle of the flower. You want both tips of the petal free for sewing, so place your dot of glue towards the middle of the petal.
Double check that your bottom conductive petal is in NO CONTACT with your top conductive petals. Ideally, the ribbon petals should insulate between them, but there can be gaps, so check now. If the top and bottom petals touch, your circuit will always be closed, which means that whatever you're controlling with the switch will be always turned on.
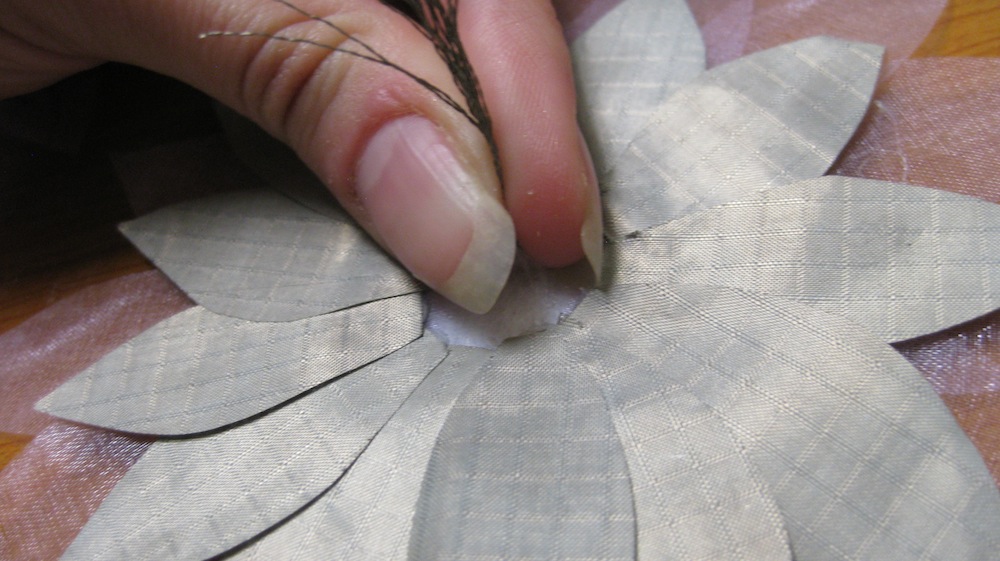
Cut 8 strands of conductive thread, about 3 inches long per flower, and twist them all together. Thread the entire twist through a single needle- this will be easiest with a fairly fine thread, such as the 2-ply conductive, and a large chenille needle, available at craft and fabric stores or in our needle set.
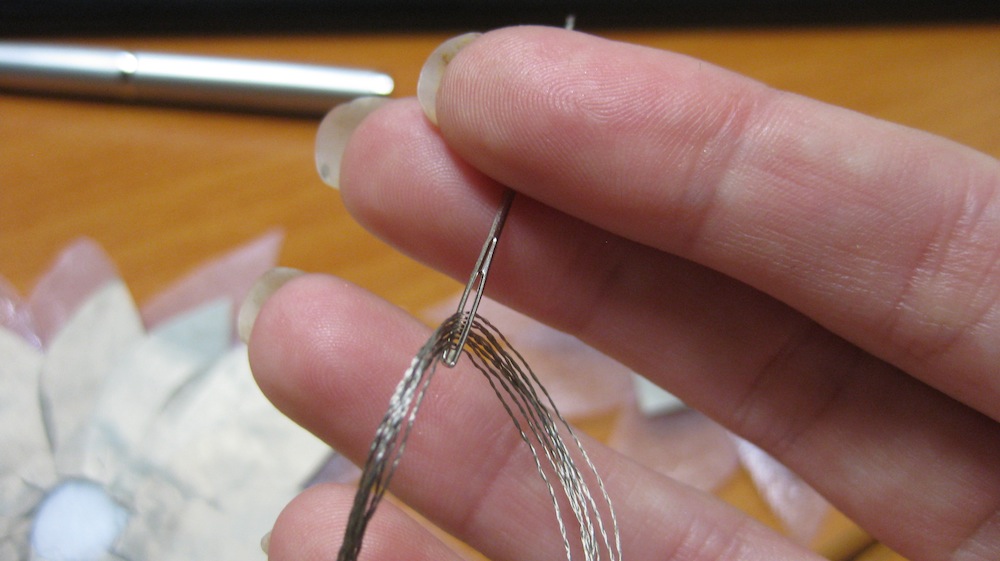
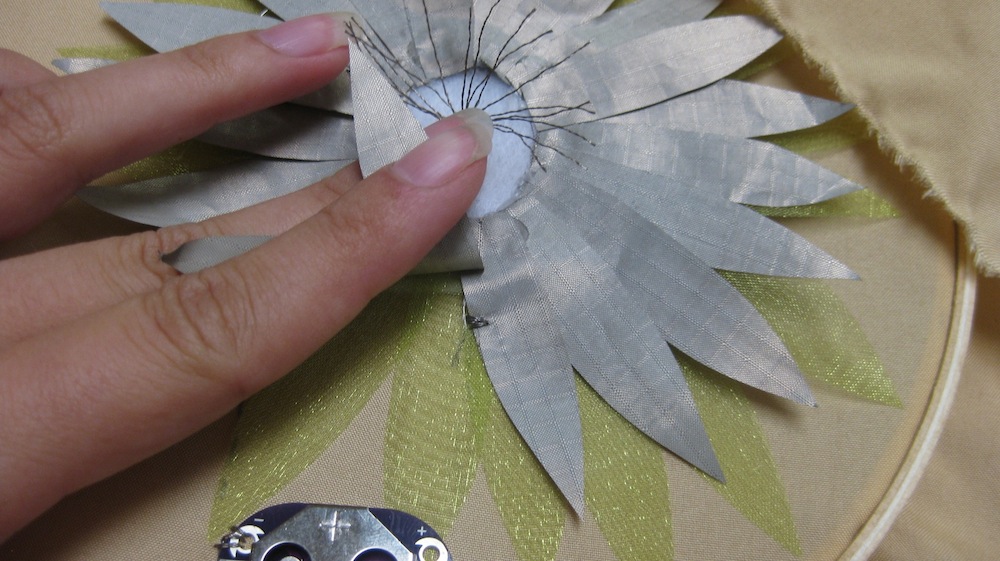
Make one stitch all the way through the bare center of your flower, making sure that it goes through the bottom petal, and back up, without pulling the thread tight- you want about an inch and a half of thread on each side of the stitch, on top of the flower, like a tailor's tack. (Many thanks to Miss P for putting up such a great tutorial on the subject!)
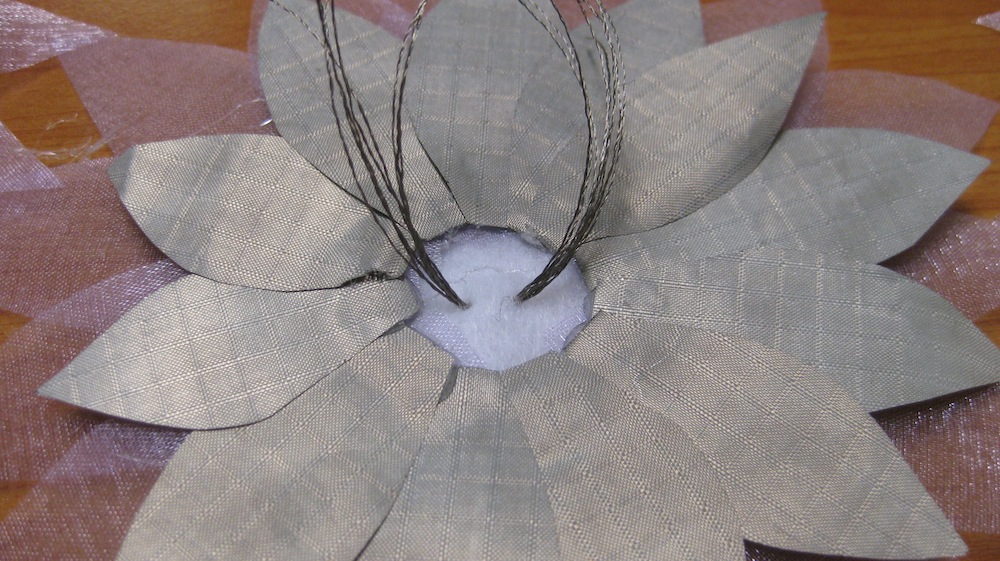
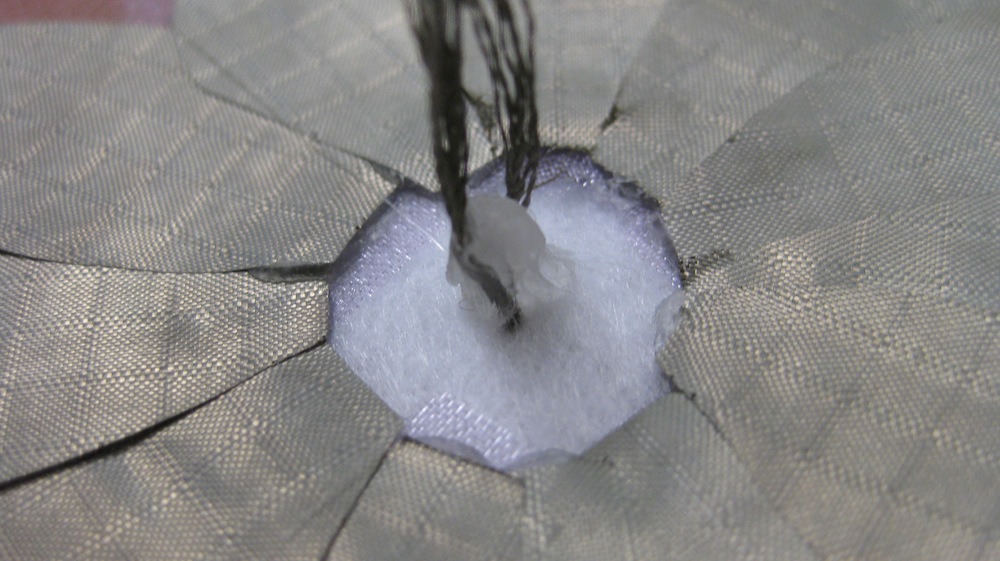
The stitch should be solidly in contact with the back petal, as shown. This is going to create the electrical connection between the two petals and stamen, closing the circuit when the switch is activated.
It's important for the stamen to stand up so that it's only in contact with the petals when you brush it. To help ensure this, and also to keep the stitch from coming out, dot a little bit of hot glue in between the two bundles of strands.

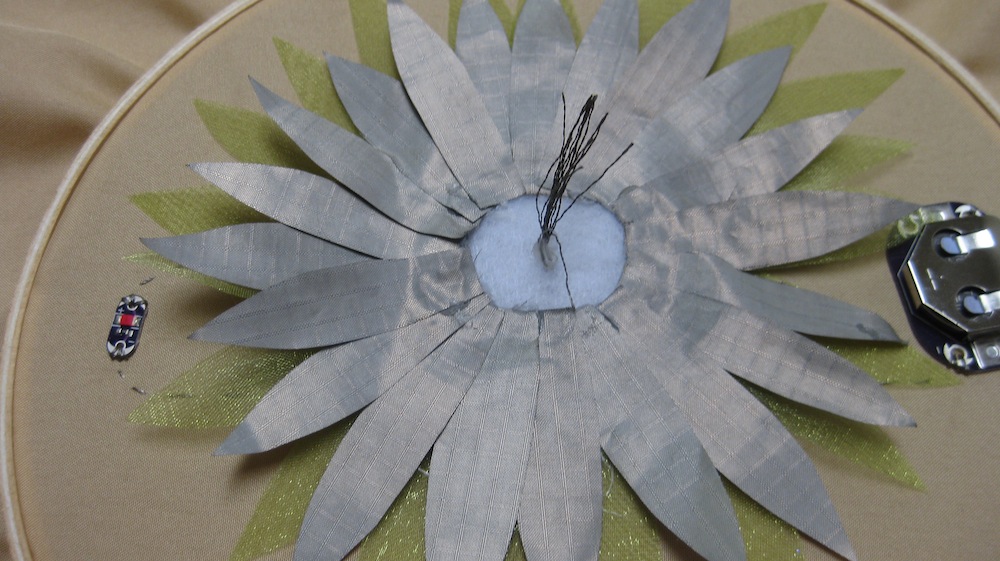
Press both bundles into the blob, being careful not to burn yourself. I'm using a low temperature glue gun, which makes this a little easier.
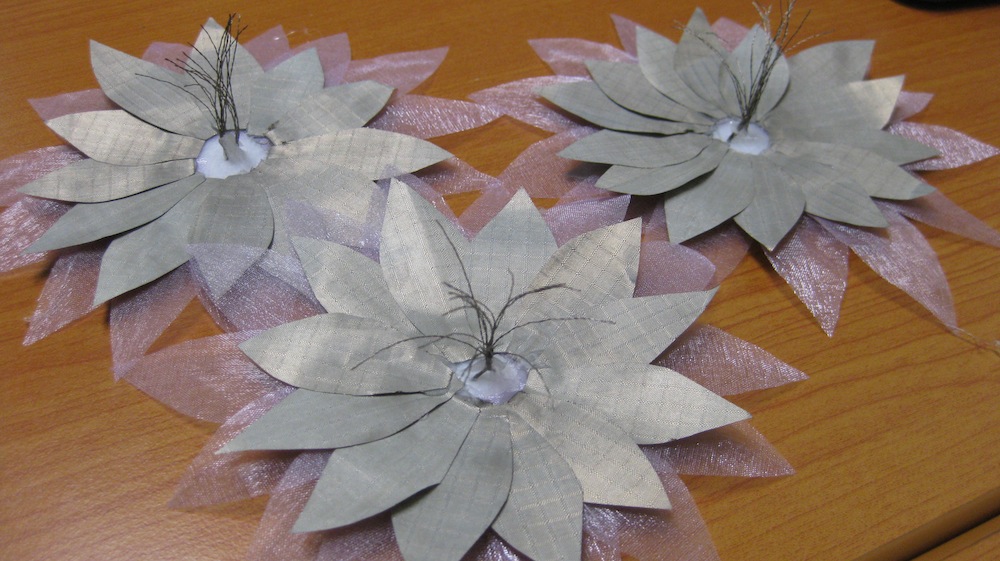
This results in one nice tall bundle of thread poking out of the top of a (slightly unsightly!) blob of glue. Feel free to try another technique here, or cover this junction with glitter, beads, whatever works for you. I left mine alone, because it was pretty small in relation to the whole dress, and unlikely to draw much notice.
And here are some finished flowers! These can be sewn into a circuit in the same way that you would sew a LilyPad Button Board.
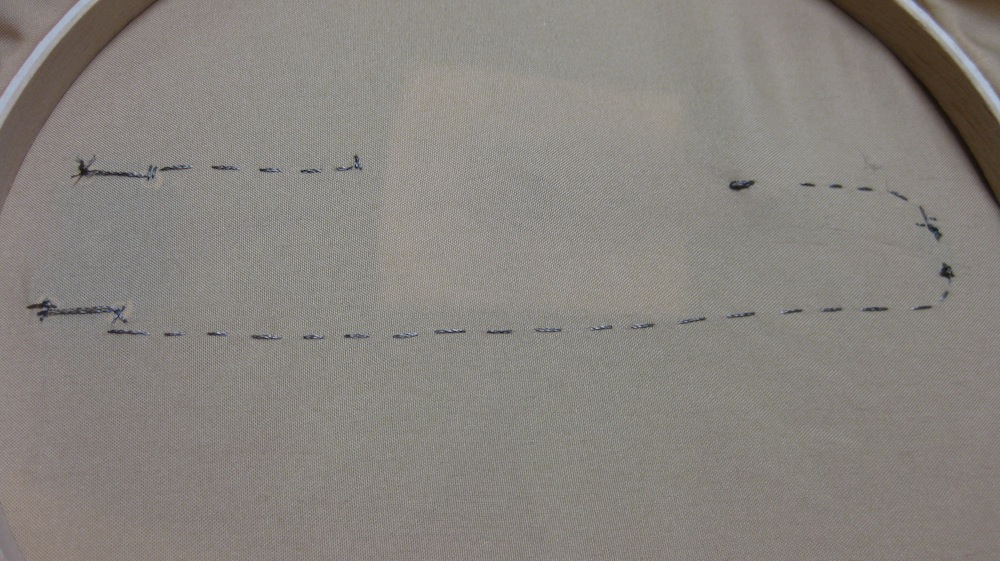
First, Go ahead and attach the negative side of your power supply to the negative side of whatever you plan to control with the switch. In my case, this is a LilyPad LED
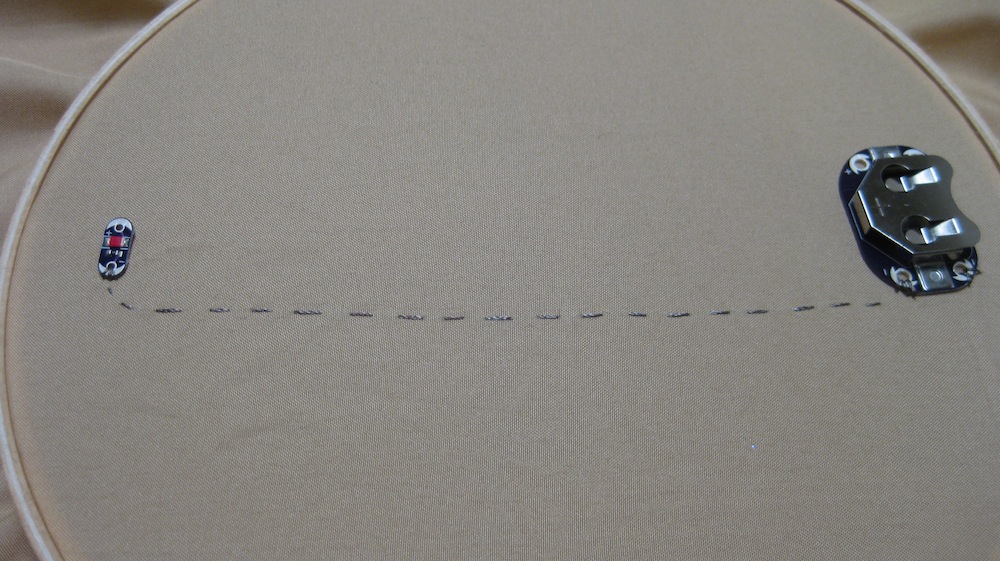
Next, sew from the positive side of your device to roughly the point where you'd like your hidden bottom petal to be.

Stitch the petal down to this point, making sure one more time that the bottom petal is entirely insulated from ALL of the top petals. If it isn't, trim it down until it is before sewing it down. Once this petal is sewn down, go ahead and knot your thread and cut it off. It's important that this section of the stitching not be electrically contiguous with the next!
Pick a top petal that points more or less directly to the positive side of your battery holder. In many cases this is going to be the one directly across from where your bottom petal was placed, but there's no reason why it has to be if you're sewing a circuit that is shaped differently from mine. As long as you've seen to it that the top petals are all in contact with their neighbors, it shouldn't matter at all which petal you use. Re-knot your thread, lift up the overlapping petal, and stitch down the one you've chosen, preferably on a section that will be entirely covered by the overlap. If you don't have enough overlap to cover a stitch you're happy with, don't worry too much about it, cosmetically, this isn't going to cause you much trouble at all
Stitch from this top petal to the positive side of your battery holder, trying not to stitch through any other petals- you want them to move freely! Carefully stitch down the battery pack, and knot your thread- the circuit should now be finished. Here it is from the top:
And here it is from the bottom- you can see the gap in the stitching where your flower is. This gap is what allows the flower to act as a switch. If you've got a contiguous line of stitching here, you'll bypass your switch, and your device will always be on.
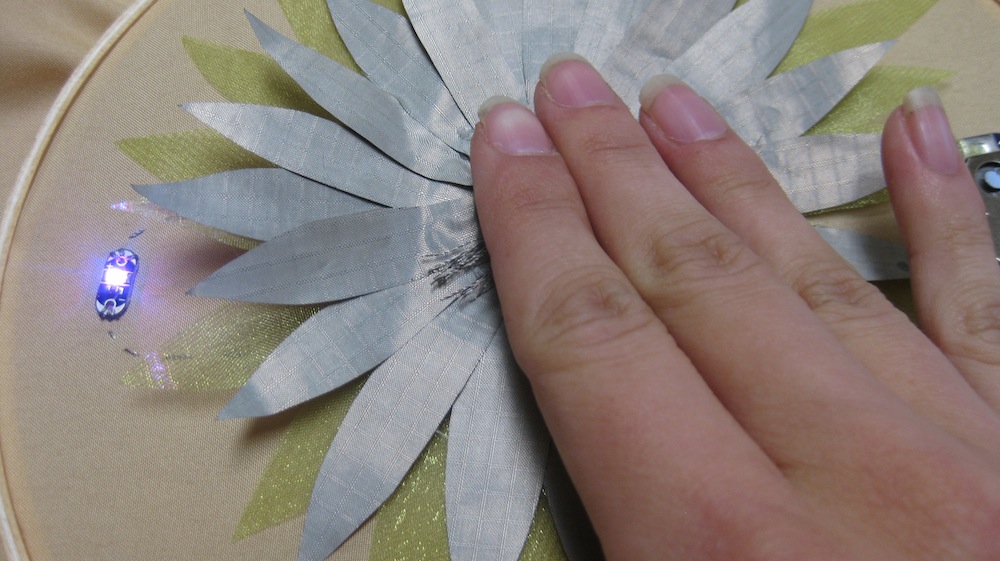
Go ahead and put a battery into your battery holder. With the battery in, your device should turn on whenever you stroke or press the conductive thread so that it is in contact with any of the top petals.
This is just one example circuit- there's no reason you can't use this switch to turn on another device, such as a motor, a servo, or an mp3 trigger- use your imagination!
Comments 0 comments