
Bright Bunny Kit
The Bright Bunny Kit is a great way to learn soldering and hand sewing. At the end of this project, you'll have a cute stuffed animal that lights up when you feed it a carrot! The original design for the Bright Bunny came from Phillip Lindsay, aka follower.
The important thing to remember before you start the kit is that there is no "right" way to make this bunny, so get creative! We've included plenty of extra felt for you to experiment with. See what you can come up with to make this bunny entirely your own.
Contents:
Your Bright Bunny kit includes:
- 20 meters of white thread
- 1 bag of stuffing
- 2 laser-cut bunny-shaped pieces of felt
- 1 black felt sheet
- 1green felt sheet
- 1orange felt sheet
- 1 white felt sheet
- 1 6" strand of ribbon
- 1 printed circuit board (PCB)
- 1 black reed switch
- 1 envelope of sewing needles
- 1 red LED
- 1 0.25" square magnet
- 1 330 Ohm resistor
- 1 12mm coin cell battery
- 1 12mm coin cell battery holder
Tools Required:
The kit requires sewing and soldering, so you'll need a few tools:
- Soldering iron
- Wire cutters
- Scissors
- Screw driver or pencil (or similarly shaped item)
- Fabric glue
Assembly
There are two main parts to building your bunny. Soldering the electronics, and sewing the stuffed animal. Since the electronics go inside the stuffed animal, we'll start by soldering the components to the board. If you've never soldered before, or just need a review, be sure to check out our Soldering 101 tutorial.
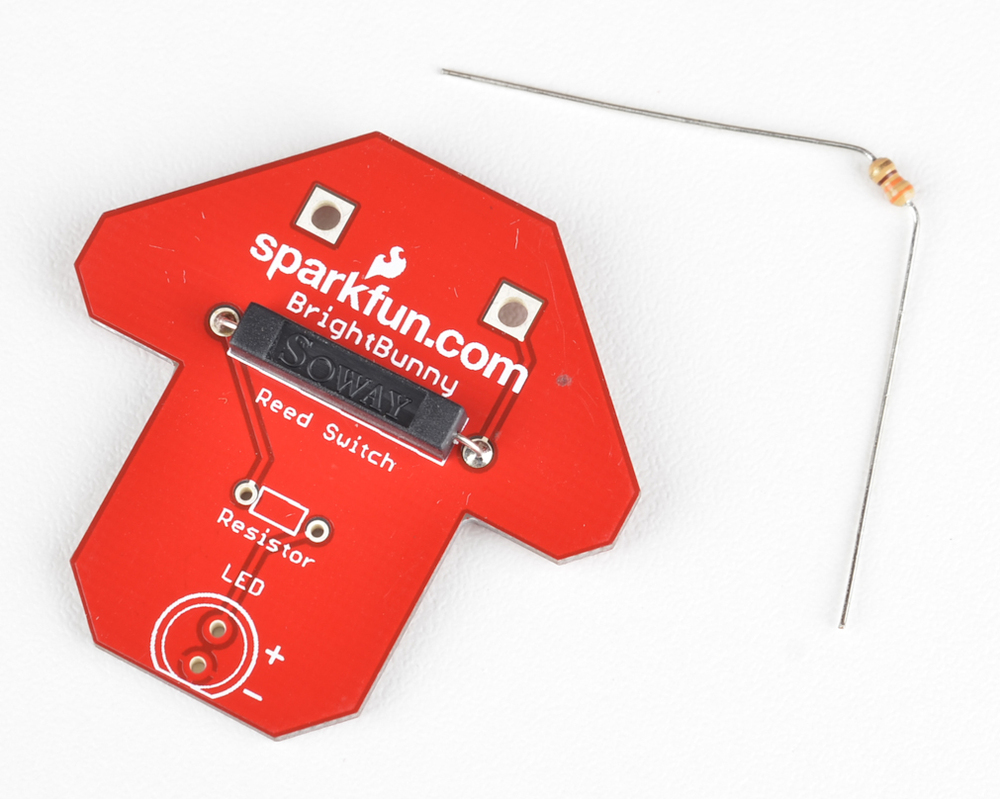
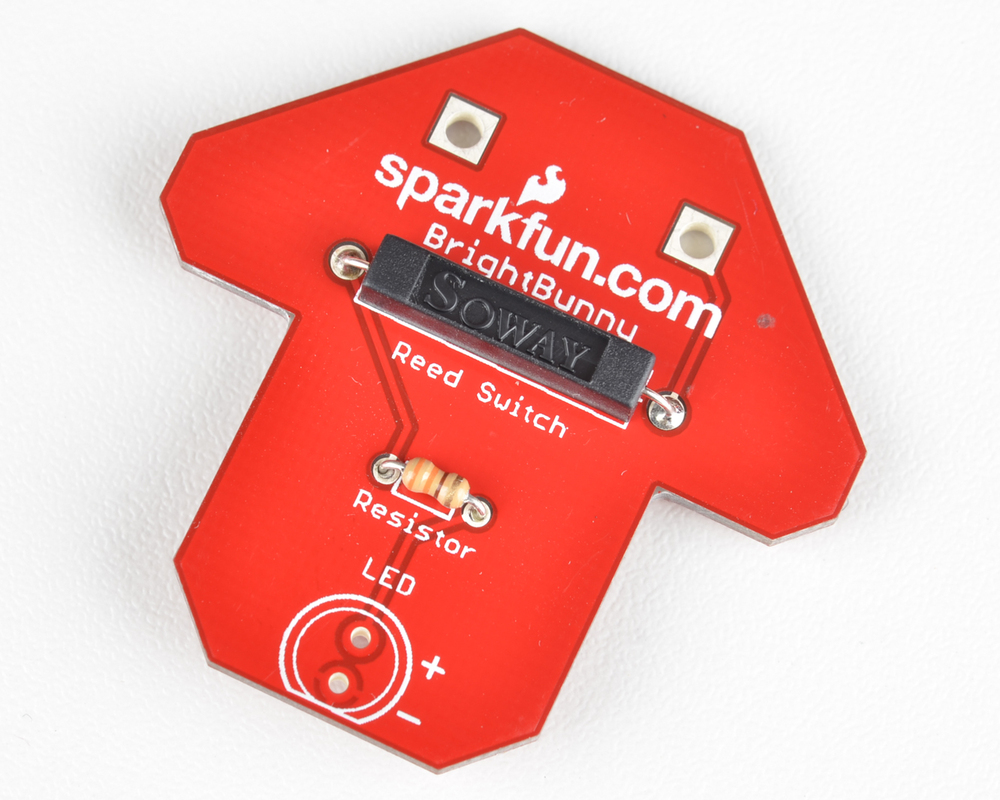
First, we'll solder the reed switch on the board where indicated. The reed switch is the rectangular black component pictured below. When a magnet is held up to the reed switch, it makes an electrical connection between its two leads. If no magnet is present, it becomes an open circuit. Feed the leads of the reed switch through the side of the board pictured below.

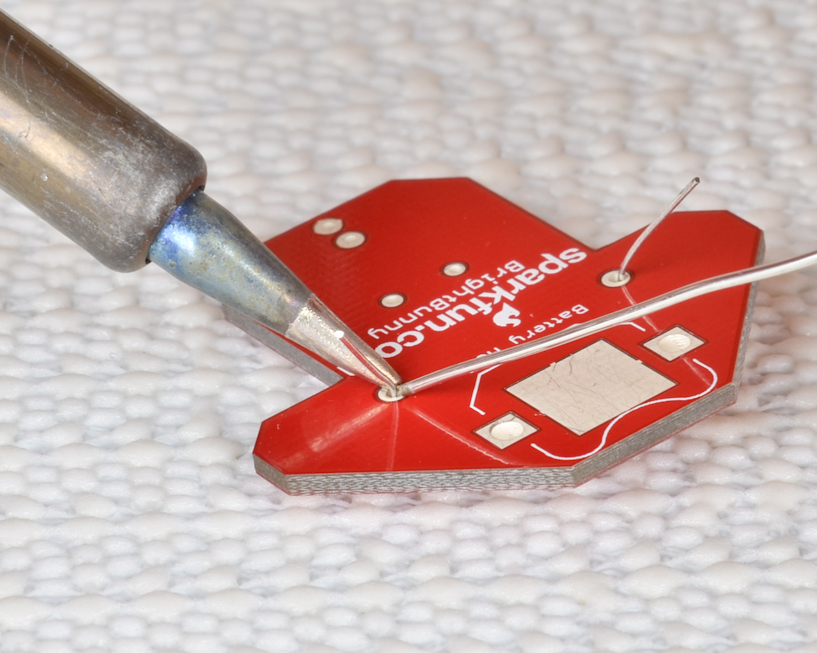
Once the leads are through the correct side of the board, spread them away from each other so the component is held in the board. Flip the board over and make a solder joint where the lead meets the vias (the copper-coated holes in the board).
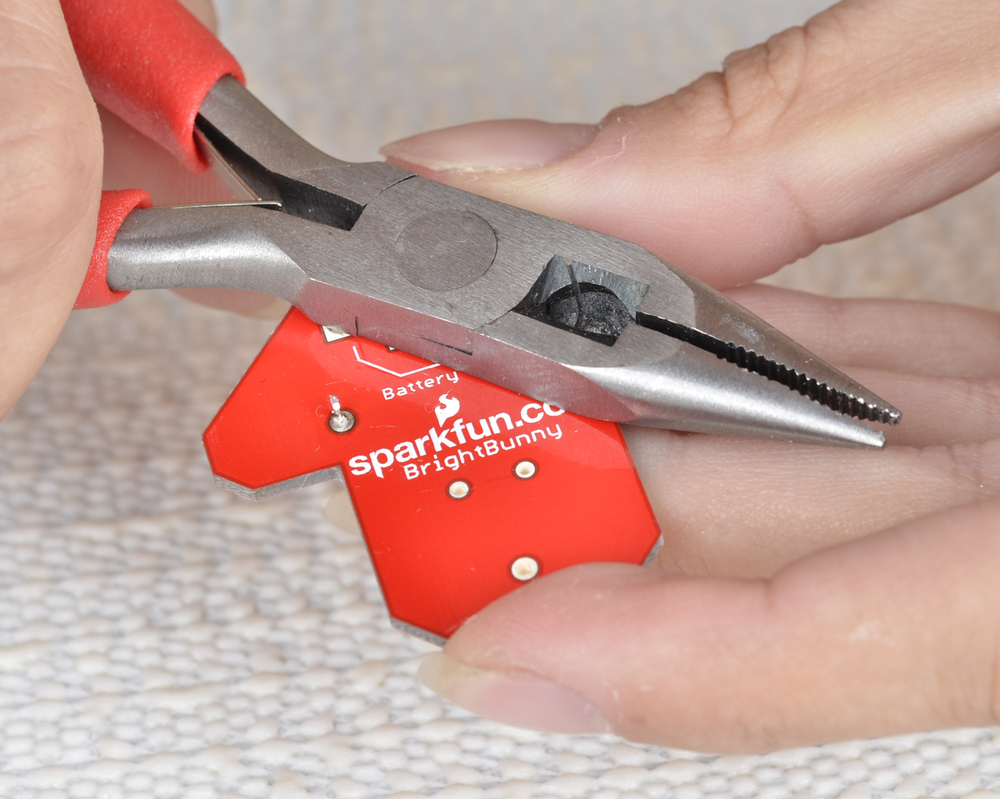
Once you've soldered both of the leads, cut off the remaining bits of the leads with some wire cutters.
Next, we'll do the same thing with the resistor. The resistor is pictured below. Feed the resistor leads through the holes in the board where it is marked, on the same side you used for the reed switch.
As you did with the resistor, spread the leads so that the component is held in place. Solder the joints where the leads meet the vias, and then cut the remaining part of the lead off with wire cutters.
Next, we'll solder the LED. Soldering the LED is different from soldering the first two components. The LED is polar, which means it has to be soldered in a certain orientation. Take a look at the LED below. Notice how one lead is a bit longer than the other. This lead needs to be inserted into the via next to the "+" symbol on the board. Feed the longer lead in near the "+" and the short lead in near the "-" in the same way you did with the other components.
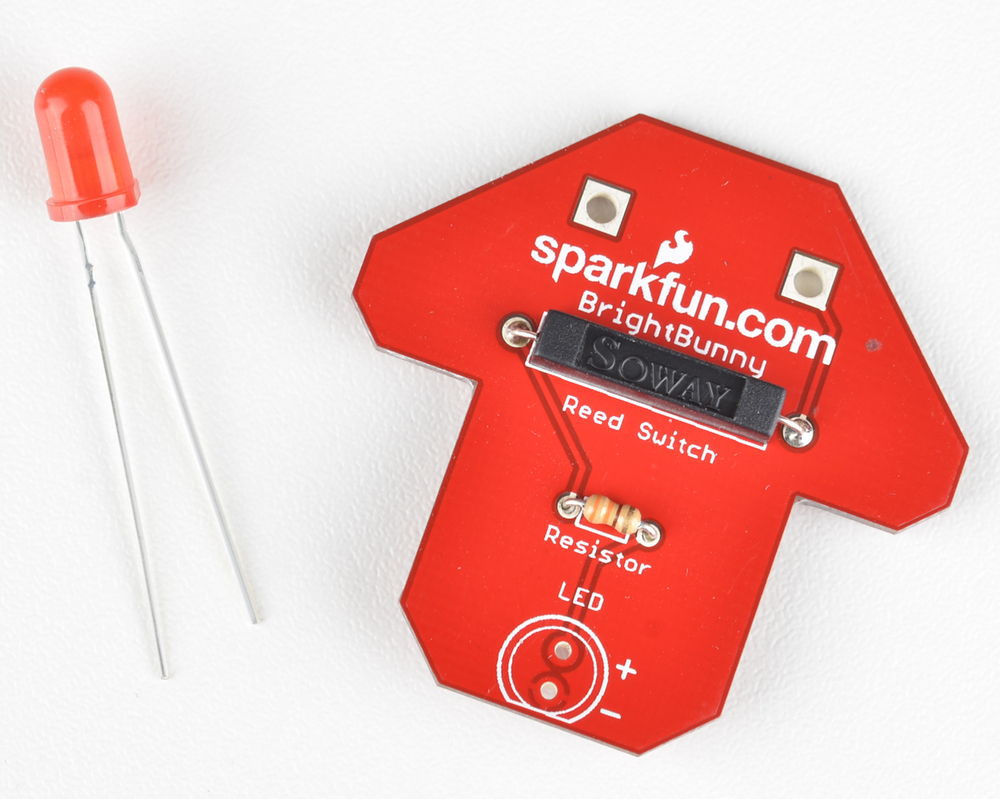
Spread the leads to hold the component in place, and then check one more time that the part is inserted correctly by looking for the flat spot on the outer diameter of the LED. Take a look at the picture below. Notice how the flat part of the LED lines up with the flat part of the silkscreen (writing on the board) at the bottom of the PCB.

As you did with the other components, solder the joints where the LED leads meet the vias on the board, and then cut off the remaining part of the leads.
The last component we have to solder is the battery holder. This component should be soldered to the opposite side of the board as the LED, resistor, and reed switch.
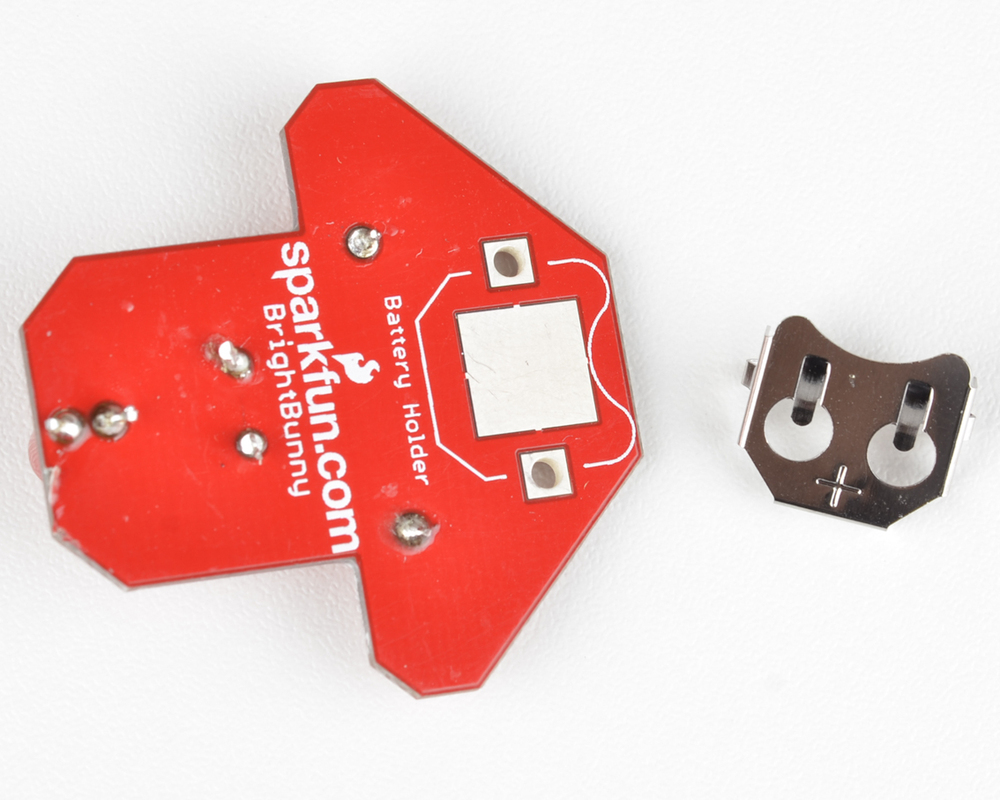
Flip the board over, and you'll see the silkscreen indicating where the battery holder should go. Insert the tabs on the battery holder into the vias on the board, making sure that the part orientation corresponds with the shape of the silkscreen on the board.
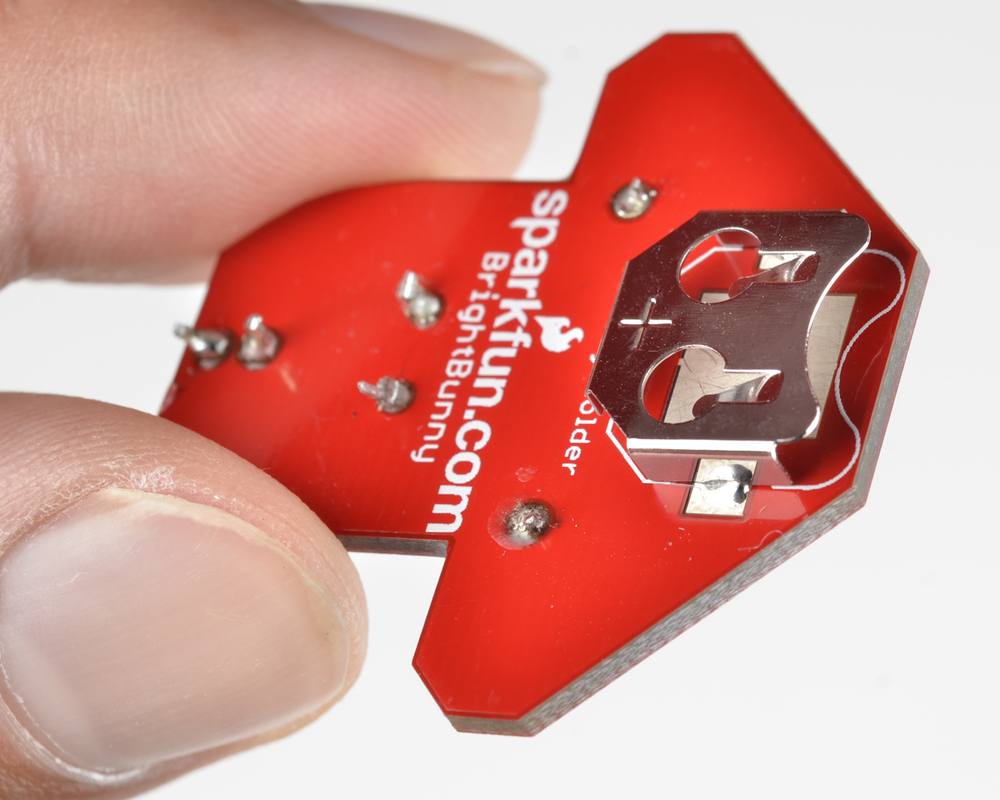
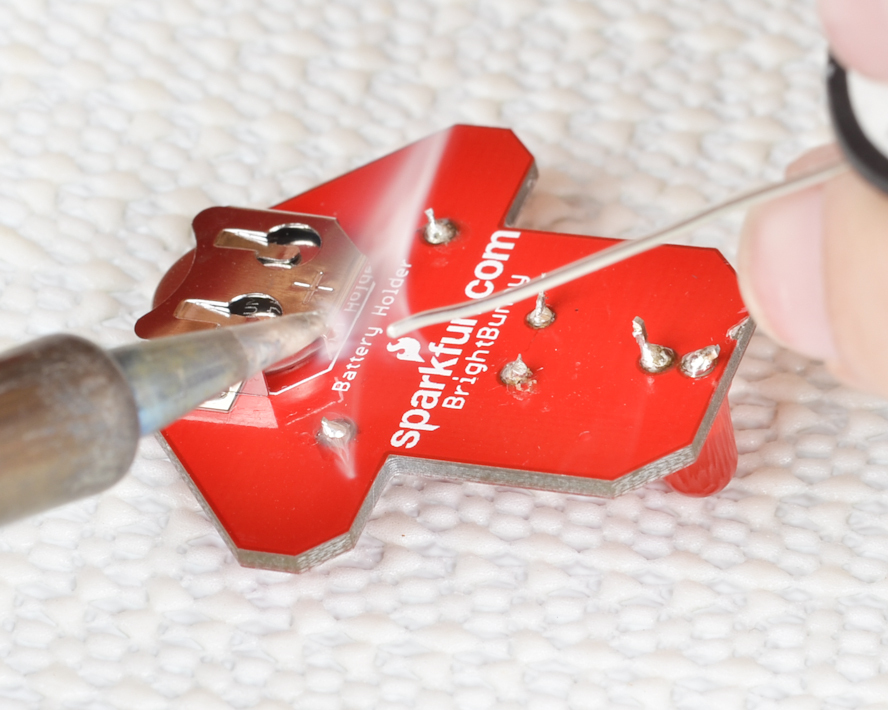
Solder the joint where the tabs on the battery holder meet the vias.
Now it's time to put the battery in the holder. See the "+" symbol on the battery holder? That corresponds to the "+" symbol on the battery. Slide the battery into the holder with the plus symbol facing up.

Now you can test your electronics. Take the magnet that was included with the kit, and hold it up to the reed switch (the rectangular black component). The LED should light up. If it does, congrats! Flawless victory. If not, try pulling the battery out just a bit to make sure that the negative side is making contact with the big pad on the board. Every now and then the battery's shape will be just concave enough to not allow it to touch this pad. Pulling it out slightly will fix the problem.
Now we move on to the second major part of the kit, sewing the bunny. Grab the two laser-cut bunny-shaped felt pieces and place one on top of the other. Thread your needle with about three feet of thread, double it over, and tie the ends in a knot. Now start sewing by feeding the needle through the two layers of bunny felt, starting just underneath one of the arms.

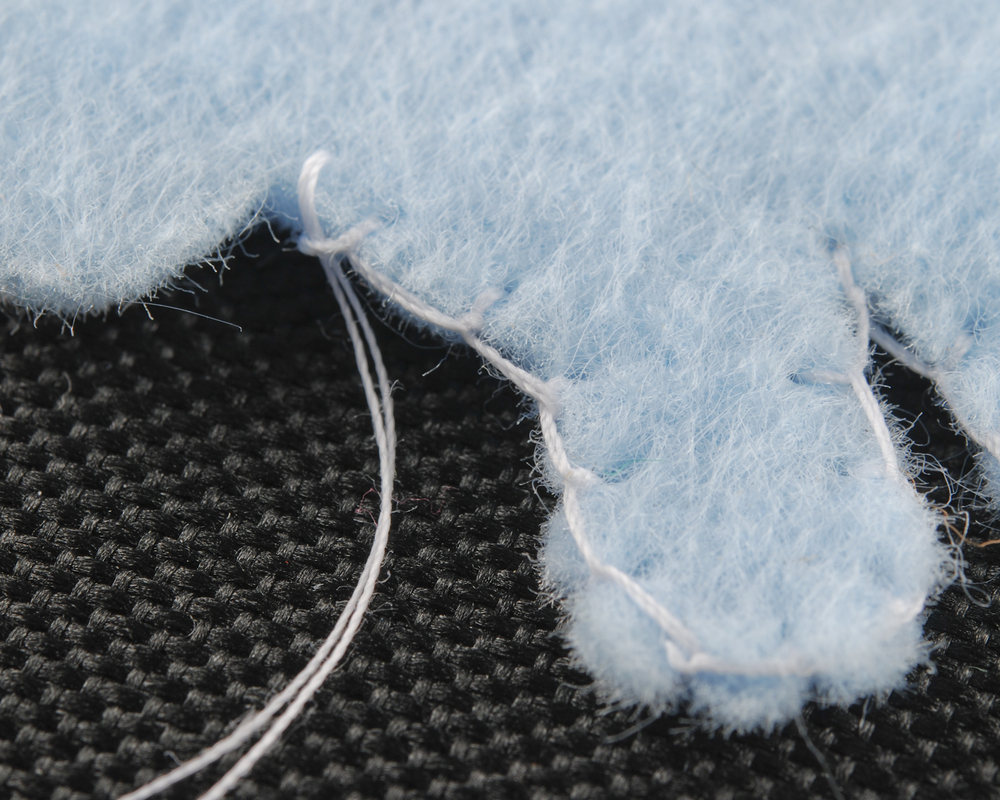
Pull the thread all the way through, and then repeat the process about 1/8" down toward the bunny's leg. When you have pulled the thread almost all the way through, run the thread through the loop you've just created, and pull until the whole thread is just somewhat taut. This is called a blanket stitch. Do not pull as hard as you can, or the felt will scrunch together and you'll get a wrinkly bunny, and nobody likes a wrinkly bunny. Repeat this process along the bunny's legs until you reach the point under the other arm. Your stitching should look like the example below.
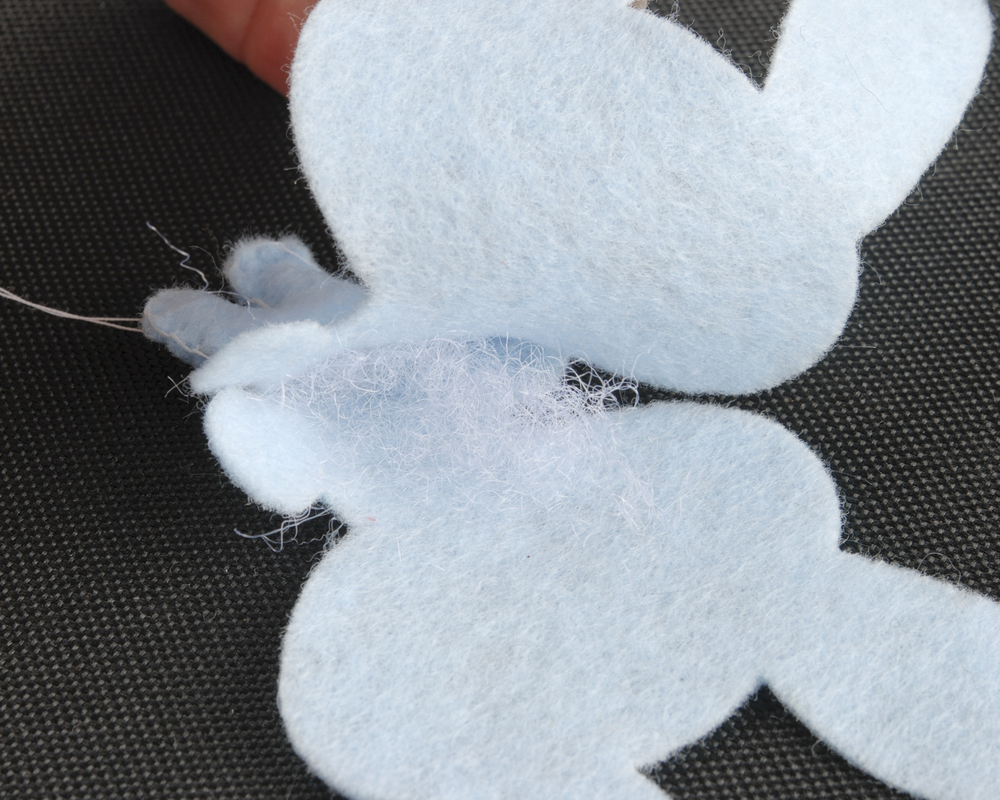
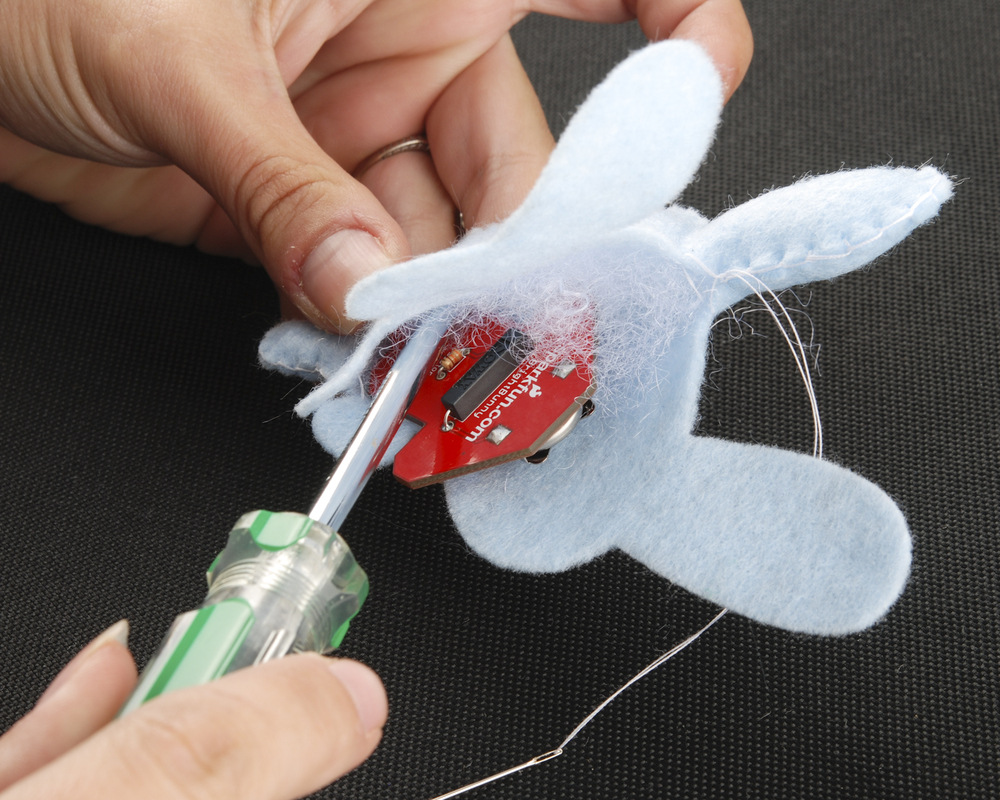
At this point, we can start adding the stuffing. Each time you sew a new section of the bunny, you can add stuffing. This is easier than waiting until the end, because you have access to all the nooks and crannies. Put a little bit of the stuffing down into the legs section of your bunny. To make it easier, you can push the stuffing into the individual legs using a screwdriver or a pencil. Don't put too much in, because we still have to put in the electronics and you don't want to burst your bunny.
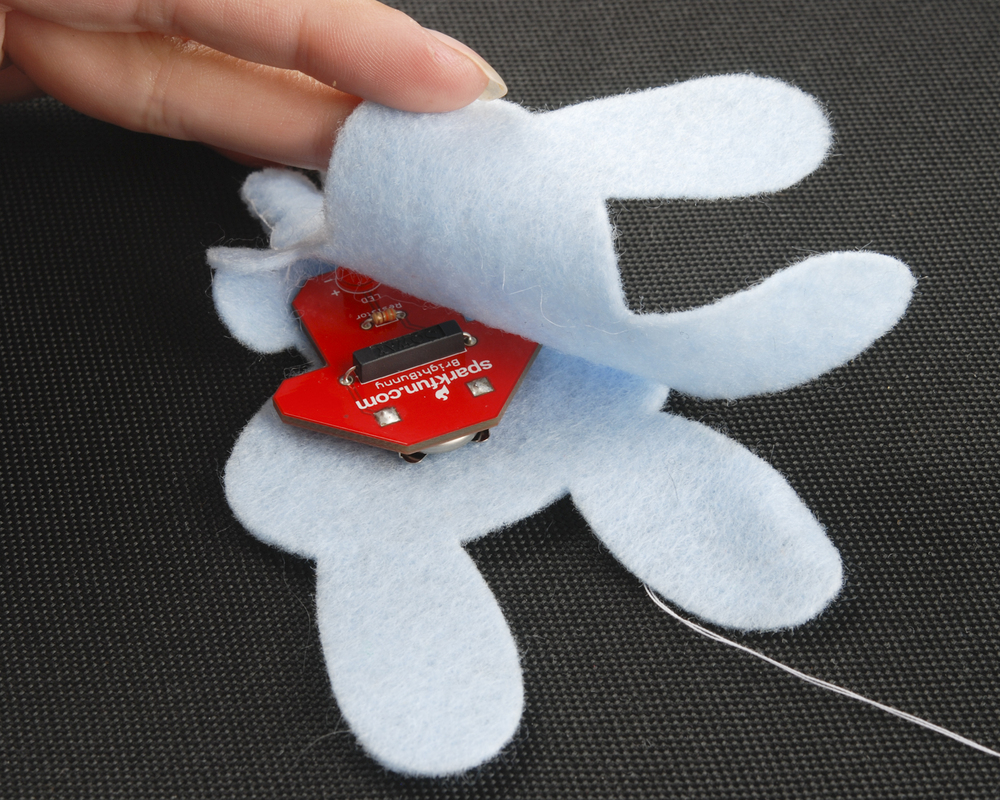
With some stuffing in the bunny's legs, now we can add the electronics. Place the electronics assembly in the bunny as shown below.
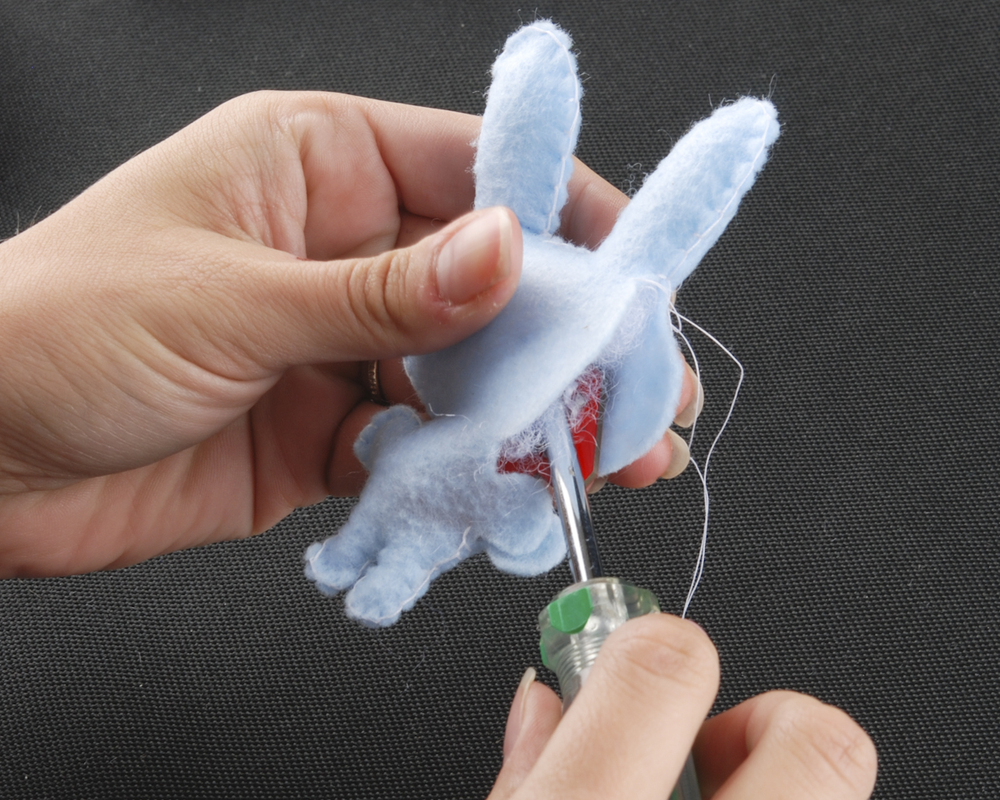
Continue sewing around the bunny from where you left off. When you finish one ear, add stuffing to the bunny's arm, its ear, and a bit in the head.
Continue sewing until you complete the second ear. Now add some stuffing to the ear and the rest of the bunny's head.
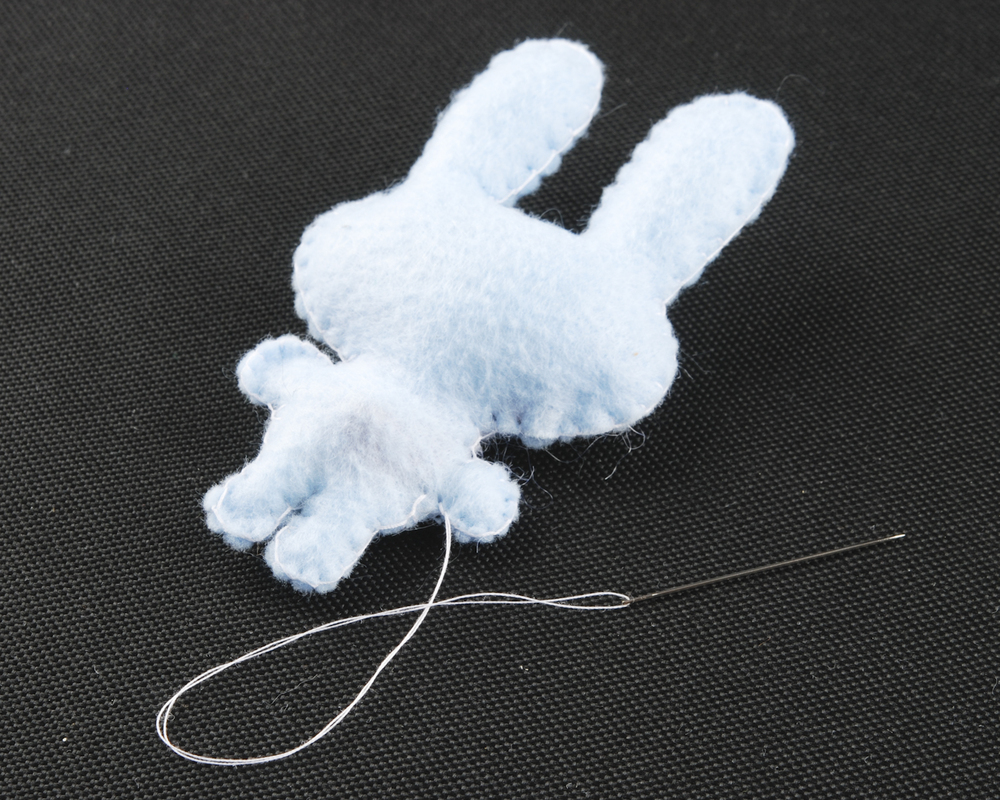
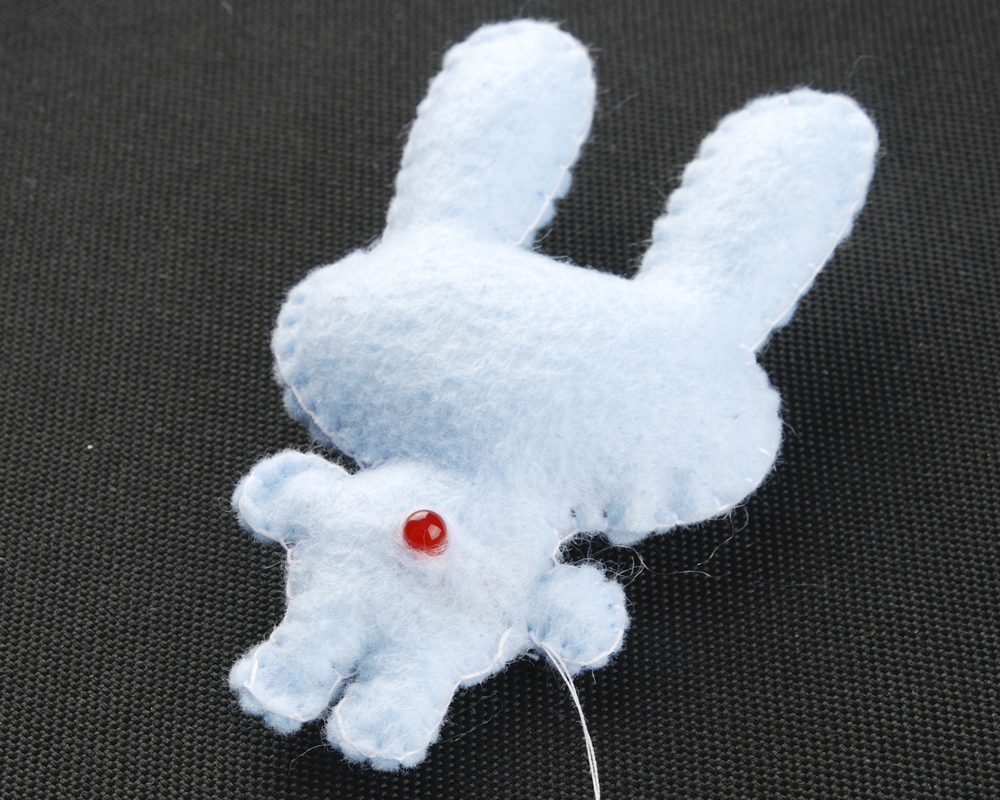
Continue sewing, adding stuffing as needed. When you're almost around the bunny, add the last bit of stuffing to the bunny's arm, and then sew the final few stitches. When you reach the starting point, knot off your thread with a couple of strong knots. Your bunny should look like the one below.
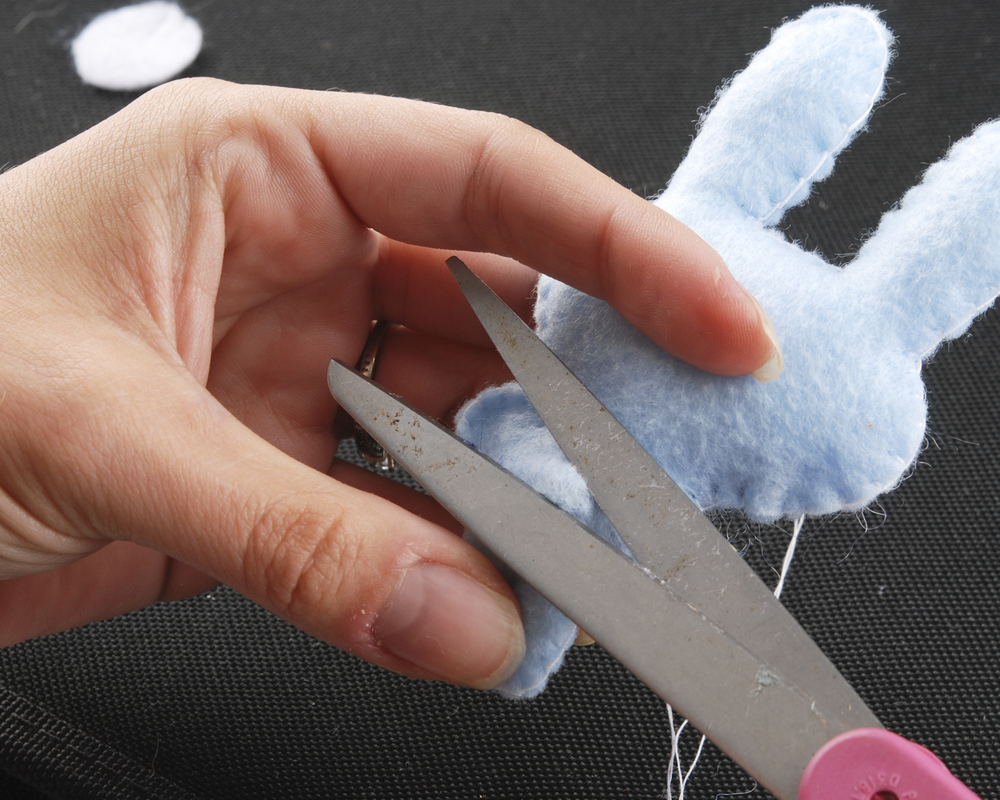
Now it's time to start thinking about what you want your bunny to look like. You can follow this design exactly, or you can make up your own. In our case, we're going to add an oval of white felt to our bunny's stomach. With two layers of felt over the LED, it looks dim when we light it up, so we cut a small hole over the part of the circuit board that holds the LED.
With the hole cut, we can poke the LED through to make it shine brighter through the layer we're going to add.
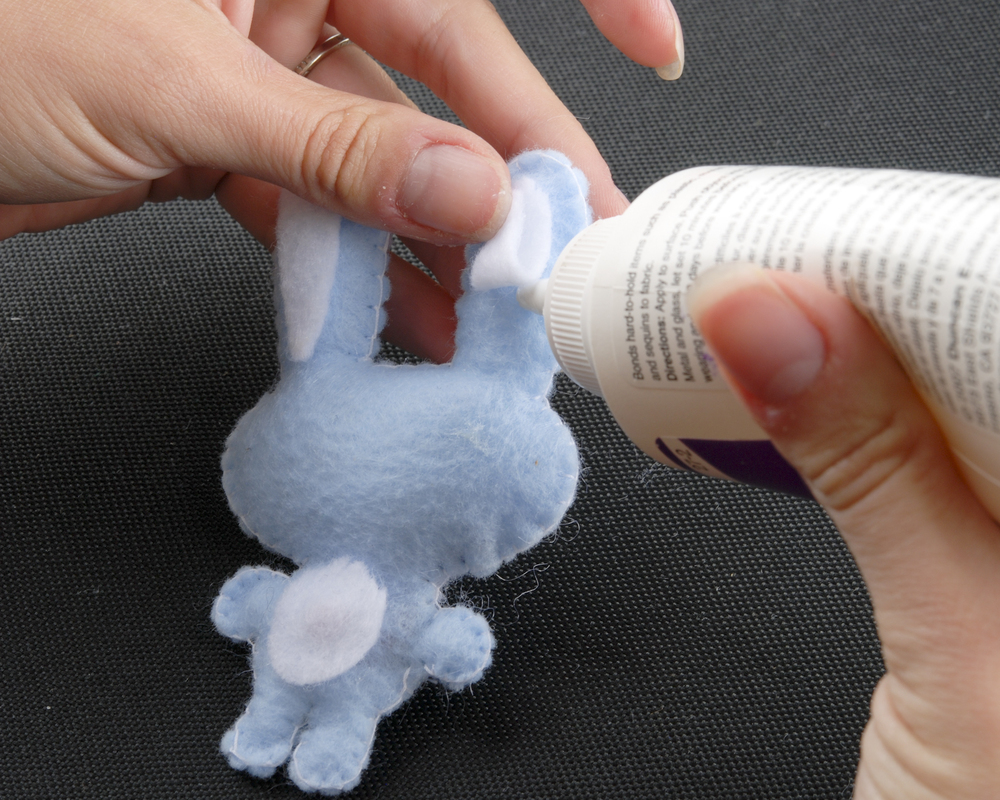
Next, we take the oval we cut from the white felt and glue it over the LED using fabric glue.

To make the bunny's ears stand out, we also cut some pieces of white felt in the shape of the ear and glued them to the ears.
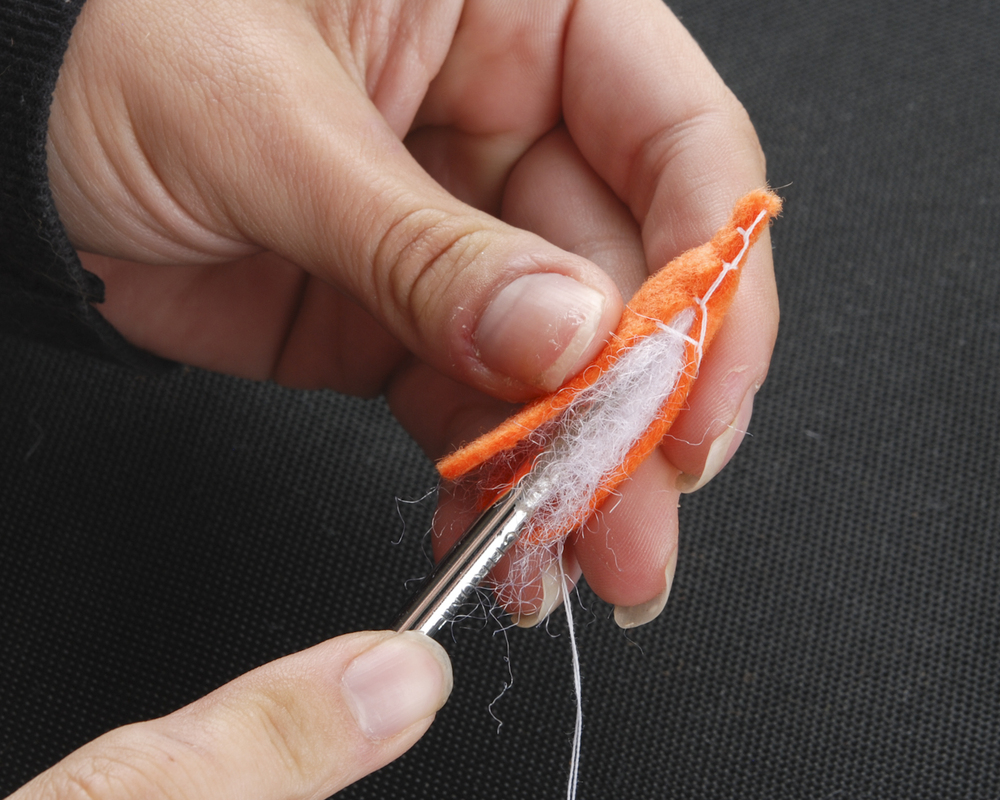
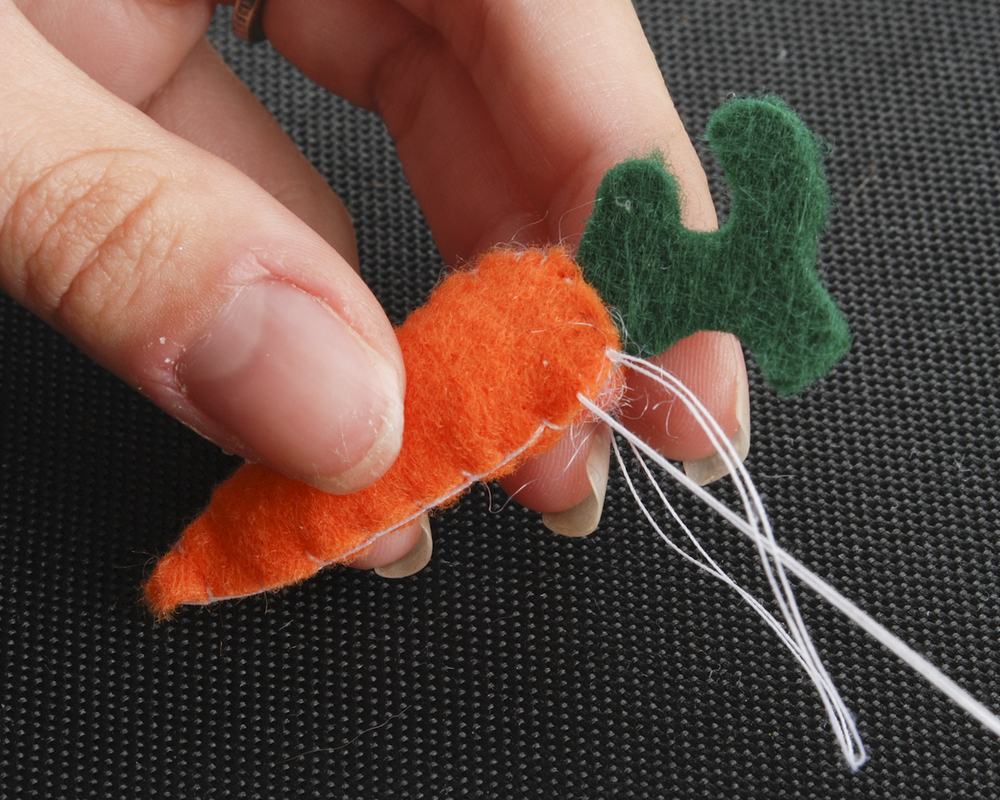
This bunny needs something to eat (i.e. something for the magnet to go in) so naturally we thought of a carrot. We cut two carrot-shaped pieces of felt from the orange swatch, and sewed them together in the same way we constructed the bunny. It's a much simpler shape, so we sewed most of it, and then added some stuffing.
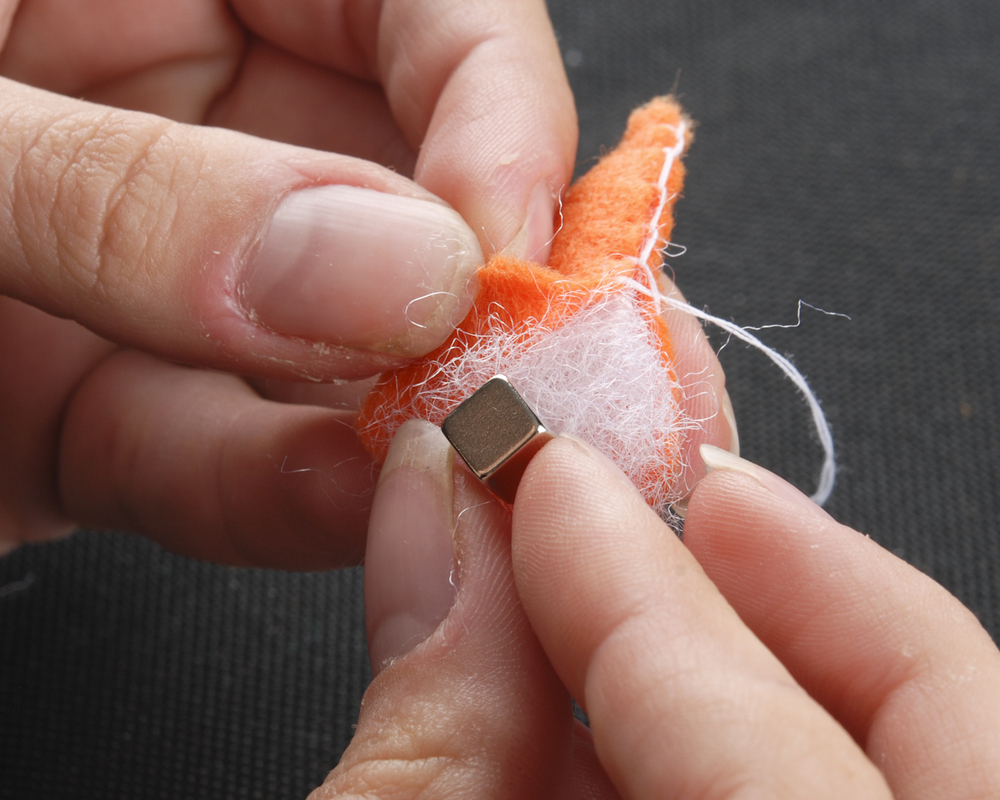
With the stuffing added, we placed the magnet inside the carrot. This way, when we hold the carrot up to the bunny's mouth, its tummy lights up.
With the magnet and stuffing inside the carrot, we cut a piece of green felt to look like leaves. We stuck a piece of the leaf-shaped felt into the top of the carrot, and then sewed through it, completing the carrot.
With fabric glue, and some black and white felt, let's add some eyes to our bunny. Now that we have all the basic components of our animal, we sewed one end of the length of ribbon to the bunny, and one end to the carrot so it wouldn't lose its snack.

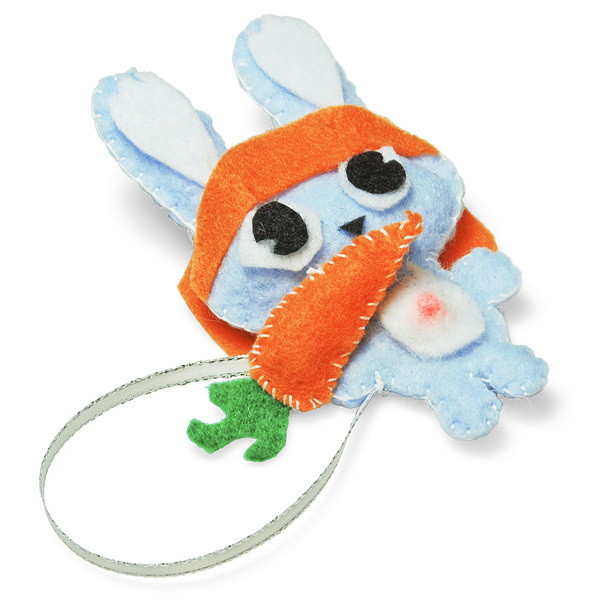
Now it's time to get creative. The bunny's features can be anything you like. We gave him a sweet headband and triangle nose. Make your bunny uniquely yours by giving it accessories or expressions. Our bunny is below, eyeballing his carrot.
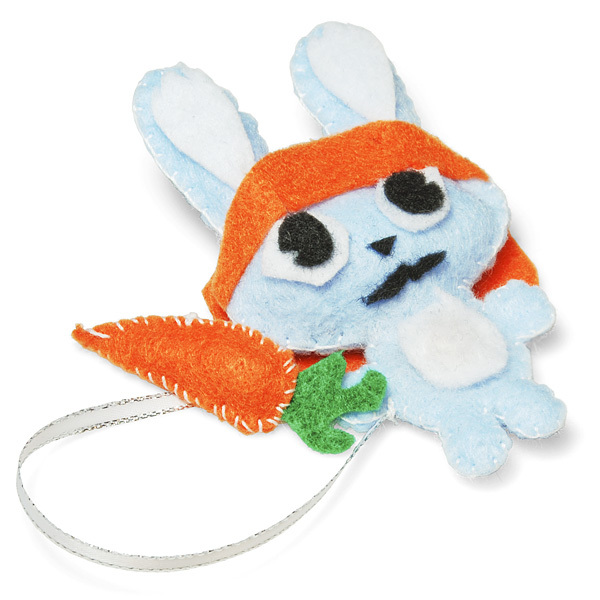
When the bunny is starved from a hard day's bunny-ing, place the carrot up to his mouth, and his tummy lights up.
The sweet taste of accomplishment.
As I've stated before, get creative! We've included lots of extra felt so you can try different things with your bunny. Below are just a few examples of what we did with our bunnies. When you've finished your bunny, take a photo and send it to us!

What happens when the battery dies?
So cute!
Are there Eagle files openly available for this project?
Check the product page, they should be up now.
Awesome. Thanks.