
Mini-ICSP Updates
This tutorial will show you how to upgrade the various SFE products that have the small ICSP header on them.
We will walk you through how to update the firmware on the SerAccel v3 but the same principals apply for the KidBot Wireless Board, the WiTilt board, and others.
The SerAccel v3.2 firmware can be downloaded here.
Get the Programming Adapter -
We designed a small ICSP connection to save on PCB space and costs. You will need a programming adapter for Olimex programmers. The Olimex connector is a polarized 6 pin Molex connector. The Mini-ICSP header is a 5 pin, 1.5mm pitch header - Digikey part # 455-1239-ND. By connecting only the programming pins (Vpp, Vdd, Vss, PGD, and PGC), we saved a little space - the 6th pin or PGM is not needed.
Open WinPic or MPLAB -
If you are using the PIC-MCP or PIC-MCP-USB, you will need to use MPLAB to correctly load the HEX file. See the MPLAB tutorial for more information.
For programming the SerAccel using the PG1 or PG2, download and open WinPic:
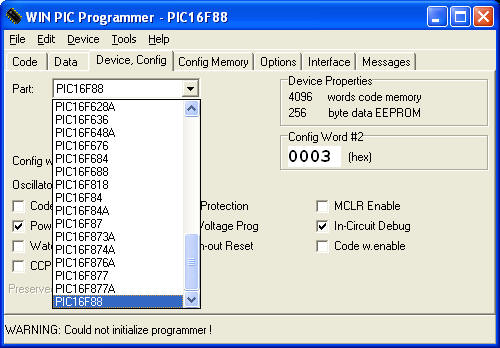
Be sure to select the correct device.
The SerAccel v3 uses a 16F88 as the processor. Select it from the list.
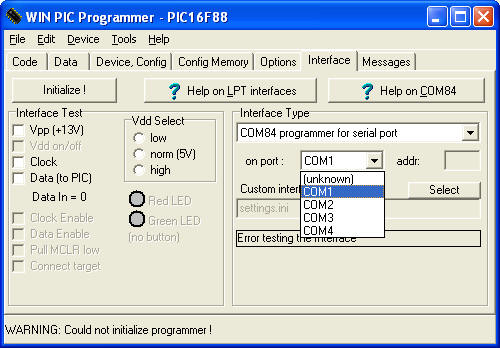
Be sure to select the correct Com port.
Most computers have COM1 as their serial port. All other default settings are correct - you will most likely not need to change anything else.
Align the Programming header to the Footprint -
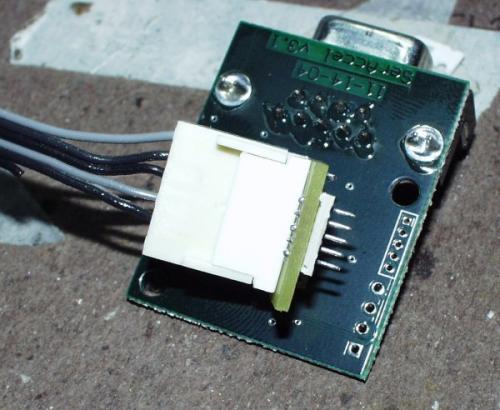
Notice the small white line over the square hole. These two features help identify pin one which is Vpp. Insert the Molex end of the programming header into your Olimex programmer and the other smaller end into the ICSP header.
The light grey wire on the end must line up with the square hole with the line over it.
If necessary, use a continuity meter to correctly identify the Vpp connection.
Hold the header in Place -
The 1.5mm header should be a snug fit. If the connection is loose, you will need to apply light pressure in a sideways manner to adequately make the connection.
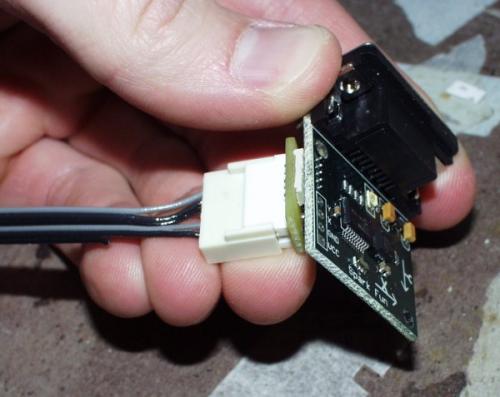
Do not force the header sideways. Hold the header in place with a slight sideways pressure while programming.
Program the Part -
Once you have the header in held place, with your other hand, navigate WinPic and select 'Load and Program Device (all)'.
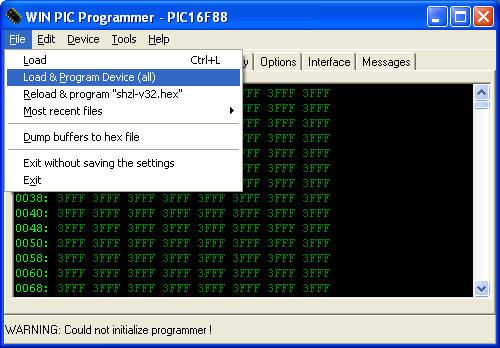
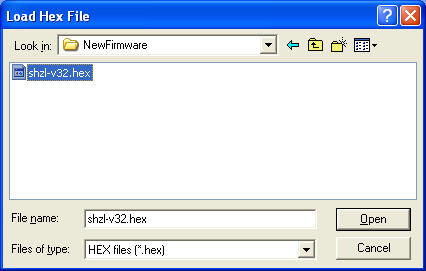
Navigate to the new hex file and double click on the file.
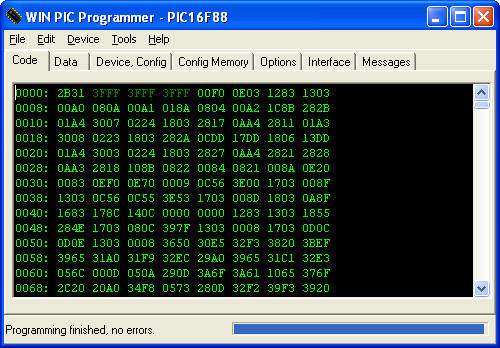
WinPic will program and then verify the contents of the PIC. WinPic should report a successful load as shown: 'Programming finished, no errors.'
If this is not the case and WinPic reports errors, double check that you have the Vpp pin (grey wire) inserted into the square hole with the white line above. Make sure the header is making contact with the ICSP footprint - a small sideways pressure may be required.
Where have the pictures gone!?
Everything should be back to normal! :) Later response, but if anyone ever sees missing images please email us at techsupport@sparkfun.com and we will get it fixed. Thanks!