Enginursday: Open Source Cross-Platform Mobile App Development
Developing a demo app using an open source cross-platform framework (Xamarin) to display data from SparkFun's Phant server.

Mobile app development can be a complex and time-consuming task. First you have to decide which of the many mobile Operating Systems (OSs) you would like to support. In many cases developers can only choose one. They can write great native look-and-feel apps, using the OS-specific Application Programming Interfaces (APIs). Each OS has a preferred language or set of languages that can make use of their APIs.
The market share of the mobile OSs is roughly split in half between Android and iOS. Many developers chose to target these two OSs to reach the greatest user base and only miss a small percentage of the market. This generally means writing two copies in two languages, calling two very different APIs. Although most of the algorithms can be reused, it's still about twice the work as targeting one.
There are a handful of projects working to solve this issue. Many are wrappers around HTML5 apps, and others are more "normal" cross-compiled binaries.
Some of the more popular cross-platform options:
- Alpha Anywhere (.NET)
- Qt (C++)
- PhoneGap (HTML5 uses Apache Cordova)
- Sencha (HTML5)
- Appcelerator Titanium (HTML5)
- Xamarin (.NET)
I've played around with a few of these and decided to work with Xamarin.
About Xamarin
The first thing to address when talking about a tool here at SparkFun is whether or not it's open source. Xamarin was founded by the founders of the GNOME foundation. That's a super popular desktop environment for Linux and BSD OSs. Miguel has also directed the Mono project since it was created.
Early this year, Microsoft acquired Xamarin, and in March they decided to make Xamarin both free and open source, under the liberal MIT license. Here is Xamarin's blog post about it. The free part was great news for a hobbyist like myself since Xamarin was previously $25/month, and $1K/year if I wanted to use it for a project at work.
Xamarin is open and under the MIT license. It's the same license we at SparkFun use for our code. The Integrated Development Environment (IDE) and the Visual Studio integration are closed source, but odds are, so is the OS you are running them on.
The key behind Xamarin is that everything is written in C# and XAML and runs on the open .NET runtime called Mono. This means no writing in a Java like Android API and in Objective-C/Swift for iOS. Much of the common code can be written once and shared across Android, iOS and Windows apps. Xamarin has complete API coverage on all three platforms, so you can do anything you could do using the standard platform-specific tools. The native bindings allow your source to be compiled to native binaries, so you don't experience the slowdown of an interpreter.
Xamarin.Forms allows you to write basic User Interfaces (UIs) and your business logic once. You can then go in and write more platform-specific code for more advanced features on each OS. Xamarin claims projects average 75 percent shared code. Using Xamarin.Forms you can get nearly 100 percent shared code. That's great news for development "teams" of one like myself.
Xamarin Studio is the way to go for developing apps with Xamarin on OS X, and there is a plugin for Visual Studio on Windows. This blog isn't going to cover boring details such as running an installer, so you will have to figure that out to play along.
About XAML
XAML stands for Extensible Application Markup Language and is pronounced "zammel." In Xamarin you define the UI in markup, just as you would when writing a Windows app using Windows Presentation Foundation (WPF). Xamarin doesn't yet support a GUI for developing your app's XAML, but it's about as easy as coding HTML by hand.
Xamarin and Visual Studio generate XAML templates. Here is what Xamarin Studio generated by default:
<?xml version="1.0" encoding="UTF-8"?>
<ContentPage xmlns="http://xamarin.com/schemas/2014/forms" xmlns:x="http://schemas.microsoft.com/winfx/2009/xaml" x:Class="Demo.MyPage">
  <ContentPage.Content>
  </ContentPage.Content>
</ContentPage>
One of the more interesting bits of code is the x:Class directive. This directive informs the compiler of the partial class defined in the code-behind written in C#. For this example the IDE generated MyPage.xaml.cs. Inside this C# file is a partial class defined in the Demo namespace named MyPage.
using System;
using System.Collections.Generic;

using Xamarin.Forms;

namespace Demo
{
    public partial class MyPage : ContentPage
    {
        public MyPage ()
        {
            InitializeComponent ();
        }
    }
}
As the C# code shows, the class `MyPage` is derived from the `ContentPage` class (`MyPage : ContentPage`). The `ContentPage` class defines a page that shows a single view. The [demo app](https://github.com/BrentWilkins/PhantMobile) that accompanies this blog post is a simple single view. ### Model View ViewModel Pattern
[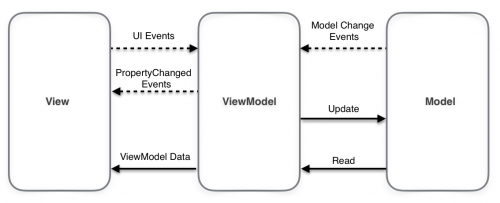](https://cdn.sparkfun.com/assets/home_page_posts/2/0/8/3/MVVM.png)
_The MVVM pattern_
Software is often trying to solve the same sort of problem as other software. Over the years, as common problems are identified, software engineers develop architectures based on best practices to solve these problems.
One of the classes of patterns is called Separated Presentation. These patterns separate the UI code from the data and associated logic. One advantage of this separation is that the interface between the parts makes automated testing of the core logic easier. This is partially what the FBI was trying to get Apple to do in their [latest court case](https://en.wikipedia.org/wiki/FBI%E2%80%93Apple_encryption_dispute). The FBI wanted a way to give the password guesses to the phone without having to use the normal UI (the touch screen). Keeping the application code separate from the UI also allows the code to be reused with other interfaces that require the same behavior. One common example of this might be the file explorer in an operating system. The same data and behavior is there if you are using a thumbnail view or a list view.
The first and likely most popular pattern for Separated Presentation is the Model View Controller (MVC) pattern. This pattern puts the data and some related logic in the Model. The UI is called the View. The Controller handles the communication between the View and the Model. The Model View ViewModel (MVVM) pattern is one of the variants of the MVC pattern. MVVM differs from MVC in that the ViewModel doesn’t communicate directly with the View. It provides bindable properties to which the View can bind. In Xamarin a handler watches the ViewModel for PropertyChanged events and updates the View. This handler is part of the .NET framework and isn't something the developer has to write.
The ViewModel helps keep even more code out of the View. This allows the View to be written by a designer in a markup language. Xamarin uses XAML for its Views. This markup can be handcoded or exported from a WYSIWYG editor. At the time of this writing, Xamarin doesn't have a WYSIWYG editor. Microsoft has one for developing the UI for Universal Windows Platform (UWP) apps in Visual Studio, so Xamarin will likely eventually get one.
#### Data Binding
The Phant demo app uses data binding between the XAML View and the ViewModel. The bindings in the View look like the following:
<Label Text="{Binding Timestamp}" />The label tag does what you would expect it to do: define a label for the View. These are more formally known as Label controls, and are a graphical control you can use to display text that a user can't change directly. The `Text` property is where the text to be displayed is defined. The `Binding` markup extension on the `Text` property of the `Label` tells the framework that this target's value is actually bound to the `Timestamp` source. `Timestamp` is defined as a C# field in the ViewModel:
private string timestamp;

public string Timestamp {
    get { return timestamp; }
    set {
        timestamp = value;
        NotifyPropertyChanged ();
    }
}
Changing the value in the View is as simple as assigning a string to it:
Timestamp = "09:45:01 AM";
On assignment the string is stored in the private string variable timestamp using the public Timestamp property's set method. After the value is updated, the set method makes the call to NotifyPropertyChanged (), and the framework updates the View.
Using Xamarin Studio
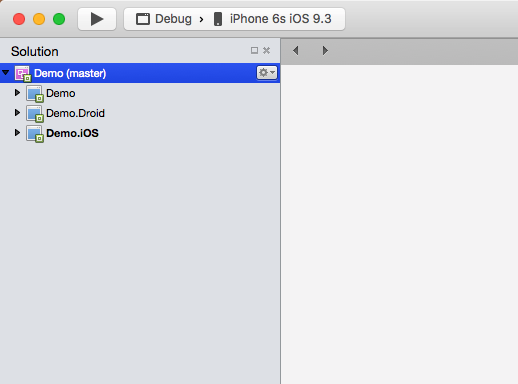
If you are on Windows you can use a free or paid version of Visual Studio with a plugin to develop apps in Xamarin. On a Mac you will want to use the free Xamarin Studio IDE. Here is what it will look like when you launch it:

Xamarin Studio at launch
The first step in creating a new app is to create a new solution. The way I do this from the launch screen is the "New Solution..." button in the upper lefthand corner. That opens the dialog box shown here:
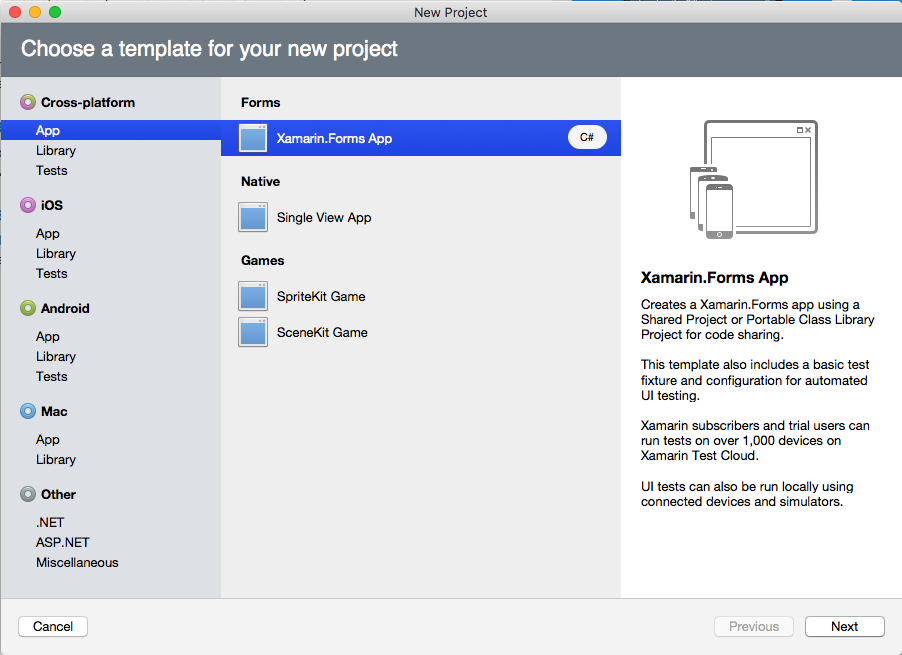
New Solution dialog
While you can develop all sorts of apps in Xamarin Studio, this is about building cross-platform apps using Xamarin.Forms. Choose this option and then "Next."
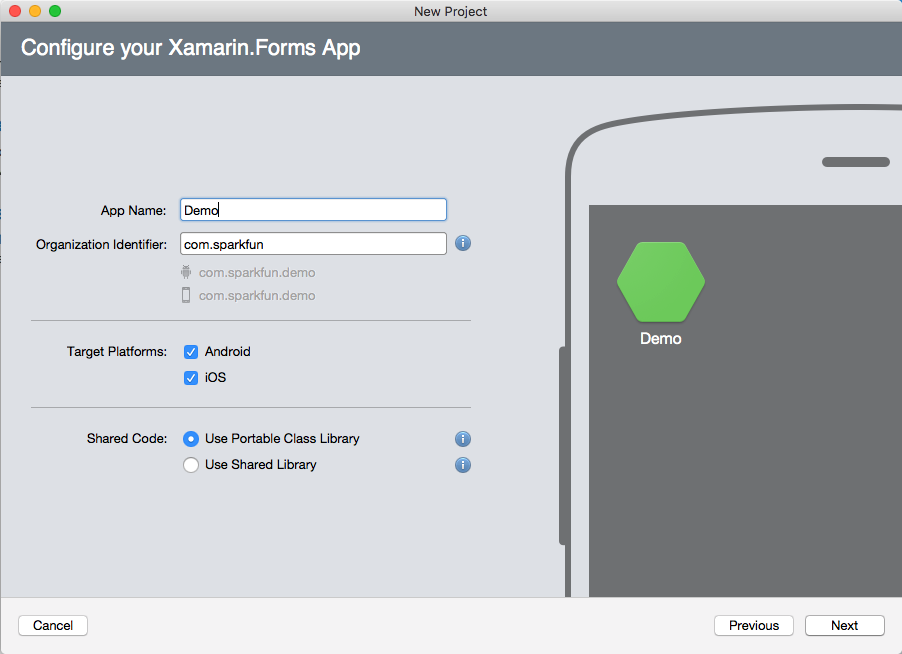
Naming your app
The next step is naming your app and configuring a few more things. The organization identifier is sort of optional, but you will want to use one if you want to get your app into the marketplaces at some point. These are traditionally your website's name in reverse order (TLD first).
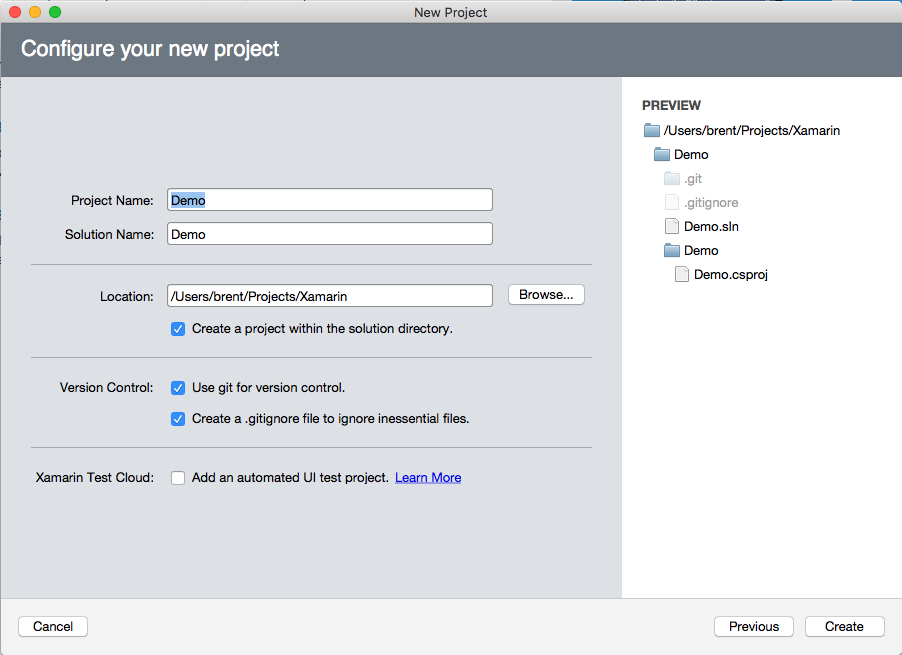
Configuring new project
A solution is a collection of related projects. In this solution you will see three projects. The first, named "Demo," is the shared code of the portable class library. "Demo.Droid" is the Android-specific code, and "Demo.iOS" is the iOS-specific code. The iOS project is in bold because it is set as the "Startup Project."
Auto-generated projects
For whatever reason, new projects come with out-of-date packages included. In the following image they are the ones with (n updates) next to them.
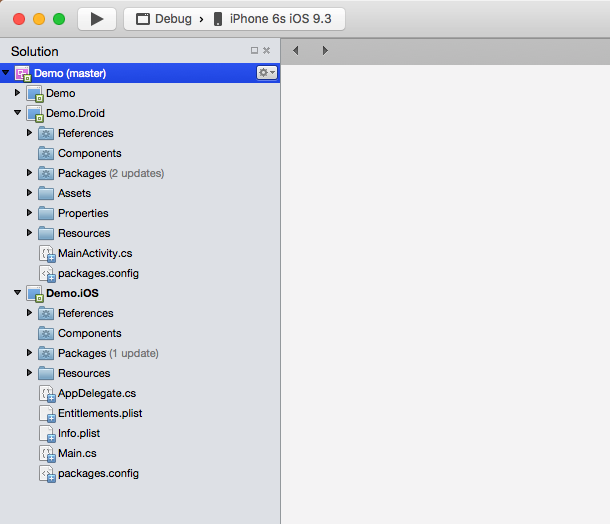
Updatable packages
The easiest way to update the packages is to right-click on the solution and choose "Update NuGet Packages." NuGet is the package manager, as many systems have.
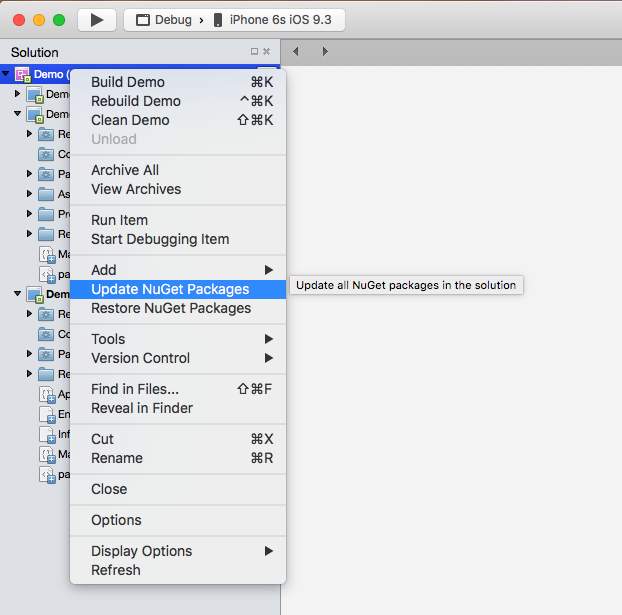
Updating all packages at once
We are going to define the View in a new file. To add a new file to a project, right-click on the project and navigate the menu and select "New File..."
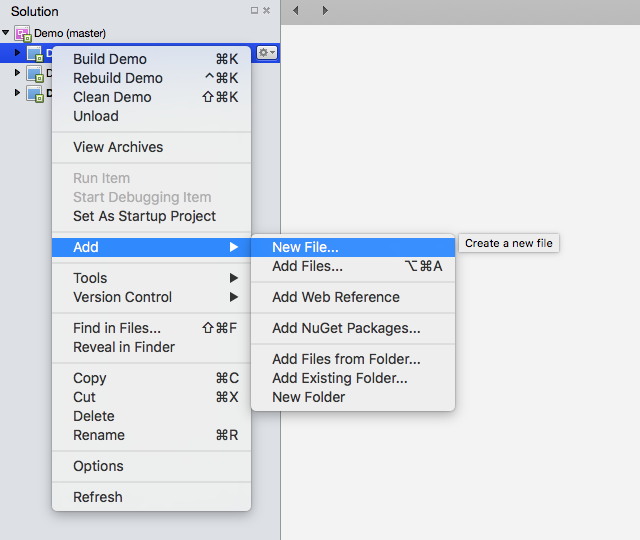
Adding a new file to a project
We want to add some XAML and its associated code-behind. The following image shows what to select for this:
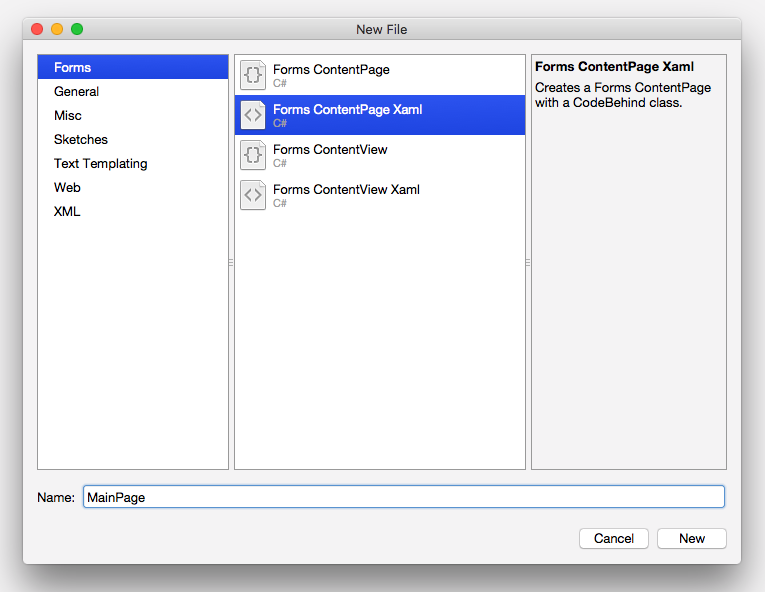
Adding a Xamarin.Forms ContentPage
When the "New" button is pressed the new files(s) will be opened in the editor:
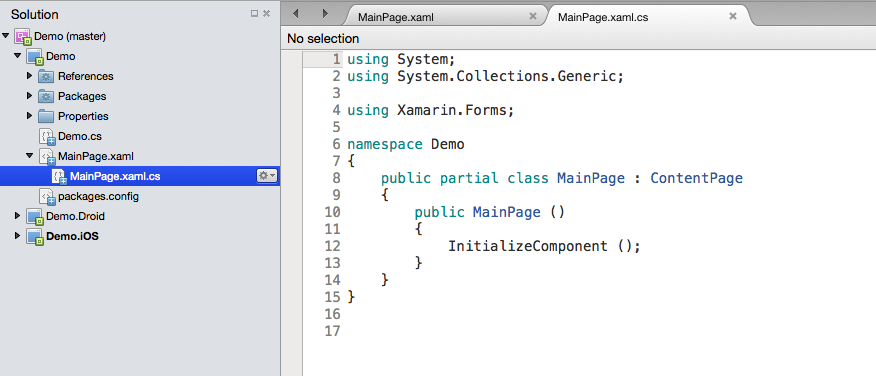
Two new files are opened in the editor.
Replace the XAML in MainPage.xaml (first tab) with the following slightly tweaked code from Xamarin's documentation. You may notice that this uses View to View binding rather than the ViewModel to View binding discussed earlier. Attributes of the two labels are specified to use the value of the slider.
<?xml version="1.0" encoding="UTF-8"?>
<ContentPage xmlns="http://xamarin.com/schemas/2014/forms"
  xmlns:x="http://schemas.microsoft.com/winfx/2009/xaml"
  x:Class="Demo.MainPage"
  Title="Slider Bindings Page">
  <ContentPage.Content>
    <StackLayout>
      <Label Text="ROTATION"
        BindingContext="{x:Reference Name=slider}"
        Rotation="{Binding Path=Value}"
        FontAttributes="Bold"
        FontSize="Large"
        HorizontalOptions="Center"
        VerticalOptions="CenterAndExpand" />
      <Slider x:Name="slider"
        Maximum="360"
        VerticalOptions="CenterAndExpand" />
      <Label BindingContext="{x:Reference slider}"
        Text="{Binding Value, StringFormat='The angle is {0:F0} degrees'}"
        FontAttributes="Bold"
        FontSize="Large"
        HorizontalOptions="Center"
        VerticalOptions="CenterAndExpand" />
    </StackLayout>
  </ContentPage.Content>
</ContentPage>
Example code from Xamarin's site MainPage.xaml
Next we need to tell the app to use this new View. This is done in Demo.cs. The constructor for the App class was auto-generated with the following code:
public App ()
{
    // The root page of your application
    MainPage = new ContentPage {
        Content = new StackLayout {
            VerticalOptions = LayoutOptions.Center,
            Children = {
                new Label {
                    XAlign = TextAlignment.Center,
                    Text = "Welcome to Xamarin Forms!"
                }
            }
        }
    };
}
Auto-generated constructor Demo.cs
This shows how the View can be done in C# code, and not just in XAML. Another reason to define the View in XAML and not in C# code is that the XAML compiler is aware of runtime efficiency optimizations that you may not be.
public App()
{
    // The root page of your application
    MainPage = new MainPage();
}
Simplified constructor that moves the View from C# to XAML Demo.cs
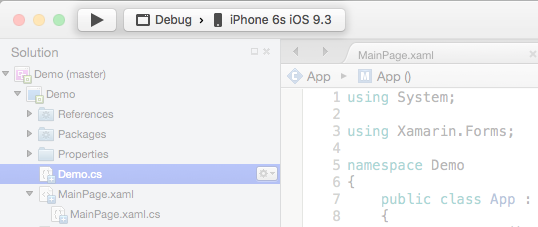
Run options in Xamarin Studio
Running an app is simple. I'd recommend keeping the build in Debug mode during development. There are many options for iOS and Android simulators. As shown above, I chose to test this app in a simulator of my phone running the latest version of iOS. If you want to test an app in Android I highly recomment installing Xamarin Android Player. It's way faster than the default one.
 App freshly launched
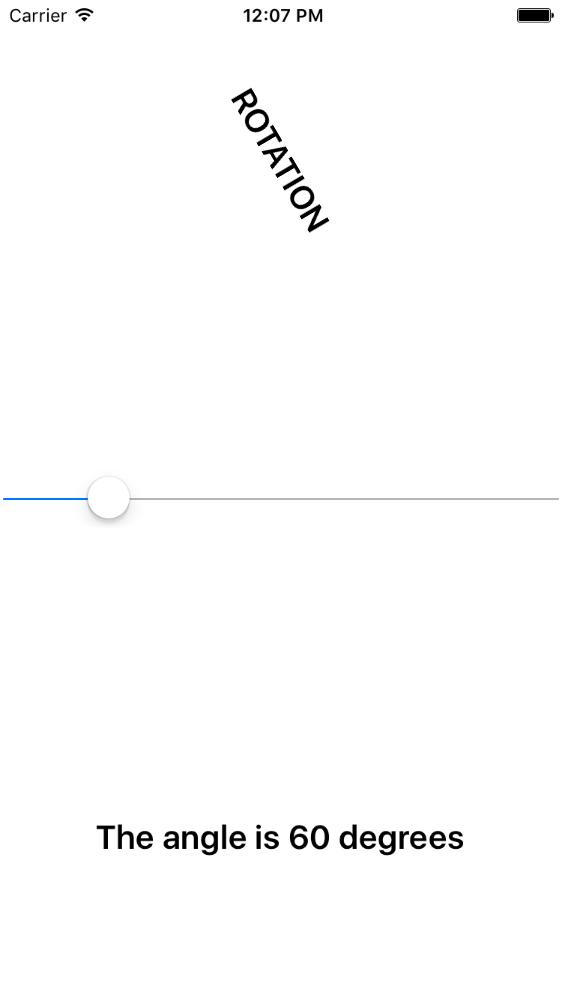 Slider moved and UI updated
 Simple XAML View demo in iOS
IoT Demo App
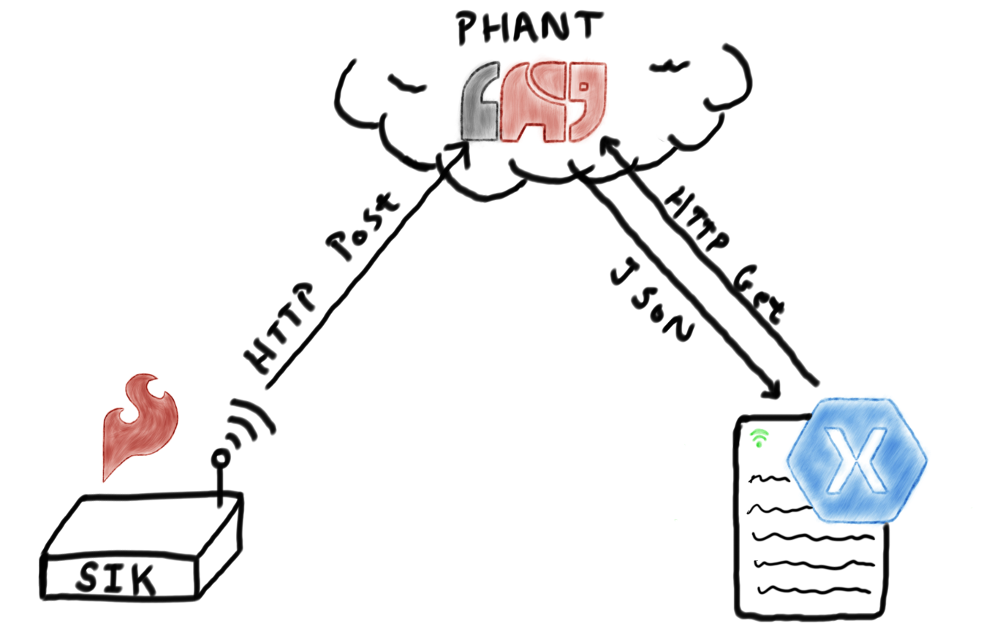
Flow of data
I've written my first demo app, which pulls data from our Phant server. The feed I'm pulling from is being posted to by my SparkFun Inventor's Kit for Photon running our Environment Monitor Experiment.
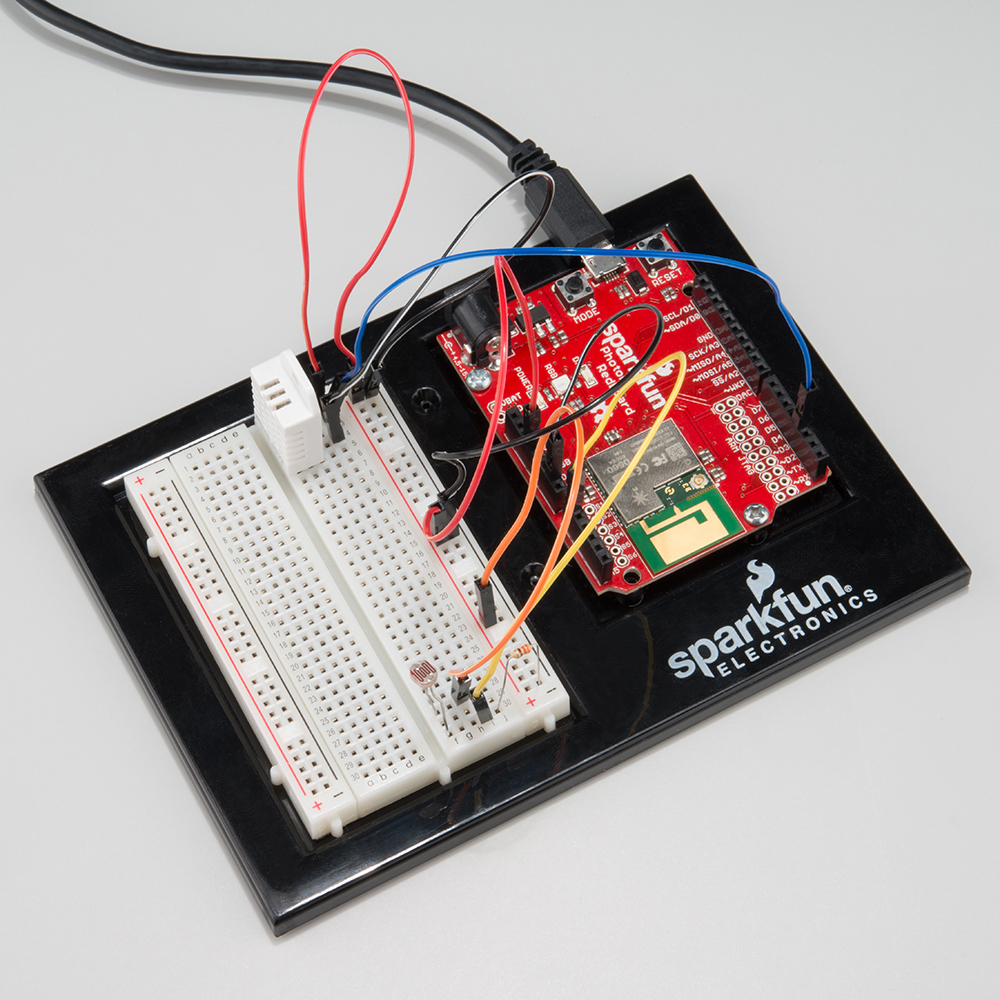 Environment logger from our Experiment Guide
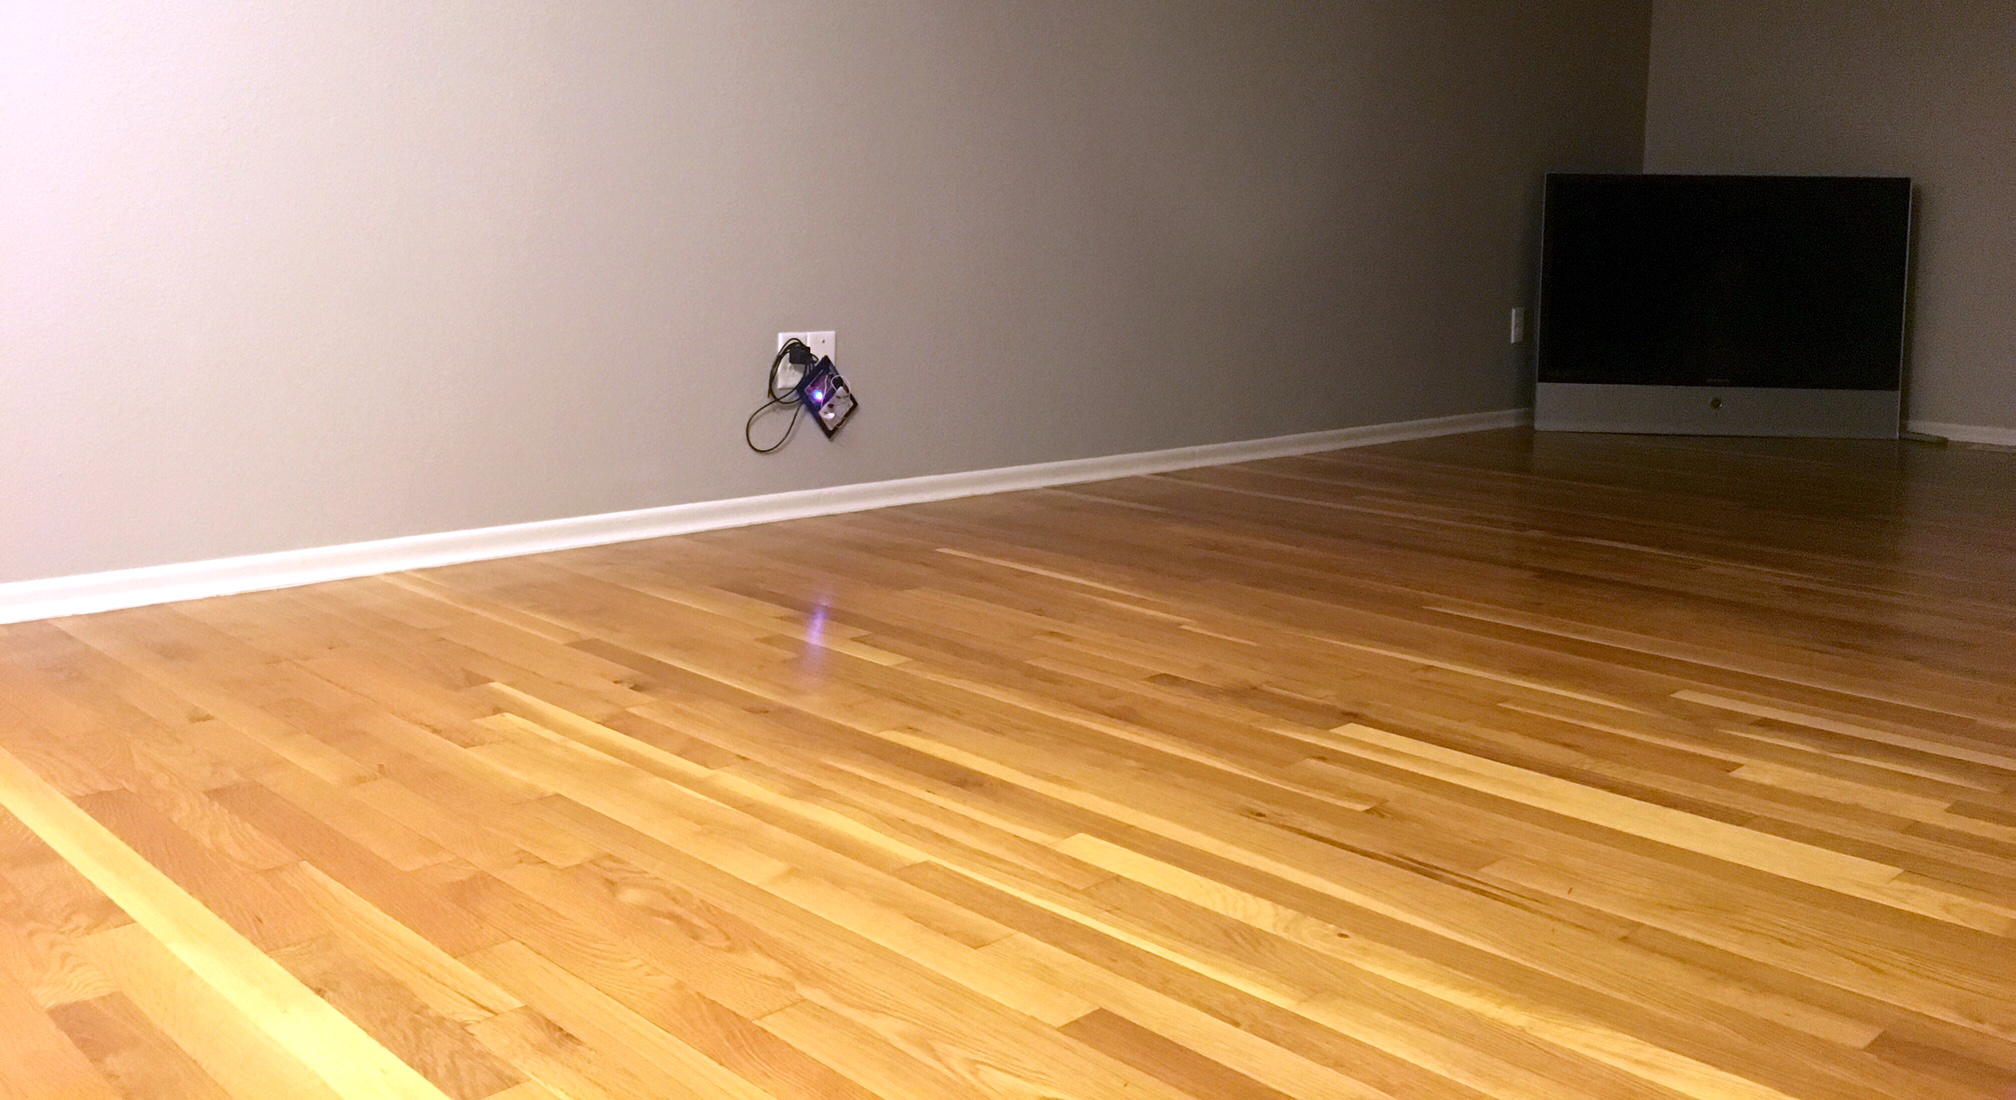 The climate-monitoring IoT device mounted to the wall (feel the buzz!)
 IoT demo hardware setup
I have a demo app up on GitHub. It's not a polished app, but was written to test out some things. It might be cleaner to auto update the display, but I wanted to keep a button to show interactivity. It's written in Xamarin.Forms, so it runs on Android and iOS. I developed it in OS X, so I never bothered making a Windows phone version, but it should build there without much work.
This demo demonstrates the use of the MVVM design pattern that I didn't bother with in the simple demo above. It's more complex than I'd like to spell out here, but here are some screenshots of it running on a few devices.
 SplashscreenApp freshly launched
 App after button press
iOS version of Phant app
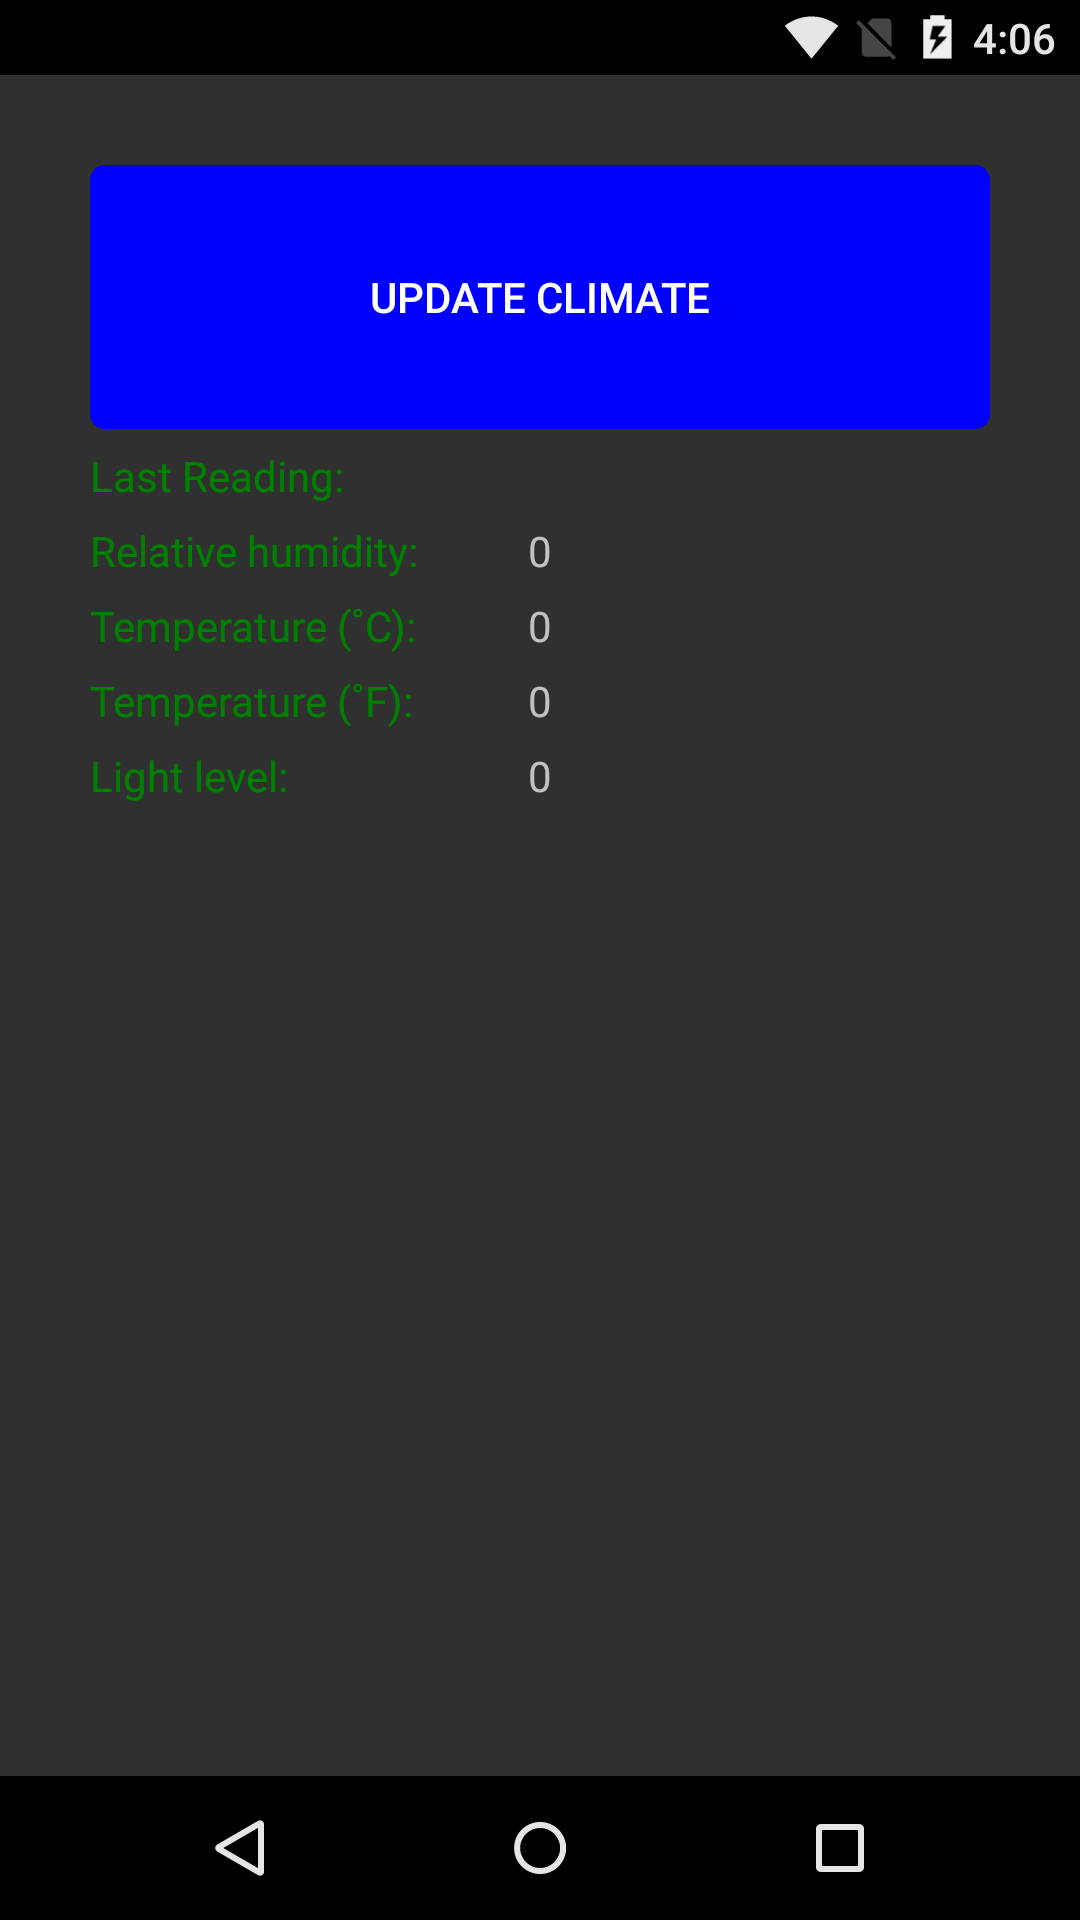 App freshly launched
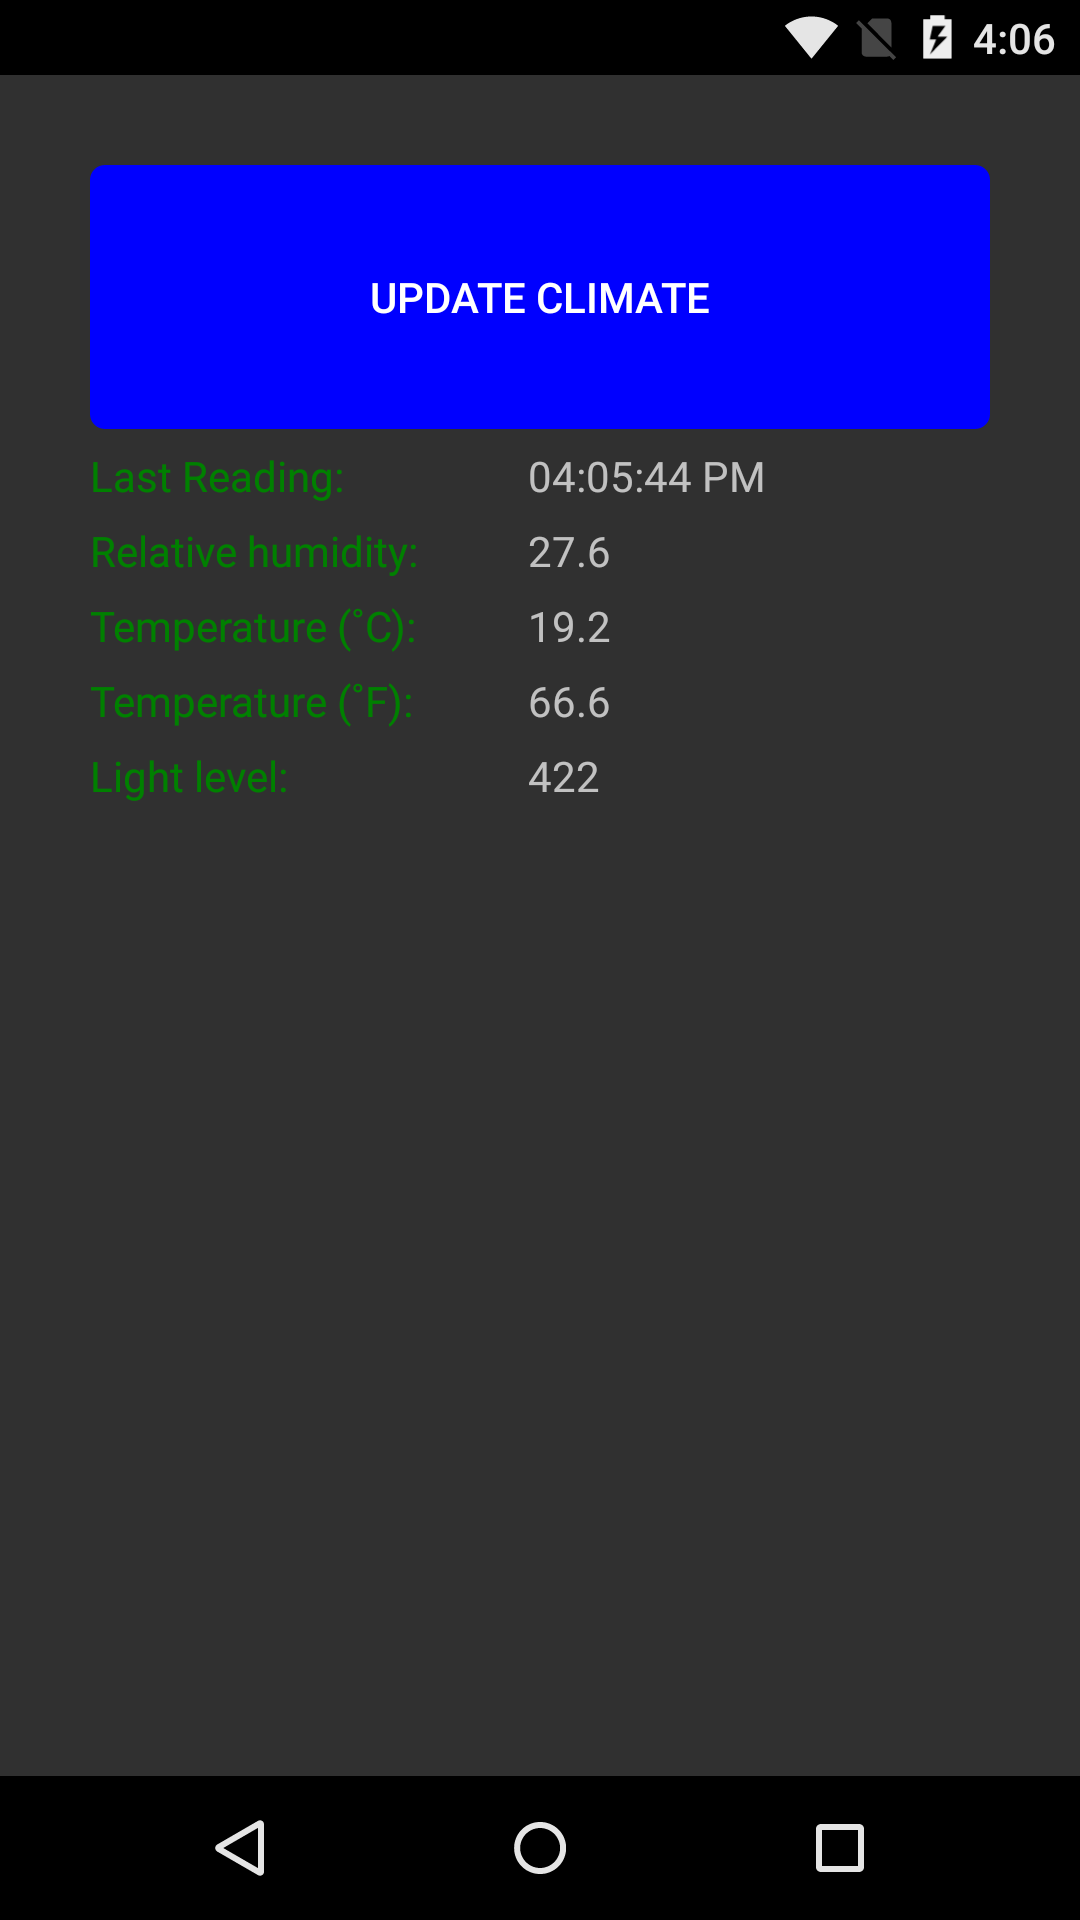 App after button press
Android version of Phant app


Thank you Brent for taking the time to write this up! It will take some time to go through, but i do appreciate having a well developed introduction! Have a great weekend!