IoTuesday: Build-a-(Connected)Bear!
Stay connected with this Particle Photon-enabled stuffed animal.

Happy IoTuesday! In this week’s edition, I build a connected stuffed bunny for my newborn niece (and yes, even though we refer to it as a bear for title purposes, we realize it has decidedly lagomorphic qualities).
Having recently moved to Colorado, I’ve been dealing with the challenges of living far away from family for the first time. This drove me to design a special method of communication for just my niece and myself---a stuffed animal that would alert me, all the way in Colorado, any time she played with it back in New York.
This is a great place for any IoT n00bs to get started! To follow along make sure to gather the following supplies:


You will also need to pick up your own stuffed animal and some craft supplies, including:
- foam
- sewing needles
- regular thread
- fabric glue
Now let’s jump in! This project can be broken down into three parts:
Hardware
Programming
- Fabrication
HARDWARE
Let’s start with the hardware. Picking a WiFi-enabled microcontroller is a crucial part of any IoT project. Each option has its own benefits and pitfalls, so it’s important to be thoughtful about which one you choose. I myself had not worked on a connected project in a few years and was delighted to see how far IoT tools have come. I started my build process by collecting my WiFi-enabled microcontrollers and testing which one would work best for my purposes.
I started with a Raspberry Pi, a Spark Fun ESP8266 Thing Dev Board, an Arduino Yun and a Particle Photon.
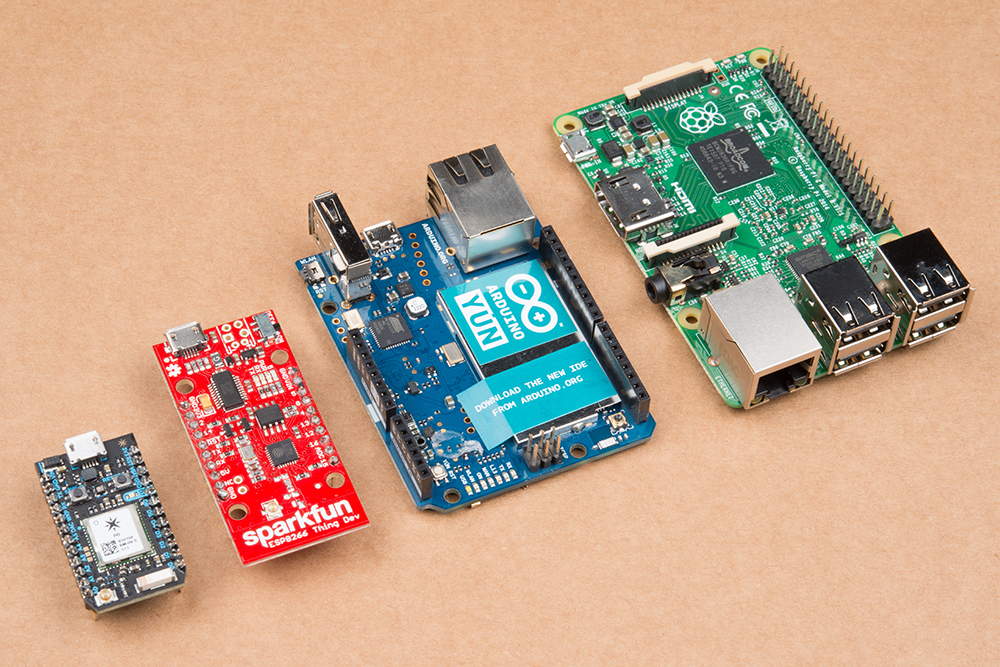
I quickly vetoed the Raspberry Pi because I wanted something much smaller. Then I moved on to the Arduino Yun, for which I was looking to build a texting bot using Twilio, an API for phone services. I quickly learned that Twilio is a paid service, so I decided to move on.
Next was the SparkFun ESP8266 Thing Dev Board, for which I used the same hookup process that we outlined in our IoT Hobby Kit Experiment Guide. It worked great using IFTTT and ThingSpeak services.
While this was definitely a great solution, I found out that IFTTT works even better for my purposes with the Particle Photon board because IFTTT offers a particle-specific service, so you can totally cut out the ThingSpeak element from the process.
For all these reasons, I decided to move forward with the Particle Photon.
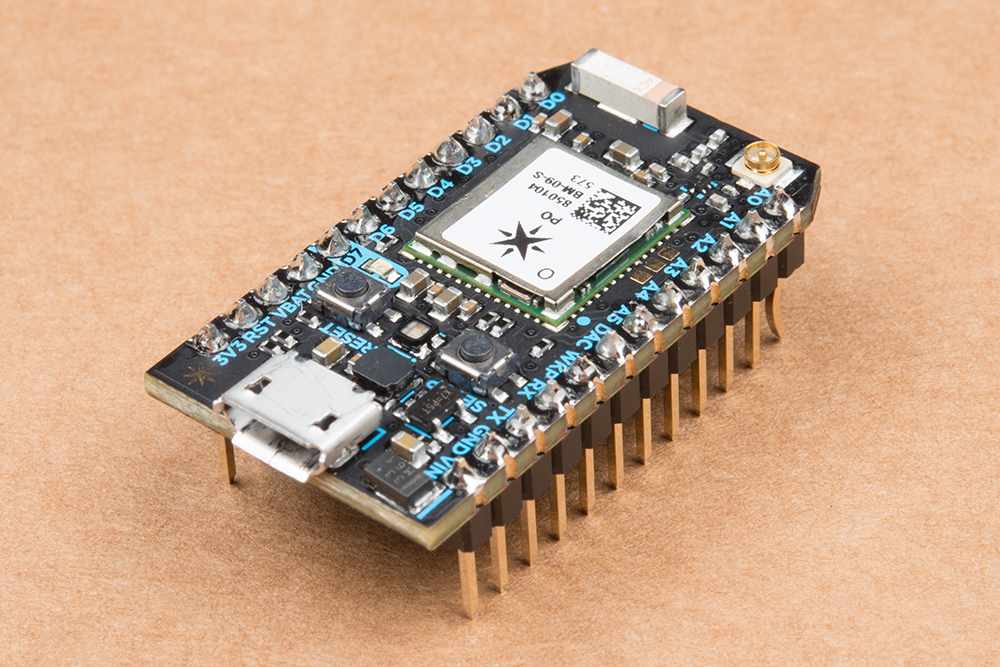
This board is amazing for connecting to the Internet, and I would highly recommend it for all things IoT. What’s even better is that SparkFun has built a sewable photon shield, which makes it even more suitable for a connected soft project.
There are lots more WiFi-enabled boards that could have also been good options for this project. If you have a suggestion, let us know in the comments below!
PROGRAMMING
Once I had selected my board, it was time to build my applet, or program. Particle has an amazing service that offers a phone app with detailed instructions on setting up a new device and connecting to the internet for the first time. They also provide a web IDE and thorough, easy-to-follow documentation. The first thing you want to do is set your new board up using Particle’s instructions.
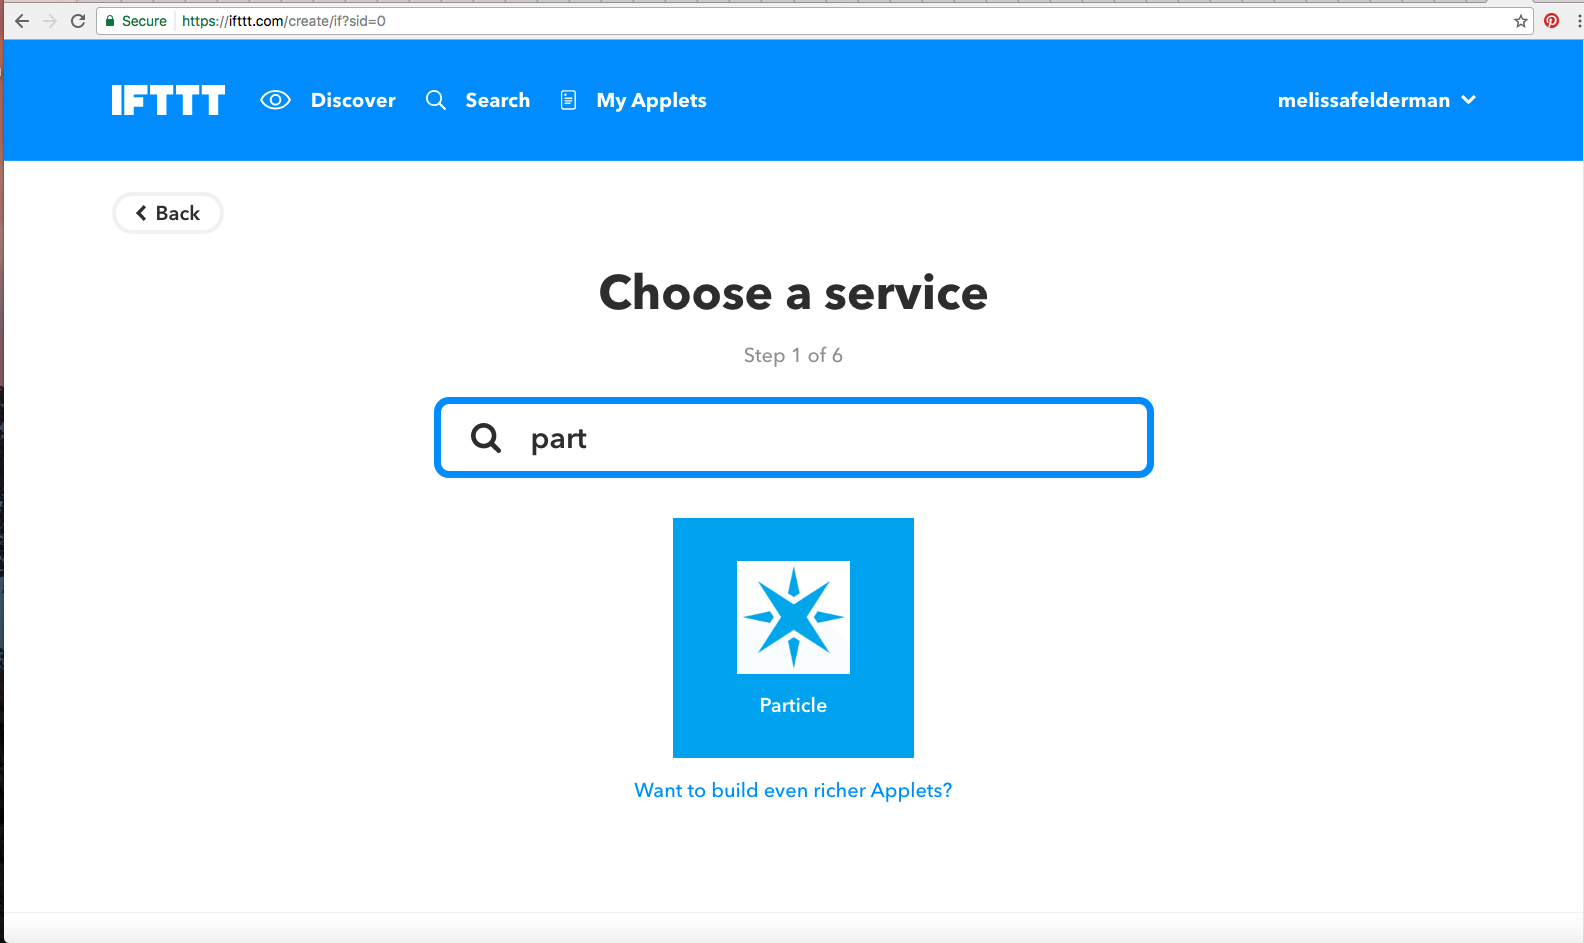
Then, head over to IFTTT to build your applet, or program.
Create a new applet and click the + on this:

For this, find and select the particle service:
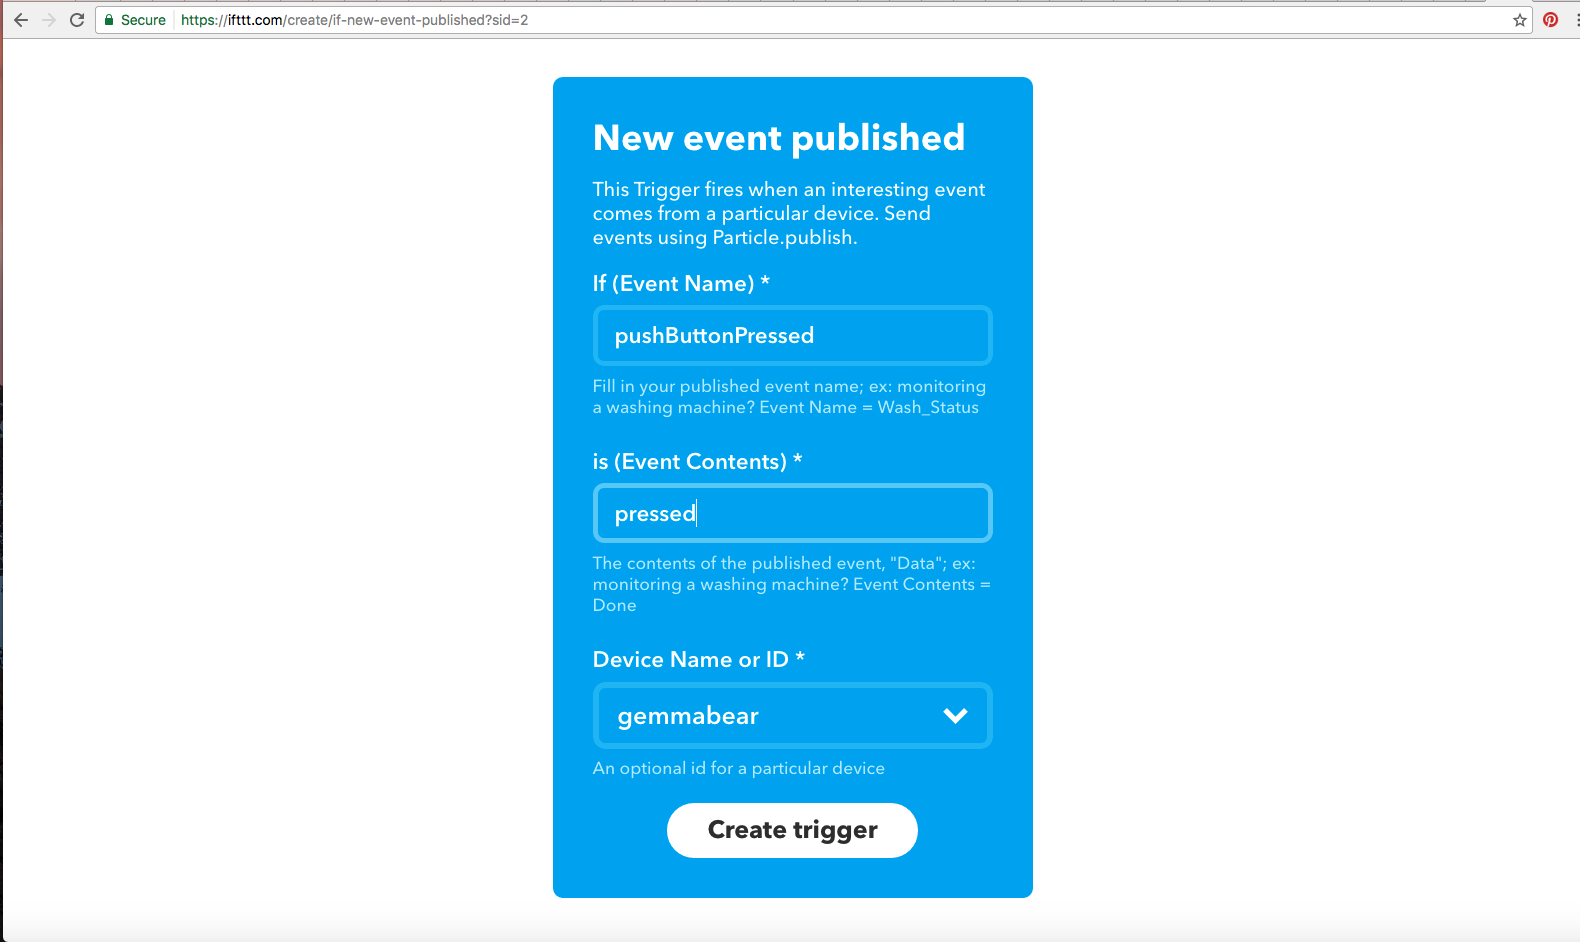
Then select the New Event Published trigger.

Fill in the fields, and select your Board, and hit create trigger.
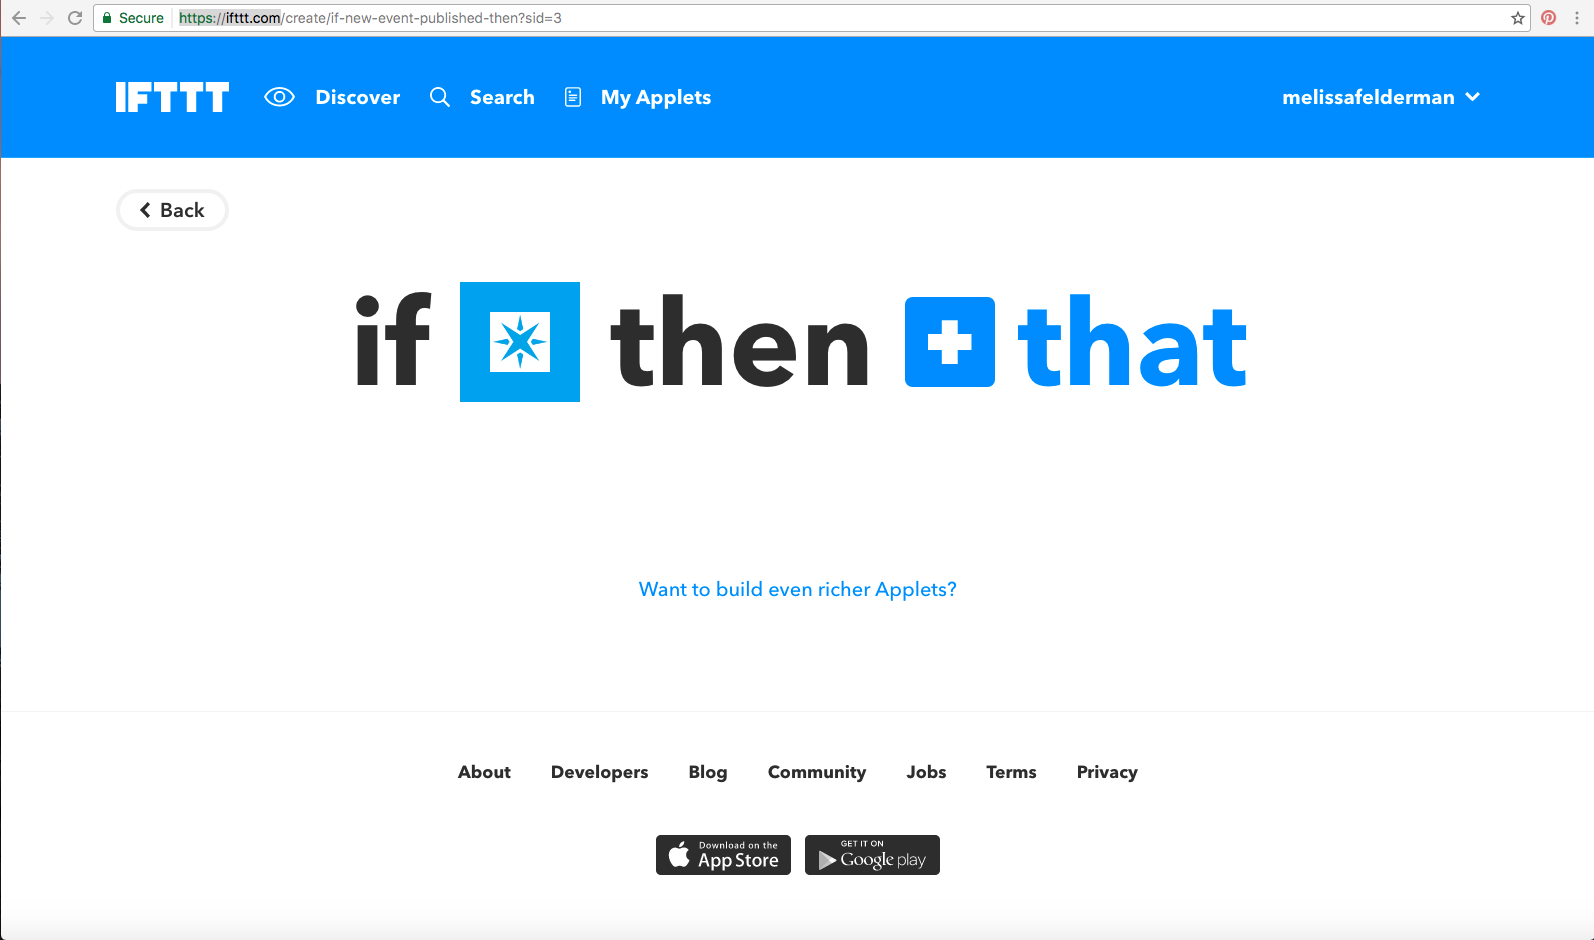
Then click on the + that.
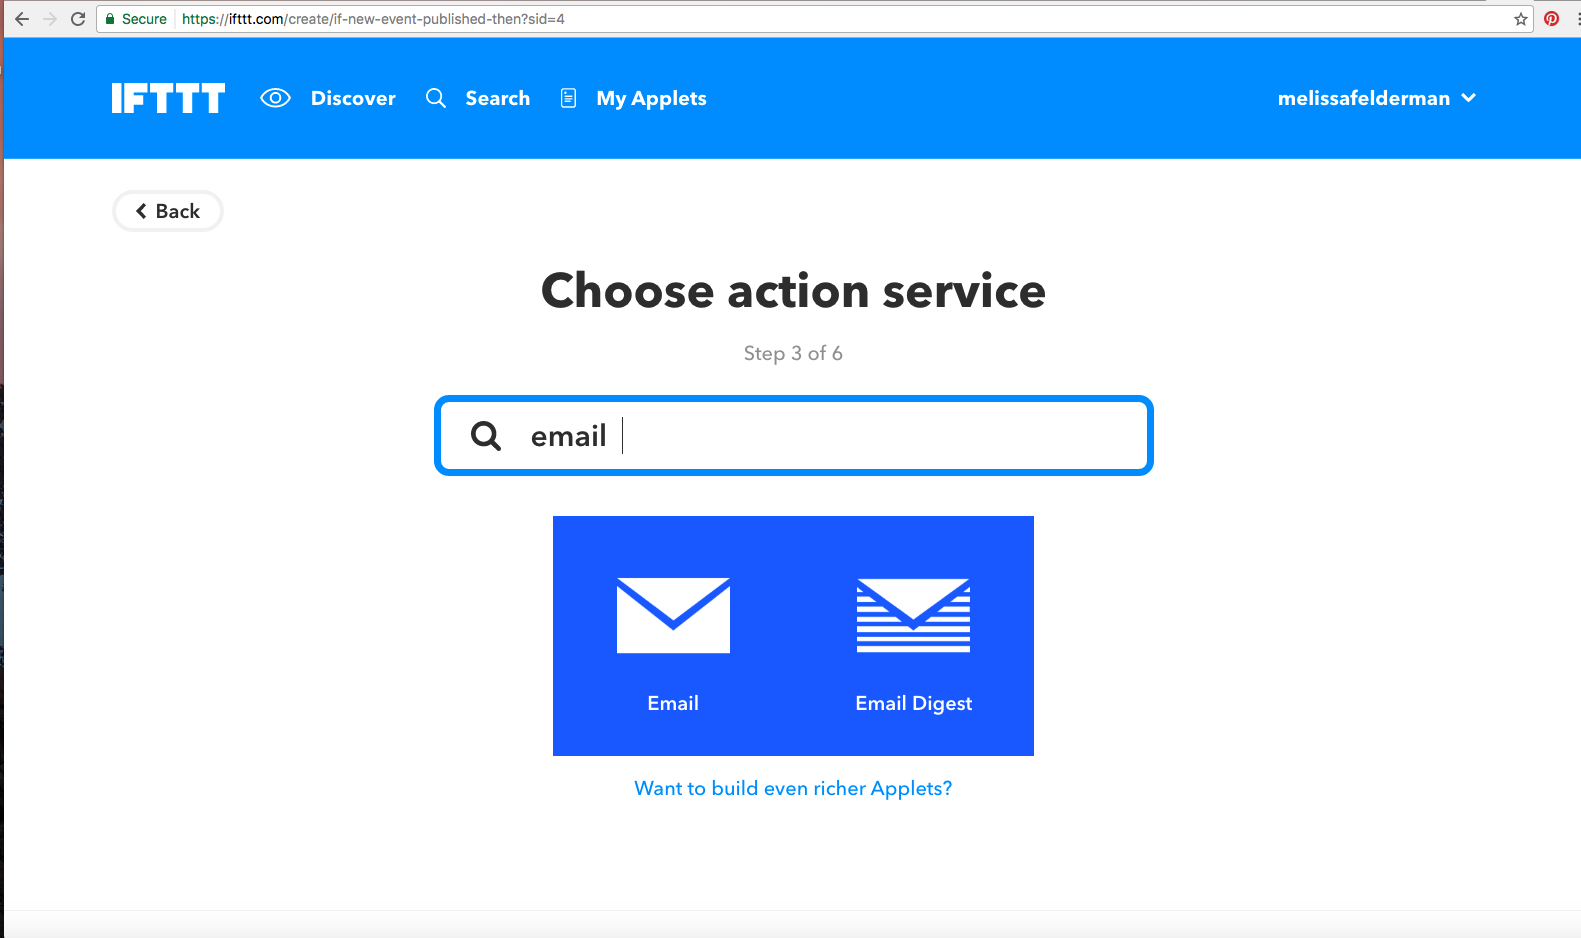
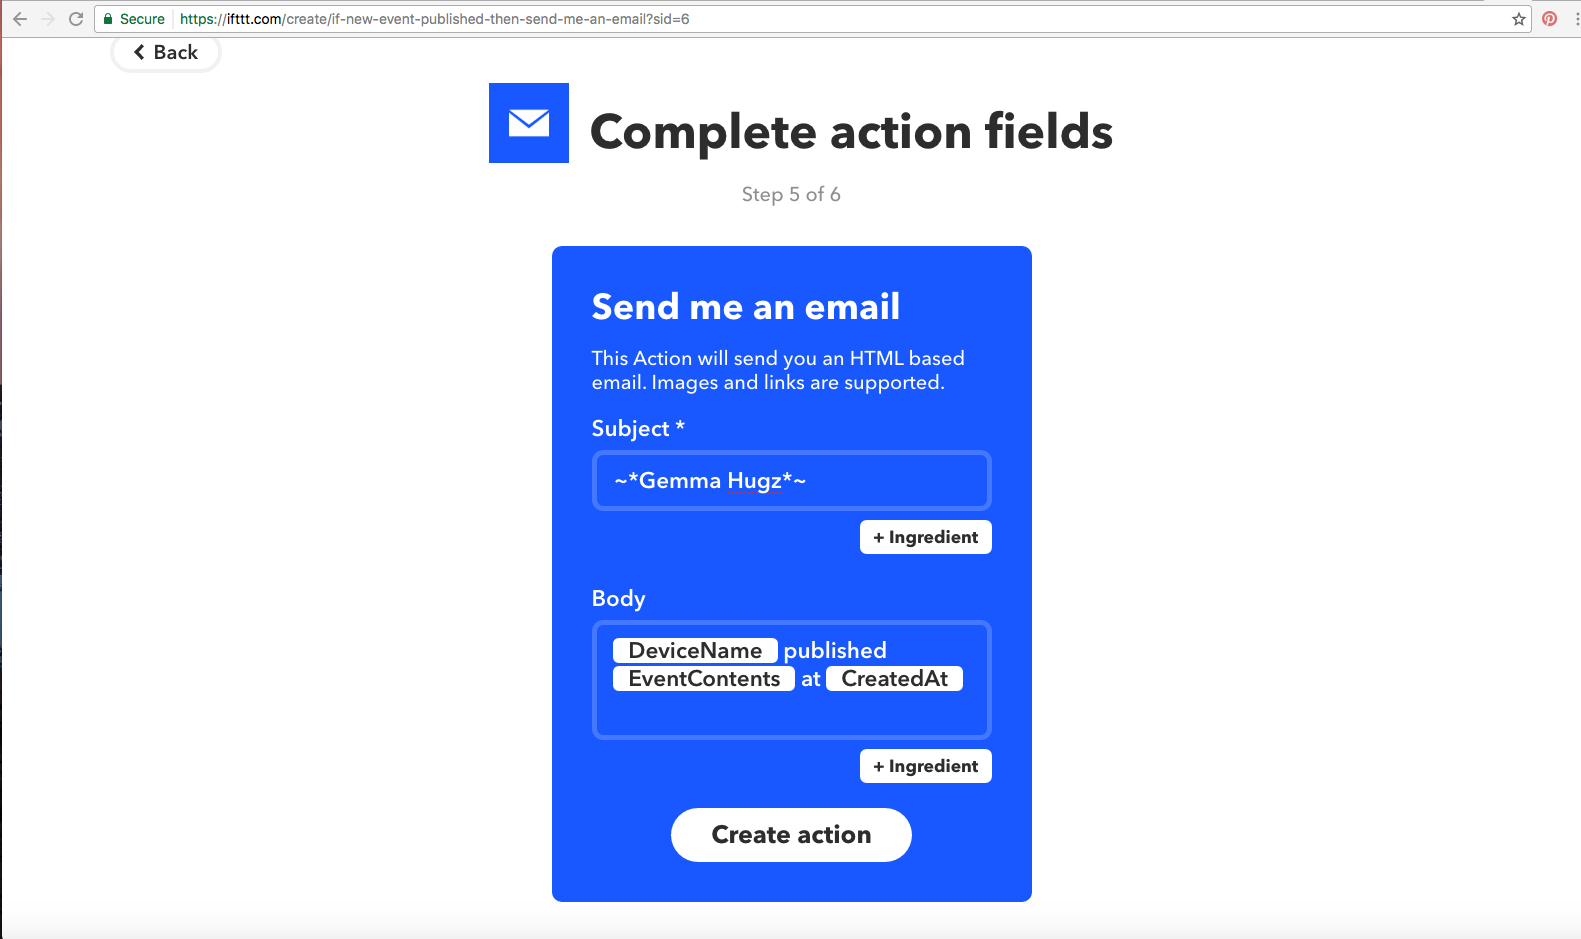
Find and select the email service:
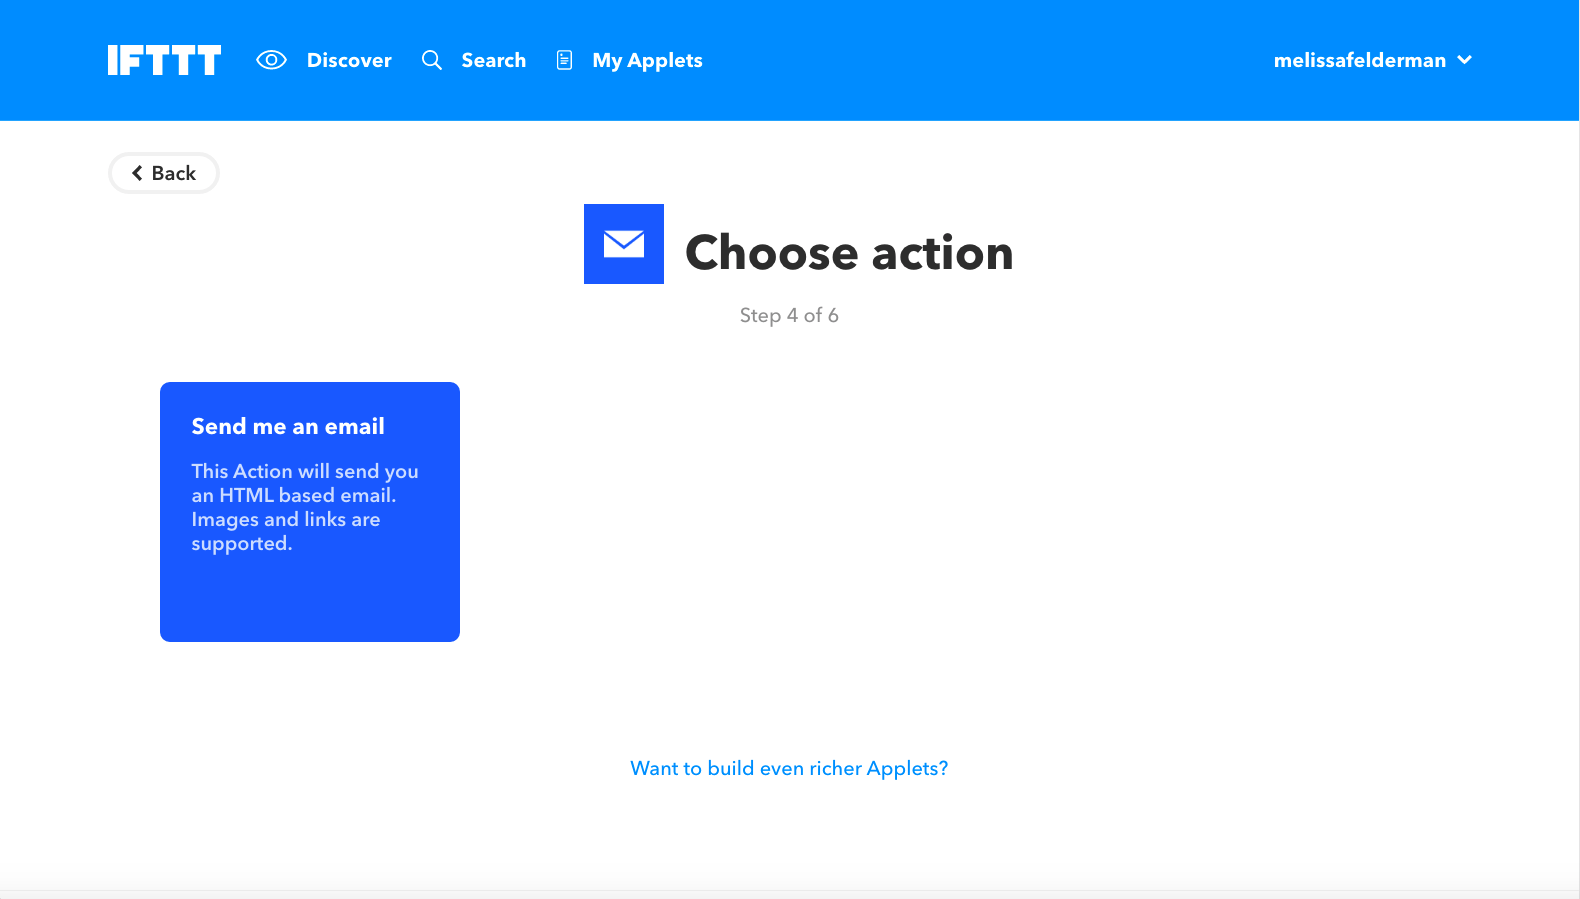
Choose the "Send me an email" action:
Complete the Action fields with whatever information you want and select "Create Action."
Finally, select finish - and your applet is complete!

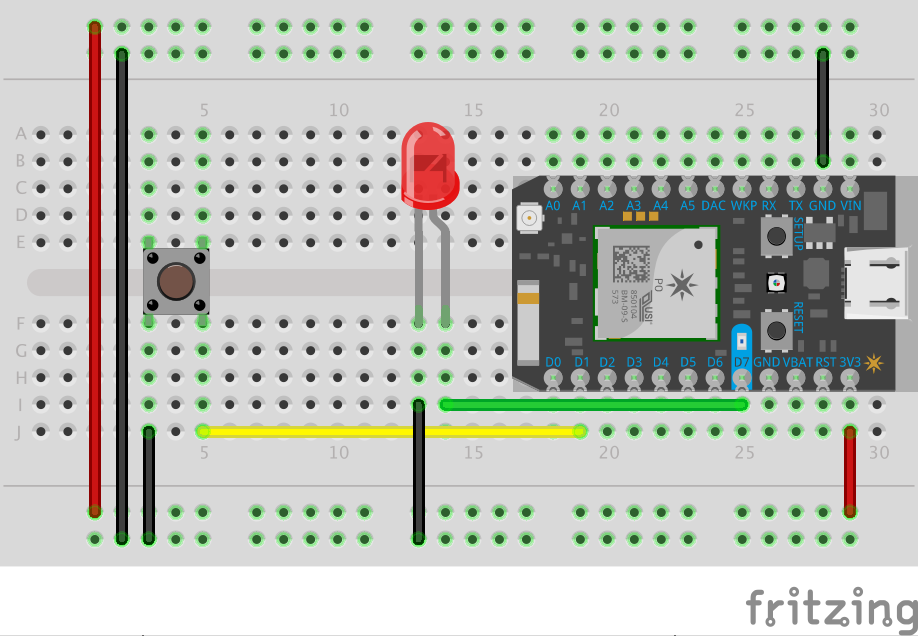
Now we need to breadboard out the circuit and program the Particle Photon. The following diagram illustrated the circuit.
Then, head over to Particle’s Web IDE and paste in the provided code, and flash that over to your device.
//Connect Bunny, By: Melissa Felderman for Spark Fun Electronics.


//int led = D7; // Uses inbuilt LED
int myLED = D7;
int pushButton = D1; // Push button is connected to D1

// This routine runs only once upon reset
void setup()
{
 //pinMode(led, OUTPUT); // Initialize D7 pin as output
  pinMode(pushButton, INPUT_PULLUP);
  pinMode(myLED, OUTPUT);
  digitalWrite(myLED, LOW);
 // Initialize D1 pin as input with an internal pull-up resistor
}

// This routine loops forever
void loop()
{
int pushButtonState;

pushButtonState = digitalRead(pushButton);

if(pushButtonState == LOW)
{ // If we push down on the push button
 digitalWrite(myLED, HIGH);
    //digitalWrite(led, HIGH);  // Turn ON the LED
    Particle.publish("pushButtonPressed","pressed",60,PRIVATE);
    // Add a delay to prevent getting tons of emails from IFTTT
    delay(10000);
    digitalWrite(myLED, LOW);
}
}
Once you have tested that everything works, it’s time to move on to the next step!
FABRICATION
Working "soft" can be a slow and labor-intensive process for those used to working with traditional hardware, so it’s important to think, plan and plot before putting your project together. The connected bunny has three major elements:
- A soft momentary push button
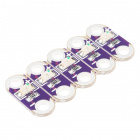
- Sewable LEDs
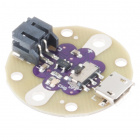
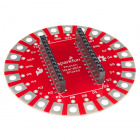
- SparkFun Sewable Photon Shield
Let’s start with the button, which can be made using a piece of foam and two pieces of conductive fabric.
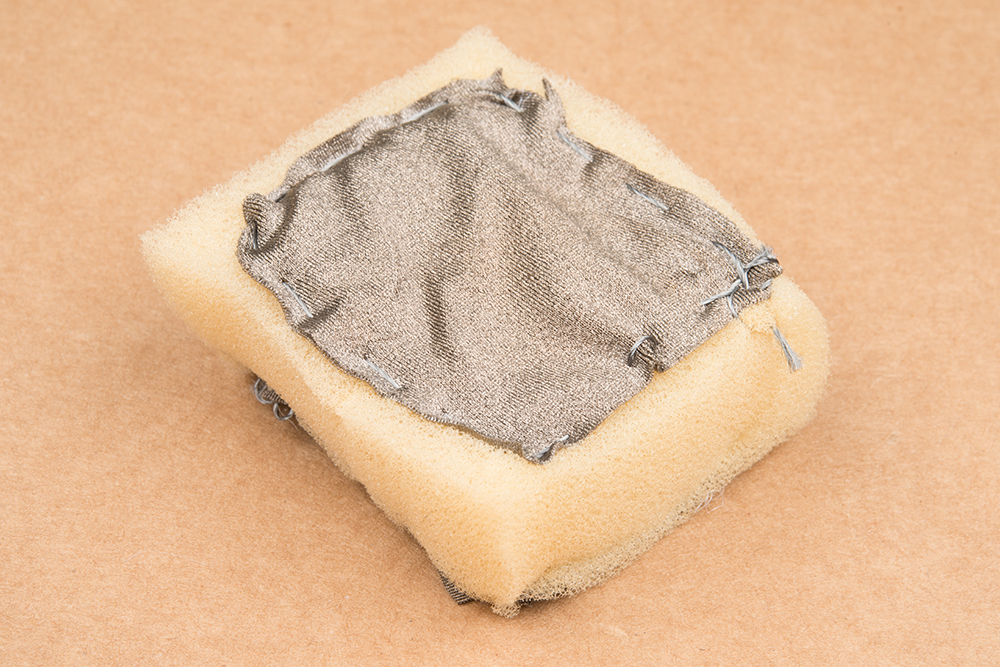
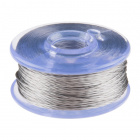
Cut a section of foam out from the center of your piece and sew down the conductive fabric to either side. Use conductive thread as leads to each piece of conductive fabric.
To place it inside the bunny, you will need to cut along the seam and take out a majority of the stuffing. Replace it with the button, making sure it’s in there without being squeezed, and sew the button leads out from the inside and leave them there for later. Restuff the bunny until its shape is back---and sew it back up!
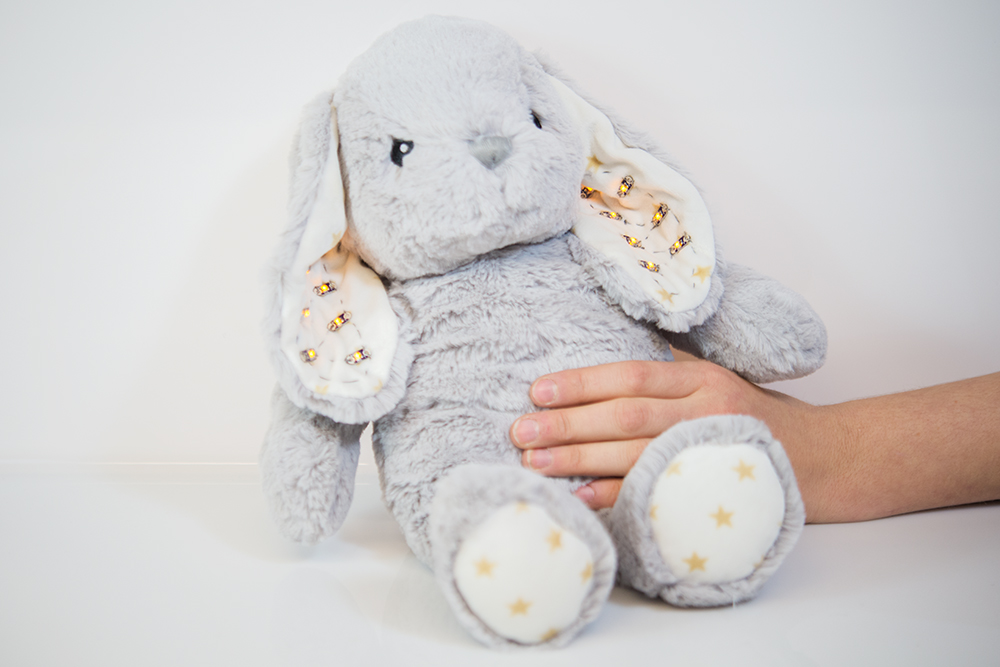
Now we will look at the Sewable LEDs.
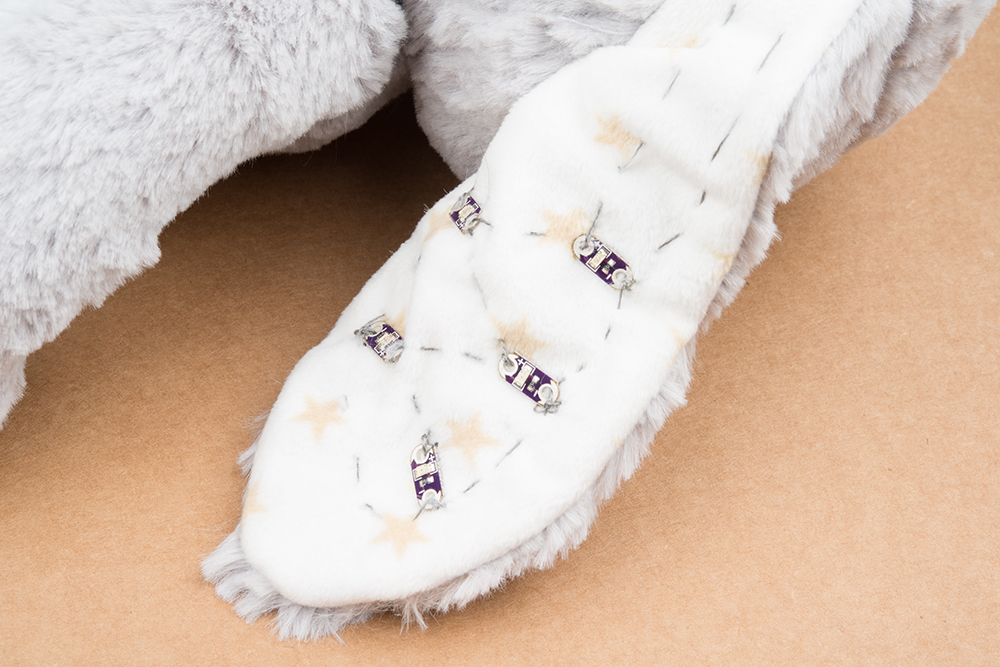
It’s good to use a touch of fabric glue to plot an arrangement suitable for a parallel circuit. In mine I placed anodes pointing toward the center of the ear, and cathodes toward the edge---but the opposite works just as well. Then, using one piece of conductive thread connect all the anodes, and with a separate piece connect all the cathodes. The thread will once again act as the anode and cathode leads, so do not tie or cut it off.
Finally, it’s time to place and sew down the SparkFun Particle Photon Sewable Shield. I put mine right under the back of the Bunny’s head.
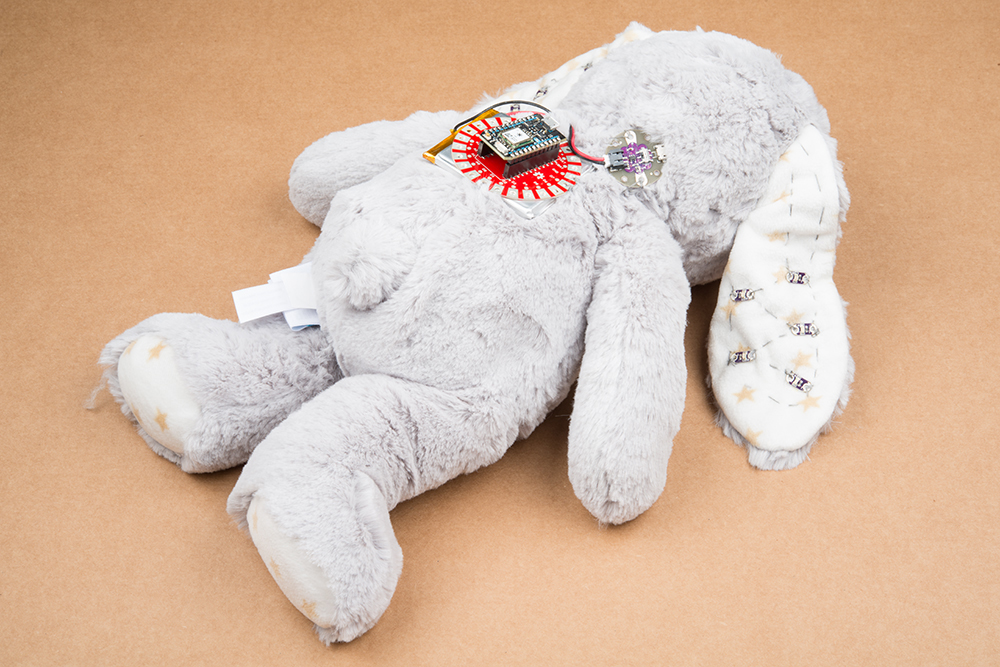
This was the most central location to my thread leads. Now it’s time to manage the uncut conductive thread. Take one of the button leads and sew it to ground, Take the second and sew it to D1. Then, sew the anode thread of the LEDs to D7 and the cathode thread to ground.
You may also want to add a LilyPad Simple Power board so that you can power your project with a LiPo battery instead of a chunky USB cable.
The last step is popping in your Particle Photon, which should already be programmed with your applet and a battery. When I squeeze bunny, the Sewable LEDs light up and, within a few seconds, I get my email.
That’s it for IoTuesday! Let us know how you would or do use the Internet of Things to stay connected to the ones you love in the comments below!


Little children put nearly everything in their mouths; think of the leds getting chewed off and sticking in the throat of a little one... hilarity ensues.
I wouldn't give it to any child younger than 5 years of age let alone the 5 day old granddaughter I have. Just sayin...
Here are some techniques for insulating the thread if you are building onto something that may bend/flex a lot and potentially short out the thread connecting the LEDs - https://learn.sparkfun.com/tutorials/insulation-techniques-for-e-textiles.
I would be concerned about the exposed circuit board being subject to abuse such as normal wear and tear, or ESD. Any reason you couldn't place inside the bunny to protect it better? And with an ESD safe case of some sorts?
That's a great Idea! I wasn't thinking about wear and tear YET, because newborns don't have the motor skills to really 'handle' something. At this point she's meant to just touch it. But it's definitely something that will need to be addressed as she gets bigger. Thanks for the feedback! :)