Introduction
This is now the second post of many in an on-going project to "make smart" the lights in my house. I've broken up the project into a number of parts; the first blog post dealt with the process of building IR tripwires to keep track of the number of people entering and exiting the garden level in my house. The IR tripwire project was a journey into the timing of microcontrollers to create modulated IR signals, which signal the microcontroller to count up or down depending on the order of the tripwires being tripped. As deep as that journey went into hardware, this part of the project will conversely be wide, rather than deep, as we sweep the land of web page development.
As the project grows, I'll be creating a tutorial to keep better track of the actual project. It will take some time to complete the tutorial, as the project is large. If you follow along it'd be great to hear what things tripped you up in any one particular section; it will undoubtedly help someone out there with similar questions. One last thing - I picked this project because it looked super fun, but more importantly because I wanted to be baptized in the world of WiFi on microcontrollers. I say that because not every decision is well informed; sometimes you plow blindly ahead so as to look back upon your decisions and grow wiser in doing so.
The Why, What and How (WWH)
Let's begin by discussing the decision that led to using an ESP32 Thing Plus, SPIFFS, and ESPAsync Web Server. After reading on Hackaday about a person's four-year journey into building an IoT garage door opener, I was inspired to finish the relayed-controlled lights. Much like his project, I wanted a Web Server on an ESP-based board that had an attractive interface, and could reliably but simply complete the task of flipping one of four relays.
This is a Web Server on an ESP32, with VIM Solarized theme!
It also had to display the status of each individual light on the web page in real time (no page refresh). Prior to beginning the project I had experience in what HTML looked like, and some experience using bootstrap in our hookup guides - not really understanding that it was a toolkit for Cascading Style Sheets (CSS), HTML and Javascript (JS). I had completely zero idea on how they all interacted to create web pages and what each individual component did, so it was with great relief that someone had left some bread crumbs to help me piece together the big chunks while leaving a lot of the details to me. Fear not, the tutorial will be those bread crumbs. Now how do we accomplish this seemingly simple task of creating a web page on an ESP32? Let's start with the FSBrowser Example in the ESP8266 Example Code.
The WWH - File System Browser and SPI Flash File System (FSBroswer and SPIFFS)
Why are we talking about the ESP8266, when the ESP32 Thing Plus is clearly in the title? I started with the ESP8266 in the first part of this series because I was under the assumption that support for the ESP8266 still out-paced the ESP32, and also because the ESP32 Thing Plus was not out yet. Coincidentally, the aforementioned blog post also used an ESP8266 - nice.
We'll talk about switching microcontrollers in a bit, but first, what is the FSBroswer example all about? FSBrowser is short for "File System Browser". What the example does is provide code that allows you to navigate files on the ESP like it was a hard drive of flash memory. This is used in conjunction with the SPI Flash File System Library, or SPIFFS Library, that organizes the files for serial upload via USB for your ESP board. Specifying which files is as easy as putting them in a folder named "data" sharing the same folder as your Arduino sketch. In addition, there is a tool built for the Arduino IDE that handles the transfer of these files onto your ESP. You have to download and add either the EPS8266 File Upload tool or the ESP32 File Upload tool (depending on your microcontroller) to the Arduino IDE. There'll be more details or are more details in the tutorial (depends on when you're reading this).
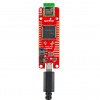
The ESP32 Thing Plus = 16MB of memory
A web page, similar to an Arduino sketch, has a number of interlinking files: the style sheets, javascript files and/or jquery files. All of these take up space on our small microcontroller, and since we're using it as a hard drive of sorts then space matters. The ESP8266 doesn't have much space when compared to the ESP32 Thing Plus, and the EPS32 has GOBS of it - 16MB of flash memory. Also at this point, while the ESP8266 has proven reliable throughout the years, it feels like starting a project with Python 2.7 when Python 3 is the latest and greatest (RIP Python 2.7 Support BTW).
FSBrowser or ESPAsync FSBrowser Example?
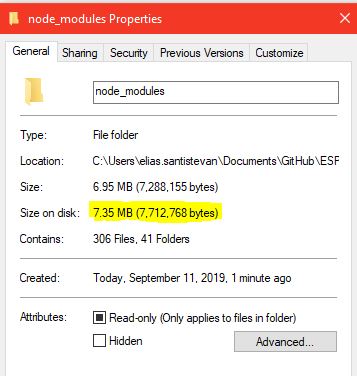
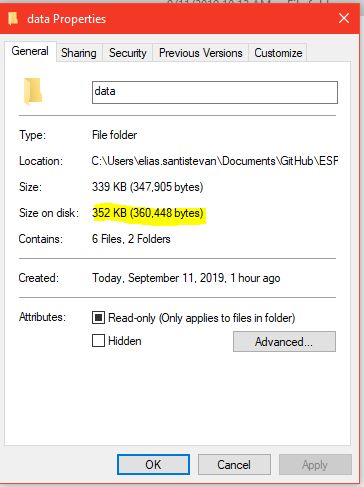
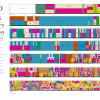
Again, the amount of space the files take up is important for obvious reasons - it's a file system on a microcontroller. When I first started the project, I downloaded Node.js as an easy package installation manager. I used it to naively download everything suggested on the Bootstrap page - Bootstrap, Popper.js and jquery - because I didn't know what was necessary and what wasn't. "Best to start with everything," was my refrain.
 |
 |
| BEFORE | AFTER |
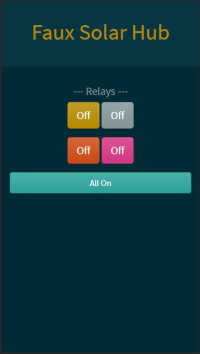
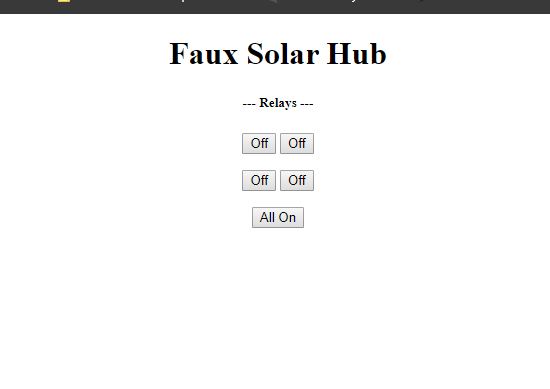
After some experimentation and time getting familiar with the project, I was able to greatly reduce the file size to 350 KB. I loaded up the FSBrowser example and uploaded my files to the ESP32, but was dismayed to find that my snappy color theme was not being loaded.
Wat.
Looking at the developer console in Chrome, I found that the dependent files were not being accessed due to the following error.
Well why NOT?!
I spent hours searching for clues and repeatedly came across the ESPAsync Library. It touted many benefits in the README, and since I wasn't getting anywhere in my search I was inclined to try it – it worked immediately. Huzzah! I can't really report on the benefits of the library because I never got the chance to run into the limitations of the previous example code, since I couldn't get it to host my web server correctly. The new library touts being asynchronus, which translates into my server being able to handle multiple connections. If you have any ideas on the other benefits of this library, I'd be happy to hear them.
What's next?
The web page should be able to dynamically be updated. If multiple people are connected, then the web page needs to be able to alert anyone on the page that a light has been switched on. I would also like to save the state of the relays and the WiFi info (network name and password) locally in a JSON file. Keep an eye out on this tutorial for updates as I get along in the project. It will have detailed instructions on how to do all the above, including the whosit whatsits of the first blog post, and of course, what's to come. If you'd like to follow the project as I work on it, then take a look at my Github Repo for all the updates. I'd love to hear any trip ups you've had making a web server, or the things you wish you had known before starting. Do you have any advice for me? I'd like to hear that too!
Shout Out!
Shout out to me-no-dev for your excellent work on the ESPAsync library, and to Ludzinc for your excellent blog post on the garage door opener, which inspired all the fun I'm having with this project.
Links from the Post
- Ludzinc's Garage Door Opener
- ESPAsync Library - Web Server Library
- AsycTCP - Dependent library for ESPAsync Library
- SPIFFS - SPI Flash File System
- ESP32 File Upload tool - Tool to upload web page files onto ESP32
- Node.js - Package manager for HTML files
- Bootstrap page - Toolkit for making web pages dynamic and slick.



Nice! You should look into using OpenHab or HomeAssistant as a centralized UI for all of your "things". With one of these applications, your "things" just need a programmatic API (HTTP/MQTT/ZigBee/any of a plethora of options) and the application takes care of the UI, user management, notifications, etc. Additionally, you now have a central location to coordinate rule-based actions based on the inputs of one-or-many of your things.
I can't wait to see how this smart home project turns out. =P
Also, RIP Python 2.7. o.O