- Home
- EiBotBoard


EiBotBoard
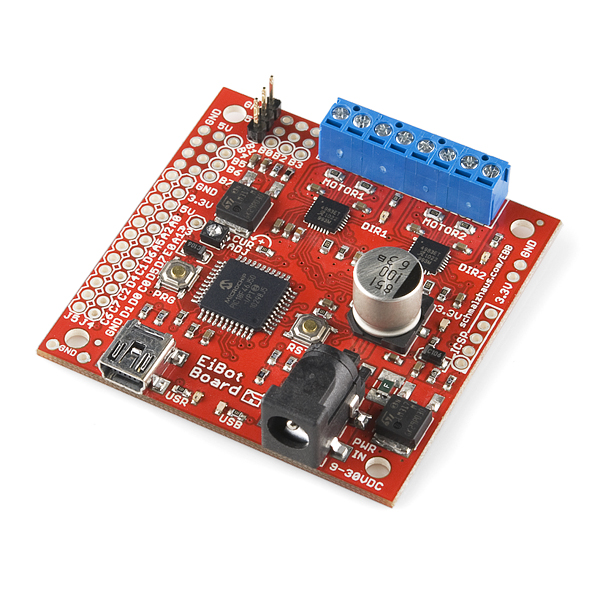
The EiBotBoard (EBB) was originally designed for the Egg-Bot project. It is a small (2.2" x 2.2") two channel stepper motor driver board with USB microcontroller. It is based on the UBW board and supports all of the commands that the UBW does (for the most part), plus several extra, like stepper motor commands and RC servo output commands.
The EBB also has commands to drive up to 7 RC servo motors at the same time! While the EBB has a built-in 5V power regulator for the RC servos, if too many servos are connected you may need to use the additional power input circuit on the back of the board to provide additional power.
The idea with this board is to have a simple way to control two stepper motors from a PC over a USB connection. This is accomplished by two microstepping chopper stepper motor drivers and a small Microchip PIC microcontroller that has USB support. When you plug the EBB into a PC (Windows, Mac or Linux), it will show up as a serial port. You can easily type commands to it using a terminal emulator, or write your own application to send commands for moving the stepper motors.
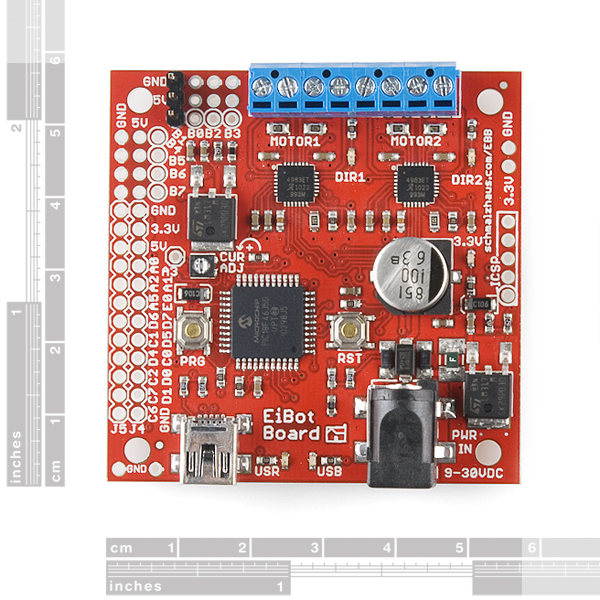
Note: We had a manufacturing error on about 60 of the first run of EiBotBoards. If you have already purchased an EBB, before powering it up please read this warning and double check the resistor value. Resistor R27 was supposed to have been populated with a 390 ohm resistor, but was incorrectly populated with a resistor value of 3269 ohms. This causes the voltage regulator to output 9V for Vcc, which will damage the PIC. If you are comfortable with switching out the resistor yourself, we would be happy to send you the correct resistor. If not, we are also willing to replace your EBB with a new one.
To check your EBB, look at the small numbers on top of R27. To locate R27, hold the EBB so the stepper motor terminal blocks are on the top of the board, then look at the voltage regulator at the bottom right hand corner of the board. R27 is the resistor directly above the regulator, centered between the two pins of the regulator. The text on top of the resistor should read 391. If it does not, then you have one of the EBBs with the wrong resistor.
We have currently fixed the problem and all future boards ordered after 11/29/2010 will not have this issue. Thank you for your understanding, and please feel free to contact customer service if you have any questions.
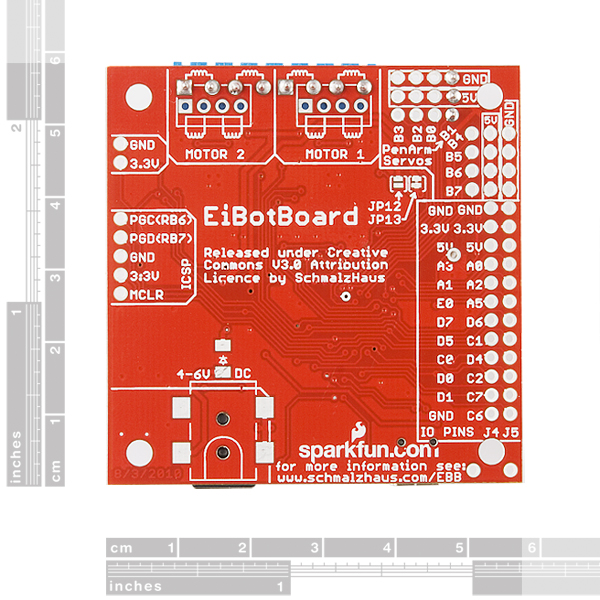
Note: If using metal mounting hardware, please be aware that the top side of the board has a 3.3V copper pour and the bottom side has a ground copper pour around the lower right hand mounting hole. You will want to use plastic washers to prevent a short.
**Note: **This product is a collaboration with Brian Schmalz. A portion of each sales goes back to them for product support and continued development.
Comments
Looking for answers to technical questions?
We welcome your comments and suggestions below. However, if you are looking for solutions to technical questions please see our Technical Assistance page.
Customer Reviews
4 out of 5
Based on 1 ratings:
A good stepper board with many other functions
I have found the EiBotBoard very useful in driving stepper motors from a 12V power source (both wheel motors and otherwise) on warehouse robots. I have not used any of the EggBot-specific features.
You can control the behaviour of motors precisely and reliably with these. Perhaps the only feature to be labeled "missing" is acceleration control - but that is easy to write code for.
The board can also measure analog voltages, including its own PSU voltage, which is handy - through adequate sensors, you can measure pretty much anything you want. It should be capable of also driving RC servos, but I haven't tried that yet.
Please remember that you WILL need tiny heatsinks on the two driver chips if you're going to do hard work. (I also ensured constant air flow, but only because I'm using them to move a 30-kilogram robot, naturally with adequate gear reduction, but currents are still close to maximum permitted levels.)
I bought this board, although I was hesitant about making the purchase because I had no previous experience with UBW's and I was worried that it might be too complicated to use or have limited support for the various stepper motors that I accumulate every month at the local TRW swap meet. When I received the device, I connected a stepper motor that I previously operated by using 4 MCU pins connected to a CanaKit H-Bridge DC motor driver. The DC motor driver actually did a pretty good job of moving my stepper, but when I tried the same motor with the EBB I was immediately astonished by how smooth the motor turns with the microstepping that the EBB produces. It felt like I had a completely new motor... and what's even better is that you've got two motor outputs on one board, along with a UBW to control servos! I do wish it came with a simple GUI (a la Pololu's Mini Maestro servo controller) to enable code-phobic people like me a way to graphically manipulate the device, but it is not hard to make a GUI of your own using Liberty BASIC, and I'm also sure that when the EBB's user base grows a little there will be plenty of options as far as software is concerned. Even without the GUI, this board is an awesome way for newbies to programming (like me) to get a fast start and see results right away. Instead of having to deal with finding the right controller module, then finding a driver to power the motors, then trying to figure out how to get the things to turn the way you want them to (or even turn at all for that matter!), with the EBB, you plug it in, and with a simple command "SM" (plus the number of steps and the timespan of the movement) in your terminal program, you get that stepper motor turning smooth as butter in a matter of seconds. All in all I'm very happy with my purchase.
A note on analog inputs: getting them to work right requires updating your EiBotBoard to firmware version 2.2.4. EiBotBoard responds to the "v" command by printing its version number, and mine reported 2.0.1 or something.
Unfortunately the "mphidflash" binaries supplied on Brian Schmaltz's website tend to fail on most modern Linuxes (they're compiled against old libraries). I also had no luck with the firmware flasher GUI on a virtualized Windows XP, despite making all USB devices accessible to the guest OS.
What finally worked on my (Debian Jessie) system was "mphidflash" version 1.6 from here: https://code.google.com/p/mphidflash/
I probably also installed the packages "libusbhid-common", "libusb++", "libhidapi-dev", "libhidapi-hidraw0" and "libhidapi-libusb0".
Is EiBotBoard capable of reading analog input? Will I need to reprogram the board, or does the firmware already handle this?
topkara - the EBB is able to read analog inputs. However, updating to the latest firmware (e-mail me if you need instructions) will get you much more solid analog reading code. I recently re-wrote the analog sub-system, and it works a lot better now for a lot of people.
is there a driver available for windows 8 or is there any kind of work around I can do to make it work with windows 8?
The existing driver is signed and works just fine under Windows 8 and 8.1 (both 32 and 64 bit). Try running the UBW Driver Installer v2.0 from the Egg-Bot site : driver and see if that allows you to use the EBB. That's the latest driver installer that we have.
Has the problem using metal mounting hardware shorting the board been fixed yet?
Hello, I got my Eibotboard a few days ago. I plug it in my computer and it did not show up anything. Is it broken or I have to do something else to make Windows recognize it? I've been to this website (http://schmalzhaus.com/UBW/index.html). And it said that Windows should recognize it as a hardware.
You need to run the UBW Driver Installer v2.0 : driver Give that a try and let me know if it doesn't help.
i know that embedded man defiled this problem three years ago but maybe it has been updated since then. Is it possible to use this for a cnc?
Depending on what you need in CNC, yes it is. It does not natively process G-code, and it only has 2 axis of stepper outputs. However, it does have eight RC servo outputs, and both the Egg-Bot and Water Color Bot products use this board in a 2.5D type CNC configuration where the 1/2 Z axis is done with the RC servo.
if there was added a mounting hole in the middle between the two A4983s a single screw could clam something like a short piece of aluminium u channel onto the top and/or bottom for heat sinking
There is seriously no copper pullback around the mounting holes? WTF? That is really trivial good-practices.
46249- Yup, you're absolutely right. Big mistake on my part - sorry for that. In the next version, that will be fixed. (Not sure when that version will get produced) Not a problem for the EggBot kit (where the board was originally supposed to go) because plastic screws and standoffs were used.
The bug has been reported and logged for the next version of the hardware. Thanks-
Is there an advantage to using a LM317 instead of a fixed-voltage regulator?
Yes, sometimes. If you want to tweak the output after you've designed the board, an adjustable is good. Also the 317s are really cheap since they're high volume parts. For the price of two resistors, you can change what your VCC is for the whole board, should you need to. In this case, a fixed probably would have worked just as well, since we know we want a 3.3V VCC.
Since not all planes around the mounting holes on the EiBot are at GND level, there should be a notice somewhere to use plastic mounting hardware.
Both planes at right of the power connector are 3.3V
Planes at left of power connector are GND top and 3.3V bottom.
Using Al hardware and lock washers simply short out the board. :shock:
I otherwise love this product!
Can this guy drive 2 (http://www.phidgets.com/products.php?category=23&product_id=3307) 2.2A Bipolar steppers?
Yup, you can connect it and it will work. However, the EBB is not able to output 2.1A/phase, so your motors will run at below their rated torque. However, even at 1A or 1.2A/phase (EBB maxed out) you'll get lots of speed and torque from the combination. Run it at 24V to help with top end speed and put a fan on the driver chips.
Would this be a sensible choice for the following scenario?
I'm looking at using the EiBotBoard without a computer to drive two stepper motors to add motor control to my lathe. Not CNC, just manual controls. So: controls -> arduino -> EiBotBoard -> steppers... is this plausible?
(I'd like the adaptability of such a scenario, as it would let me work up to CNC later)
Thanks for any thoughts.
Yup, you could do it. You'd have to re-code the EBB's micro just a little bit - have it check some IO pins (from your Arduino) and then route those through to the step and direction lines on the drivers. Make sure you pay attention to 5V tolerant vs. 3.3V inputs on the EBB if you have a 5V Arduino.
After downloading Inkscape (an open source vector based graphics program similar to, and in many ways better than Illustrator) and the Eggbot Control plugin, I felt it necessary to recant the statement in my previous comment about the EBB not having a GUI. This EBB is an incredible value and is a must have for anyone who is interested in getting their feet wet with DIY CNC machines or pretty much any project that uses small stepper motors. Absolutely worth every penny.
I got two of the bad boards; the offending resistor is R27, which should be 390 ohms, but is instead 4.2 kohms. This is one of the two resistors which sets the output voltage of the LM317. Replacing the resistor fixed the problem.
My first plan is to set up a IR sensor "pan and scan" system to create a poor man's IR imager. Bought a couple of 1x12 IR sensor tubes and will be using the EiBot board to control the horizontal & vertical movement of a pair stepper motors.
Off topic -- remember the opening to The Outer Limits? Ah, but I'm dating myself again.
Hopefully I can correct the image afterward using RoboRealm or other image processor to flatten it out, but even without the flattening, I'm hoping for something legible. The EiBot makes the task much simpler!
Also note that even though these driver chips are supposed to do like 2A per phase, you can't get that much from this board. The max I've been able to push to is about 1.25A/phase on all four phases at the same time. The biggest problem is heat dissipation - this is only a 2 layer board, and there is no heatsink. Putting a fan on the chips helps a lot. At that current, the board and the motors will be toasty, so be prepared and don't touch with sensitive flesh. You can't hurt the driver chips with over-temp - they will start cutting out when they reach their max temp to protect themselves.
These A4983 chips also appear to be more robust than the A3987s that we used for the EasyDriver. I have not been able to destroy a A4983 yet, and I've tried.
This EBB is like a super UBW (because of the much better PIC) plus two super-duper EasyDrivers all in one package with lots of extra IO and RC servo outputs (7 of them). The nice thing is that you can't screw up the wiring between the driver chips and the UBW because it's all done for you.
Note that right now (10/25/2010) there is no built-in way to synchronize multiple EiBotBoards. So for CNC machining, having two of these is not ideal.
However, it would not be hard to do at all. All of the major communications peripherals come out to headers on the side of the EBB - SPI, I2C, USART, etc. So if you wanted to connect two of them and have them start their moves at the same time, it would not be very hard to add.
The first project that comes to my mind is a CNC machine... two of these boards would make a fairly cheap CNC controller compared to most you can find. Add the fact that you can find steppers in most old printers and you have a fairly cheap CNC!
However, it's a dandy replacement for the driver board in a laser cutter. The pen-up/pen-down signal turns the laser on and off and the two axes control X and Y. This lets you upgrade a DOS-only laser cutter that needs a parallel port to a USB-controlled laser cutter that can run on any of several different operating systems. I've done this, it works.
Hey, MadBodger... Have you pursued this laser cutter idea? Any pointers of similar projects? :)
THIS has several immediate uses in my robotic lab! Deliciously useful. Now, where did I put those steppers?
I will now aspire to use the words "Deliciously useful" at least once a day, erryday.