- Home
- Product Categories
- Development Tools
- Breadboard Arduino Compatible Parts Kit (Old-School)

Breadboard Arduino Compatible Parts Kit (Old-School)
Replacement:DEV-10786. The new version comes preloaded with the Optiboot bootlader. This page is for reference only.
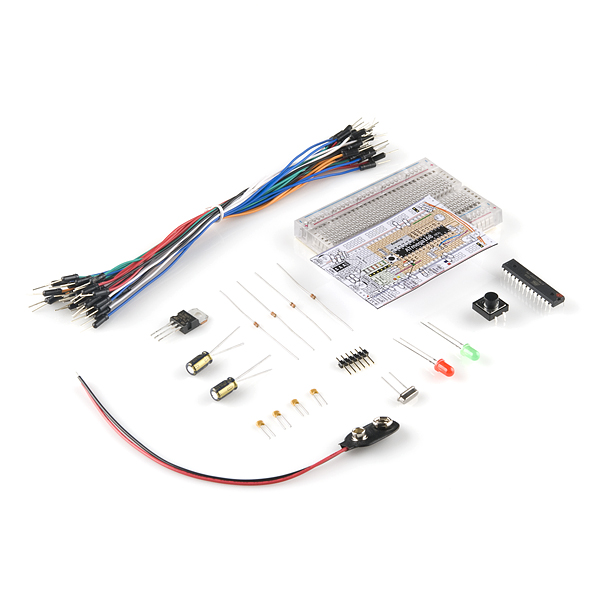
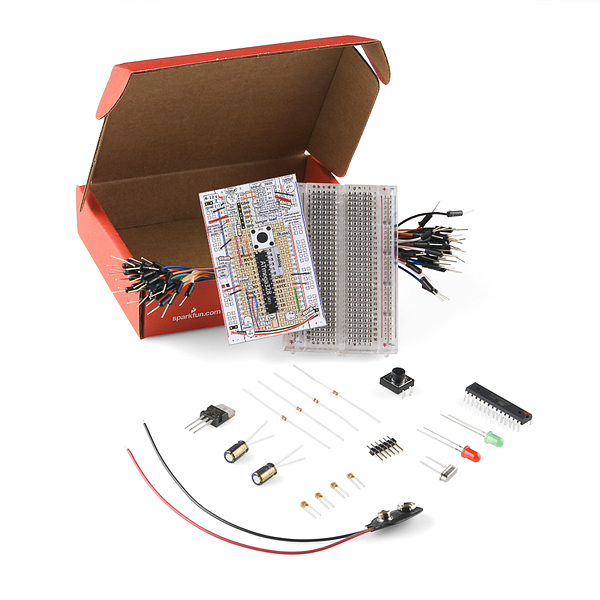
The Breadboard Arduino Compatible Parts Kit allows you to assemble your very own Arduino on a breadboard. If you've ever wanted to make an Arduino board from scratch or just understand how it all works, this kit is a good start.
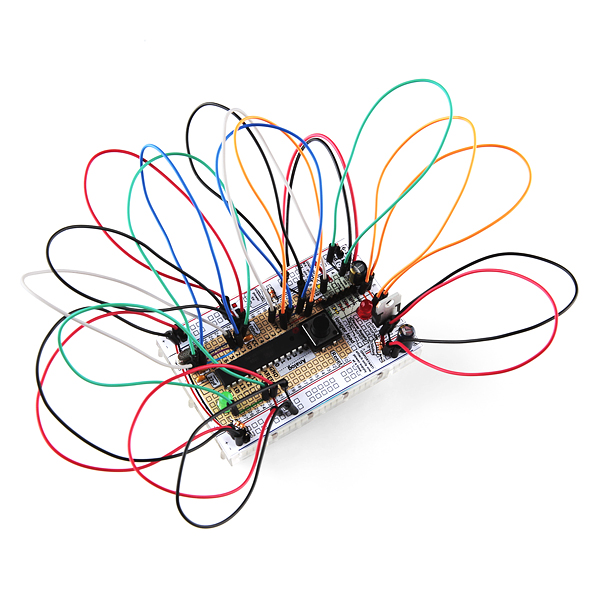
We've put together all the parts you will need including an ATmega328 preloaded with an Arduino bootloader. The breadboard overlay makes it easy to hook everything up correctly. Once you are finished, you will have a fully functioning Arduino on a breadboard.
An instruction booklet is included. Previous experience with a breadboard and electronics is recommended but not absolutely necessary.
**Note: **This is the old-school version of this kit which comes with the Duemilanove bootloader installed instead of the newer Optiboot version. We have a handful of these left in stock so we're selling them for a limited time at a reduced price. Get 'em while we've got 'em!
Note: You will need an FTDI basic for loading code and communicating with the Arduino. Check the related products down below.
- Assembly guide
- Clear breadboard
- Jumper wires
- Breadboard overlay
- ATmega328 with Arduino bootloader
- All other components necessary to get up and running
- Quickstart Guide
- Assembly Guide (Print Version)
- Assembly Guide (Web Version)
- Overlay (Print Version)
- Overlay (Web Version)
Comments
Looking for answers to technical questions?
We welcome your comments and suggestions below. However, if you are looking for solutions to technical questions please see our Technical Assistance page.
Customer Reviews
No reviews yet.
I'd love to see this kit minus the breadboard and jumper wires. Having all the parts together in a single kit would be nice for those who have already developed a project using the Arduino, but want to make it into something permanent on a perf board or custom PCB. Otherwise, I've got to browse around the site and add all the parts to a wishlist or shopping cart one at a time.
awsome find thanks to John from Sparkfun!
I bought this kit with the FTDI breakout board and like mark2006 I'm having troubles programming the chip from Arduino. What setting should I be using? (I also modified the circuit to connect the DTR from the breakout board to the reset of the MCU)
thanks
Dan
See the response I posted to mark above...
hello!
I am the owner of Breadboard Arduino Compatible Parts Kit with an FTDI basic. Which board have i to choose from the toolbox list?
My computer don't upload my breadboard Arduino.
Excuse me for my english!
mark
I used "Arduino D... or Nano with ...328" for the selected board. Makre sure you have the FTDI drivers installed and have selected the COM port under the Arduino tools menu, Serial Port submenu. Then, to actually get my BBAC and FTDI basic to program my chip, I had to program the arduino is "verbose" upload mode (hold down shift while hitting the programming button) AND I had to hit the reset button on the breadboard very quickly as soon as I saw text appear on the console, then I can upload.
Im still having trouble getting anything to upload to my board. I tried what you said here but with no go. Any suggestions?
Im getting
avrdude: stk500_getsync(): not in sync: resp=0x00
Is this a 5V or 3.3V Arduino setup?
is there a more detailed list of what is included?
Although not a direct analog to the Arduino itself, what about updating the kit in the future to use a ceramic oscillator instead of a crystal? In projects with students, I've found that it is possible to bang up a crystal enough that it goes wonky. (I don't even thing they were being that rude to the crystal, either.)<br />
<br />
Mind you, I'm not an electronics guru, so this might be a bad idea for some other reason. But it could eliminate a potential point of failure.
From past experience, ceramic resonators seem to be more fragile than crystals. Perhaps they're better now than they used to be, but I still don't like resonators.
Those jumper wires look different than the ones you sell, they seem to have formed plastic ends rather than crimp-ons.<br />
<br />
Are these a new/cheaper/soon available style?<br />
<br />
They are the ones we include with a lot of our kits. They are a bit cheaper than our normal ones we sell, but are just fine for the kits.
They look cheaper in a good way - I see packs of 70 with assorted lengths selling at other sites for 6 bucks.
Those crimped square ones are probably better, especially for pugging in side-by-side, but I would love to see some cheaper assortments of these kind of cables.
Man, this thing is the coolest.
Is there a link to a soft copy of the assembly guide and breadboard overlay?
Yes, there is. I just don't know where it is right now :-) I'll track down the PDF's and post them later today.
This is cool, but it would be nice if it came with shorter jumper wires (or wires cut to fit).<br />
<br />
Also, there are alternatives to the FTDI cable, if you have an arduino, you can use it's serial, or you can make a serial to TTL converter with a max232 chip.
Yep, using the Arduino is talked about at the end of the manual. Of course for beginners, the FTDI is the easiest. I'll add the MAX232 to the related items, that would work as well, although most people don't have a serial port anymore.
this is why i love sparkfun.... always assemles the kits that id like to have :) :)