- Home
- Product Categories
- LilyPad
- LilyPad LED Micro - Yellow (5pcs)

LilyPad LED Micro - Yellow (5pcs)
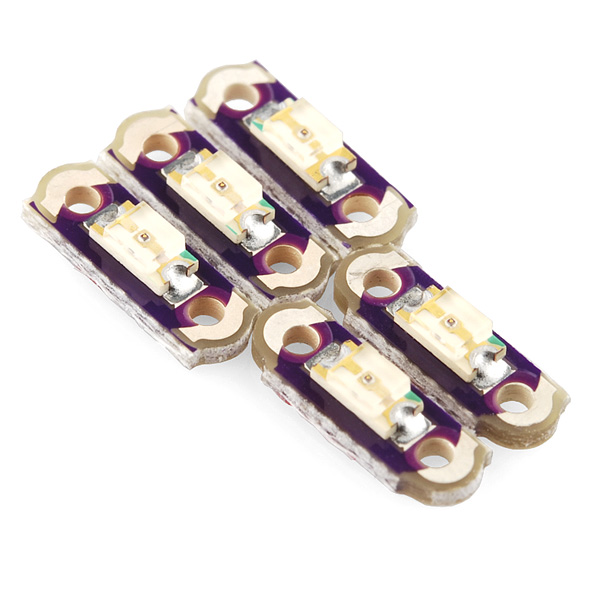
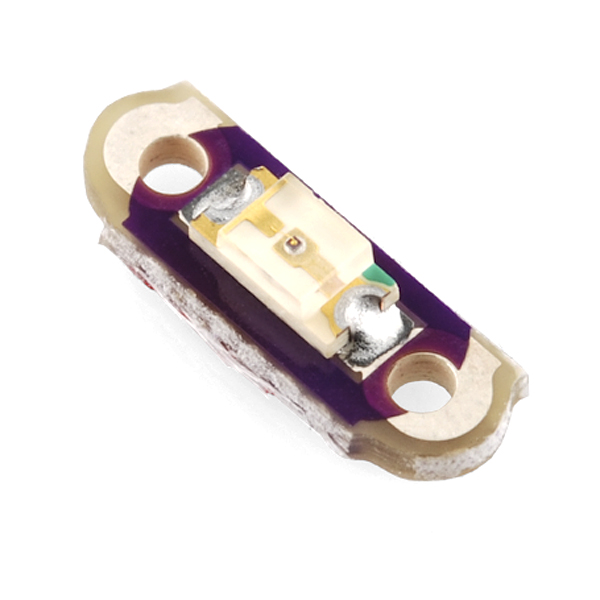
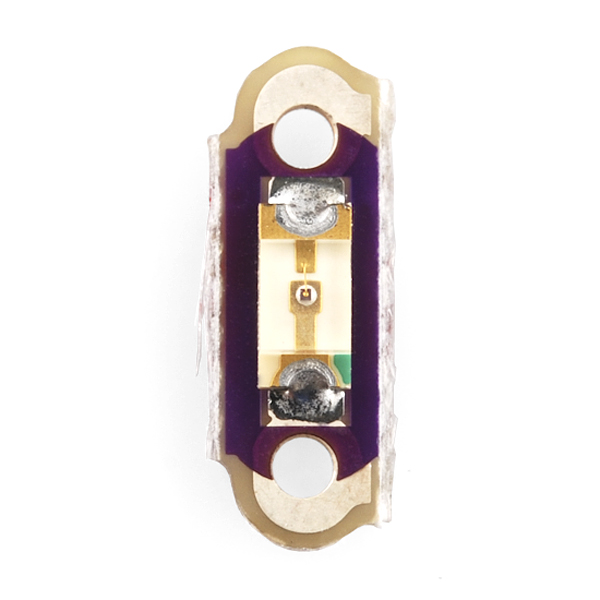
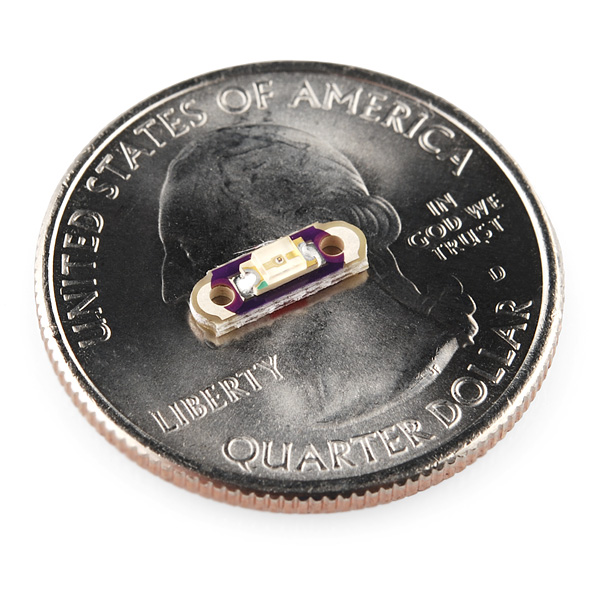
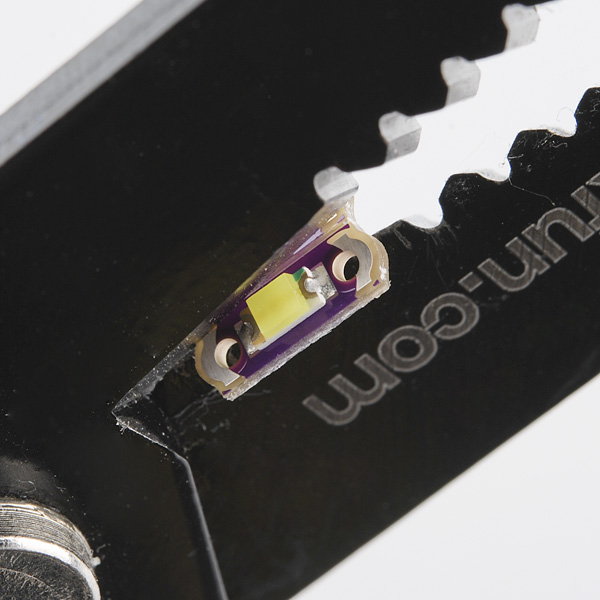
Need a smaller way to add some 'twinkle' to your LilyPad project? Then you need some LilyPad Micros! A LilyPad Micro is like a smaller version of the LilyPad LED board. By eliminating the resistor and changing the orientation of the surface mount LED we've shrunk the board down which looks great in elegant designs or on sheer fabrics where you don't need the extra weight or exposed board space. It's really the closest you can come to sewing a point of light directly to your project.
**Note: **Because the board don't include a current-limiting resistor, it is possible to over-power them and possibly burn them up. The high resistance of conductive thread can help protect the Micros from high current, so long stitches can be used with most power sources to keep the power levels 'Micro-friendly'. If you aren't sure where to start with resistance and current, using these in conjunction with a LilyPad Simple or Main Board is a great place to start, because they both have built-in current limiting and can't burn up your Micros.
Note: These are sold in strips of five boards which can be snapped apart with wire cutters, flush cutters or scissors. Some, however, may come as loose pieces that are already snapped apart.
Note: A portion of this sale is given back to Dr. Leah Buechley for continued development and education of e-textiles.
LilyPad LED Micro - Yellow (5pcs) Product Help and Resources
Origami Paper Circuits
May 26, 2015
A quick tutorial to get you started in the world of light up origami flowers.
Core Skill: DIY
Whether it's for assembling a kit, hacking an enclosure, or creating your own parts; the DIY skill is all about knowing how to use tools and the techniques associated with them.
Skill Level: Noob - Basic assembly is required. You may need to provide your own basic tools like a screwdriver, hammer or scissors. Power tools or custom parts are not required. Instructions will be included and easy to follow. Sewing may be required, but only with included patterns.
See all skill levels
Core Skill: Electrical Prototyping
If it requires power, you need to know how much, what all the pins do, and how to hook it up. You may need to reference datasheets, schematics, and know the ins and outs of electronics.
Skill Level: Rookie - You may be required to know a bit more about the component, such as orientation, or how to hook it up, in addition to power requirements. You will need to understand polarized components.
See all skill levels
Comments
Looking for answers to technical questions?
We welcome your comments and suggestions below. However, if you are looking for solutions to technical questions please see our Technical Assistance page.
Customer Reviews
No reviews yet.
I'm new to electronics, but if I read the specs correctly, each LED draws 20mA, right? What I want to know is how many of these LEDs I could power properly from one digital I/O pin on a Lilypad Main. My goal is to have 36 LEDs total, connected in groups of 3's per I/O pin.
If you're new to electronics, my advice is to use our Lilypad LEDs that have built-in resistors. The reason is that you can just power them up without having to worry about adding your own resistors (which are necessary to keep from burning out the LEDs).
The linked LEDs above draw 10-15mA each, so you can indeed put three of them in parallel on an I/O pin and still be below the 40mA/pin limit. (You can add more but they will start running dimmer). One thing to watch out for is that the total current through the processor is limited to 200mA, so for 36 LEDs you'll be pushing the limits. I'd give it a shot though, they may run slightly dim but it should work. Have fun!
Thanks! There is verbiage in the description of the micro LEDs that lead me to believe there is some setup on the Lilypad Main that would prevent burning out the micros, but maybe that doesn't apply to multiple LEDs / pin.
Hmm. Well my plan is to have a chaser pattern run through the I/O pins in sequence (and thus each 'column' simultaneously) such that at any given moment, the most amt of LEDs that'd be lit would be 12 (4 per column). That should keep me below the processor current limit too.
In any case, I'll go with the LEDs that you linked. Thanks again!
You're right about the verbiage, and sorry for the mixed message, which deserves a little more explanation. The product description is correct in that you can drive LEDs without additional resistors under certain circumstances. Since those circumstances are kind of an advanced topic, including factors like the Voltage you're running, the specific type of LED, the length of the stitching (which is itself a kind of resistor) and possibly running the LEDs beyond spec, I didn't want you to have to deal with that (and burned-out LEDs if you get it wrong) when the other product is so much more straightforward. Once you get a bit more experience, you can use these resistor-less LEDs to squeeze a bit more performance out of your system, but for now I'd go with the easy solution. Best of luck on your project!