- Home
- Product Categories
- Kits
- SparkFun XBee 3 Wireless Kit

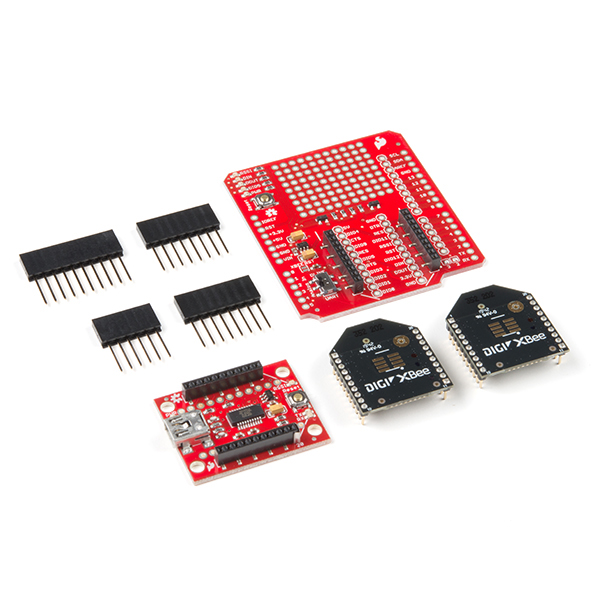
SparkFun XBee 3 Wireless Kit
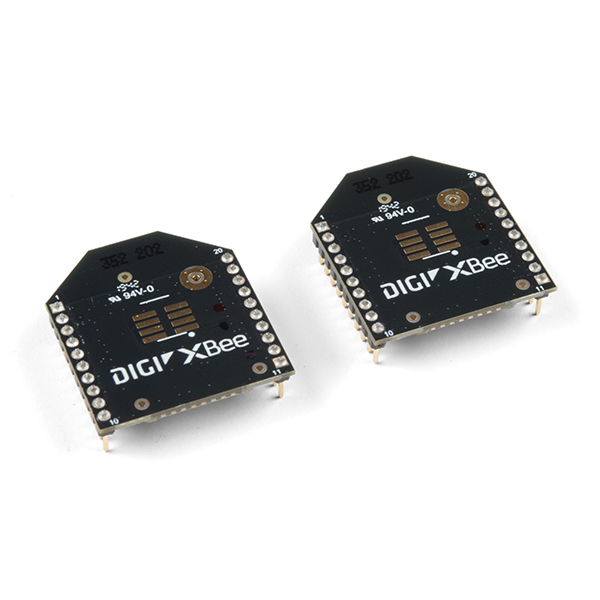
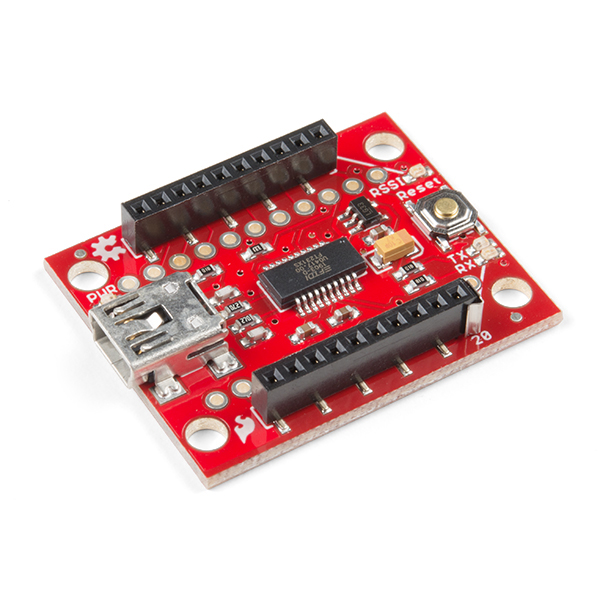
This is the SparkFun XBee 3 Wireless Kit, the perfect box full of goodies to get you started using XBees. Inside this kit you will find two XBee 3 Modules, one XBee Explorer, one Xbee Shield and a set of Arduino R3 headers to solder onto the shield. Our entire goal for the XBee Kit was to make wireless communication simple. Connect one XBee to the shield and your Arduino, connect the other XBee to the Explorer board and your computer, and you'll be able to seamlessly pass serial data to and from your Arduino wirelessly! Using this connection, you can transmit remote sensor data, or send data from your computer to update a scoreboard, or drive a robot from your keyboard!
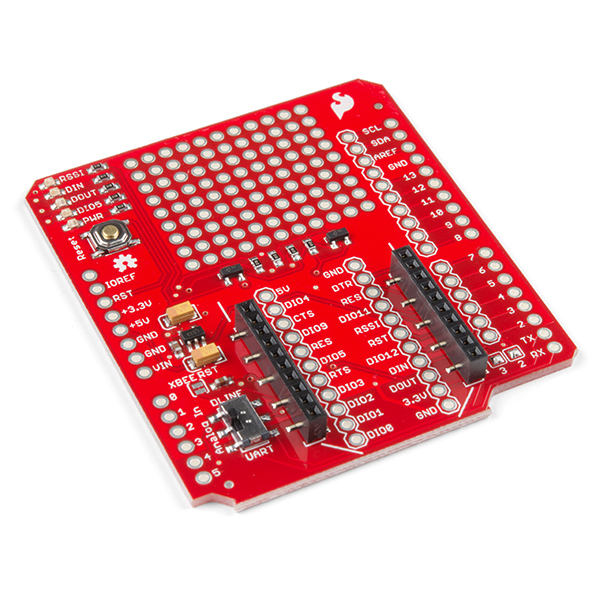
The XBee Shield mates directly with an Arduino Pro or USB board, and equips it with wireless communication capabilities using the popular XBee module. The serial pins (DIN and DOUT) of the XBee are connected through an SPDT switch, which allows you to select a connection to either the UART pins (D0, D1) or any digital pins on the Arduino (D2 and D3 default). Power is taken from the 5V pin of the Arduino and regulated on-board to 3.3VDC before being supplied to the XBee. The shield also takes care of level shifting on the DIN pin of the XBee.
The board also includes LEDs to indicate power and activity on DIN, DOUT, RSSI, and DIO5 pins of the XBee. The Arduino's reset button is brought out on the shield, and a 12x11 grid of 0.1" holes are available for prototyping. The boards in this kit cannot source the power required for the Cellular XBee line. It will only work with the 802.15.4 XBee variants like the ones included in this kit.
Note: If you are using these outside of the United States, please check with your local laws regarding radio communication.
- Kit allows for simple serial cable replacement
- Modules support data rates up to 115200bps
- DIN and DOUT pins of XBee can be connected to either the UART pins or any digital pin on the Arduino (D2 and D3 default)
- 3.3V power regulation and level shifting on-board
- 12 x 11 grid of 0.1" spaced prototyping holes
- Reset button
- Power, DIN, DOUT, RSSI and DIO5 indicator LEDs
- Arduino R3 Footprint
- Schematic
- Eagle Files
- Hookup Guide
- X-CTU Software
SparkFun XBee 3 Wireless Kit Product Help and Resources
XBee Shield Hookup Guide
June 5, 2014
How to get started with an XBee Shield and Explorer. Create a remote-control Arduino!
Exploring XBees and XCTU
March 12, 2015
How to set up an XBee using your computer, the X-CTU software, and an XBee Explorer interface board.
Core Skill: Soldering
This skill defines how difficult the soldering is on a particular product. It might be a couple simple solder joints, or require special reflow tools.
Skill Level: Noob - Some basic soldering is required, but it is limited to a just a few pins, basic through-hole soldering, and couple (if any) polarized components. A basic soldering iron is all you should need.
See all skill levels
Core Skill: Programming
If a board needs code or communicates somehow, you're going to need to know how to program or interface with it. The programming skill is all about communication and code.
Skill Level: Rookie - You will need a better fundamental understand of what code is, and how it works. You will be using beginner-level software and development tools like Arduino. You will be dealing directly with code, but numerous examples and libraries are available. Sensors or shields will communicate with serial or TTL.
See all skill levels
Core Skill: Electrical Prototyping
If it requires power, you need to know how much, what all the pins do, and how to hook it up. You may need to reference datasheets, schematics, and know the ins and outs of electronics.
Skill Level: Rookie - You may be required to know a bit more about the component, such as orientation, or how to hook it up, in addition to power requirements. You will need to understand polarized components.
See all skill levels
Comments
Looking for answers to technical questions?
We welcome your comments and suggestions below. However, if you are looking for solutions to technical questions please see our Technical Assistance page.
Customer Reviews
4.5 out of 5
Based on 2 ratings:
Wireless communication made easy
I had about XBee before and decided to use them to send data from a weather info data logger in my back yard to a PC in my house. I read the XBee tutorials and was up and running very quickly. I tested the range and it transmitted a strong signal from the furthest point in my backyard. I also like that the XBee only uses 2 GPIO pins on the XBee Shield which leaves plenty of access for sensors. The XBee works seamlessly with the Software Serial library making its use very easy. I really appreciated the tutuorial for the XBee and Xbee Shield. Very thorough and well written. I highly recommend Sparkfun.
I like it!
The kit is just what I wanted for my project and just what was described in the product info. It wasn't difficult to configure and convert my Arduino sketch from streaming serial over USB to XBee (thank goodness for search and replace!). Freeing the project up from the cable was an important step in developing my environment sensing and telemetry module.
My first ever Sparkfun purchase was a bunch of Xbee gear back in 2014. And I don't want to think how much I've spent here since on these little radios and breakouts.
But I just gotta share the XBee3 kit from Digi is really the way to go: https://www.sparkfun.com/products/15216
Would love to see a SFE board that uses the same connector as the Seed boards in the Digi kit. Also, the PyCharm Digi Micropython plugin doesn't seem to like the SiLabs CP210 USB UART you used on the Xbee3 Thing Plus.
I'm not sure if we'll adopt the "Grove" connector system, but we do offer a Qwiic to Grove adapter cable for I2C devices.
Oh yeah, I'm happy with Qwiic for sure. But I was actually talking about how Seeed implemented a connector so you could use a SMT Xbee3 module with it. I'm not sure what it's called though, but you can make it out in the images from their dev kit. Some sort of friction/spring connector, I suppose.
You guys used the SMT package on your Xbee3 Thing plus - my only point is it would be nice to be able to have a SFE Xbee3 board that supported removable SMT radios, instead of the TH 'bee' connectors - either as a dongle, or breakout board that would allow me to plug in whatever SMT Xbee3 I wanted to.
Haha... I actually started looking around for those after I saw them. If you know what they are called or find a supplier, let me know.
As a follow up, I talked with the engineer about the UART chip and he said to make sure you install the drivers manually, as described in the hookup guide. Don't rely on Windows to install them automatically, they will use an outdated driver version, which won't allow the XBee Thing Plus to be recognized (need version 10.1.3.2130 or newer). He also mentioned that you should make sure to Enable the API for MicroPython using XCTU, as described in the hookup guide. If you need more technical assistance, please use the link in the banner above to get started with posting a topic in our forums. Our technical support team will do their best to assist you.