- Home
- Product Categories
- Robotics Kits
- Actobotics Kit - Channel Slider Kit

Actobotics Kit - Channel Slider Kit
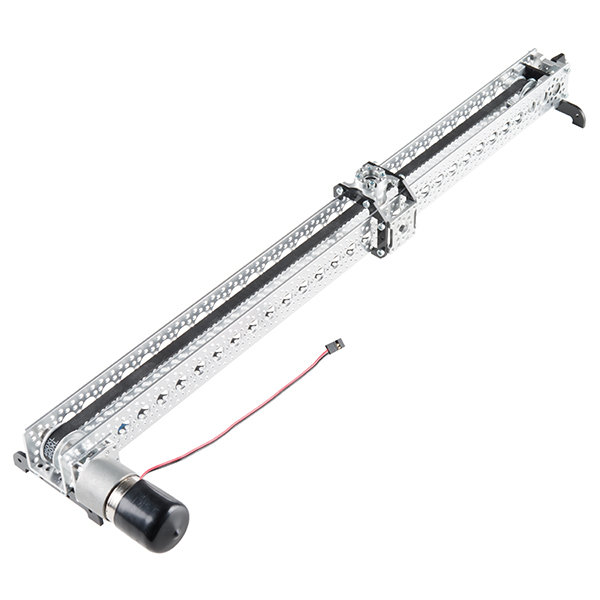
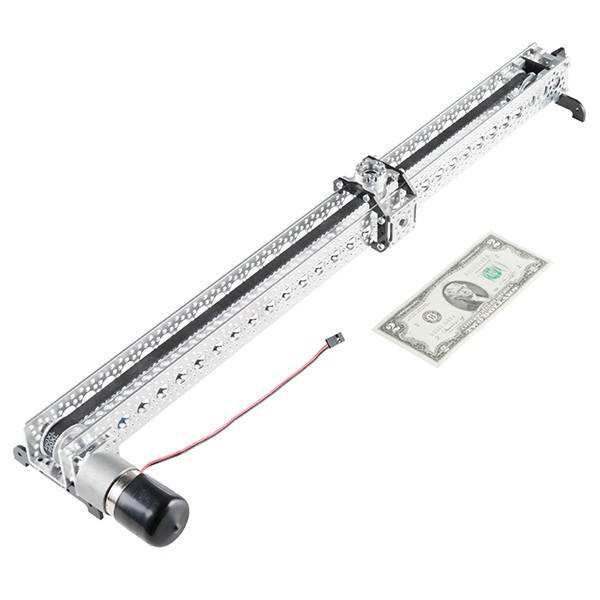
With this Channel Slider kit from Actobotics you will be able to put your videos in motion. This slider has an overall length of 24” with a usable 19” of slide travel. It fits nicely in a carry-on bag and is very portable for those who wish to take it along to capture their active lifestyles (overall weight of only 1.1 lbs without motor). The motor mount is compatible with most 3-12V standard gearmotor and 6-12V precision gearmotors. The vast motor options allow you to tailor the slider to fit your shooting style whether it’s for real-time shots or super slow time-lapse shots. The slider kit is constructed entirely of Actobotics components which allow you to expand it incredibly easily.
Actobotics is a robotics building system based around extruded aluminum channels, gears, precision shafts, and ball bearings. Thanks to the two standardized hole patterns, nearly all Actobotics components can be intuitively connected together. The wide range of components makes building complex electromechanical prototypes or finished projects a reality.
Note: This kit does NOT include a gearmotor or stepper motor, these will need to be purchased separately.
- Product Page (637108)
- Product Video
Actobotics Kit - Channel Slider Kit Product Help and Resources
Core Skill: Robotics
This skill concerns mechanical and robotics knowledge. You may need to know how mechanical parts interact, how motors work, or how to use motor drivers and controllers.
Skill Level: Rookie - You will be required to know some basics about motors, basic motor drivers and how simple robotic motion can be accomplished.
See all skill levels
Core Skill: DIY
Whether it's for assembling a kit, hacking an enclosure, or creating your own parts; the DIY skill is all about knowing how to use tools and the techniques associated with them.
Skill Level: Rookie - Basic hand tools are required and instructions will allow more freedom. You may need to make your own decisions on design. If sewing is required, it will be free-form.
See all skill levels
Comments
Looking for answers to technical questions?
We welcome your comments and suggestions below. However, if you are looking for solutions to technical questions please see our Technical Assistance page.
Customer Reviews
No reviews yet.
That's a pretty hefty price for a belt and a few pieces of aluminium. If SF would manage to get these prices down, we would be able to make really awesome things, and scale things up.
I would not consider this slider suitable for heavier DSLRs unless you're only using it as a starting point. It needs modification. As is, It will support point+shoot cameras, some lightweight mirrorless cameras with pancake lenses, a GoPro, a smartphone... but I wouldn't trust it with much else. Whether it merely moves the camera is not the concern... as a good gearmotor will definitely handle the load. It's the actual ruggedness of the slider itself that is the problem.
The first thing to do to make it heavier duty is to use the channel slider A. Then, install limit switches and diodes as necessary to prevent damage to your gearmotor when it hits the end. Next, I would use one of Actobotic's round base plates as a mounting point for the camera. And, if desired, put a ballhead on that.
I'd also consider mounting the motor so that it's in line with the channel, using bevel gears. With the tiny, flimsy plastic feet on this thing, a motor sticking out the side can easily cause it to tip over.
Then stick a few 1/4-20 camera/tripod mount "hubs" on the bottom of the channel for attachment to a tripod.
Regarding the little plastic feet it comes with... pretty useless. I'm going to have to replace them with something much better.
Lots of work to do on this thing to make it suitable for my DSLR. But IMO it is a decent starting point... that said, I think if I were doing this again, I'd go with one of the IGUS slider kits from Actobotics.
Could anyone show me how to wire up limit switches on each end to cut the power? Bonus bonus for some smart way to reverse direction....
The easy way to do this is to make it so that the limit switches, when pressed, cut off the flow of electricity to the motor. But, put diodes across each limit switch so that they will allow current to flow through them in a direction that allows the motor to reverse away from the limit switch.
But be sure the diodes are rated for a high enough currrent to handle the motor's draw, and that they will not break down with reverse polarity. Consider using Schottky diodes for a low forward voltage drop. I might recommend 1N5822 diodes.
The open-loop way of working this would require you to manually change direction when a limit is reached (presumably by flicking a switch/button on your controller). But a microcontroller should be able to sense that the current or voltage drop through the motor has suddenly changed, and automatically reverse. But that will require an additional sense circuit and some care taken to protect the analogue input on the microcontroller from high voltage, flyback, etc.
I can see same item in stock on servocity so guess you should have it soon as well?
If I preorder it now, when should I expect to get it? I live in California :) Thx in advance!
Can I put heavier stuff instead of the camera? ex 1kg, 2kg. And can I maintain consistent speed with this stepper motor with heavier weight?
I would assume so. a beefy DSLR weighs about that. It can easily move my camera, which comes in at around 2.5 pounds I think. as far as maintaining speed with a motor, you can just size the motor appropriately.
Awesome, thx!
Can you extend the track? i.e. if I had several 24" channel pieces, can the joining plates (and a much longer belt) can you make this longer?
Wonder how this would work with the Nema 17 as a 3D printer axis ? seems like you could use it to make a pretty big printing area.
I think so. Have a look at the Product Page, (637108).
Will this work in a vertical orientation?
The linked product page says "Use both vertically and horizontally!" How well this will work depends greatly on the weight of your camera (or whatever) and the torque of the motor you use: you need a motor powerful enough to raise the load against gravity. A small stepper and a heavy DSLR are going to be a bad combination!
I don't think the first concern is gear slippage, as the belt can be seen in the assembly instructions to be a toothed belt.
it takes a LOT to get belt slip from a timing belt. your stepper will lose steps or you will possibly stall your motor or strip a gear before the belt slips, if tensioned correctly.