- Home
- Product Categories
- Infrared
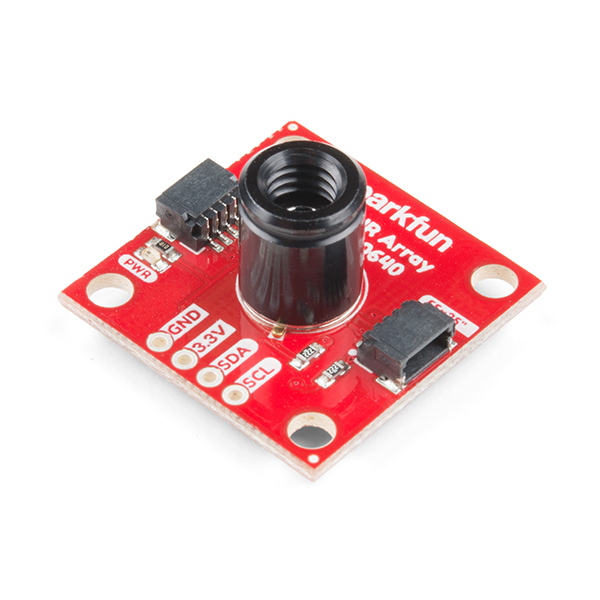
- SparkFun IR Array Breakout - 55 Degree FOV, MLX90640 (Qwiic)

SparkFun IR Array Breakout - 55 Degree FOV, MLX90640 (Qwiic)
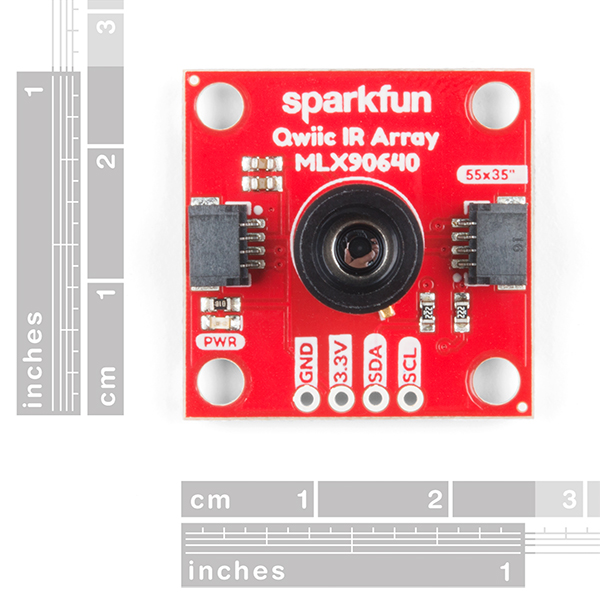
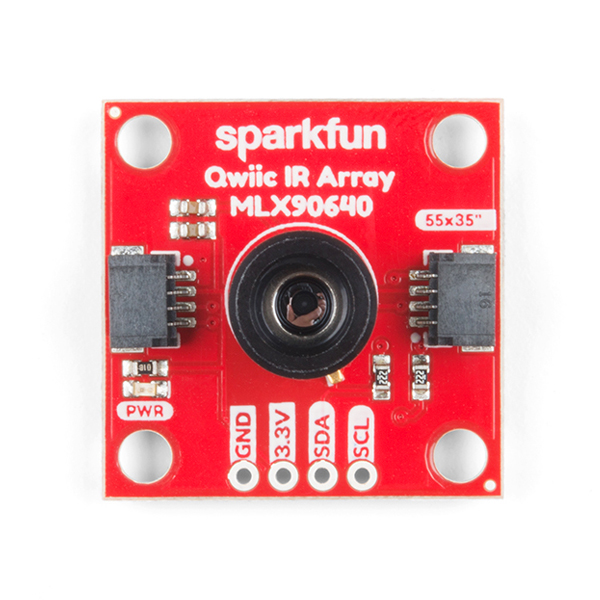
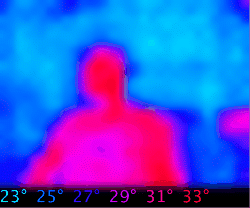
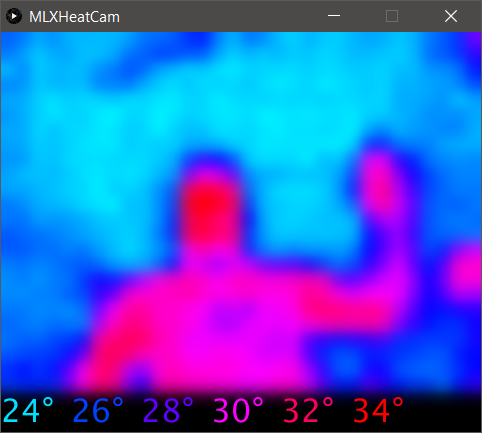
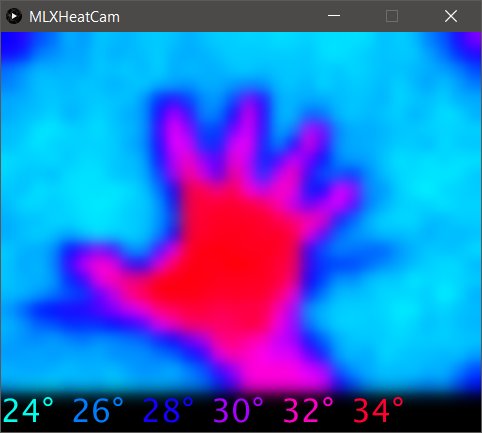
It's time to say hip hip array for this IR Breakout! The MLX90640 SparkFun IR Array Breakout is equipped with a 32x24 array of thermopile sensors creating, in essence, a low resolution thermal imaging camera. With this breakout you can detect surface temperatures from many feet away with an accuracy of ±1.5°C (best case). To make it even easier to get your infrared image, all communication is enacted exclusively via I2C, utilizing our handy Qwiic system. However, we still have broken out 0.1"-spaced pins in case you prefer to use a breadboard.
This specific IR Array Breakout features a 55°x35° field of view with a temperature measurement range of -40°C-300°C. The MLX90640 IR Array has pull up resistors attached to the I2C bus; both can be removed by cutting the traces on the corresponding jumpers on the back of the board. Please be aware that the MLX90640 requires complex calculations by the host platform so a regular Arduino Uno (or equivalent) doesn't have enough RAM or flash to complete the complex computations required to turn the raw pixel data into temperature data. You will need a microcontroller with 20,000 bytes or more of RAM. To achieve this, we recommend a Teensy 3.1 or above.
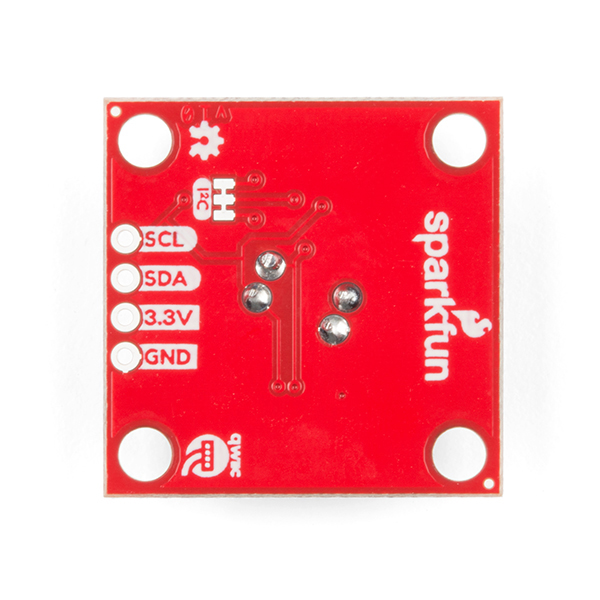
The SparkFun Qwiic connect system is an ecosystem of I2C sensors, actuators, shields and cables that make prototyping faster and less prone to error. All Qwiic-enabled boards use a common 1mm pitch, 4-pin JST connector. This reduces the amount of required PCB space, and polarized connections mean you can’t hook it up wrong.
- Operating Voltage: 3V-3.6V
- Current Consumption: ~18mA
- Field of View: 55°x35°
- Measurement Range: -40°C-300°C
- Resolution: ±1.5°C
- Refresh Rate: 0.5Hz-64Hz
- I2C Address: 0x33
- 2x Qwiic Connection Ports
- Schematic
- Eagle Files
- Hookup Guide
- Datasheet (MLX90640)
- GitHub
SparkFun IR Array Breakout - 55 Degree FOV, MLX90640 (Qwiic) Product Help and Resources
Qwiic IR Array (MLX90640) Hookup Guide
September 20, 2018
The Melexis MLX90640 contains a 32x24 array of thermopile sensors creating, in essence, a low resolution thermal imaging camera. In this guide, we’ll go over how to connect your Qwiic Infrared Array with MLX90640 and get it communicating with Processing to produce a nice thermal image.
Core Skill: Programming
If a board needs code or communicates somehow, you're going to need to know how to program or interface with it. The programming skill is all about communication and code.
Skill Level: Competent - The toolchain for programming is a bit more complex and will examples may not be explicitly provided for you. You will be required to have a fundamental knowledge of programming and be required to provide your own code. You may need to modify existing libraries or code to work with your specific hardware. Sensor and hardware interfaces will be SPI or I2C.
See all skill levels
Core Skill: Electrical Prototyping
If it requires power, you need to know how much, what all the pins do, and how to hook it up. You may need to reference datasheets, schematics, and know the ins and outs of electronics.
Skill Level: Competent - You will be required to reference a datasheet or schematic to know how to use a component. Your knowledge of a datasheet will only require basic features like power requirements, pinouts, or communications type. Also, you may need a power supply that?s greater than 12V or more than 1A worth of current.
See all skill levels
Comments
Looking for answers to technical questions?
We welcome your comments and suggestions below. However, if you are looking for solutions to technical questions please see our Technical Assistance page.
Customer Reviews
5 out of 5
Based on 4 ratings:
3 of 3 found this helpful:
Awesome IR thermal imaging for the price!
At 32x24 resolution, this is far from being the high-res thermal imaging you see in the movies, or even in the most budget FLIR devices, but this is also a heck of a lot less expensive than any of that and it works well for what it is. It's a great intro into thermal imaging, and can be useful for many sensing projects. I got it up and running easily with a Teensy 4.0.
A few key points to mentions:
1) Especially considering the low resolution, this 55 degree version is going to provide more detail and be better for thermal photography than the 110 degree version. The 110 version might be better for robotic vision and applications where you need a wider view.
2) This samples in a checkerboard pattern by default, and it effectively takes two samples to get one complete image. You'll notice artifacts of that upon fast movement of the sensor or the object in its view, which can be improved by setting a higher sampling rate (some rates may also need a higher I2C speed)
3) There can be a bit of noise in the image, which is worse at higher sampling rates, but objects significantly warmer or colder than the rest of the scene are still pretty distinct.
4) Take a look at the "Iron" and "Rainbow" palettes used by FLIR and their competitors... While other palettes may be better in specific circumstances, these are the best options I've found for distinguishing objects across many different scenes.
Here's some palette code that I quickly threw together for an Android app, taking the pixel temperature input as a 0.0 to 1.0 level:
static int levelToRgb(float level, int palette)
{
    // Hacked up HSV to RGB algo to create our thermal vision palette

    float hueStart, hueRange;
    float blendToWhiteRange;
    float baseIntensity;
    float baseSaturation;

    switch(palette)
    {
        case sThermalPaletteIron:
            // Similar to FLIR's "Iron" palette: dark blue/purple to bright yellow to white
            hueStart = 225.0f;
            hueRange = 180.0f;
            blendToWhiteRange = 0.35f;
            baseIntensity = 0.00f;
            baseSaturation = 1.0f;
            break;

        default:
        case sThermalPaletteRainbow:
            // Similar to FLIR's "Rainbow" palette: dark blue/purple to bright red to white
            hueStart = -75.0f;
            hueRange = -285.0f;
            blendToWhiteRange = 0.40f;
            baseIntensity = -0.10f;
            baseSaturation = 1.0f;
            break;

        case sThermalPaletteGreen:
            // Dark green to white
            hueStart = 150.0f;
            hueRange = 0.0f;
            blendToWhiteRange = 0.20f;
            baseIntensity = -0.20f;
            baseSaturation = 1.0f;
            break;

        case sThermalPaletteCyan:
            // Blue to bright cyan
            hueStart = 255.0f;
            hueRange = -90.0f;
            blendToWhiteRange = 0.30f;
            baseIntensity = 0.00f;
            baseSaturation = 1.0f;
            break;

        case sThermalPaletteWhite:
            // Grayscale; white hot
            hueStart = 0.0f;
            hueRange = 0.0f;
            blendToWhiteRange = 0.05f;
            baseIntensity = -0.10f;
            baseSaturation = 0.0f;
            break;

        case sThermalPaletteBlack:
        {
            // Inverted Grayscale; black hot
            int grayLevel = 0xFF - packU8(level * 255.0f);
            return 0xFF000000 | (grayLevel << 16) | (grayLevel << 8) | grayLevel;
        }
    }

    float blendToWhiteLevelStart = 1.0f - blendToWhiteRange;

    float hueLevel = (level / blendToWhiteLevelStart);
    if(hueLevel > 1.0f)
        hueLevel = 1.0f;

    float hue = hueStart + (hueLevel * hueRange);

    while(hue >= 360.0f)
        hue -= 360.0f;

    while(hue < 0.0f)
        hue += 360.0f;

    // Make the hottest temps white by reducing saturation
    float saturation = baseSaturation;
    if(level > blendToWhiteLevelStart)
    {
        saturation -= ((level - blendToWhiteLevelStart) / blendToWhiteRange);
        if(saturation < 0.0f)
            saturation = 0.0f;
    }

    float intensity = baseIntensity + (hueLevel * (1.0f - baseIntensity));


    float hh = hue / 60.0f;
    int i = (int)hh;
    float ff = hh - i;
    float p = intensity * (1.0f - saturation);
    float q = intensity * (1.0f - (saturation * ff));
    float t = intensity * (1.0f - (saturation * (1.0f - ff)));

    float r, g, b;

    switch(i)
    {
        case 0:
            r = intensity;
            g = t;
            b = p;
            break;

        case 1:
            r = q;
            g = intensity;
            b = p;
            break;

        case 2:
            r = p;
            g = intensity;
            b = t;
            break;

        case 3:
            r = p;
            g = q;
            b = intensity;
            break;

        case 4:
            r = t;
            g = p;
            b = intensity;
            break;

        case 5:
        default:
            r = intensity;
            g = p;
            b = q;
            break;
    }

    return 0xFF000000 | (packU8(r * 255.0f) << 16) | (packU8(g * 255.0f) << 8) | packU8(b * 255.0f);
}

static int packU8(float value)
{
    int valueI = (int)Math.round(value);
    if(valueI > 0xFF)
        valueI = 0xFF;
    else if(valueI < 0)
        valueI = 0;

    return valueI;
}
Great for the cost
Very simple to setup with the examples provided. Will be able to test my concept using these examples
example code is the real MVP
Driver code and examples provided by both Sparkfun and Melexis is super handy. I was able to port the code to a TI Tiva LaunchPad without too much pain. Really fun to play with once it's working.
Works great for me!
Had many of these and all work flawlessly.
I bought one of these when they (finally!) came back in to stock at Digikey. The Sparkfun unit works great with the Adafruit library. [Adafruit_MLX90640.h]
For some strange reason, the Sparkfun breakout has the sensor mounted at an angle, so that all the images are rotated by about 30 degrees. You could probably fix it in software, but I have found it easier to just mount the breakout board "rotated" relative to the rest of the circuit and enclosure. Sparkfun, is there a reason for this rotation? I see it on the old SparkX version too. There's even a reference tab on the MLX90640 sensor so you know where the "bottom" of the sensor is... am I missing something?
Other than that, nice sensor at it does the job. I've cobbled together some Arduino code from various online sources that works on ARM Cortex M4 boards and displays on a 160*128 LCD driven by the ST7735 chipset.
When will it be back in stock?
As mentioned in the linked webpage on COVID-19 (from the banner at the top of our webpage), we are being affected by supply and production limitations. We are doing our best to get products back in stock as quickly as possible. Unfortunately, at this time, there is not an ETA for this part. Thank you for your understanding.
Is it possible to query only a few of the pixels, thus increasing the refresh rate to 64 Hz on an ATMega 328p?
i cannot read this sensor on i2c scanner. not getting any data
Same issue with Teensy 3.6
Hi there, it sounds like you might be looking for technical assistance. If that is the case, please use the link in the banner above, to get started with posting a topic in our forums. Our technical support team will do their best to assist you.
Is this breakout functionally any different from SPX-14769?