- Home
- Product Categories
- Weather
- Weather Meter Kit

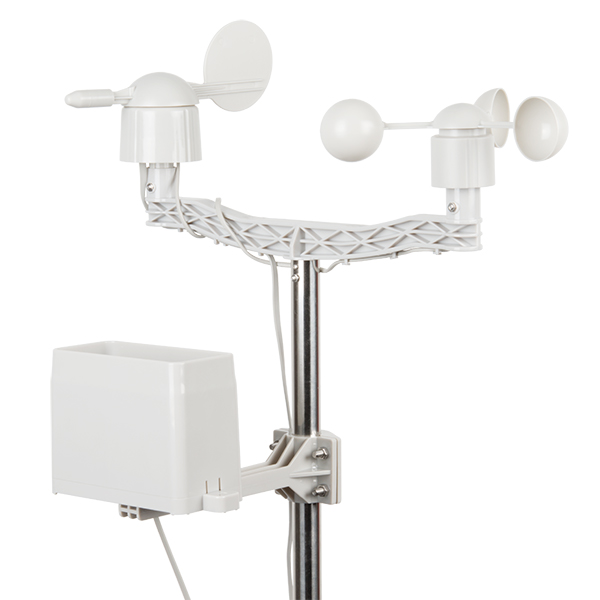
Whether you're an agriculturalist, a professional meteorologist or a weather hobbyist, building your own weather station can be a really rewarding project. When you're measuring weather, however, you need some pretty specialized sensors. This kit represents the three core components of weather measurement: wind speed, wind direction and rainfall.
None of the sensors in this kit contain active electronics, instead they use sealed magnetic reed switches and magnets so you'll need to source a voltage to take any measurements. The positive side of this is that the sensors are easy to interpret:
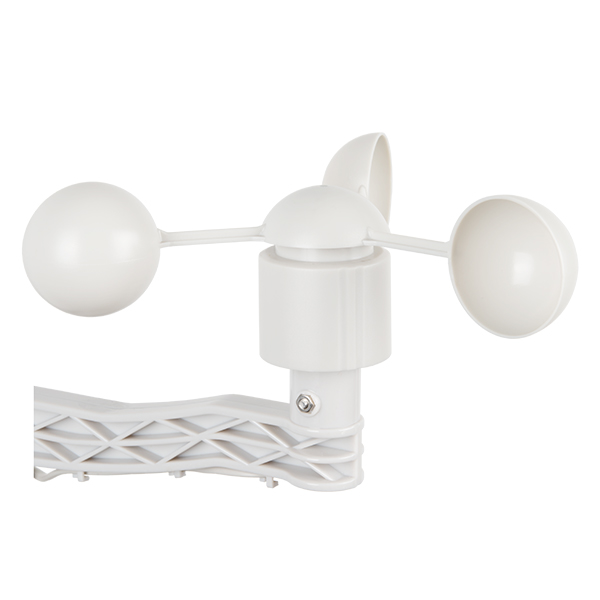
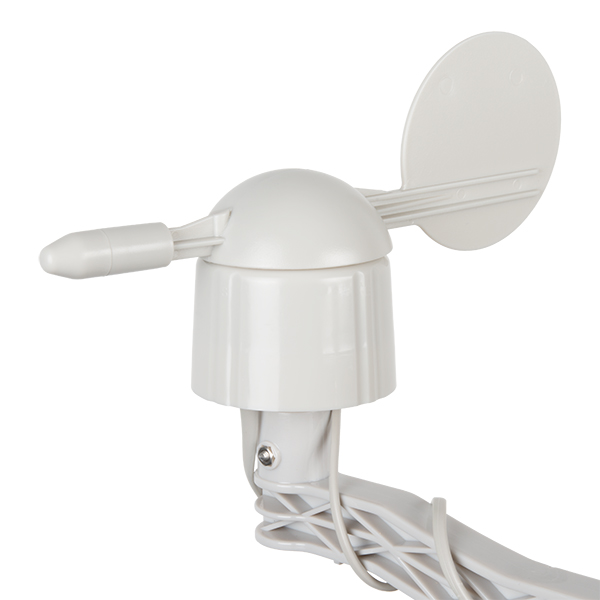
The rain gauge is a self-emptying bucket-type rain gauge which activates a momentary button closure for each 0.011" of rain that are collected. The anemometer (wind speed meter) encodes the wind speed by simply closing a switch which each rotation. A wind speed of 1.492 MPH produces a switch closure once per second. Finally, the wind vane reports wind direction as a voltage which is produced by the combination of resistors inside the sensor. The vane’s magnet could potentially close two switches at once, allowing up to 16 different positions to be indicated, but we have found that 8 positions are more realistic.
All of the included sensors are supplied with RJ11 terminated cables, for information on the pin-out of the cable, check out the datasheet.
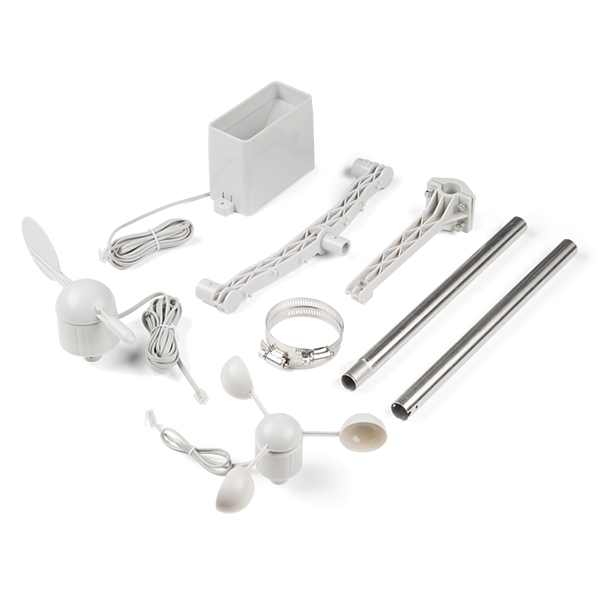
Note: Some basic assembly is required.
- Wind Vane
- Cup Anemometer
- Tipping Bucket Rain Gauge
- Two-Part Mounting Mast
- Rain Gauge Mounting Arm
- Wind Meter Mounting Bar
- 2 x Mounting Clamps
- 4 x Zip Ties
Weather Meter Kit Product Help and Resources
Wireless Remote Weather Station with micro:bit
May 11, 2020
Monitor the weather without being exposed to it through wireless communication between two micro:bits using the radio blocks! This is useful if your weather station is installed in a location that is difficult to retrieve data from the OpenLog. We will also explore a few different ways to send and receive data.
Core Skill: DIY
Whether it's for assembling a kit, hacking an enclosure, or creating your own parts; the DIY skill is all about knowing how to use tools and the techniques associated with them.
Skill Level: Noob - Basic assembly is required. You may need to provide your own basic tools like a screwdriver, hammer or scissors. Power tools or custom parts are not required. Instructions will be included and easy to follow. Sewing may be required, but only with included patterns.
See all skill levels
Core Skill: Electrical Prototyping
If it requires power, you need to know how much, what all the pins do, and how to hook it up. You may need to reference datasheets, schematics, and know the ins and outs of electronics.
Skill Level: Noob - You don't need to reference a datasheet, but you will need to know basic power requirements.
See all skill levels
Comments
Looking for answers to technical questions?
We welcome your comments and suggestions below. However, if you are looking for solutions to technical questions please see our Technical Assistance page.
Customer Reviews
4.3 out of 5
Based on 11 ratings:
5 of 5 found this helpful:
Very good for the price
The instructions provide approximate values for a voltage divider based on a 5V Arduino. These days there are probably more 3.3V devices out there and the values are different. I found it was better to simply work off of the analog values after sampling at every possible direction (N, NNW, NW, WNW, W........). Takes a bit of time, but then a simple table allows a more reliable reading. I've included mine (using a 10k resistor. The value read must be LESS THAN the table value to represent the direction. Hope this is useful to someone.
struct wind_Dir_Def
{
char dir_ASC[4];
uint16_t dir_Val;
uint16_t dir_Cnt;
};
// Uses a 10K resistor for VD
wind_Dir_Def windDirTable3V[16] = { {"ESE",84,0},
{"ENE",92,0},
{"E",126,0},
{"SSE",185,0},
{"SE",245,0},
{"SSW",287,0},
{"S",408,0},
{"NNE",463,0},
{"NE",599,0},
{"WSW",629,0},
{"SW",702,0},
{"NNW",784,0},
{"N",824,0},
{"WNW",883,0},
{"NW",939,0},
{"W",1024,0}};
// Check all the possible values to determine the closest to what we have
for(int ix = 0; ix < numDirs; ix++)
{
if(rawWindDir < windDirTable3V[ix].dir_Val)
{
// We tally up the number of hits for a particular direction and then use the one with the most for reporting
windDirTable3V[ix].dir_Cnt++;
prevWindIdx = ix;
break;
}
}
1 of 1 found this helpful:
Easy addition to my WeatherShield
We live on a windy coastal headland, and I was pleased to see good data flowing as soon as I plugged the unit into the WeatherShield. The anemometer and wind direction devices look robust -- they will be tested! I replaced half the metal mast, as it wouldn't survive the salty air. Having minute-to-minute wind speed and direction is a treat! No rain here yet, and some spurious hundredths associated with wind gusts are registering, but the wiring for the rain gauge is simple, and I can sub in a different unit if I can't get this one stabilized. I am running this unit in parallel with a reliable older unit (that gives instantaneous data but doesn't play nicely with my RPi system), and the new data is acceptably close. Good unit; easy assembly and installation.
1 of 1 found this helpful:
Weather station works well
The weather station is connected to the ublox cellular Expresslink and an RP2040 for awesome visualization in aws grafana.
1 of 3 found this helpful:
It's a start
First, this is missing temperature, humidity, and barometric pressure sensors. If it had these sensors it would be significantly more complete. Next, there is a lack of interface units to connect it cleanly to your processing unit. I want to use it with a Raspberry Pi Zero, 3, or 4, but there does not seem to be a HAT for it yet/anymore. Once I built the required adapters to hook stuff up, I found that the wind vane switches do not seem evenly spaced and some of the 16 directions it can detect are larger than others, no matter how slowly I turned I could only barely get some directions to show up. Overall I think it's a good start, but be prepared spend a fair amount of effort to get it working.
Still not in production
I am still waiting for an ADC chip to be used with the wind direction element.
My order
We receive the order in perfect condition and in a fairly good time.
Have a question about the screws needed for assmbly
Can anyone tell me the size and length of the screws needed to assemble this kit? I don't have any that small, so I'll need to run down to Ace Hdwr or Lowe's for some small machine screws. I'm not looking at it now, but I got couple pieces out of the box when it arrived to see how they looked, as I recall they looked like #4 or possibly #6 machine screws. Can anyone advise? Thanks in advance! BTW, I'll be using an ESP32 Modbus board (whatever it's called) as the processor on mine, and I'm also using the weather breakout board that has temp/humidity/pressure sensor, a lightning detector, and UV detector for a full weather station.. I'll use either wifi or BT to get the data into the house & onto my LAN. Not sure what platform I'll use for visualization of the data, and historical aspects. So far, it all looks good! My only concern is regarding how long it will last. Also, it would be really great if Sparkfun would develop a wind sensor using ultrasonic tech. I was looking for one but couldn't find one at a reasonable price. I'm sure Sparkfun could do it! Hint, hint! Hear the call, Sparkfun?!
Send us an Email and we can look into the screw sizes. Also, thanks for the feedback on this product: Support@SparkFun.com
Yes its good, but
Yes its really good, but I think to make it log and a few other AWS things you will need a Arduino Mega as the code and libs max out the Uno.
Super easy to assemble and use
The weather meter kit was super easy to assemble - thank you for detailed instructions, and very well thought out assembly technique (unlike IKEA stuff). The connections are dead-easy to use. Used the sample sketch to check everything out; next step will be to prop it outside (and all the other fun stuff that will entail).
Good sensors, Good value
I have 3 stations based on these sensors. I just replaced the oldest sensors at 6 years. I bumped a cup and it snapped off. The plastic of the cup arm had mostly deteriorated and was very brittle. At around $14 per year for sensors - Good Value
The vane is dependent on the length of wire between the sensor and the micro. Too long - won't work. Too short - only 4 directions solid.
The light cups are very sensitive to light wind and velocity changes. I have recorded 86 mph wind without issue. The cup arms are the limiting factor for age. A little more material would push service life a lot.
The rain bucket works well. It can give a false toggle from high gusty wind.
Do you have anything that can be used in conjunction with the new qwiic phat for raspberry pi? I plan to use the sensors that come with that for a little weather station and seeing this, it would a nice addition but as far I can tell I’d have to buy a whole other device to run this.
Guys, what about to make a HAT for Raspberry Pi? Arduino Uno not anymore interesting, MicroBit does not fit for bigger projects.. You have a lot of great products which could fit to Pi.