- Home
- Luxeon Rebel High Power LED Breakout - Warm White

Luxeon Rebel High Power LED Breakout - Warm White
Replacement: None. We are no longer carrying this LED breakout in our catalog. This page is for reference only.
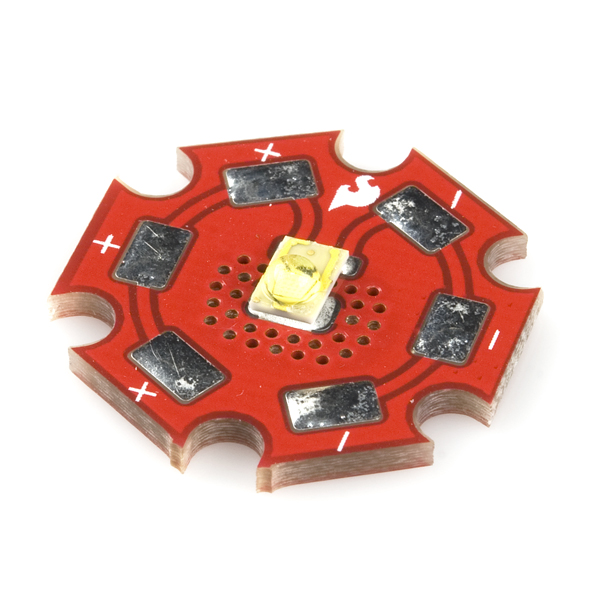
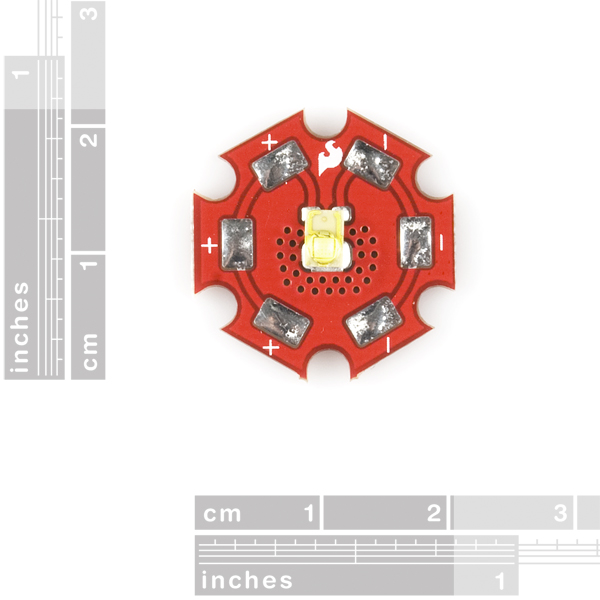
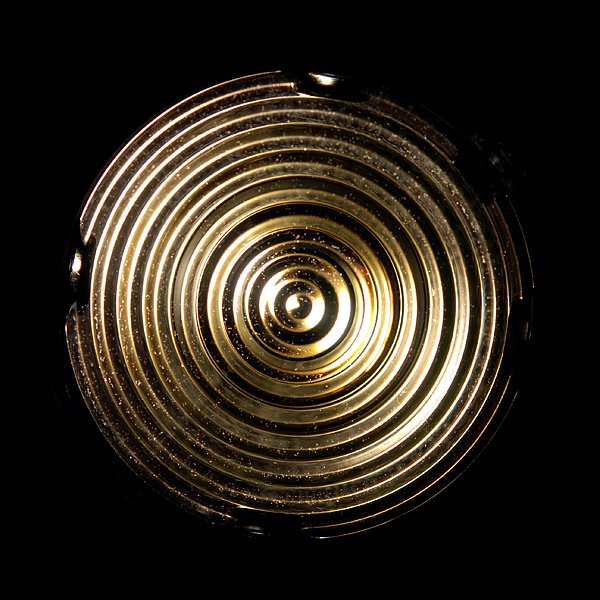
This is a breakout board for the very high-intensity Warm White Luxeon Rebel LED. The board is designed to dissipate damaging heat away from the LED to the back of the board. There are three pads for each the anode and the cathode of the LED.
This breakout board comes with the LED installed as shown.
- Warm White Luxeon Rebel LED Datasheet (part# LXM3-PW61)
Luxeon Rebel High Power LED Breakout - Warm White Product Help and Resources
Core Skill: Soldering
This skill defines how difficult the soldering is on a particular product. It might be a couple simple solder joints, or require special reflow tools.
Skill Level: Competent - You will encounter surface mount components and basic SMD soldering techniques are required.
See all skill levels
Core Skill: Electrical Prototyping
If it requires power, you need to know how much, what all the pins do, and how to hook it up. You may need to reference datasheets, schematics, and know the ins and outs of electronics.
Skill Level: Rookie - You may be required to know a bit more about the component, such as orientation, or how to hook it up, in addition to power requirements. You will need to understand polarized components.
See all skill levels
Comments
Looking for answers to technical questions?
We welcome your comments and suggestions below. However, if you are looking for solutions to technical questions please see our Technical Assistance page.
Customer Reviews
No reviews yet.
I'm wondering if anyone has and knowledge of the light ramp and decay times. So when we apply a specific current, how long does it take for the light output to reach maximum? And then when the current is removed, how long for it to fall off?
Can I hook this up to an Arduino and run it with a 9 volt battery pack?
Not directly. You will need to use a switching power transistor that can handle at least one amp. The arduinos handle like 40ma per I/O pin (for the uno at least). I'm not an expert in this so please consult others. But using a mosfet transistor is the way to go. Then you use the arduino to turn the led on and off through the switching transistor. This may help. http://www.youtube.com/watch?v=Te5YYVZiOKs
Hrrm. It looks like you have a thermal relief on the thermal pad of the LED - isn't this a bit disingenious?
Seems a bit pointless given the otherwise thorough thermal design, what with all the vias dotted around it and all.
It looks to me as if the thermal design is nearly identical to the suggested design in the datasheet. If anyone is disingenuous it's Luxeon.
No, the thermal design is completely different. The one in the datasheet is correct; the top copper pour is connected directly to the thermal vias.
On this PCB, there is a thermal relief around the thermal pad - look for the dark corners around it. These increase the thermal resistance.