
Reflow Toaster
If you've ever played with SMD devices, you know what a pain it can be to solder tight pitch pins. Yes, we know others have used toaster ovens for reflow soldering purposes. Yes, we have our own reflow oven that cost 30 times as much. But where's the fun in that?
We have really built upon the shoulders of others here. There are many more knowledge individuals that pioneered the field. We are only here to re-hash and hopefully educate those in the art of toasting.
As of writing - we haven't reflowed anything. Well, at least not in our 110V fire starter. Basically, I just want to share the information I have obtained and the layouts I have created. And I'm too impatient to wait for the v2 PCB...
As usual, there are quite a few photos. I heard Hong Kong is going to Gigabit internet connections. Isn't it time for you to upgrade that 56k modem? My apologies to all users still on slow connections.
All the usual warnings apply: A toaster oven can kill you. It could certainly burn down your house. Lead is bad. Don't eat from a toaster oven that's cooked PCBs.
SMD Reflow Tutorials:
What can you do with a toaster oven?
These cheap-o units from Tar-chez can cost a meager $50. A toaster can hit 230C with relative ease. This is hot enough to melt solder paste allowing home hobbyist the ability to 'cook' PCBs. All that is needed is a controller to heat the toaster to a specific profile. This is all because of a posting on the SFE Support Forum...
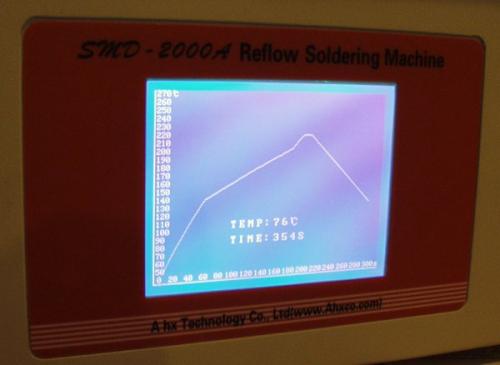
Picture of the premo profile off our $2300 reflow oven. By the way, this reflow oven didn't work.
All we aim to create is an embedded system that takes in temperatures and actuates a relay that controls the heating elements - effectively controlling the temperature. That's where the Reflow Toaster Controller comes into play. But first, we must purchase and immediately destroy a perfectly good toaster oven!
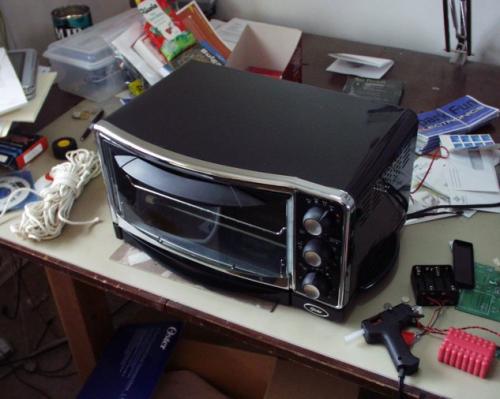
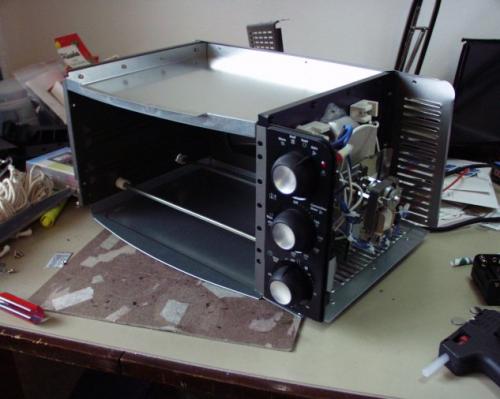
I think I paid $60 at Target (local chain - basically WalMart) for this guy :
Oster Model 6293
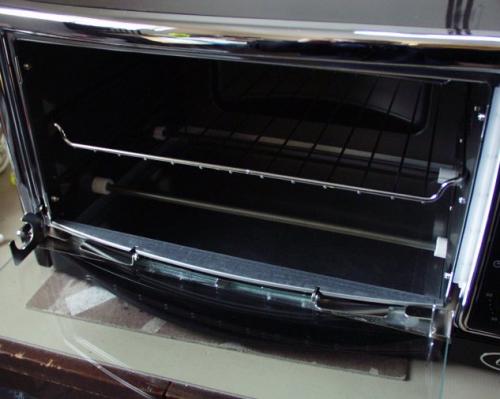
Inside tray. A dry-run test proved this baby can heat up like crazy. The lights dimming across my house gave me a fuzzy feeling in my stomach as well.
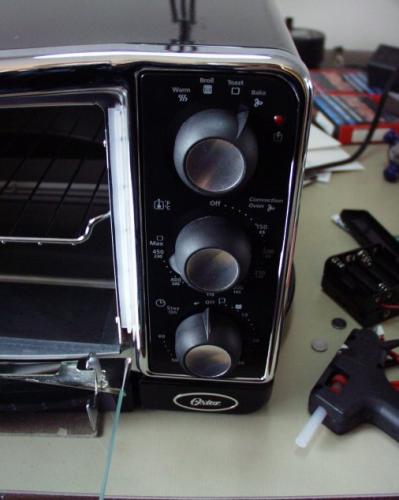
The front control panel - soon to be circumvented.
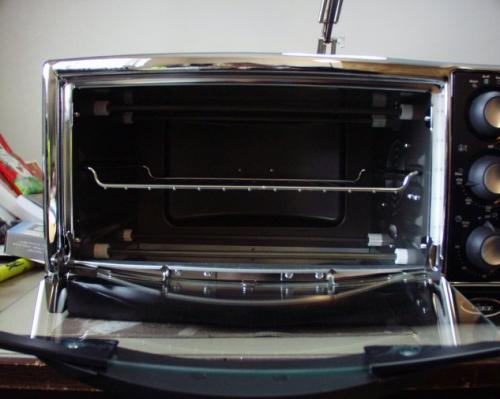
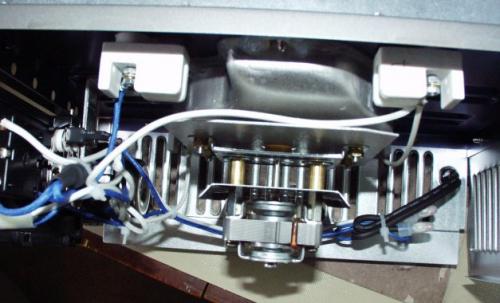
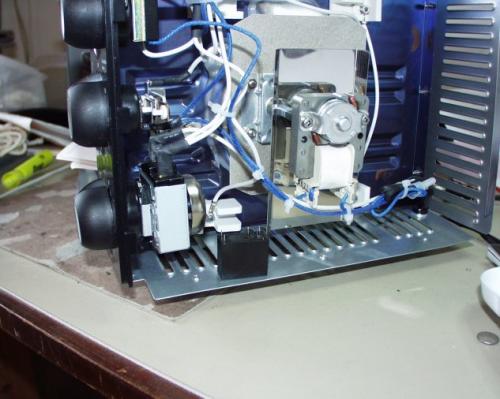
Inside. Notice the two heating elements on top and bottom. It's got to be better than just two, right?
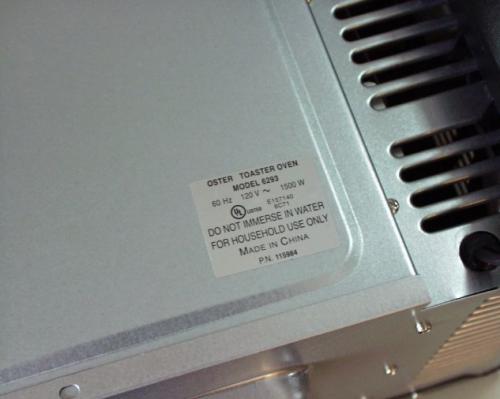
Don't immerse in water?!? Damn. 1500W is important to know though.
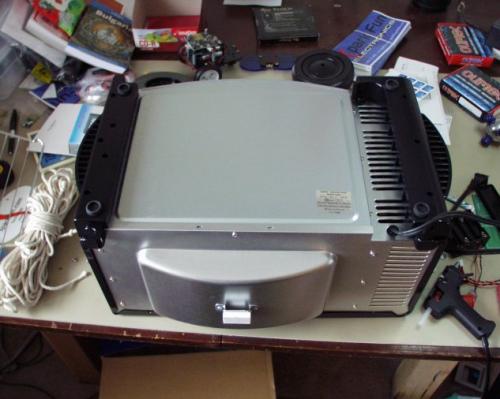
Hmm.
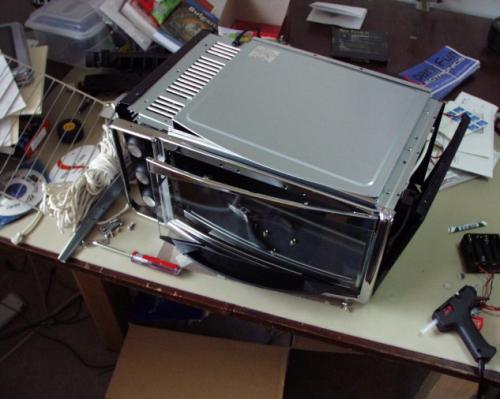
Getting there. It was actually pretty hard. I'm not sure if I can get it back together...
Ahah!
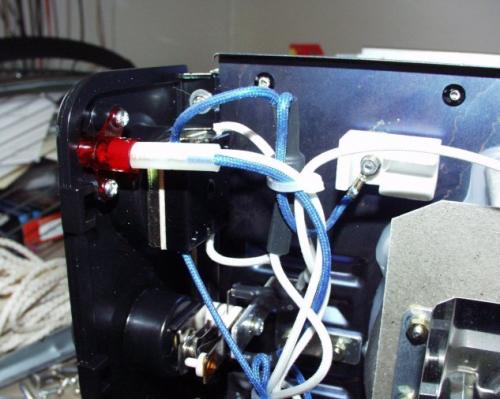
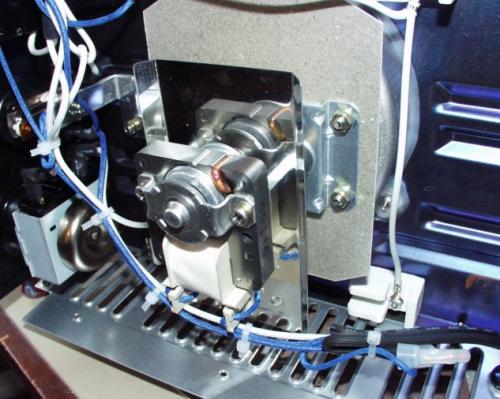
Guts. Back-side of the control panel knobs.
Guts 2.
The annoying bell.
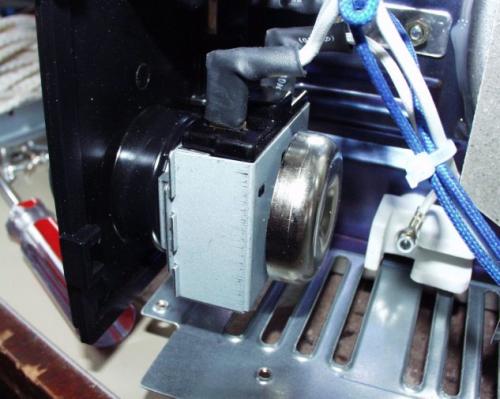
The entire oven seems very simple, yet well designed to withstand the extreme use of 10-12 years of high-temperature stressing.
An overhead shot of the AC transformer?
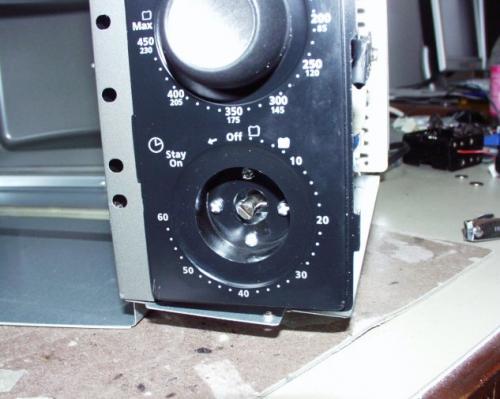
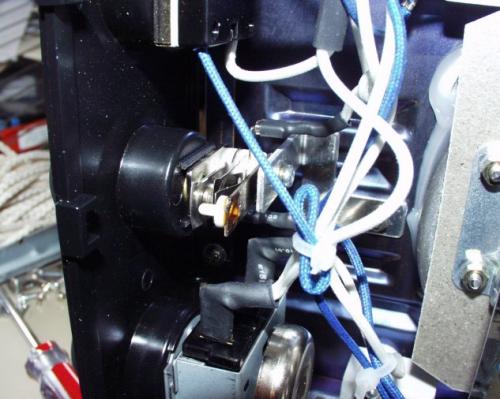
I tore into the timer dial hoping to find some sort of a relay that could be digitally controlled.
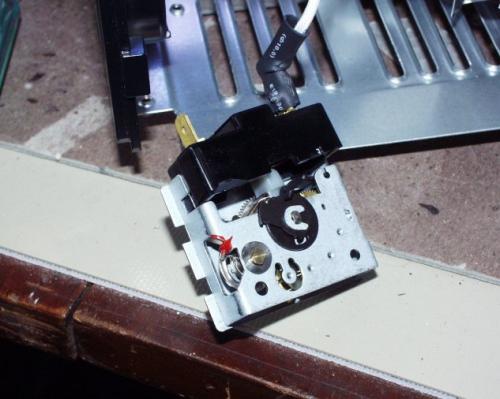
The timer dial exposed: In retrospect, this was a foolish thing to think. All low-cost ovens such as this Oster operate with the bare minimum of parts. A power relay just wouldn't be included.
Controller Time -
Ok - so that's the oven we would like to use. But how to control it close enough to reflow expensive PCBs?
First we need a thermocouple. Thermo-what? A thermocouple is a type of temperature probe that can withstand the very high temperatures (>100C) of the toaster oven. There are a lot of different thermo-whats out there. The type-K thermocouple is the most common (at least in my opinion). Type-K refers to the two types of metals that are combined to create the thermocouple sensor. I don't dare bore you with the specifics. The Analog Devices datasheet for the AD595AQ IC explains the entire principle very nicely.
Not surprisingly, you can pick these up from quite a few vendors on the internet. The tricky part is taking the voltage change distributed by the physical nature of the thermocouple and turning that into a temperature. Segway back to the AD595AQ! This very expensive DIP package was built for such a thing. Attach a K-type thermocouple, power the thing at 5V, and you've got a 10mV/C output! There are many other ways to skin this cat, many are cheaper, but all are far more complex then this tight package. And it WORKS! The readings agree nicely with our infrared temperature gun.
We are only looking for +/-1 or 2 degree C accuracy over the oven. So we can take the 10mV/C voltage levels directly into the 10-bit ADC (4.88mV per bit) found on most 16F PIC microcontrollers. If you've read anything on the Spark Fun Support Forum, you'll know I love the 16F88 PIC. Simply because it is a work horse, it's got an ADC, it's cheap, and it can be boot loaded!
So we've got the microcontroller to read temp data, now we need to turn on and off the oven. With a 1500W oven on 120VAC, that's 12.5A that needs to be turned on and off. Any normal relay would probably melt or fail after a few hundred cycles. While my co-worker (Pete) really wants to see the first option occur, I opted for a relay that wouldn't tack weld itself together. A short search on Digikey produced many options. My only recommendation is not to confuse the coil type with the paddle rating. I thought I needed a 120VAC relay. I accidentally ordered a relay that required 120VAC to actuate. My poor PIC couldn't actuate a relay like this. Instead, find a relay with a coil rating of 5V or 12VDC. Most relays will be able to control AC voltages, it is the coil voltage that needs to match your DC circuit. We chose a 12VDC coil the second time around with a 30A rating. Testing in time will tell - we haven't got them yet...
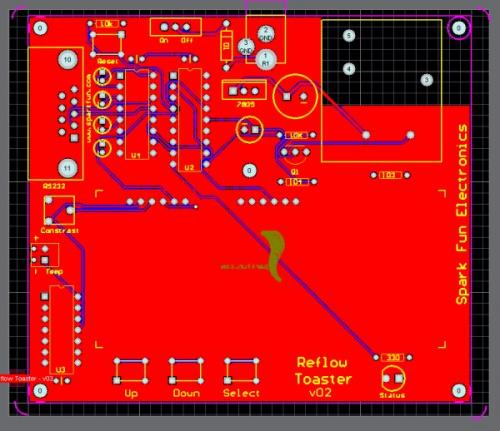
So the PIC can take temp readings, and based on those readings, turn on/off the relay. Here is the schematic for version 1 of the ReflowToaster. The PCB came out very well!
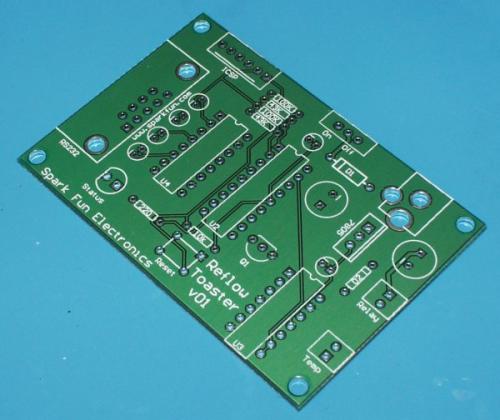
Simple through hole design
Just a few small problems with the layout. I messed up the silkscreen/mechnical diameter of the two bulk capacitors. I also forgot the current limiting resistor into the base of the BJT. I thought it would work... It doesn't.
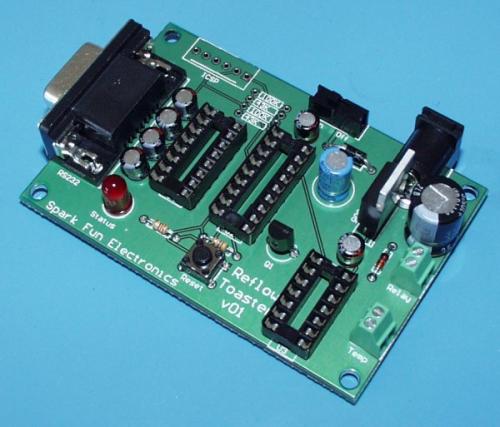
Here it is fully populated.

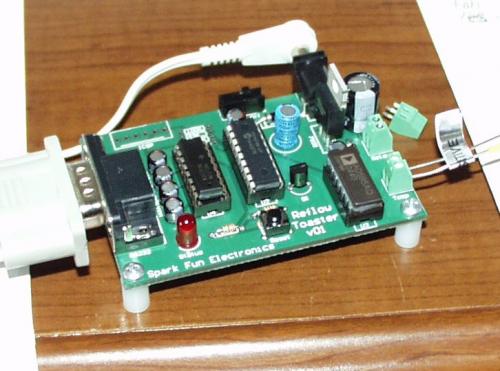
In action on my desk...
Re-thinking relays
At this point, I surprisingly have the board fully functional. The limiter was the relay. When comparing the size of my dinky relay (PCB Mount - 12VDC / 10A) with the massive heat shielded connectors of the 120VAC main wires, I decided to pause and contemplate my life. I'd rather not screw this one up.
So I decided to order a bigger, heftier relay with Quick Connect lugs. I'll still have to cut into the main wires and splice with heat shield, but I'll feel a lot safer in the end.
Instead, I decided to re-design the toaster board. A fellow user on the SFE Support Forum actually recommended this project. I initially wanted to make a board that relied entirely on a Windows VB program to control the profile. After an hour or so of programming, it was obvious it would be much more functional some day if it was stand alone. But I'll keep the RS232 interface for boot loading and data logging.
So I added a 2x16 LCD, three control buttons, and a hefty on-board relay with solder lugs. Here is the schematic. The PCB tripled in size, but I think it will be very nice in the end.
Yea, it doesn't look like much - but it's going to be very cool.
So now we wait for the new PCBs to come in. The code was really simple and is not yet complete. The basics are there though : ToasterControl-v01.c
We hope to put a kit together for under $100 for those that would like to replicate our fire hazard. We'd love to get your feedback on the forum! Let us know about your reflow experiences as well.
I noticed this was posted in 2006, any progress?
Are there any plans for a new toaster oven controller? What happened to all of the controllers and articles that were plentiful 10 years ago?
Thanks for asking! No plans currently to create a new version but it's getting easier and easier with Qwiic. If I needed a reflow controller it would look like:
You could very nearly plug it together.
Looks like a fun project however with all the lcd touchscreen ovens available on aliexpress for $175 I’d be hard pressed to go about the work unless I could buy the toaster oven and controls for under $100. Even then time is valuable for an oven designed for reflow.
We have used a toaster oven with a modified controller http://www.whizoo.com/reflowoven before switching to a commercial batch reflow oven https://www.atco-us.com/products/item/5-pro-1600-smt-reflow-ovens . The toaster oven works as long as the assembly is not too thermally heavy. The window is useful but not totally reliable method of knowing when the board is done. Smaller parts reflow much sooner than a larger IC or connector. So it was a hit or miss as the boards became more dense. An off the shelf professional oven allows thermocouples feedback to know exact board temperature at any given point along the profile curve. Nonetheless for protoypes a toaster oven is definitely more affordable and works for most.
Great article. I would think that a high-ampere solid state triac might be more suitable than a relay for this design. I would put in considerable overkill on the specs, given the spikes and surges that can come down AC lines. A 600V 25A triac will run about $5 from most vendors and would have plenty of headroom to control a 1500W oven. For the sake of safety, it might be wise to add an opto-isolator to control the triac’s gate, thus isolating the low voltage and AC sides completely. Best of all: triacs don’t tend to produce much heat, though you’d want to study the specs to make sure it could withstand heat produced within the oven.
A simple design would simply switch the heating elements on or off as needed (triacs don’t actually turn off until the next zero crossing of the AC current occurs, so there’s a bit of delay). A more sophisticated design would analyze the AC voltage to allow the power to be turned on within each 50Hz / 60Hz cycle at a specific phase. By doing so, you could vary the power being delivered to the heating elements for more precise control of the oven’s temperature. [More power when heating up, less power to maintain a particular temperature, for example.]
Just a thought. Relays to control that much current may not last as long as an equivalent triac, and a triac would occupy far less area on the circuit board.
Well, it is wise to buy a capable oven like Oster TSSTTRWF4S rather than going into the troubles!
Be aware when using thermocouples, that I found the temperature measured by a probe style thermocouple in the air a couple of cm above the board registered up to 30 deg C lower than a thermocouple bead clipped onto the board (over a via hole) using a paper clip. This is because the board and components are much better absorbers of infra-red radiation from the heating elements than the metallic probe in the air. So there is a serious risk of overheating your components if you don't measure the temperature of the board itself.
I used a 9 litre, 1400W mini-oven with 4 unshielded elements.
Looks like the forum link is incorrect
http://www.sparkfun.com/cgi-bin/phpbb/viewtopic.php?t=993 should be https://forum.sparkfun.com/viewtopic.php?t=993
I kinda need help understanding one thing. One area that was vague to me were the dial/knobs on the toaster. Do we bypass them entirely (removing all of them), only the timer, or am I supposed to leave them intact?
HELLO,BEIJING GLICHN is the professional manufacture in benchtop reflow oven,wave soldering,stencil printer,video microscope,I hope we can have a good cooperation,Hope can help you. http://www.smtchn.com
I have been using a cheap $29.00 Toastmaster toaster oven with pretty good luck on a fairly complex 6x5 board. It did take some practice and I destroyed a few parts until I figure out the system. I finally settled on this approach. 1) preheat the oven alone to 350F for at least 5 minutes. 2) Put the board in and let it preheat at 350 for 60 seconds. 3) crank to max temp, and let the reflow happen. The board should be done in less than 2:30 total oven time. The preheating steps are very important. If you just let the heaters heat the board from room temp, the components heat unevenly.
does anybody have a favorite toaster oven?
The controller is interesting but i just ordered a programmable 64 ramp PID tailored for furnaces, 3 foot K type oven thermocouple, 25 amp DC in (3-32) AC out relay and heat sink for control. I think the usual application for the PID is ceramic kilns which generally follow a ramped temperature profile working their way up in steps to a final temp. Comparable cost--maybe less.
A better application for an arduino or like controller i think would be an application to monitor a glass high temperature thermistor snugged onto a piece of junk PCB stock to help ascertain what a PCB experiences in order to collect data useful for tweaking the profile ramped into the controller? Shouldn't be too hard. Found this NTC Thermistor good for -50 to +300 degrees Centrigrade i recall:
GC4914A-3-100
data sheet: http://www.specsensors.com/pdfs/ntc_radial_glass.pdf
For thermocouples, the ones we use at work are the omegas. You can get one for $20 and we routinely take them up to 500 °C + inside our heater blocks next to our reactors and never have any problems with them. (I work in a process engineering lab).
I did a very similar project but with less modification to the oven.
I posted photos and video on reflow soldering using a cheap oven here:
https://sites.google.com/site/undergroundengineerer/projects/practical-hobby-reflow-solder
That's awesome. You definitely went way past where I got with my project.
http://www.esmonde-white.com/home/diversions/cnc-toaster-oven
Has any more been done on this project? I would like to get more information on this. Is the pc board available?
Hey Sparkfun,<br />
<br />
Any tips on a good process for PCB cleaning?
You can just use rubbing alcohol. Works very well for me. I got some from 91% isopropyl alcohol from Walmart (around $2) and it works great.
It would be nice to see an update on this. Did the project get scrapped or did/does the oven actually get used. You could post a tutorial on the actual process with the oven controller being used.
you talked about serious problems with running mixed high temperature (usb ports) and low temperature (audio jack plastics) parts on the same board;
in jewelry soldering, it is common to do the high temperature metals first, then the medium temp, then the low temp material. is it possible to do that with toaster reflow? run a batch of usb ports only, take it out, put all the other mid and low temp parts on? or does that not work because of your solder paste application technique?
Check out the WIG-00081, we've been selling a lot of them and have gone through several revisions.