Enginursday: Lessons Learned at the Workbench

A few thoughts on prototyping and breadboarding
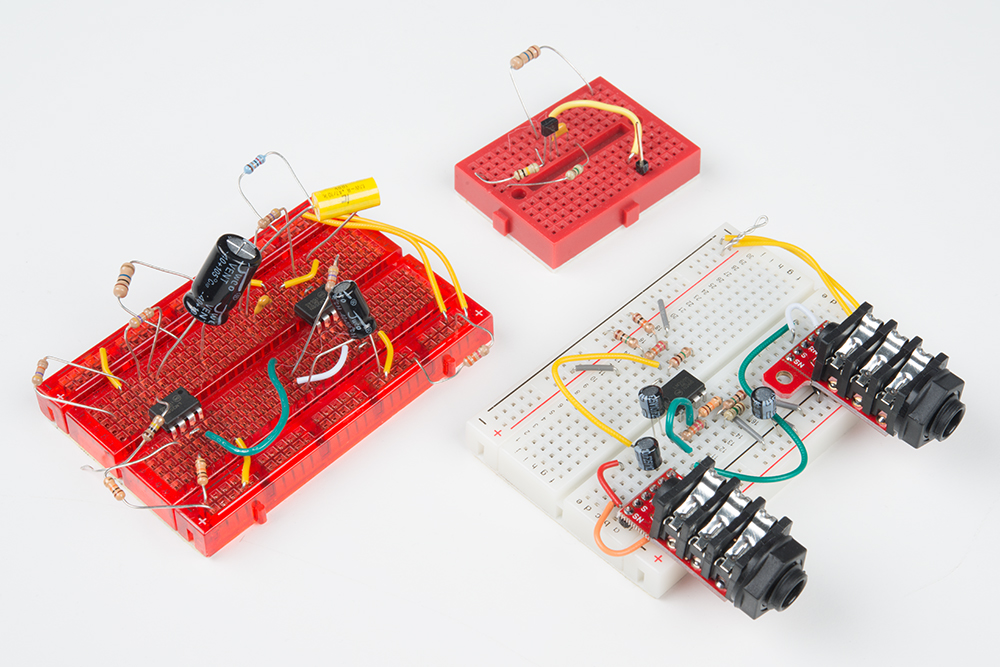
While working my way to the release of the Proto Pedal, I'd been breadboarding lots of circuits. I thought I'd share some of the techniques I've been using to build and troubleshoot breadboards on my workbench.
Work From a Hard-Copy Schematic
In the world of computers and online documentation, it can be tempting to try to work strictly from onscreen documentation, but sometimes there's an advantage to having a paper copy. Here's one example, pulled right out of my notebook:
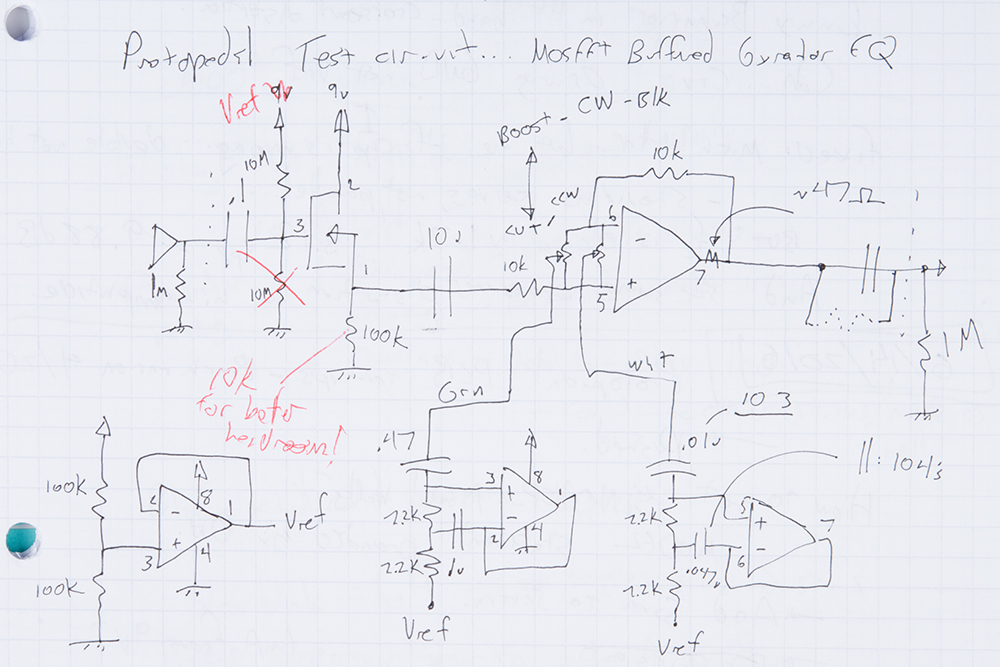
Having the schematic on paper is more convenient to use on my workbench while I'm building. You'll notice that the op-amp terminals are numbered with the package pins, and some of the wires have been marked with colors to make them easier to find. You'll also notice the red ink where some part values and connections were revised as it was being tested.
You'll also notice that the schematic was hand drawn, not just printed from a digital copy. This gave me one more chance to internalize the circuit and consider how it was going to be assembled.
Work From A Soft-Copy Schematic
In direct contradiction to the previous advice, there are also advantages to using schematic-drawing software.
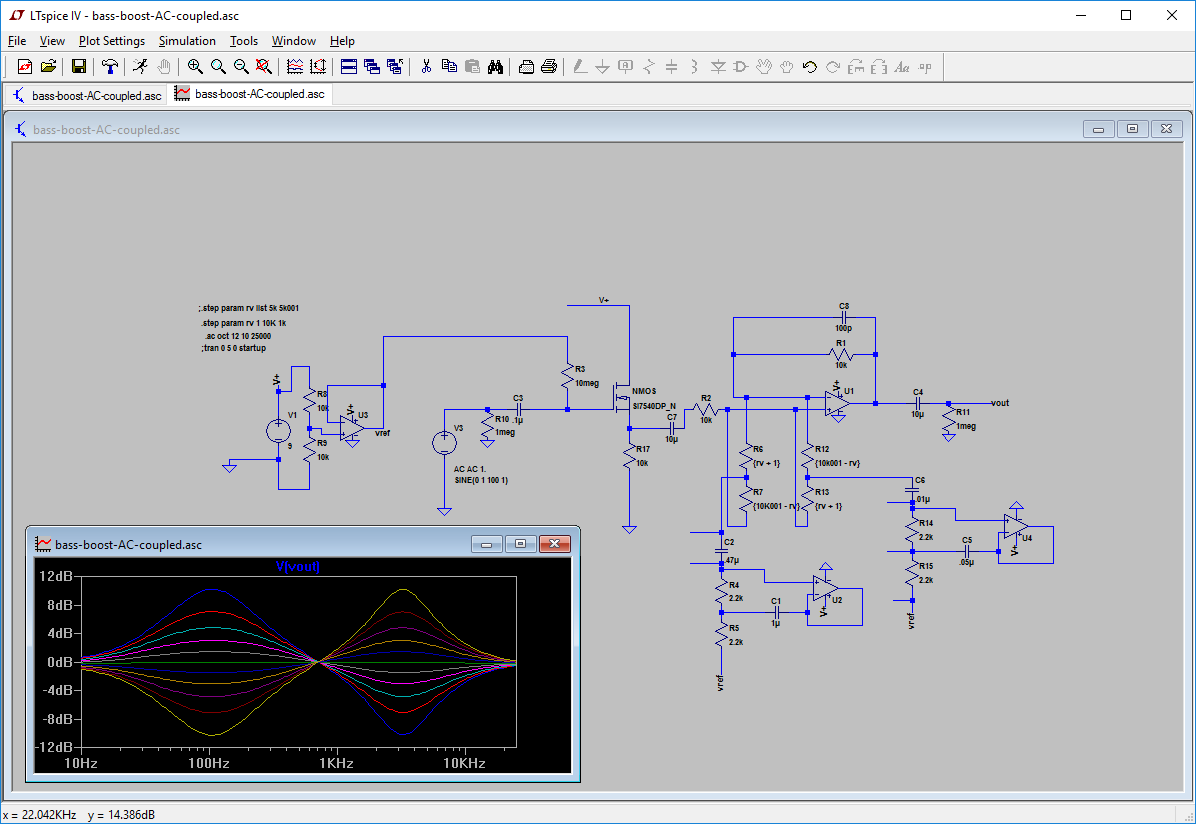
The hand-drawn circuit above was actually transcribed from one drawn in LT-Spice, which I used to verify that it was functional and select the gyrator capacitor values. In particular, it allowed me to experiment with a couple different versions of the AC-coupling circuits.
Assembly Diagram.
Moving from the schematic to breadboard means actually building the circuit from real, physical components, proving that theory and practice correspond. It's an exciting milestone in the development of a circuit. As such, it can be tempting to plunge in and throw components on the breadboard wherever they fit.
It can also be a recipe for headaches as the circuit grows unpredictably, and you may find that you've painted yourself into a corner.
To help circumvent the headache, I'll draw an assembly diagram.
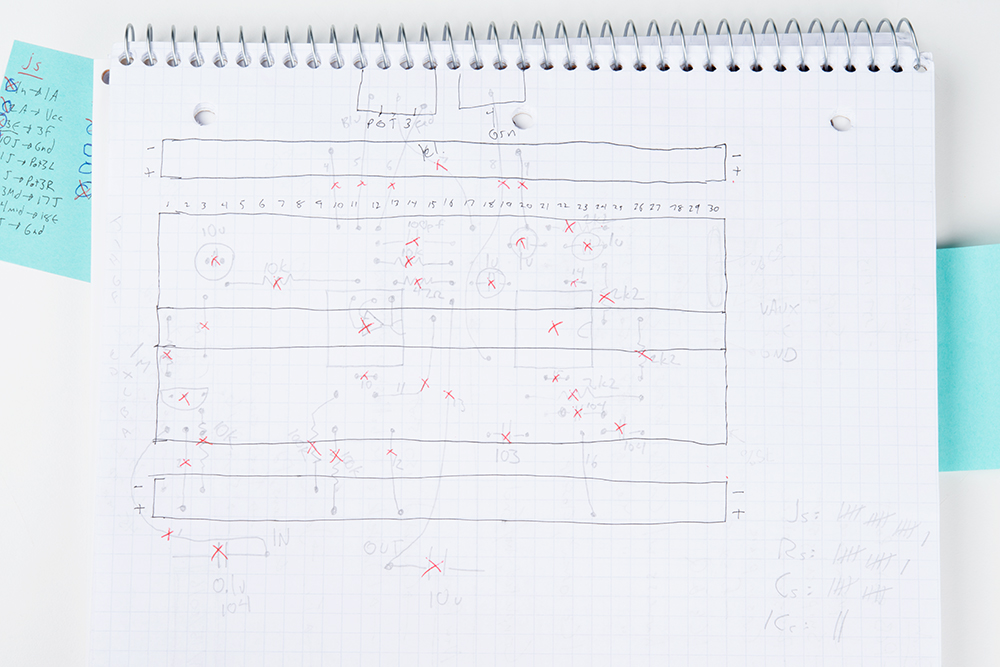
This diagram is drawn on graph paper. The rows, columns and power buses of the breadboard have been outlined in ink, and components sketched in pencil, transcribed from the schematic. As things took shape, some details got rearranged, and components were erased and redrawn.
Node Analysis
We often think about the components, but sometimes we need to more carefully consider how they're connected. For example, consider the following schematic snippet:
At first glance, we see that there's an op-amp, a couple resistors and a cap -- this is useful information because it informs the components we'll need before we can build it. But if we look at how they're connected, we notice that there's a point where C5 meets both R7 and R8. Somewhere in the circuit, we need to be sure those three parts are joined.
When you're troubleshooting a circuit, this can be a useful way to look at things – counting and making sure that each node is joining the correct number of components.
Assembly Instructions
After drawing the assembly diagram, I slowly worked through it, looking at each of the penciled symbols. For each mark, I classified it (jumper wire, resistor, capacitor, semiconductor, etc.), took note of its value and location and logged it in a list. The lists were double- and triple-checked for completeness before moving on (that's where the tally marks in the corner of the assembly diagram came from).
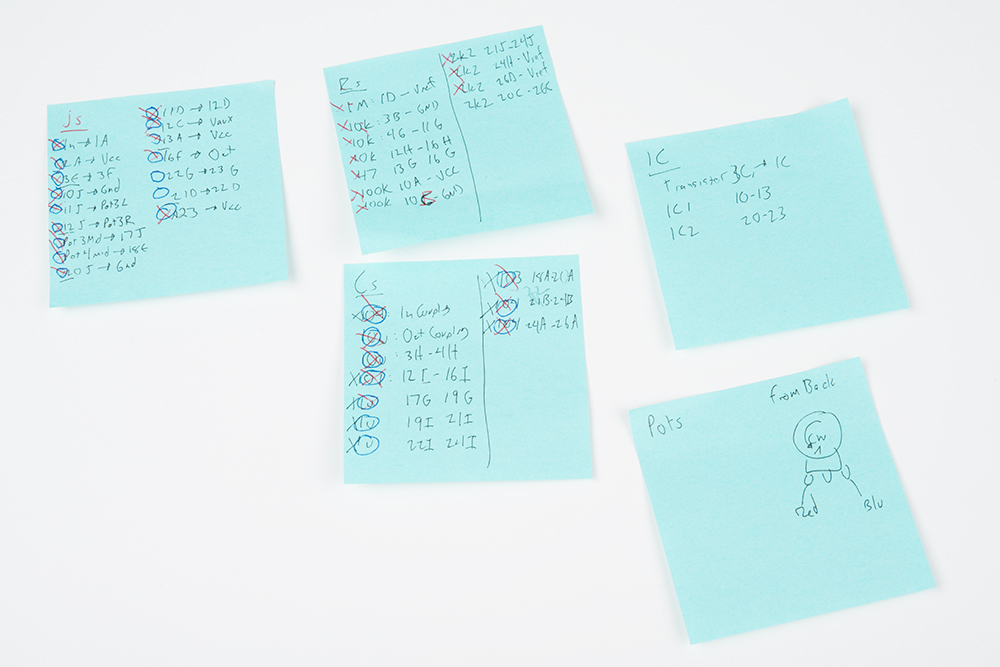
With these lists, assembling the board became a matter of following each list and installing the corresponding item at the listed coordinates. As each one gets installed, it gets checked off of both the list and the diagram.
First Powerup
Powering up a brand new breadboard the first time can be a bit nerve-wracking. Will it work? Will it explode?
You can begin to address the "will it explode" question before first applying power. Check that the power polarity is correct, and that the chips and electrolytic capacitors are the right way 'round. You can also use a continuity checker to verify that the power and ground rails aren't shorted together.
When I'm finally confident enough with my construction, I power it up. For the first power up, I turn the current limit on my power supply down, and watch the readout on the power supply. Most circuits will draw a bunch of current as they power up, then settle to something much lower.
If the circuit is drawing a bunch of current continuously, the supply should indicate that the current limit has been reached, and the voltage output will be less than the setting. If that's the case, power down quickly and look for shorts!
Neatness Counts
As I start breadboarding circuits, I usually leave the component leads long in case something is wrong and I need some flexibility to work around it.
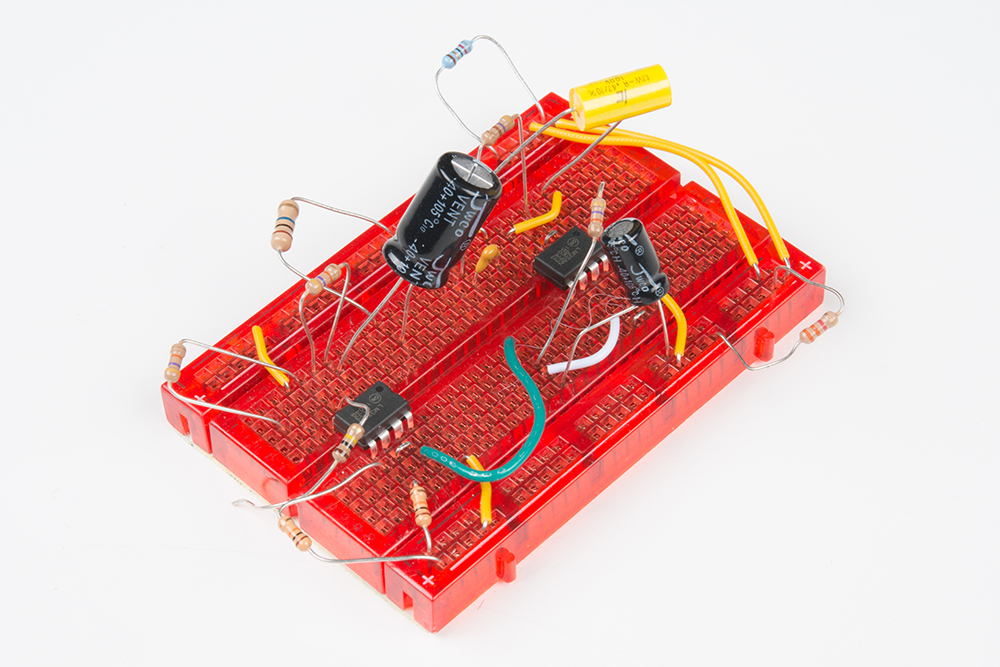
Eventually, flexibility becomes a liability. The components with long leads can bend, creating unanticipated short circuits. To prevent that, once a portion of a circuit is working, I'll snip the leads and cinch the component up against the breadboard.
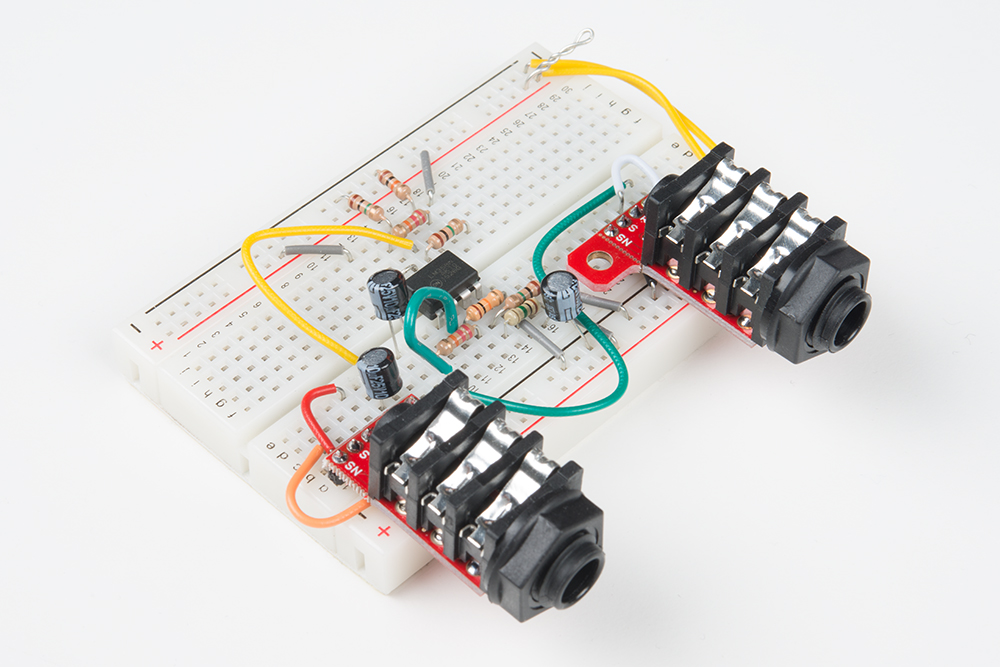
So How Does It Work?
I'm extremely happy to report that the circuit shown in these examples worked on the first try.
As they say: Proper Planning Prevents Poor Performance.


