Friday Product Post: It's Time to Buzz the Tower!

A new Qwiic Transparent OLED HUD, as well as a Qwiic Joystick, are making their debut. We also have two new LiDAR modules!
This week we have four new products, starting with two new Qwiic boards. First is a transparent OLED heads-up display that can be used in drone or automotive scenarios. Then we have a Qwiic Joystick board to control your next robot project, or a character in your favorite video game. We also have two new LiDAR modules.
Blah, blah, danger zone, blah...
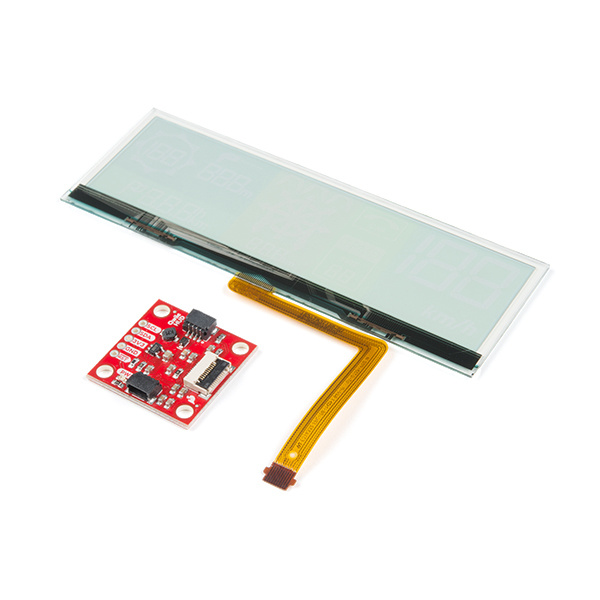
Clear screens are no longer a thing of sci-fi! The Qwiic Transparent OLED HUD is SparkFun's answer to all of your futuristic transparent HUD needs. Designed for use in vehicle heads-up displays, this OLED panel is brilliant in the dark but easily visible in daylight. The display is "area colored," meaning that while no one segment can change colors, there are different colored segments on the display. The SparkFun Transparent OLED Breakout allows you to easily control the display using the I2C protocol, and includes a voltage step-up to generate the panel's 12V driving voltage from Qwiic's 3.3V bus.
It's a joy!
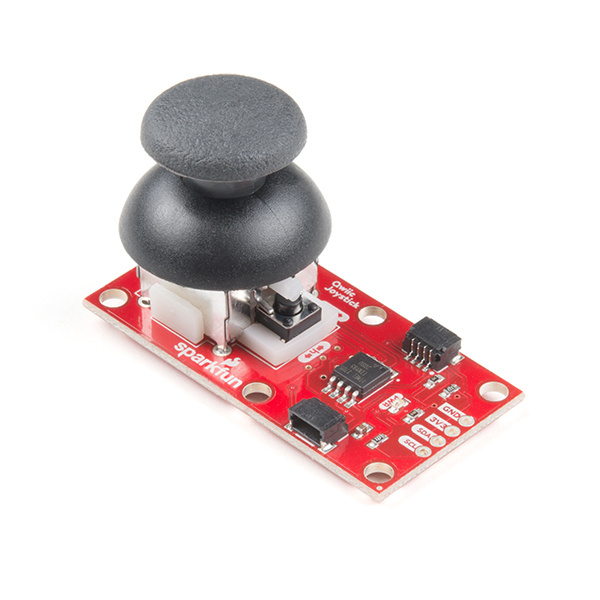
Now you can easily add an HID/controller to your project! The SparkFun Qwiic Joystick combines the convenience of the Qwiic connection system and an analog joystick reminiscent of the thumbstick from a PlayStation 2 controller. The only thing that could make it better is a "smart" version, so we made one! With the pre-installed firmware, the ATtiny85 is acts as an intermediary (microcontroller) for the analog and digital inputs from the joystick. This allows the Qwiic Joystick to report its position over I2C.
Go Plus Ultra with your LiDAR options!
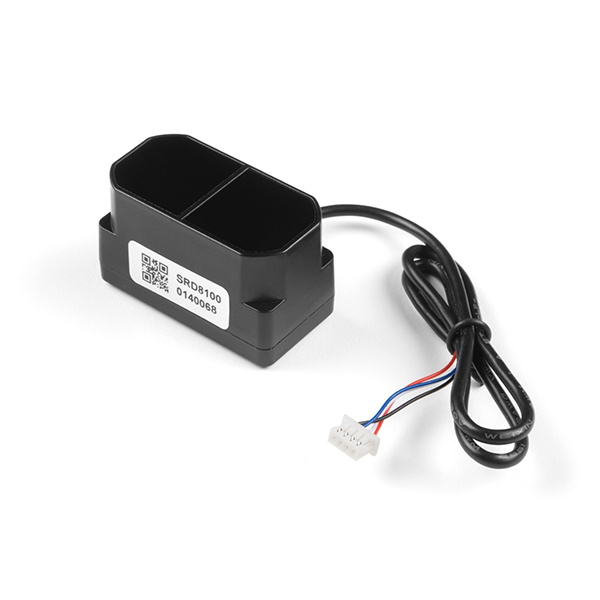
The TFMini Plus is a ToF (Time of Flight) LiDAR sensor capable of measuring the distance to an object as close as 10 centimeters (+/- 5cm up to 6m) and as far away as 12 meters (+/-1% starting at 6m)! As with all LiDAR sensors, your effective detection distance will vary depending on lighting conditions and the reflectivity of your target object, but what makes this sensor special is its size. Measuring only 35x18.5x21mm, the TFMini Plus allows you to integrate LiDAR into applications traditionally reserved for smaller sensors.
T-Minus three until lift-off!!
TF03 Long-Distance LiDAR Module
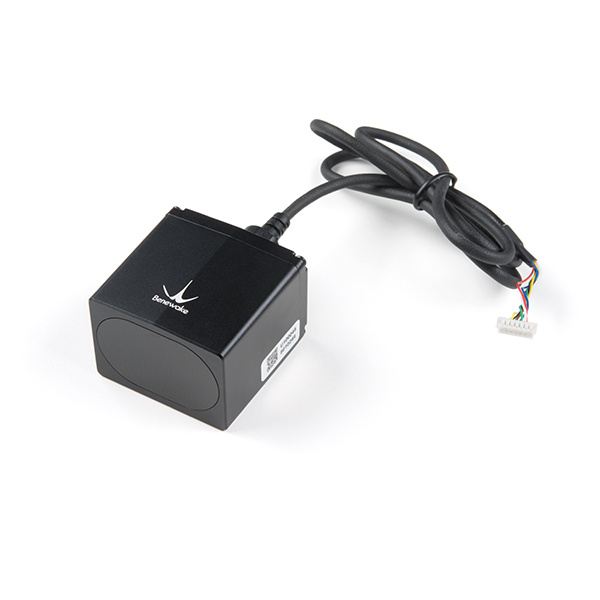
SEN-15180The TF03 is the third-generation product of the TF series, and is a ToF (Time of Flight) LiDAR sensor capable of measuring the distance to an object as close as 10 centimeters and as far away as 180 meters! As with all LiDAR sensors, your effective detection distance will vary depending on lighting conditions and the reflectivity of your target object. What makes this sensor special is its size & environmental operating range. Measuring only 44x43x32mm, the TF03 allows you to integrate LiDAR into applications traditionally reserved for smaller sensors and in harsh environments.
That's it for this week! As always, we can't wait to see what you make! Shoot us a tweet @sparkfun, or let us know on Instagram or Facebook. We’d love to see what projects you’ve made!
We'll be back next week with even more fantastic new products!


