Happy Little Laser Cutter Project

Trading cards are all the rage right now and we made a quick project on how best to display your favorites.
As most of my friends know, I am a huge fan of the trading card game (TCG) Magic: The Gathering. I started playing all the way back in 1995, when I was in the fifth grade, with the release of the Ice Age expansion. Admittedly, I was surprised that my Catholic school allowed the game for as long as it did and they really only banned it after kids started spending all their lunch money to get hustled during recess. That's right, this was all before the madness that we've all been seeing from Targets, Walmarts, and other big box retailers for Pokémon cards. Now, I'm not going to rush a store as soon as they open... but when I see a pack of cards that feature really pretty Bob Ross paintings, I will laser cut a mat to display them in my house!
As you may have read from my previous posts, I'm a bit of a fan of these nerdy topics and projects, so the leap from Dungeons and Dragons tiles to a display of Magic: The Gathering cards isn't too big of a leap.
Laser cutting is slowly but surely becoming more and more accessible to consumer electronics enthusiasts, and although I did use the industrial laser cutter we have here at SparkFun HQ, I wanted to showcase how easy it is to custom cut your own mat for photos, art prints, trading cards, and more! Let me show you how it was made!
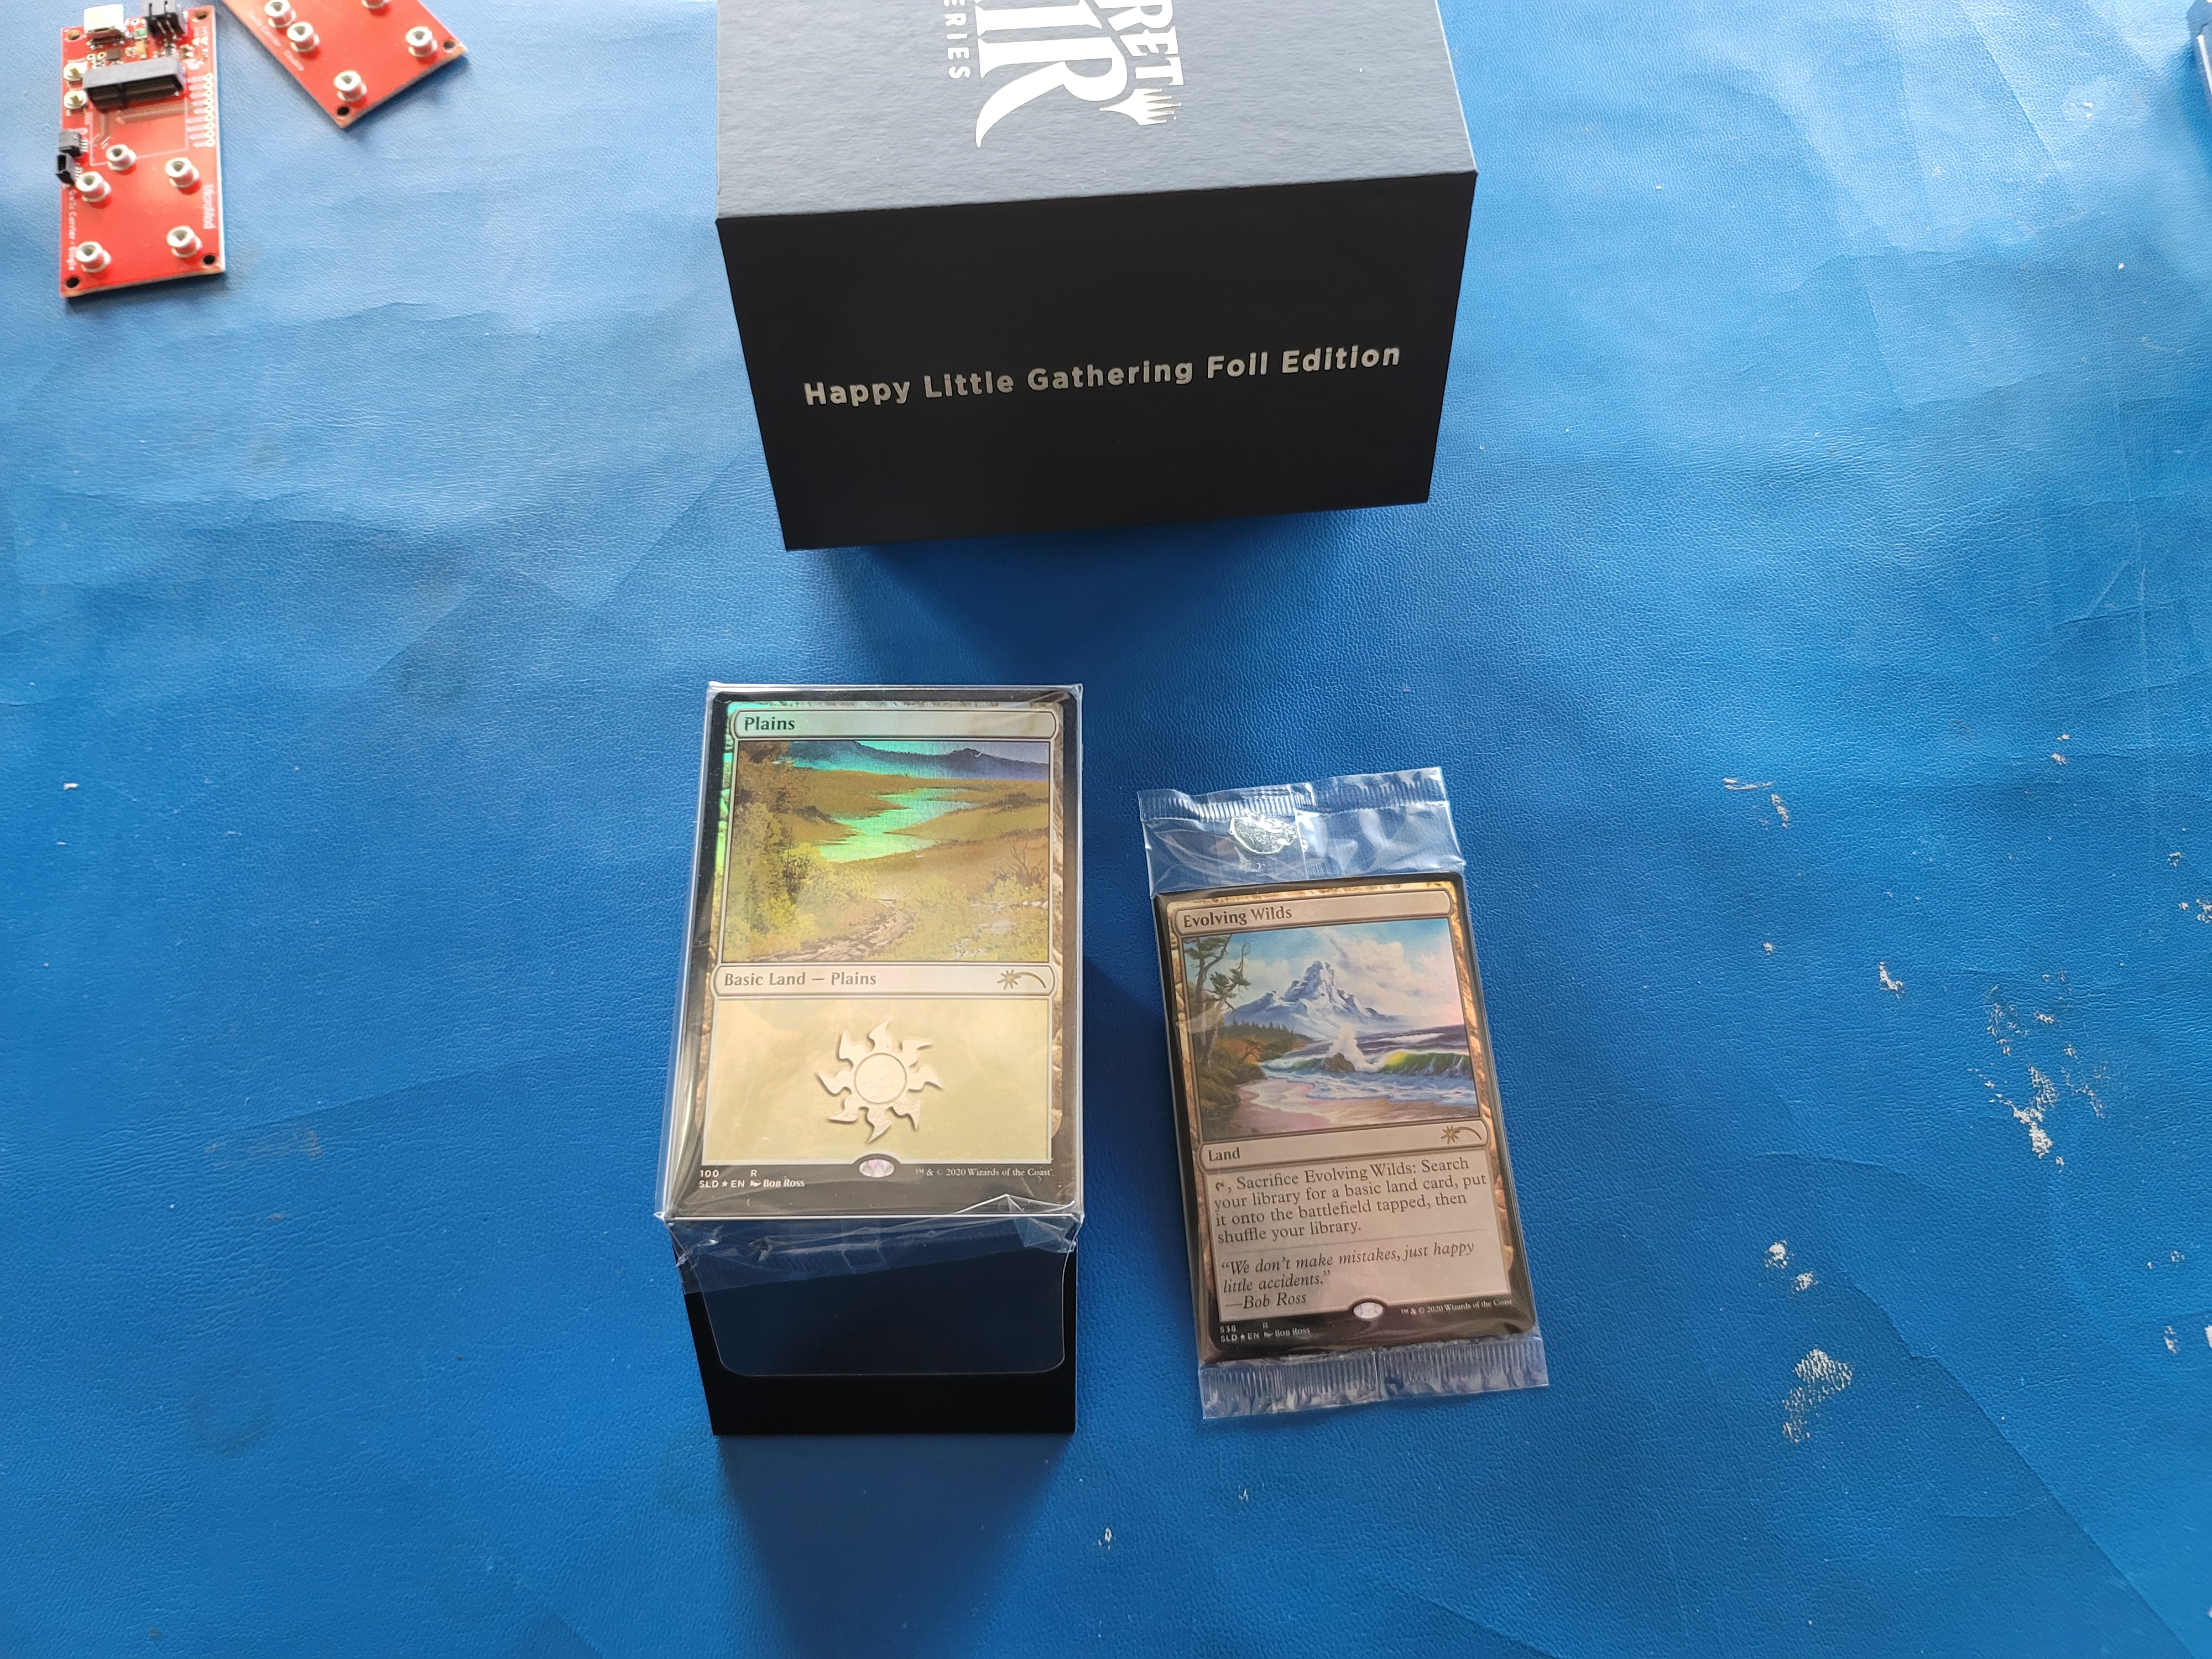
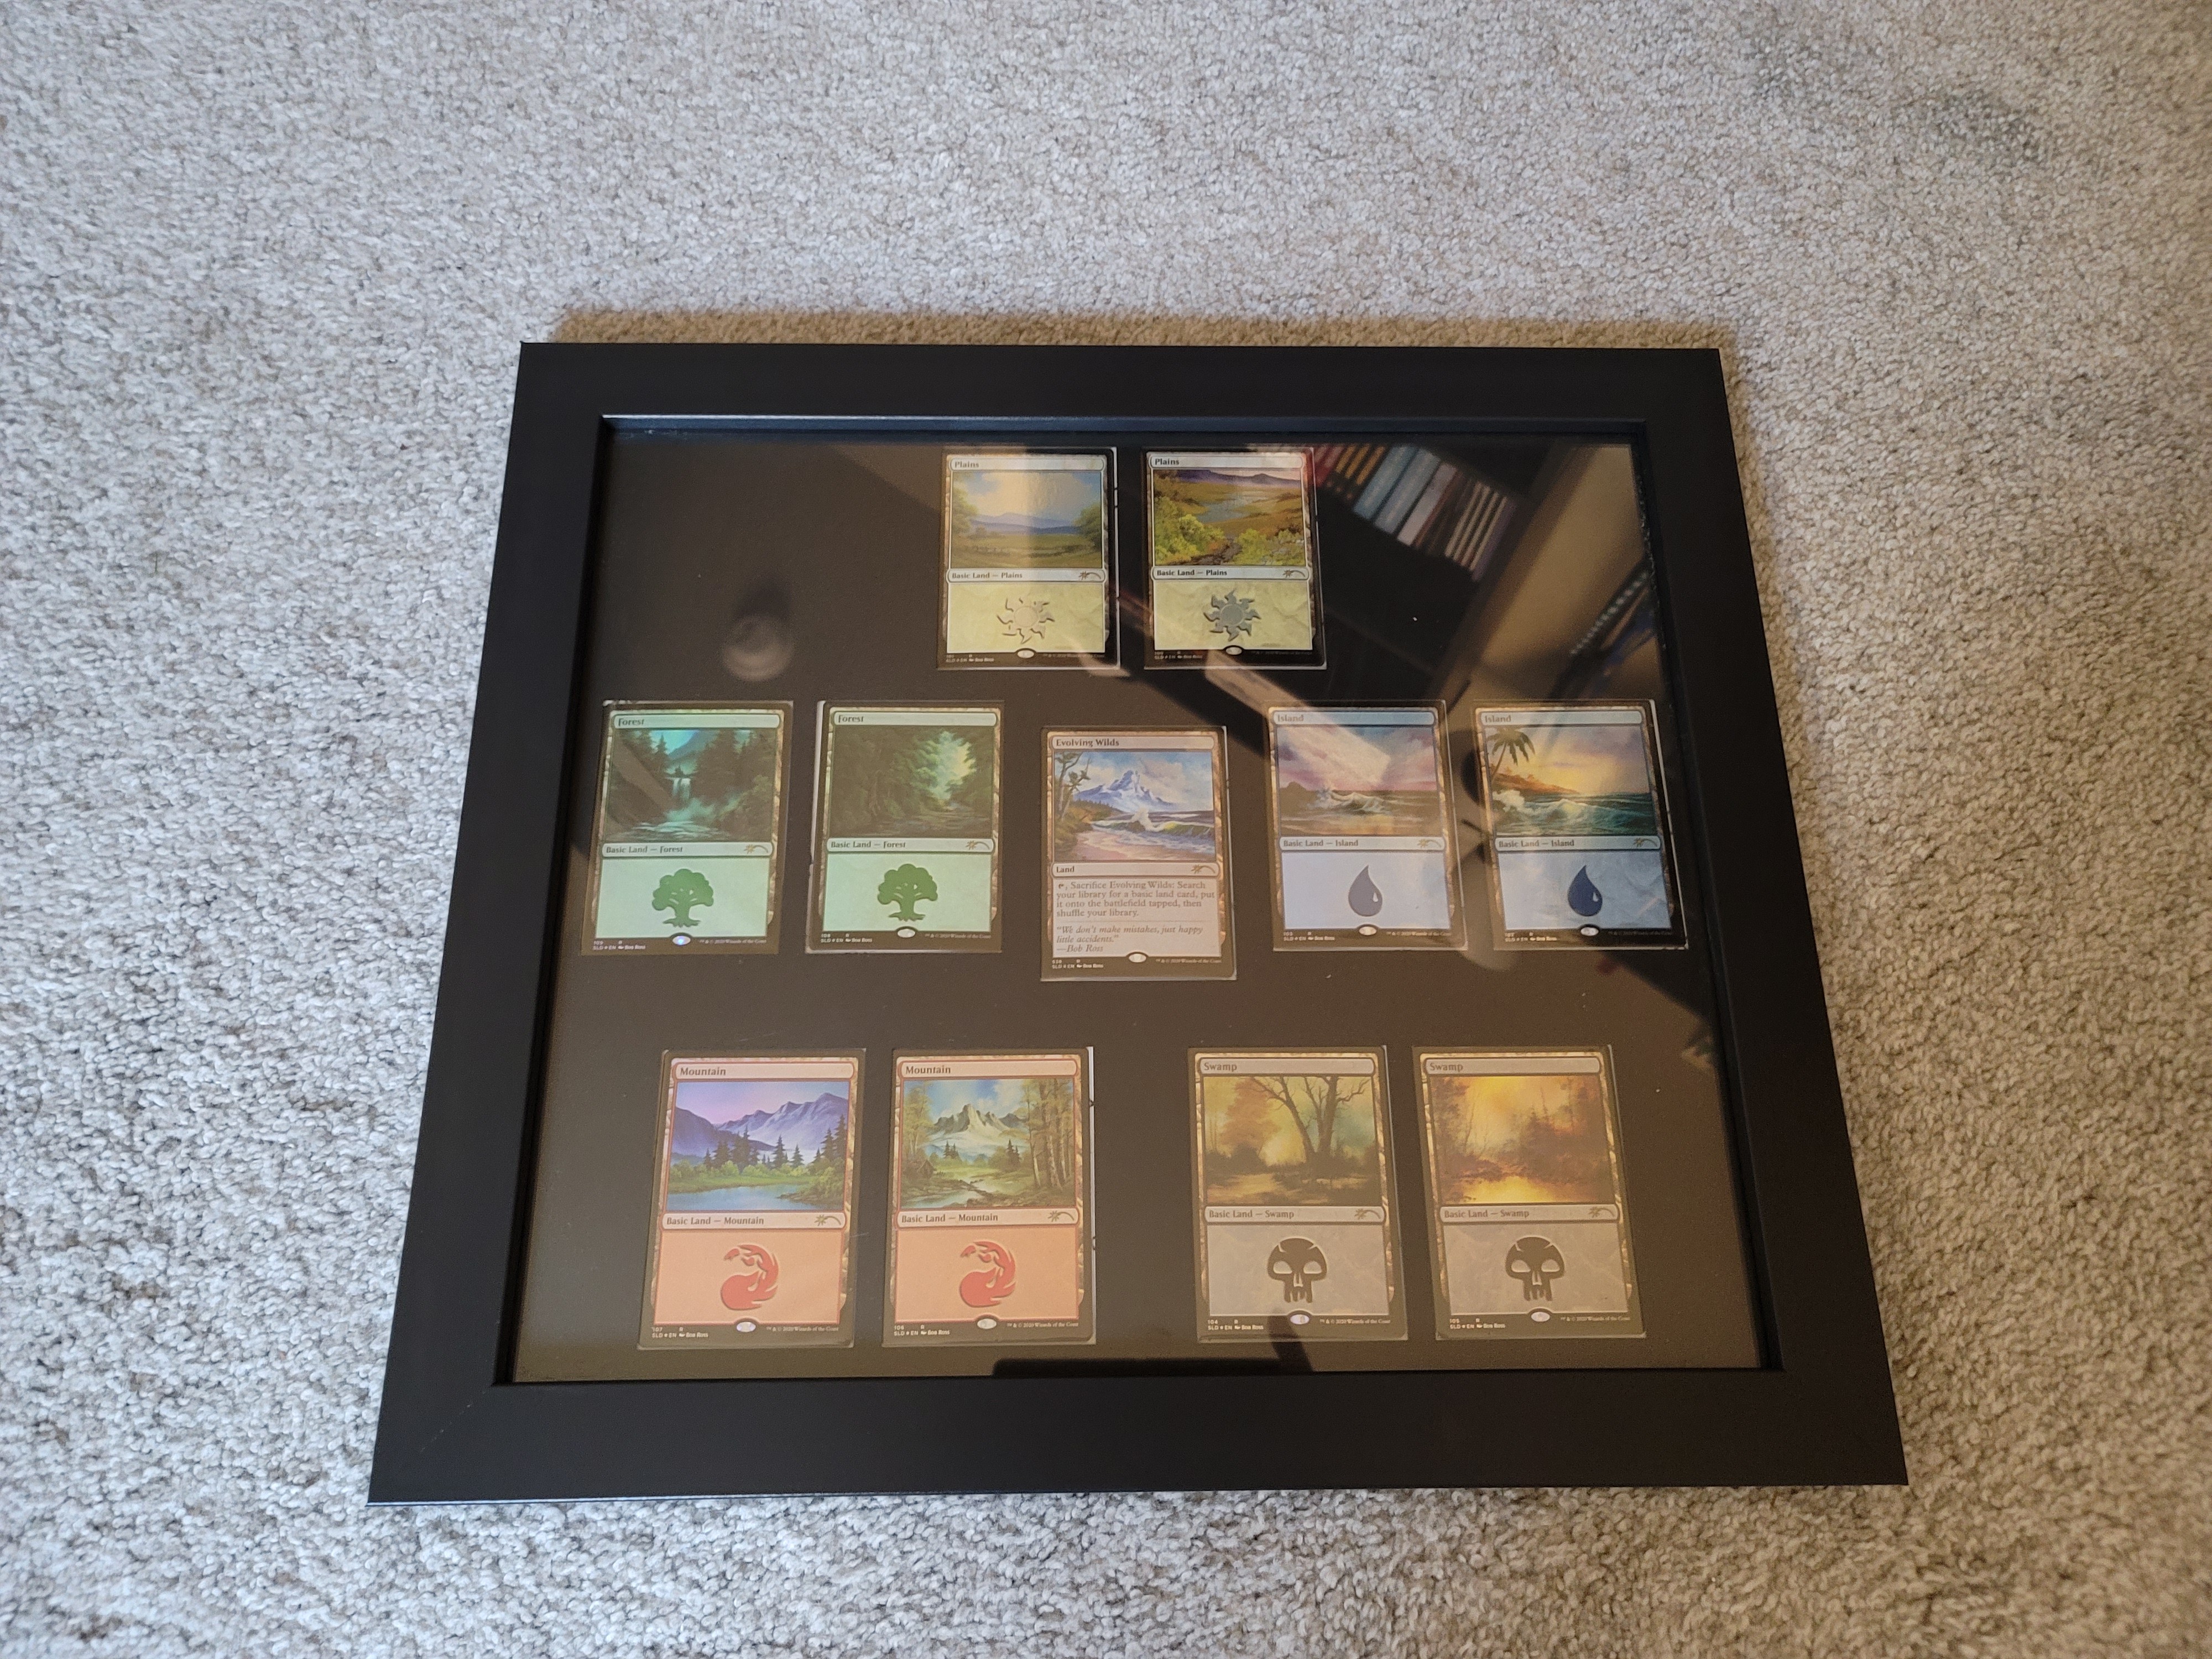
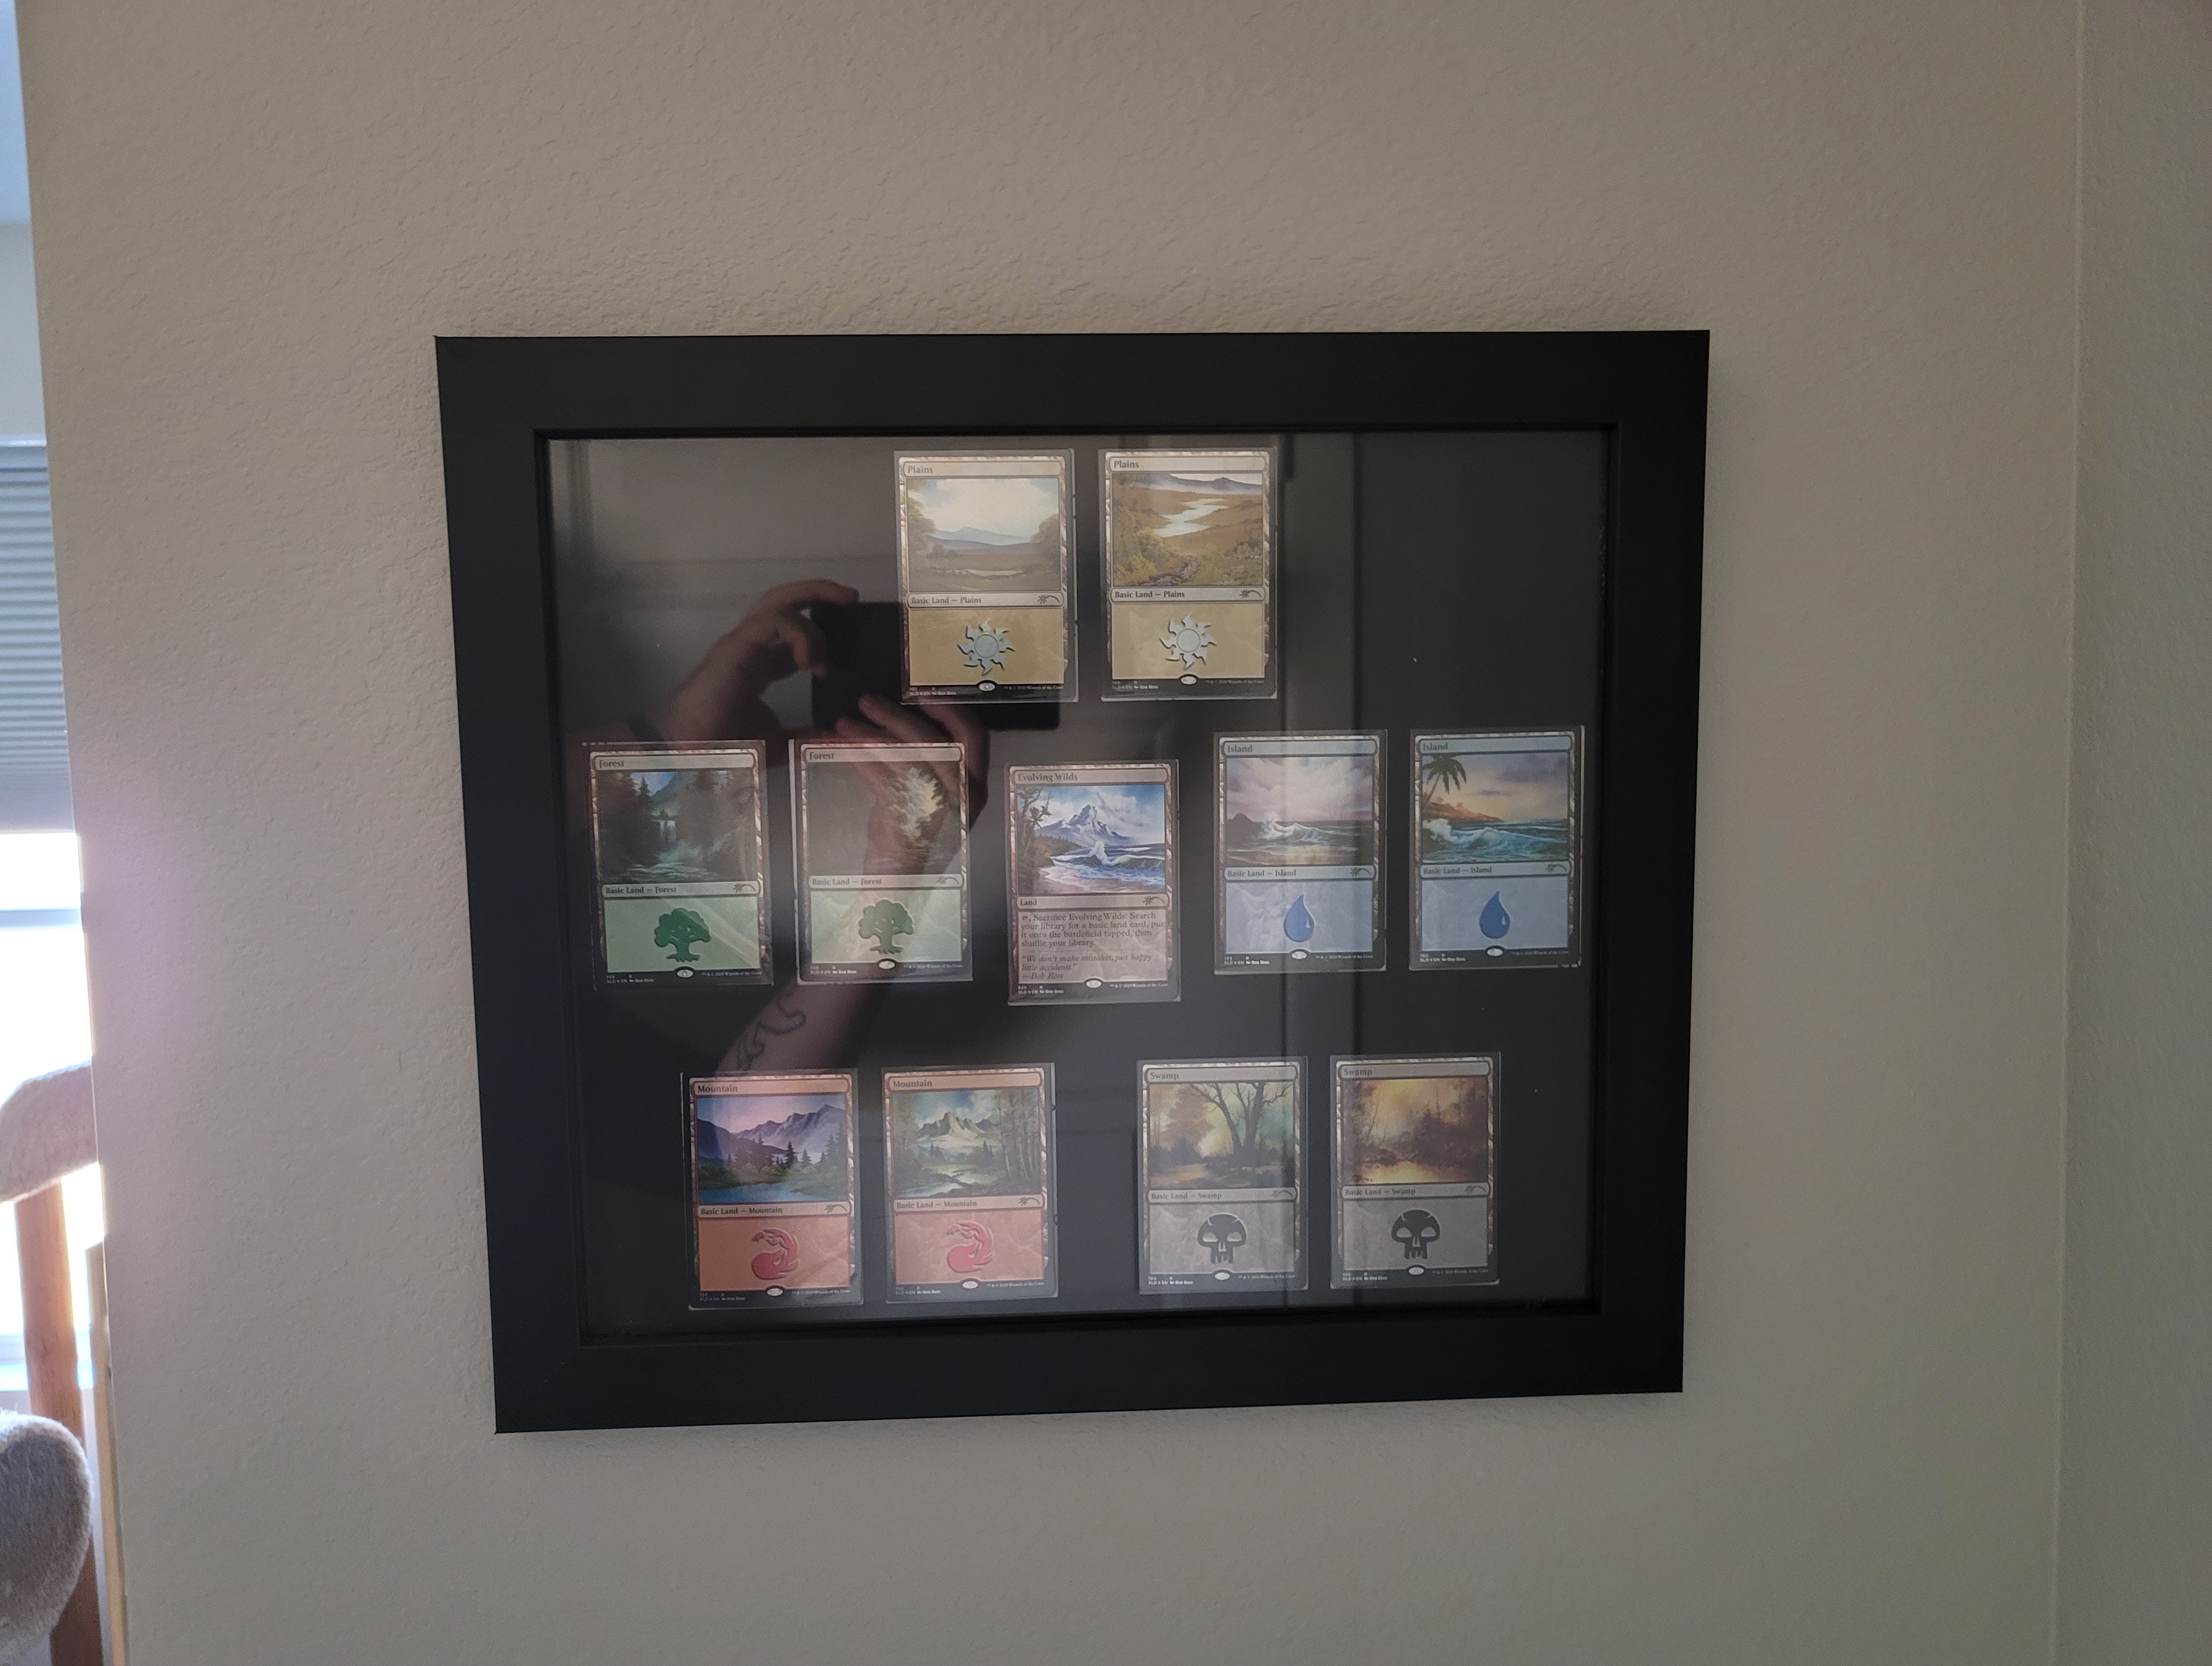
These are the cards in question, a limited edition drop called Happy Little Gathering, a cute homage to the late, great Bob Ross. Inside are 11 uniques pieces of art, two for each "mana type" needed to bring spell cards to the battle field. Let me just say, there isn't a picture in this post that does any of the portraits justice, so I highly recommend you check out some high-res images online.
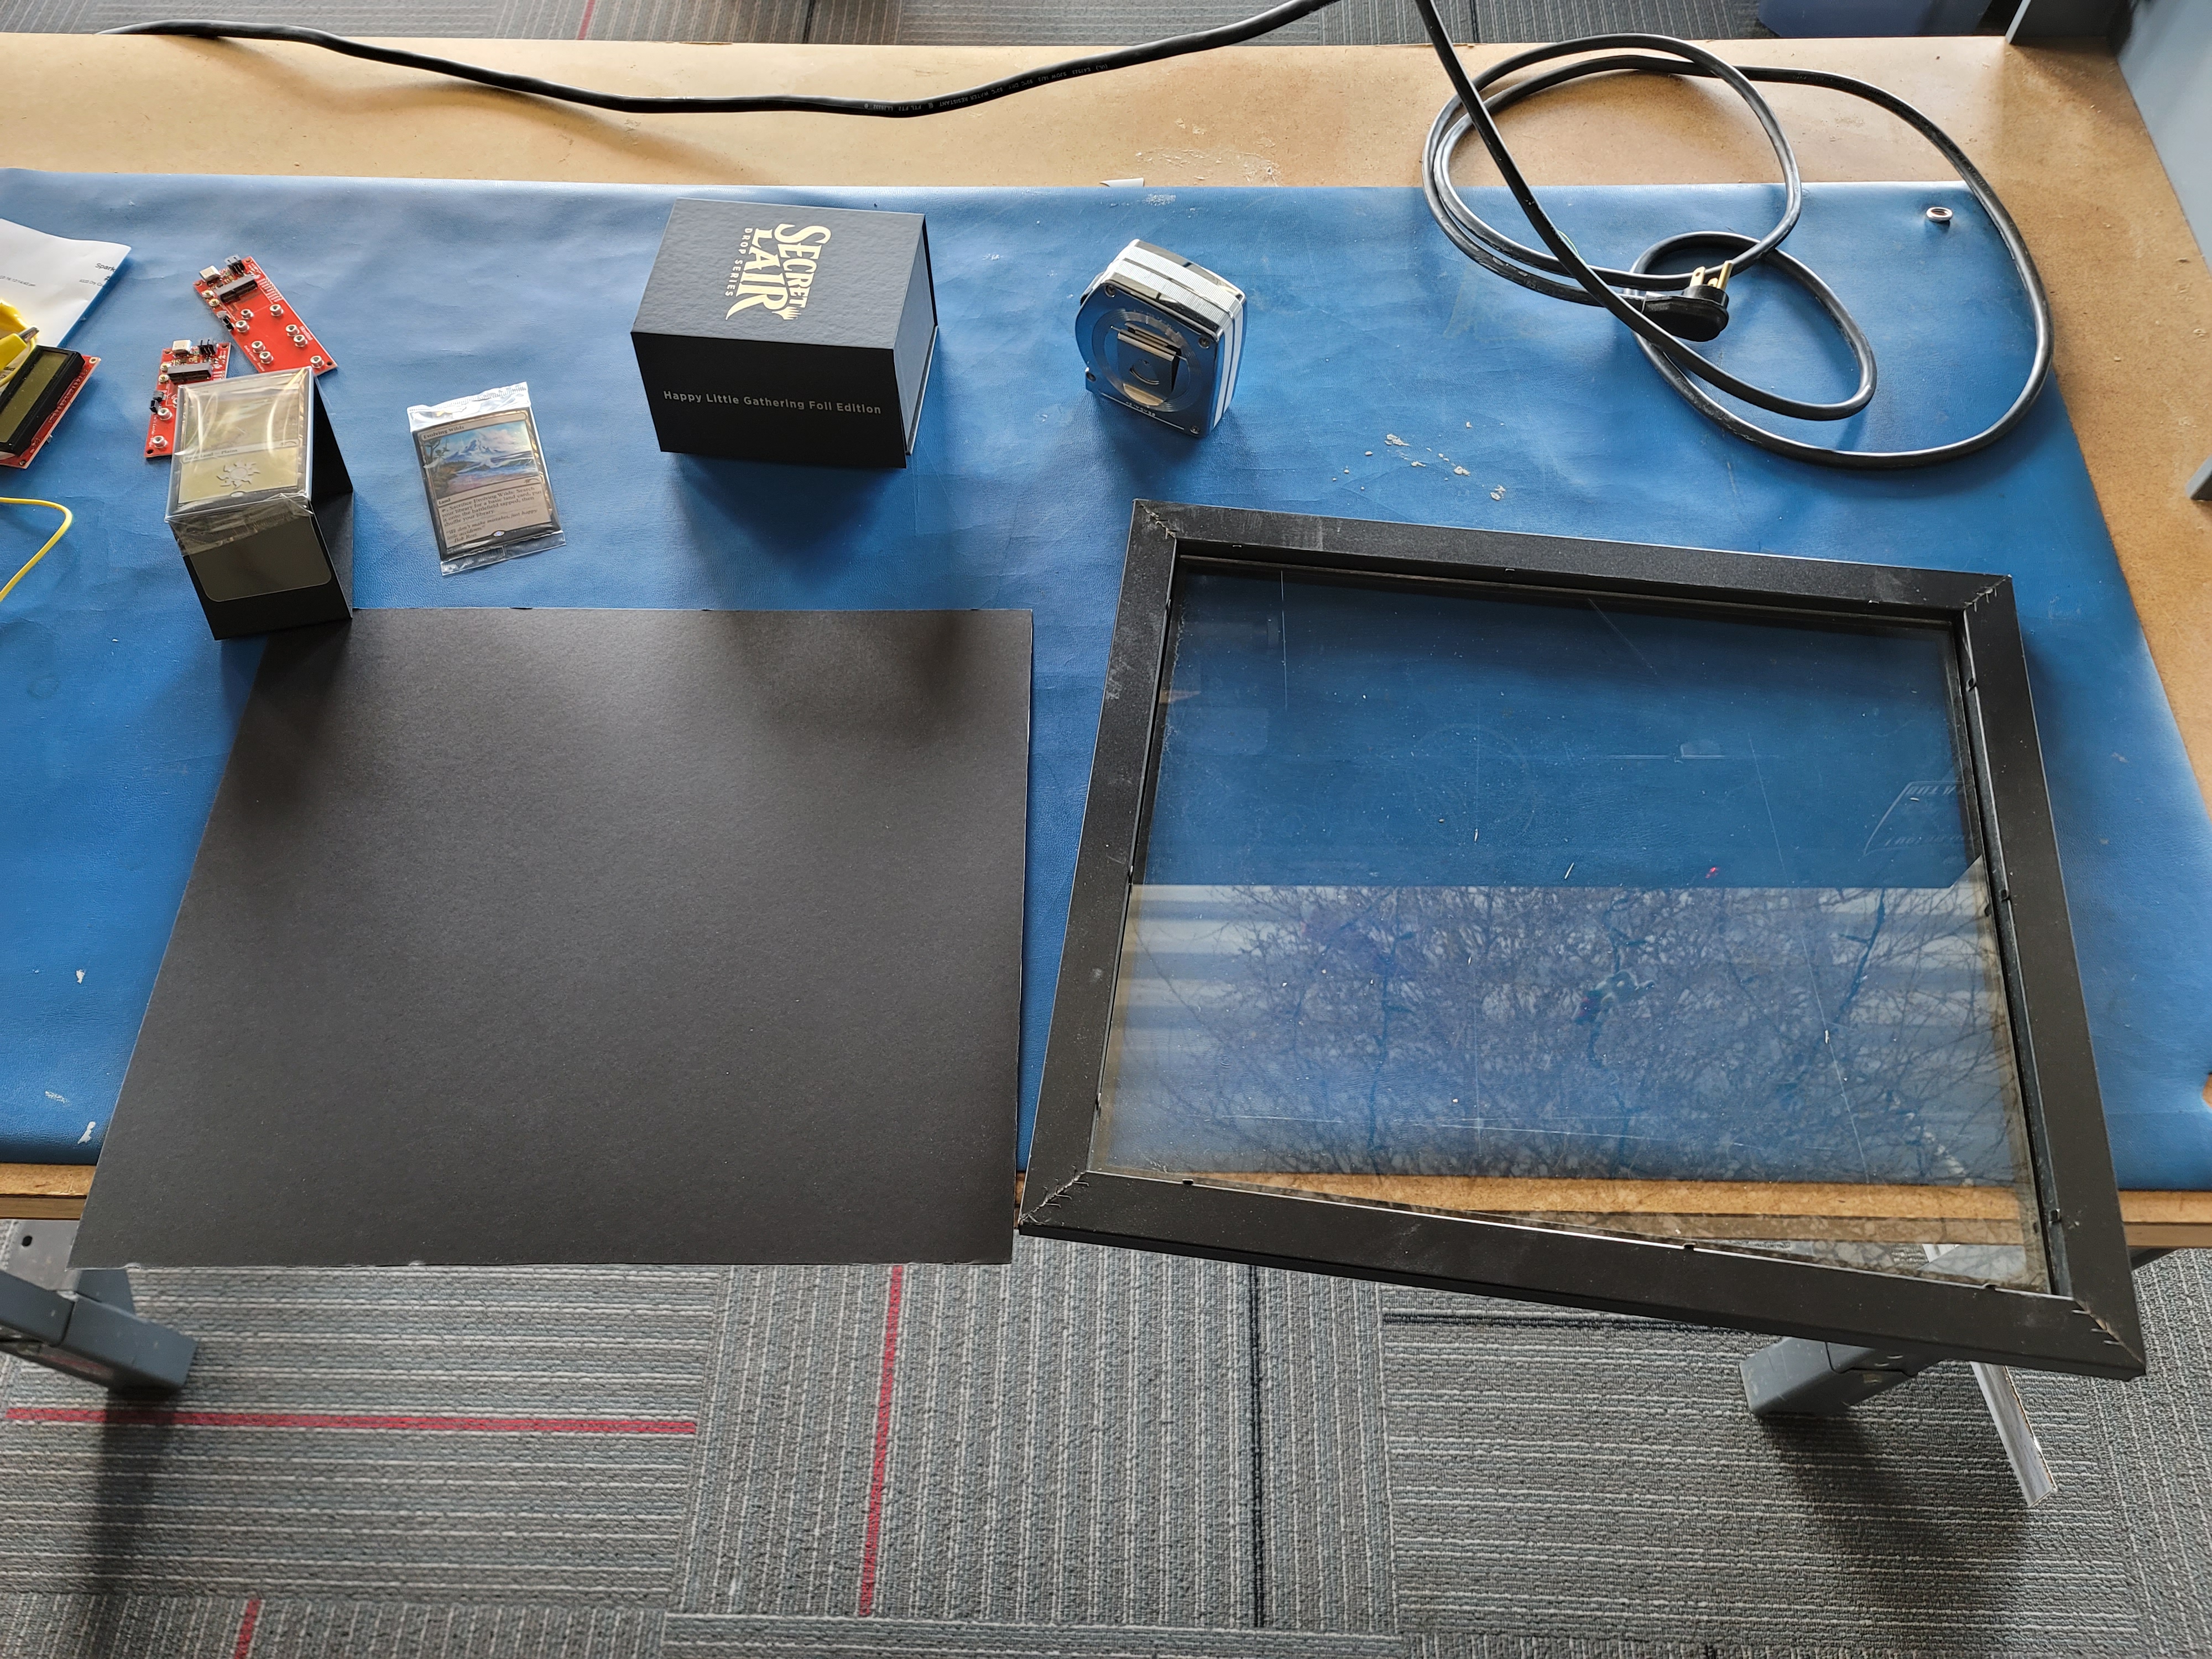
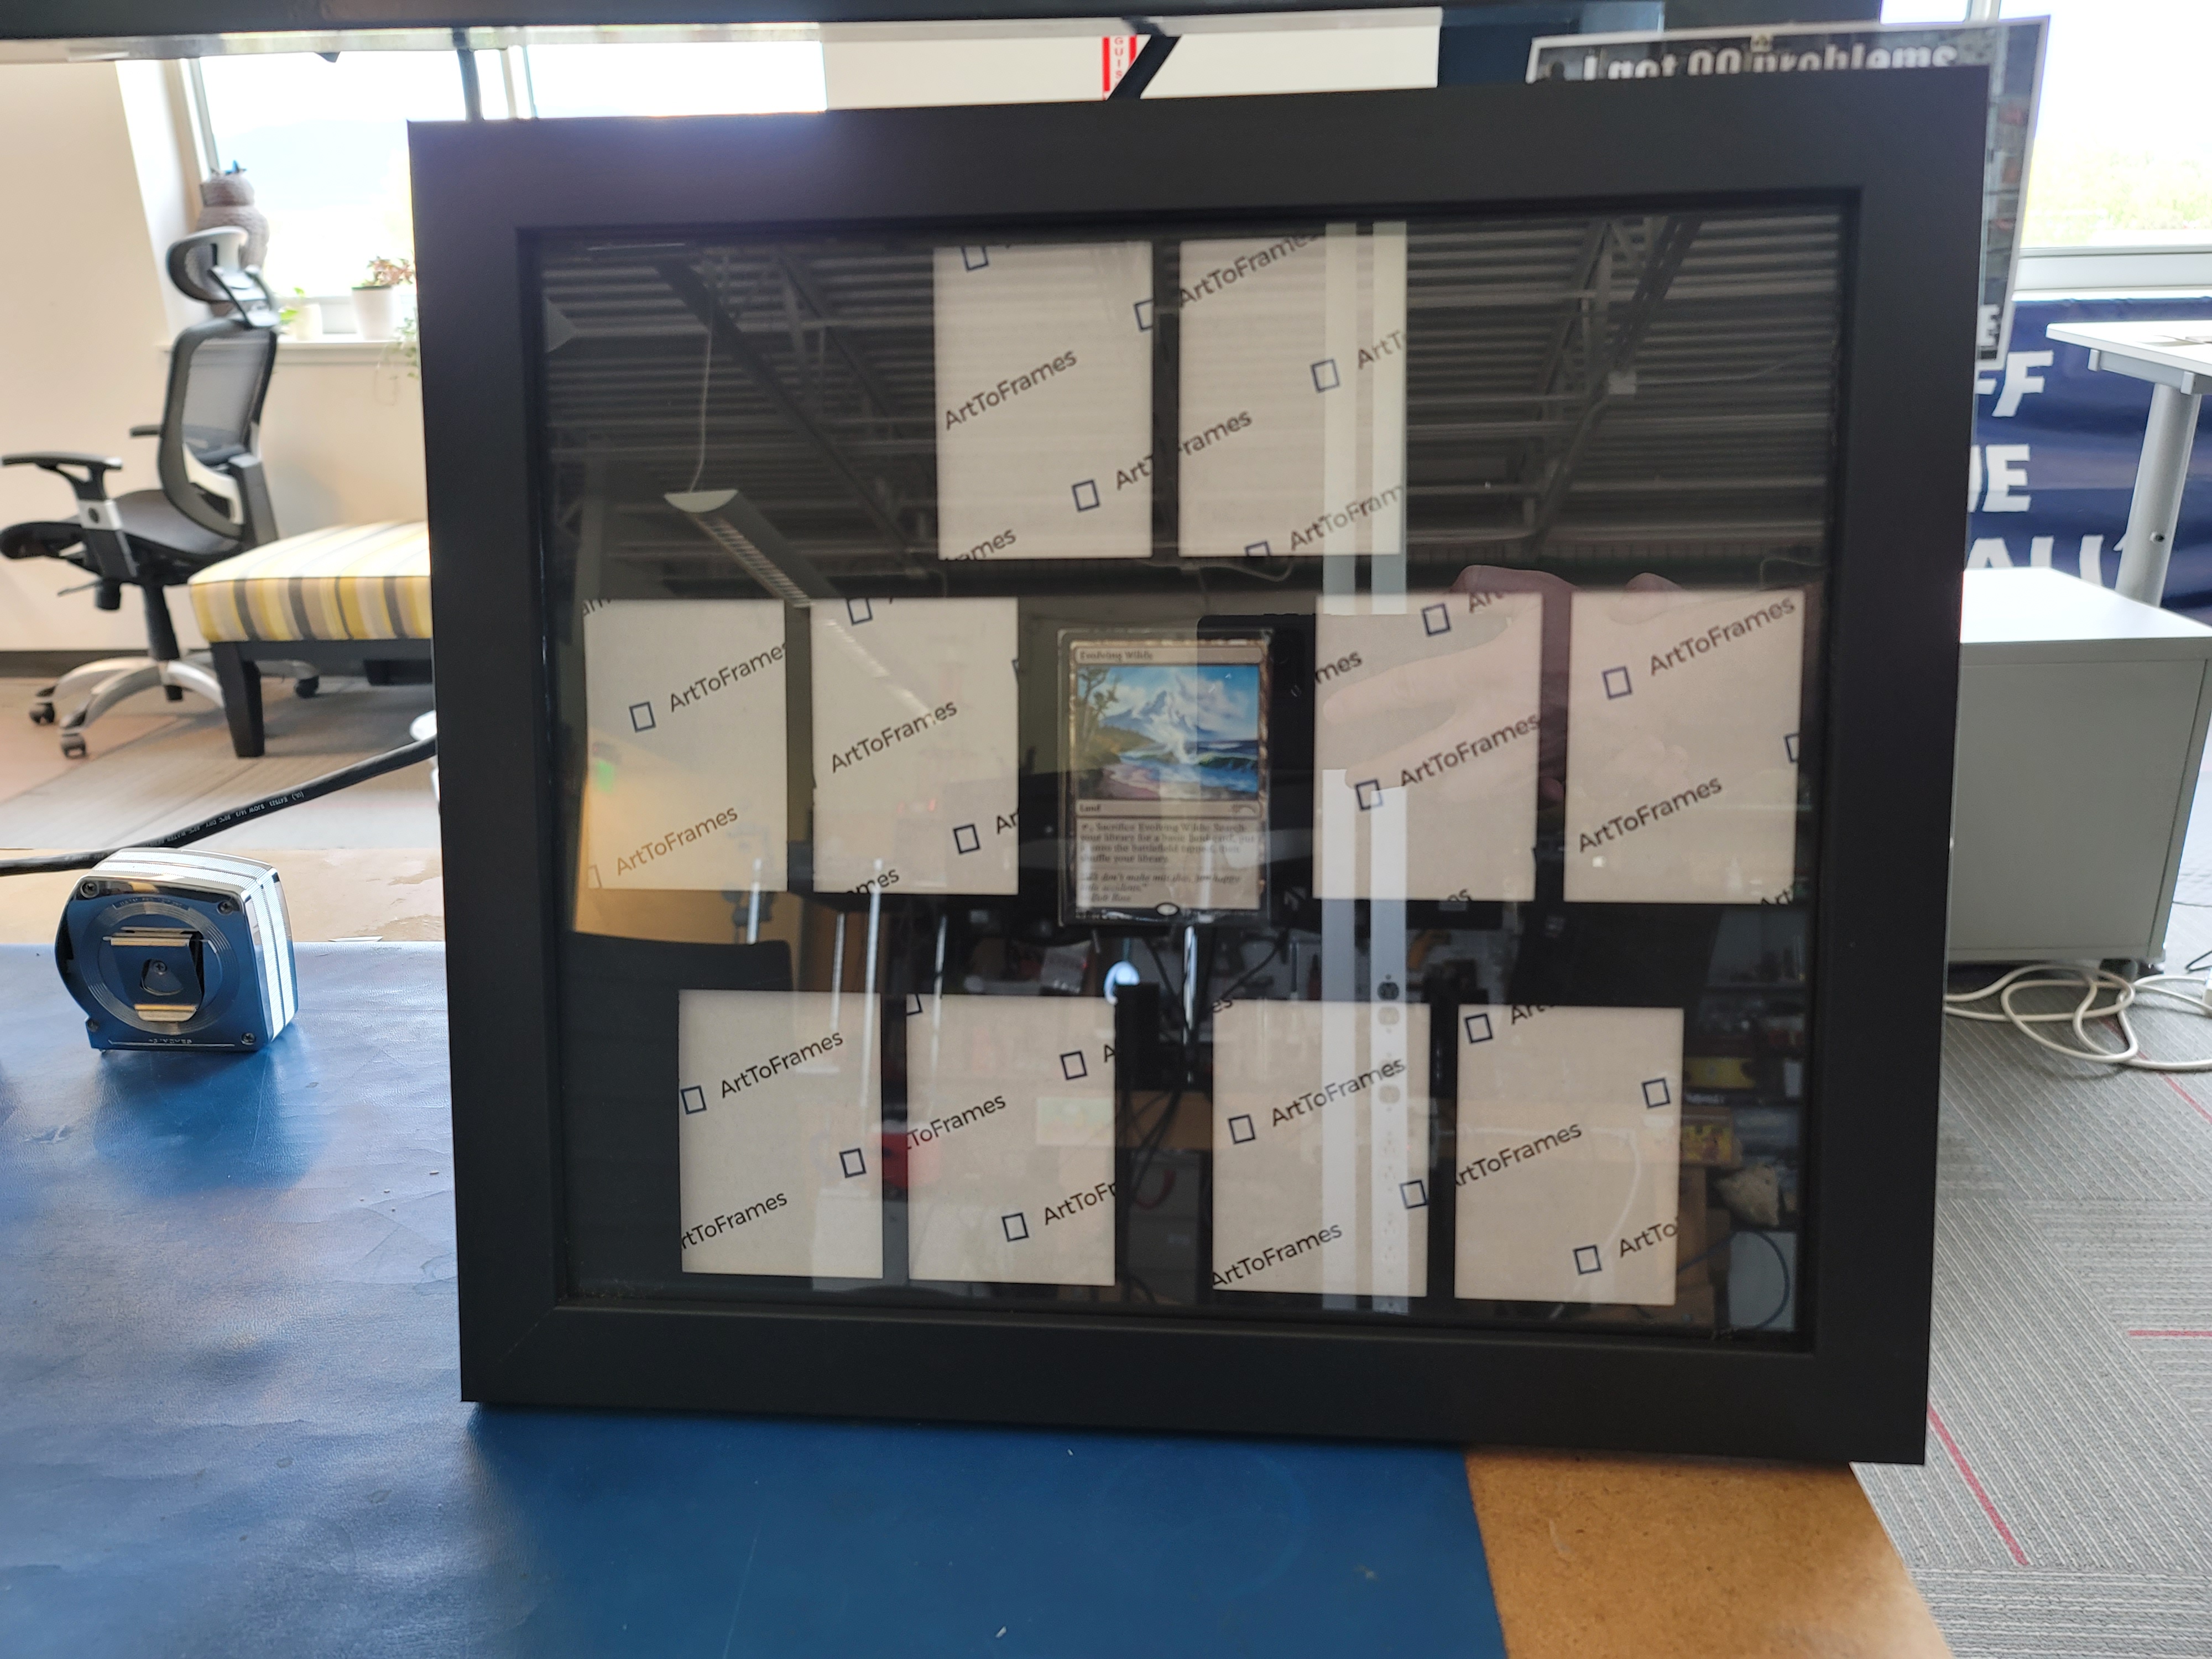
I was lucky to have a left over frame that I picked up back in January after receiving the wrong size for a different piece that I wanted to display. It just so happened that the frame was the perfect size for this project! I don't normally use/need mats for pieces that I frame so I was a little surprised how cheap a huge sheet was. I have plenty left over if anyone needs it... anyone?
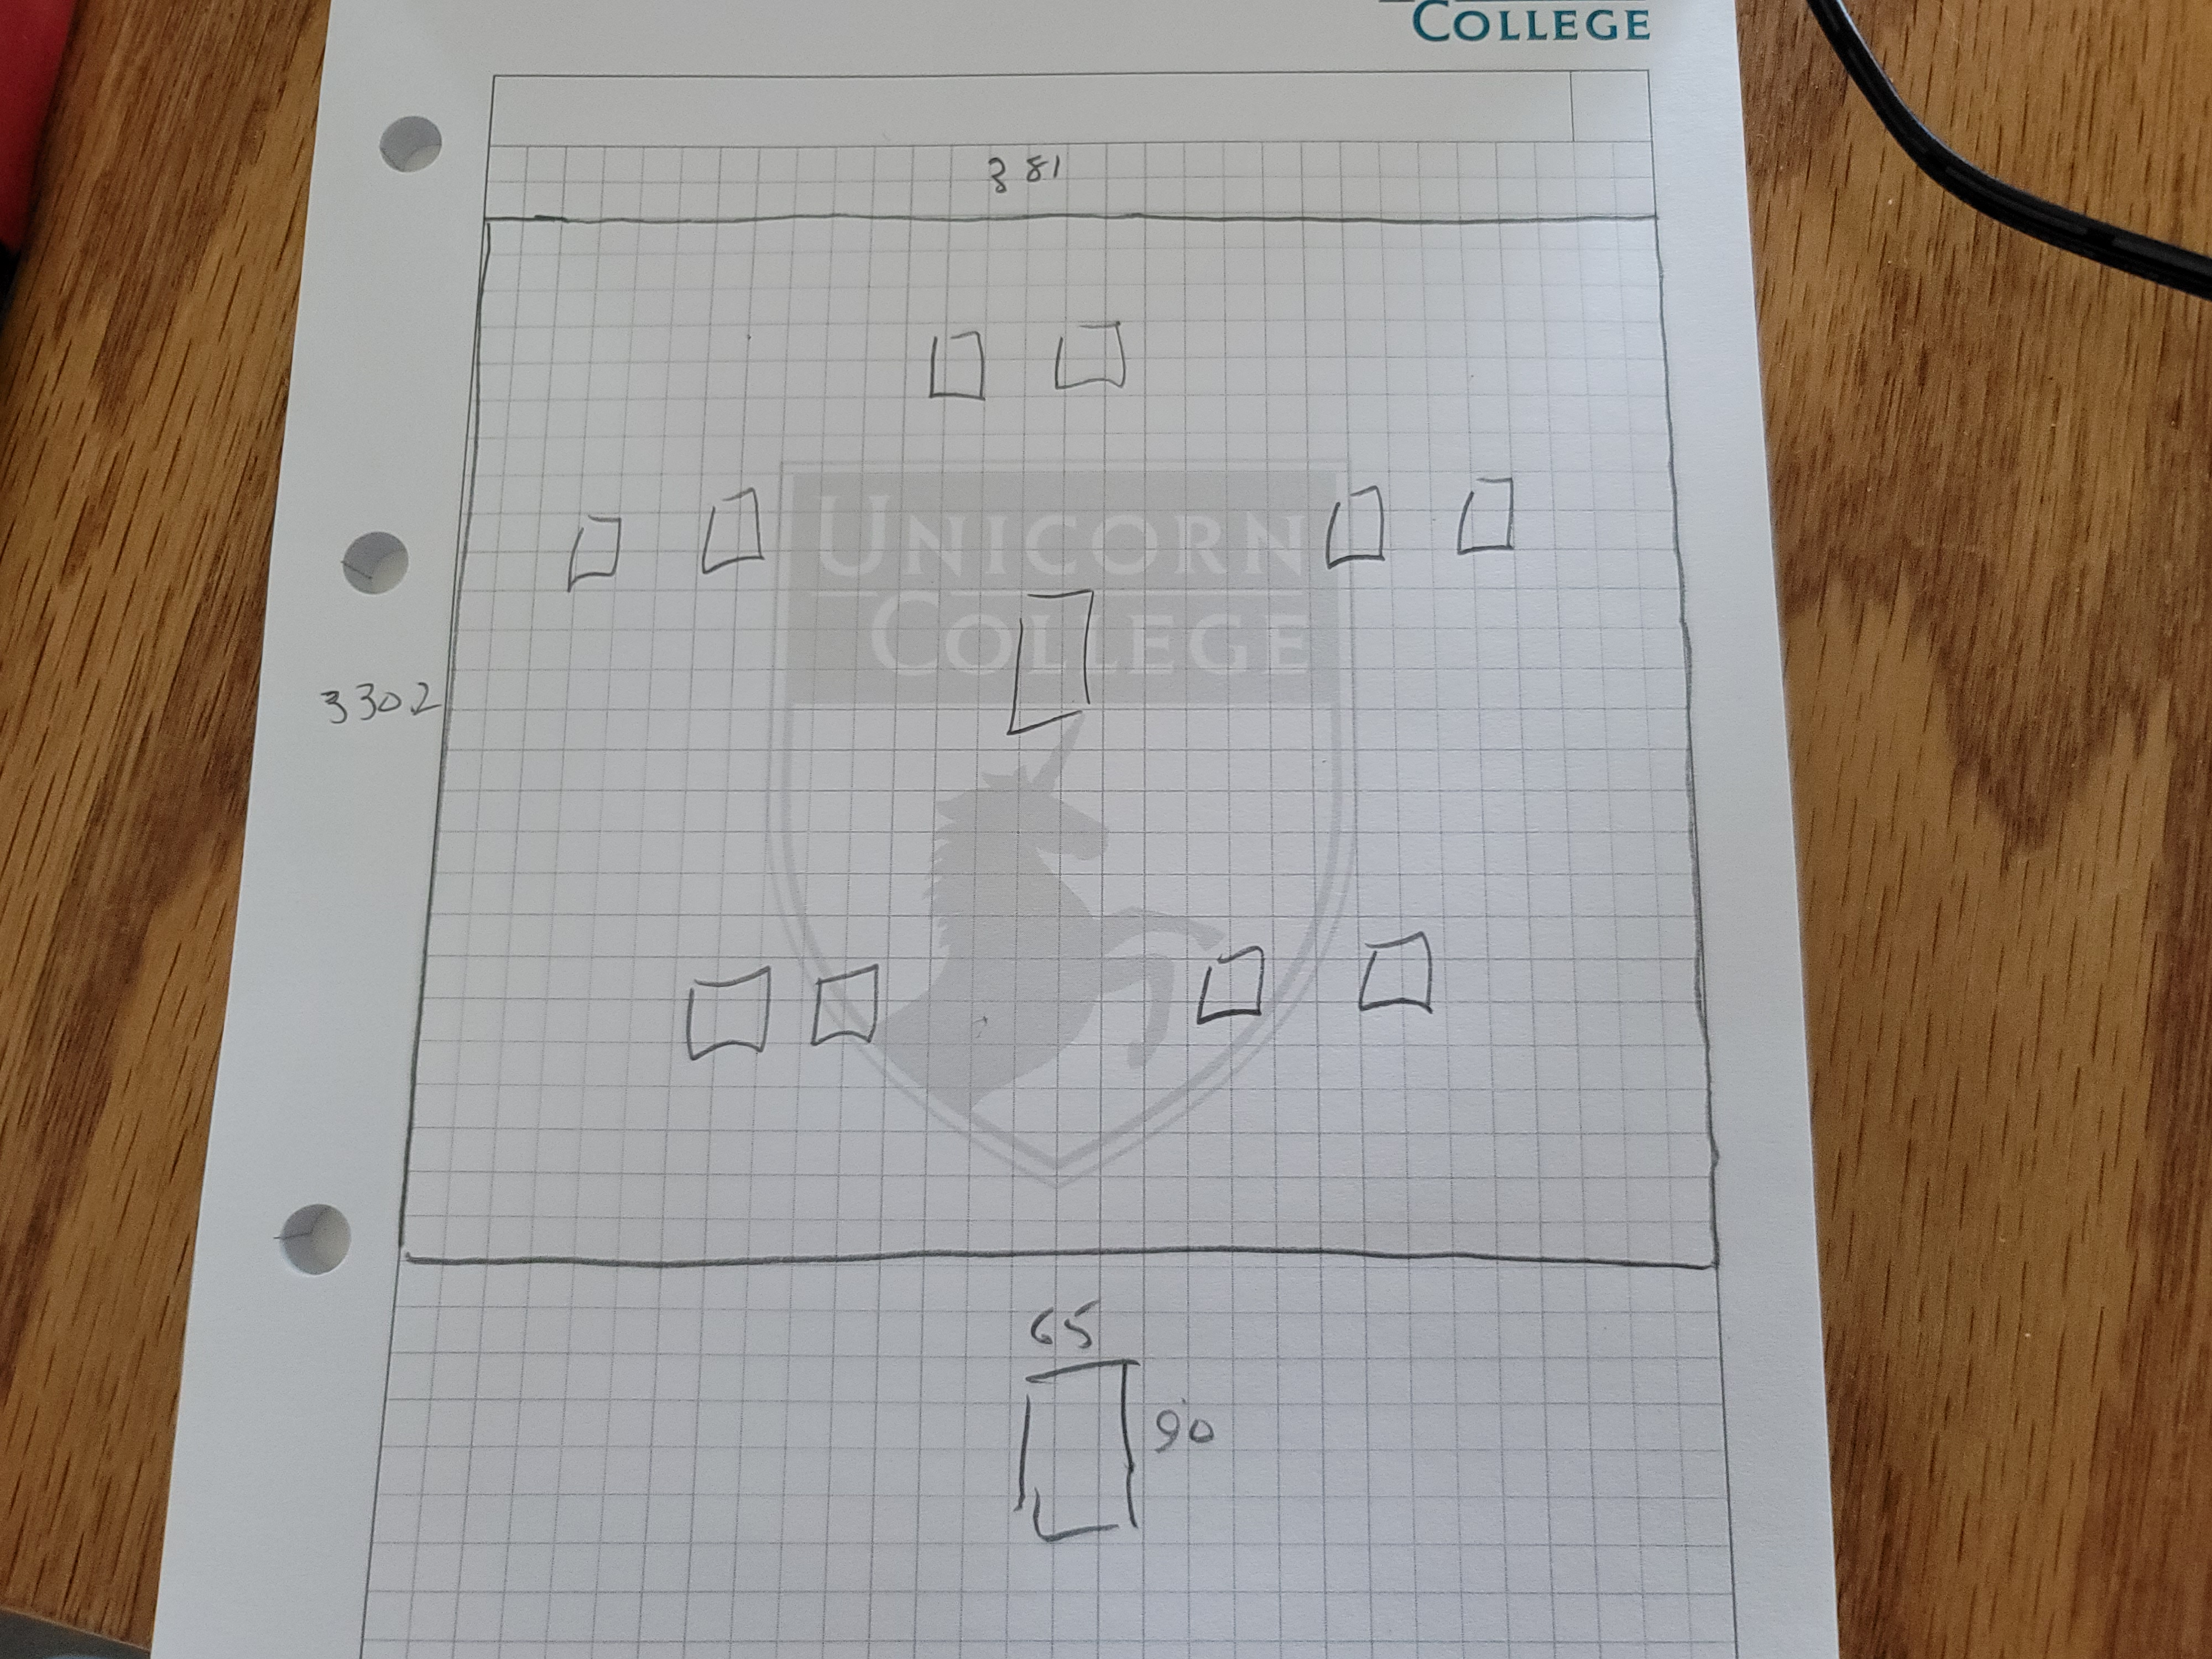
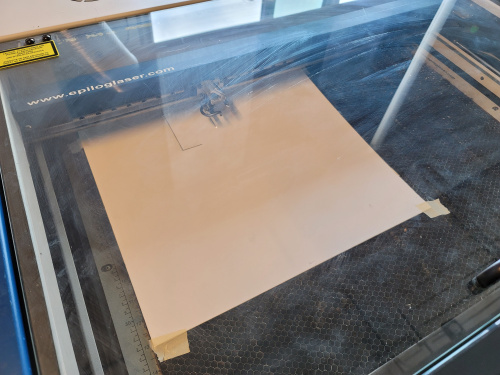
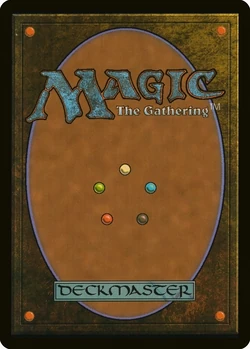
Now it was time to accurately measure each of the cards, the mat, and then lay them out on a sketch to see how we wanted to have them displayed in the frame. On the back of each Magic: The Gathering card is a layout of each of the five color types in the game (White, Blue, Black, Red, Green clockwise from the top), so we decided to keep with that pentagonal design. The 11th card happened to be a "colorless" version so naturally it fit right in the middle of the piece.

With a little help (read: a lot of help) from Rob, we were able to get the layout of the cards into Adobe Illustrator with the measurements we just took. Now that we knew how each card was going to be positioned on the black mat that I bought, we were ready to get this Fullmetal Alchemist-looking glyph to the Laser cutter!
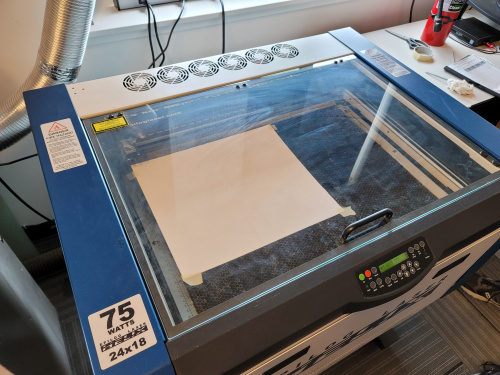
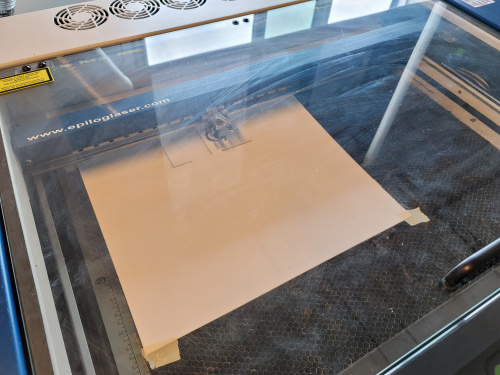
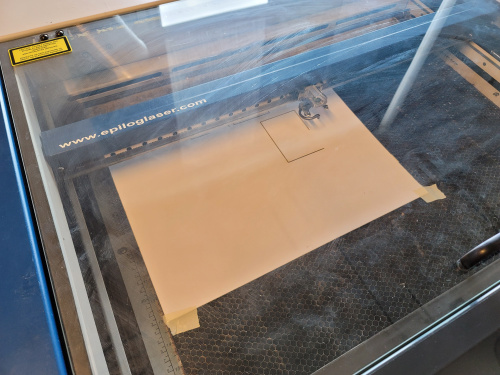
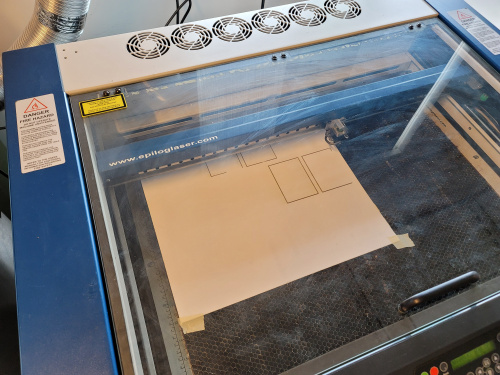
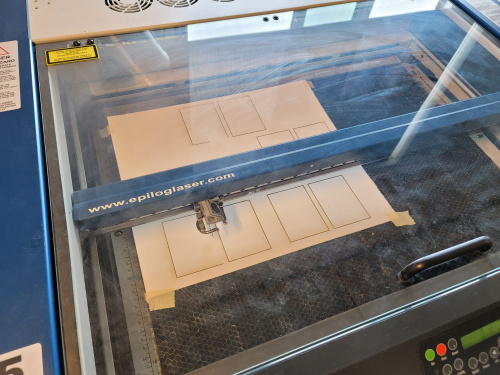
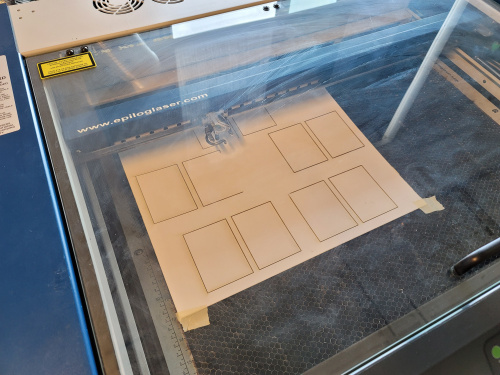
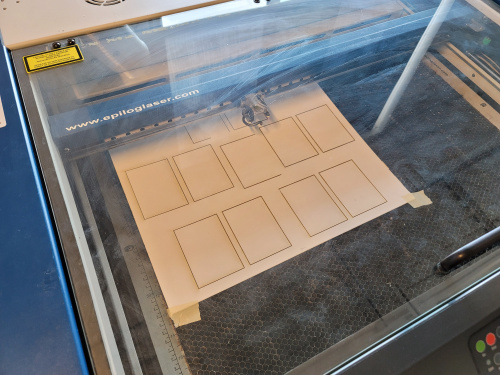
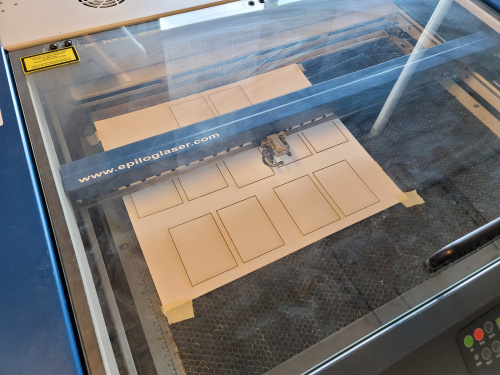
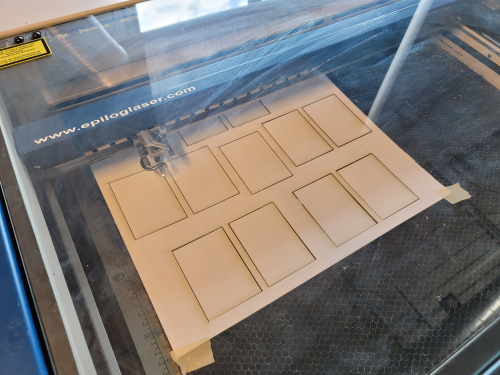
It took a couple of passes only because we had the focal length off by a quarter of an inch, so after two passes, our mat was successfully cut! Dang, that a pretty sweet pattern!
This part was a little nerve wracking because we wanted to be sure that everything we just cut would not only fit in the frame, but also allow each card to fit securely into each of their slots. Good news: even though we were only off by a single millimeter, everything fit into place just as we wanted them to!
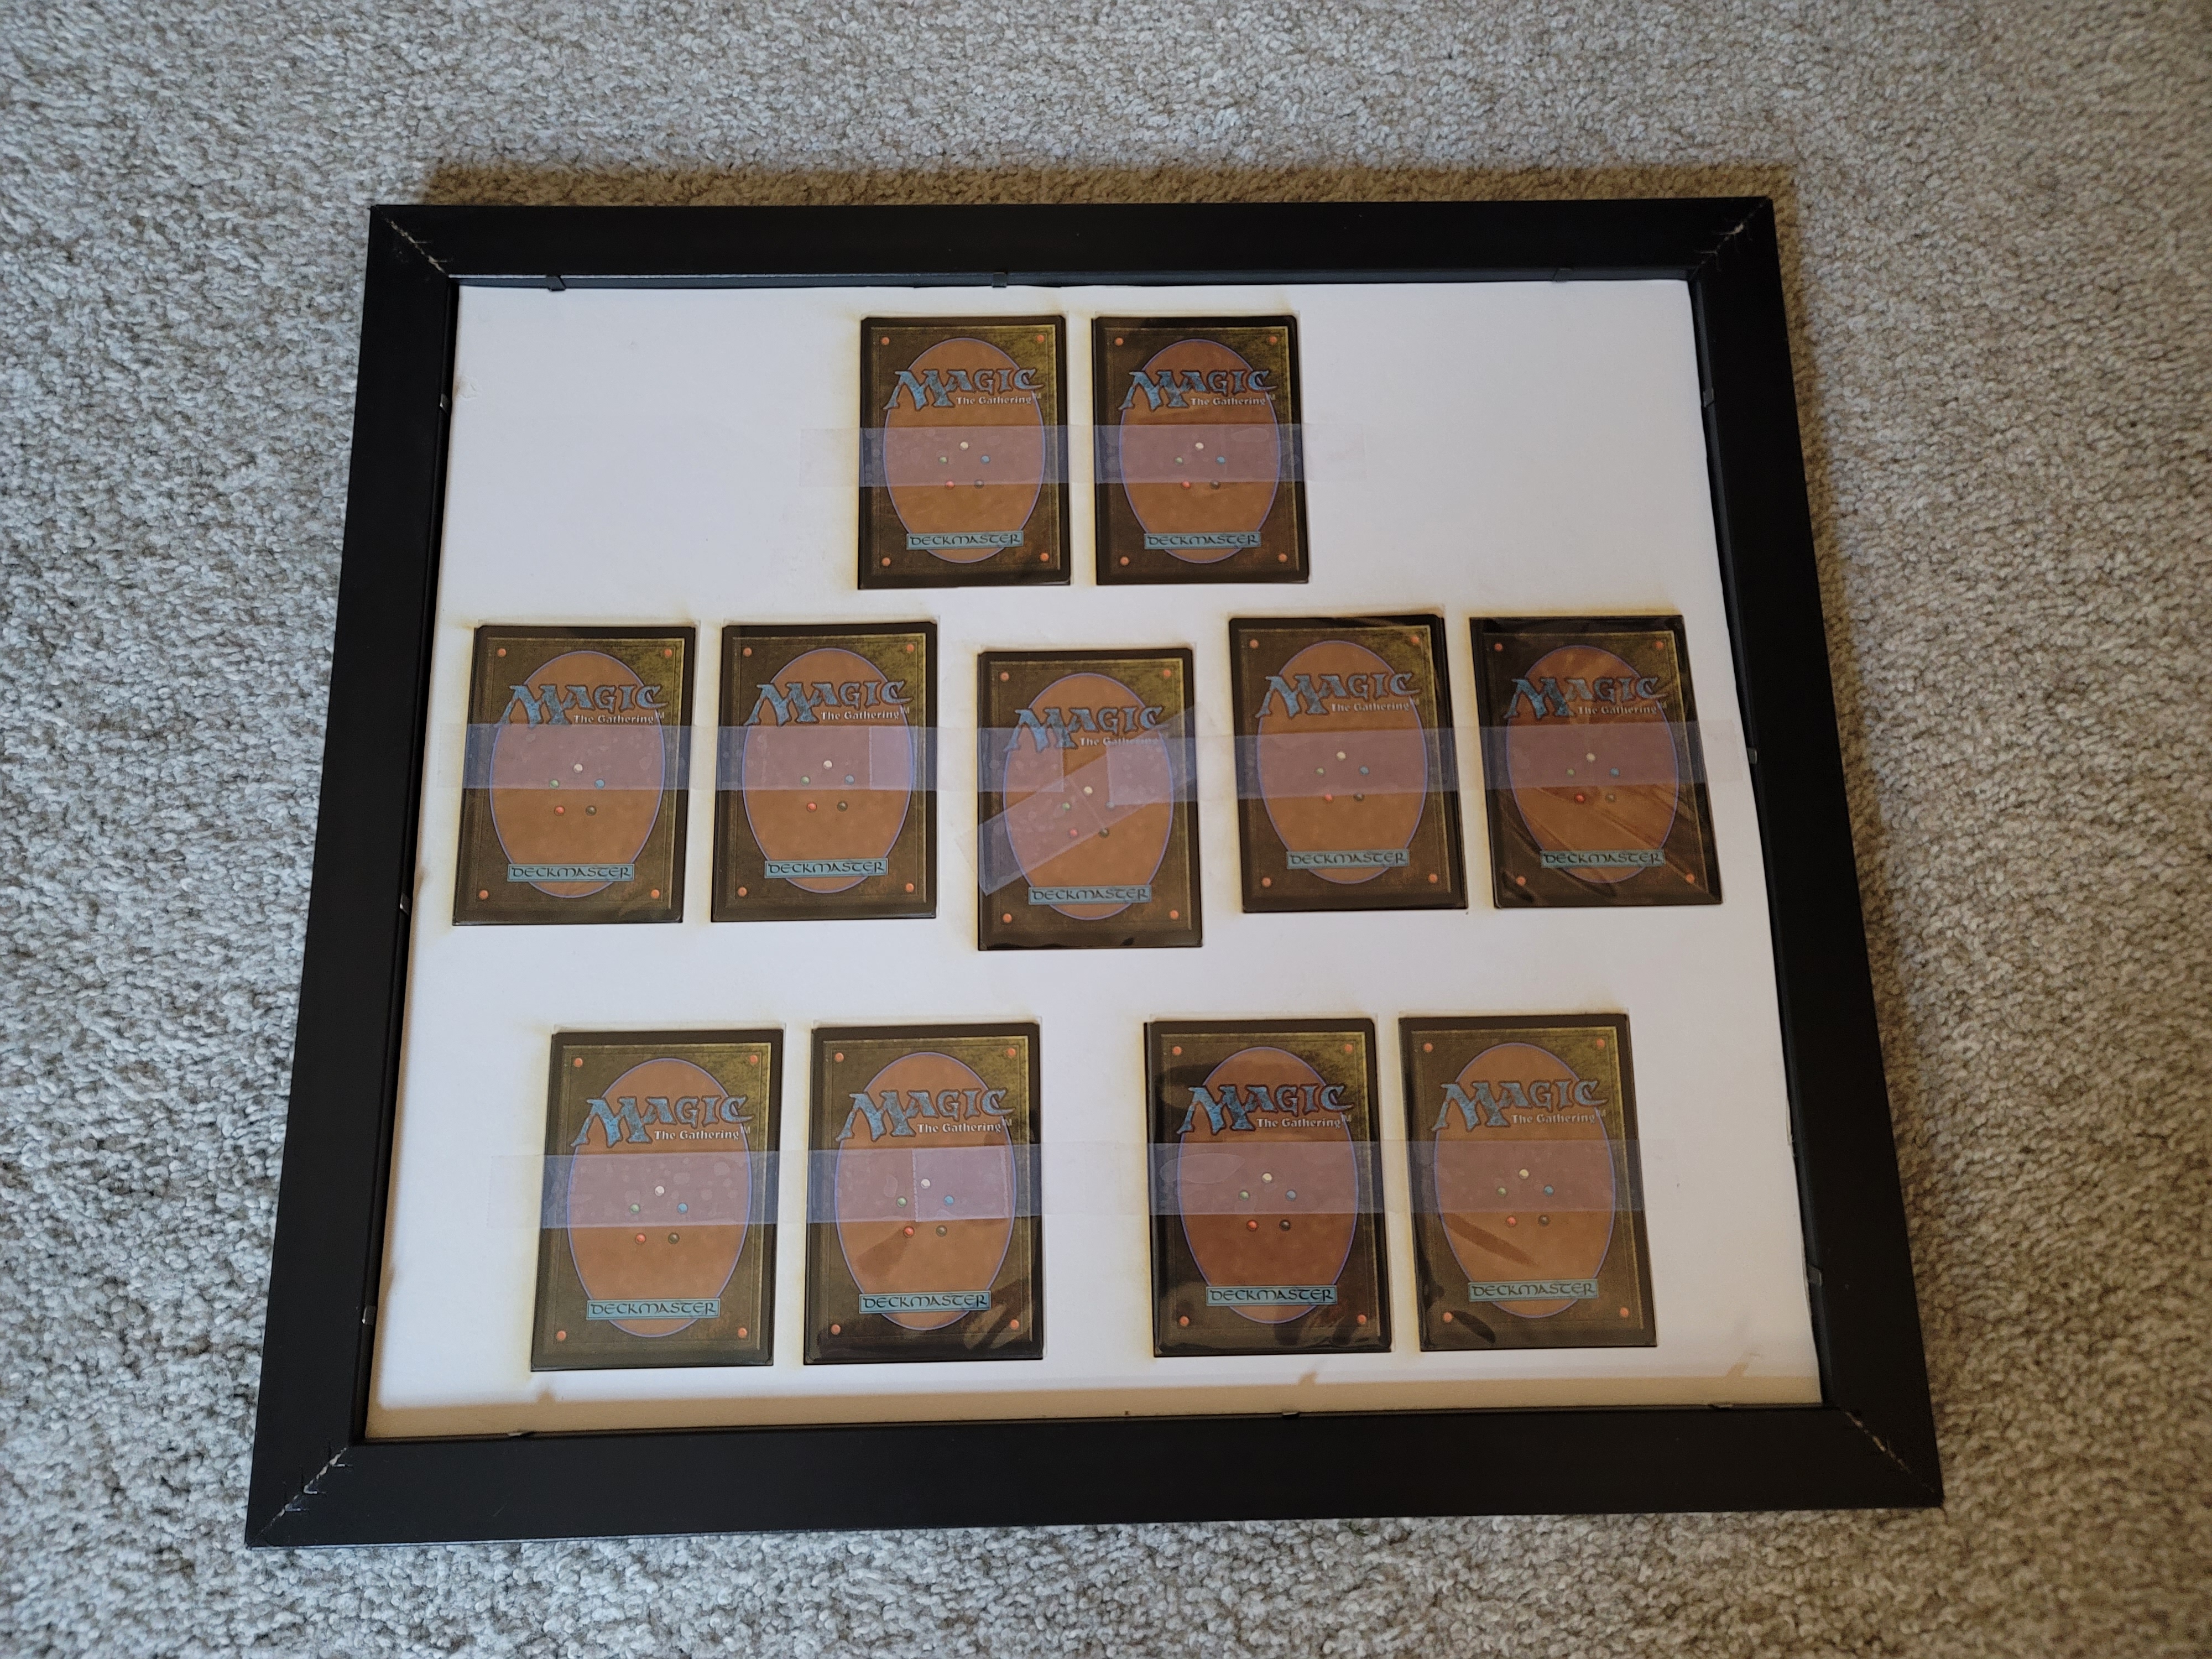
Cut to a few days later (and in a new location) and I was ready to start placing each of the 11 cards into their correct positions. I loaded each card into a protective sleeve and affixed each of them with scotch tape to the back of the mat. This is my first time ever mounting/framing any piece of work on my own so I imagine that that tape won't last but the process wasn't too difficult to do so if you have any tips or pointers for what I should use, please let me know in the comments below!
Over all, I'm pretty happy with how my first foray into Laser cutting and framing went. I was able to combine a couple of passions into one and learn a new skill. I was fortunate enough to pick up two sets of these cards so for my next project I might frame another set in a shadow box and line the inside edge with Lumenati or LuMini LEDs, or maybe a simple addressable strip that can display the colors of each mana type.
Let me know if you have any ideas on how to improve or grow this project. Also, if you happen to need the design files for this project, we have them and are happy to provide them for you!


