
Twinkling Fairy Wings
Just Winging It!
Maybe you've been looking for a good excuse to try out an e-textiles project, because you just can't see yourself wearing an illuminated business suit to work. I feel you. But it's time to put the tweed behind us, because it's almost Halloween! What better time to try your hand at a twinkling, illuminated project? LED wings make an awesome accent to your costume or a fun project to share with your little fairy or dragon! (Just make sure you don't let your kids do the melty bits!)
Necessary supplies:
- 2 LilyPad Tiny Twinkle boards
- 2 LilyPad coin cell battery holders, switched
- Conductive thread
- 8 LilyPad LEDs
- Cellophane- transparent, colored, or iridescent, it's up to you. I used iridescent and colored cellophane. This is commonly used in the making of gift baskets, so look for it near the gift wrap or the baskets.
- Thick wire - I used 12 gauge aluminum floral wire. This was easy to bend into shape, but will also be easy to bend out of shape. If you expect to put your wings to heavy use, you might want to choose a wire made from a stiffer metal. I needed about 10 yards.
- Floral tape- Whatever color you'd like- this will show through the wings, so choose a color that coordinates. I used less than a full 60' roll.
- Sewing machine- you can hand-sew these traces if you'd like, but if you have or can borrow one, machine sewing through vinyl is a bit more pleasant, and will make your traces very hearty, which is important, since this project is going to be sealed up, and it will be difficult to repair traces later on.
- Spray adhesive
- An iron or heat gun
Optional, if you're using the iron rather than the heat gun:
- Thin fabric or tissue paper
- A candle
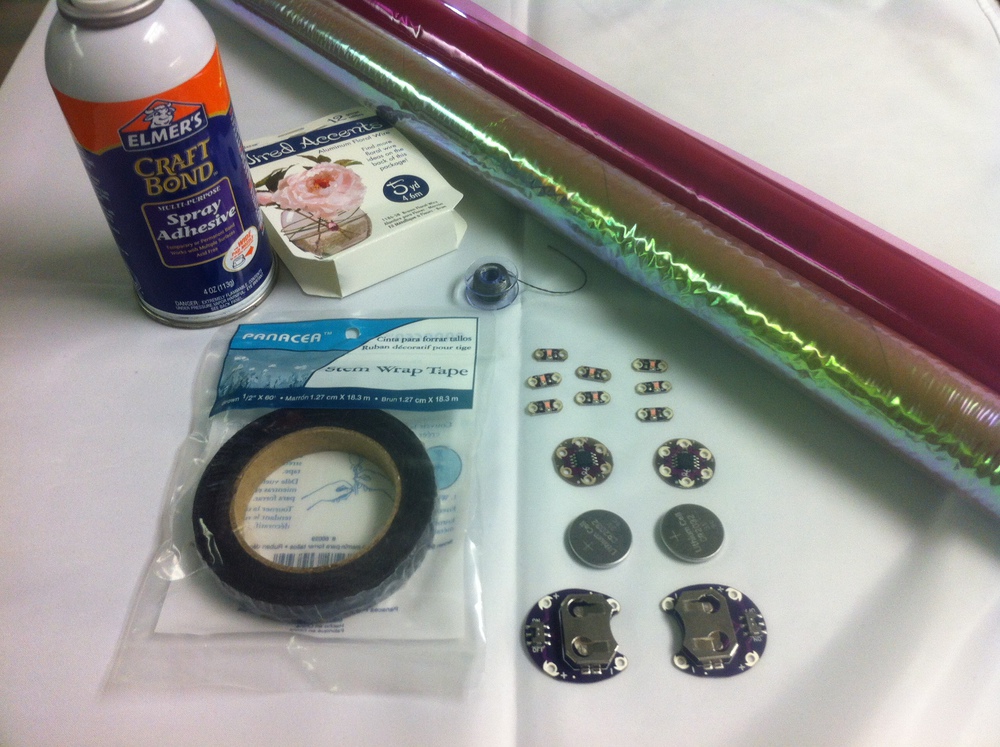
If your eyes are particularly sharp, you might notice that the wire isn't really there. I used it all. There's a picture of the packaging, in case that makes it easier to find at the store, but you'll have to fill in the actual wire with your imagination. I believe in you, dear reader.
First, go ahead and draw out the shape of your wings. You can do anything here- Fairy wings, bat wings, dragon wings. Just make sure that you factor in your need for support, because it's important that there be enough wire lines to keep your wings solid.
Here's my sketch:

The strong black lines are my wire frame, the areas with pencil-lines will be covered with cellophane, and the dark grey areas will be colored cellophane accents.
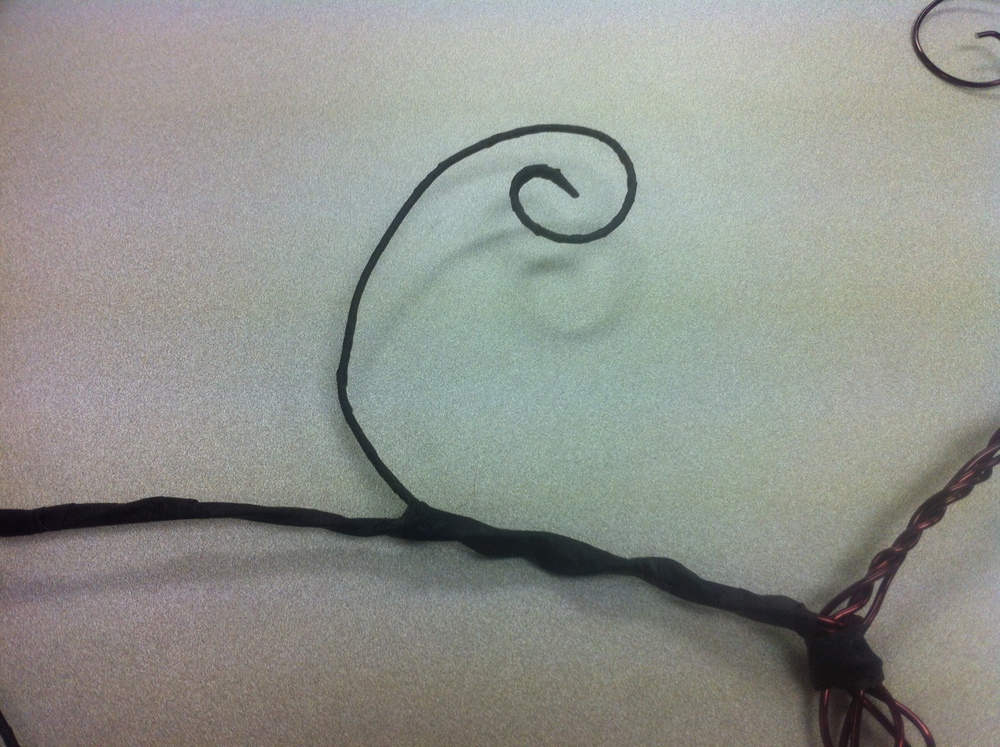
Next, start cutting your wire and bending it to shape. Be careful to cut pieces that are going to be symmetrically across from each other together, so that you can cut them to the same length. That will help you to make sure that your wings end up as even and symmetrical as possible. I recommend starting your longest wires first, and building the smaller ones off of them. Furthermore, if you use one long piece of wire for both sides of your longest point, and put a large loop in the middle, it will give you a center point to attach future pieces to, which is a handy place to work out from. You can build this center strut a little taller than the actual center of the wings, and it will give you a good place to attach straps. Anywhere that your wires join, wrap them around each other several times.
Here are a few wire joins:
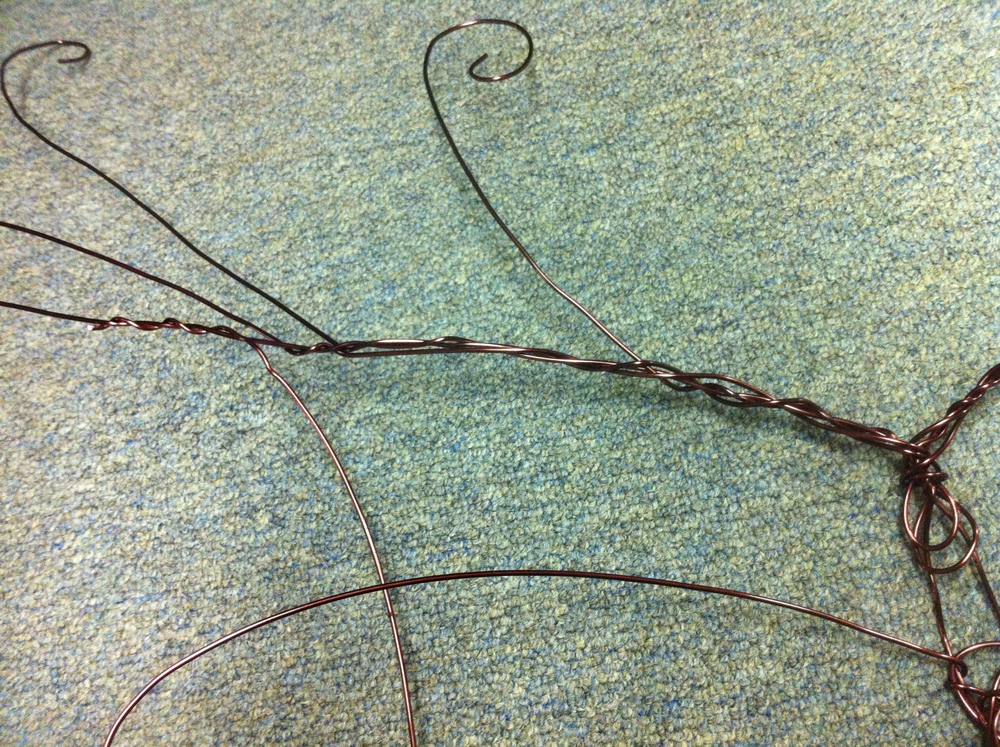
You can see that they've been twisted around each other a few times, and you can also see the loops where they meet in the middle.
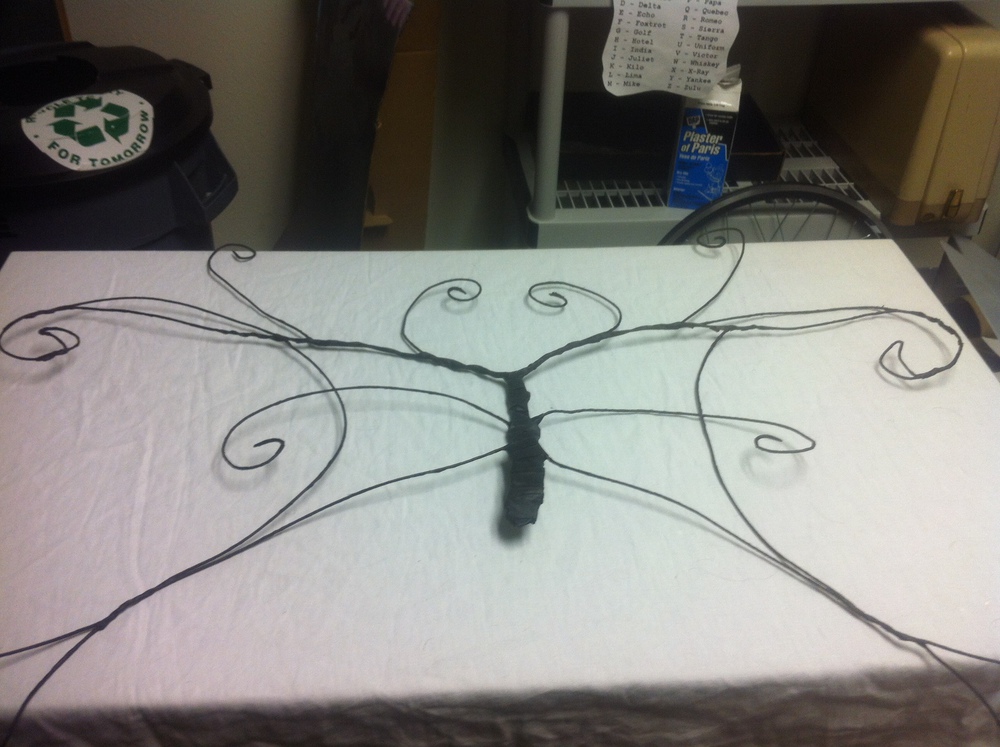
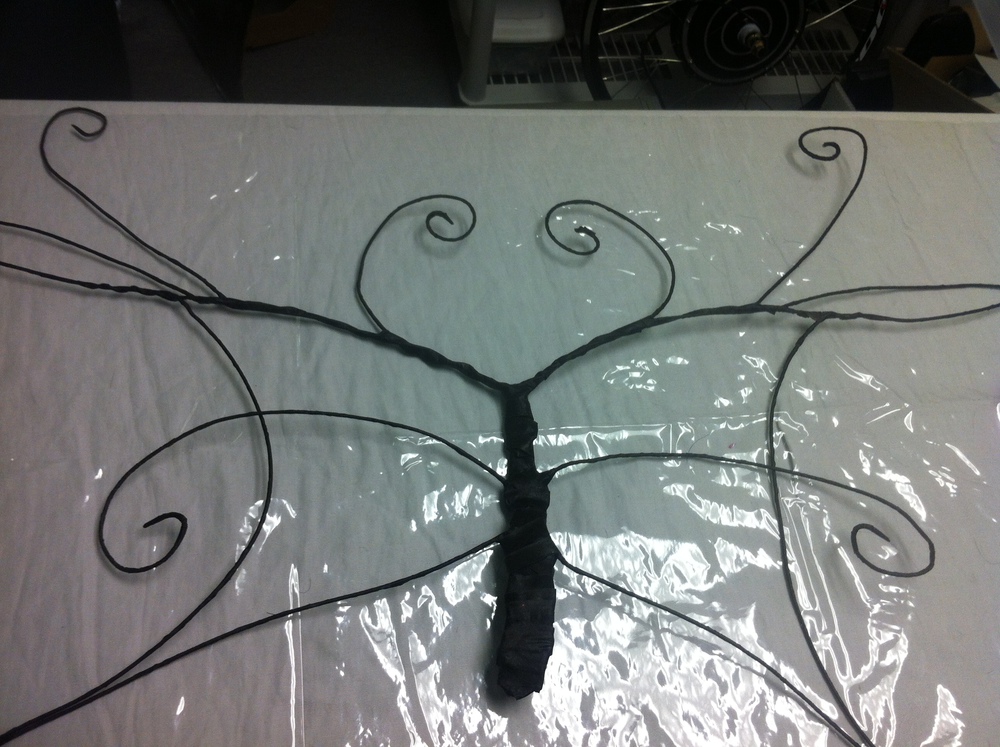
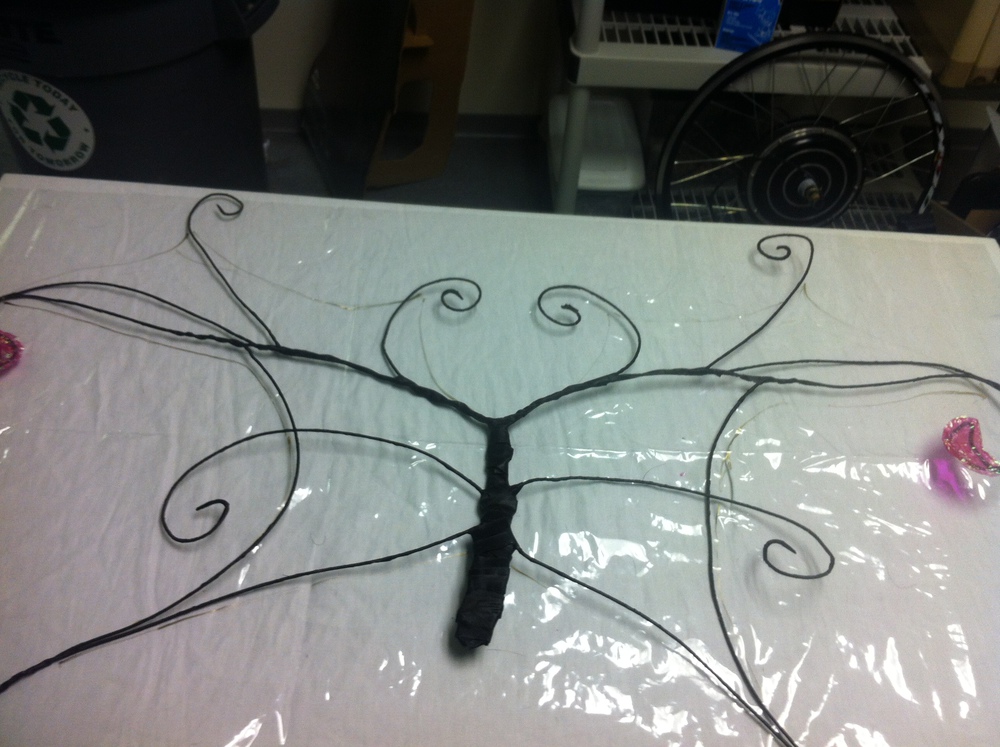
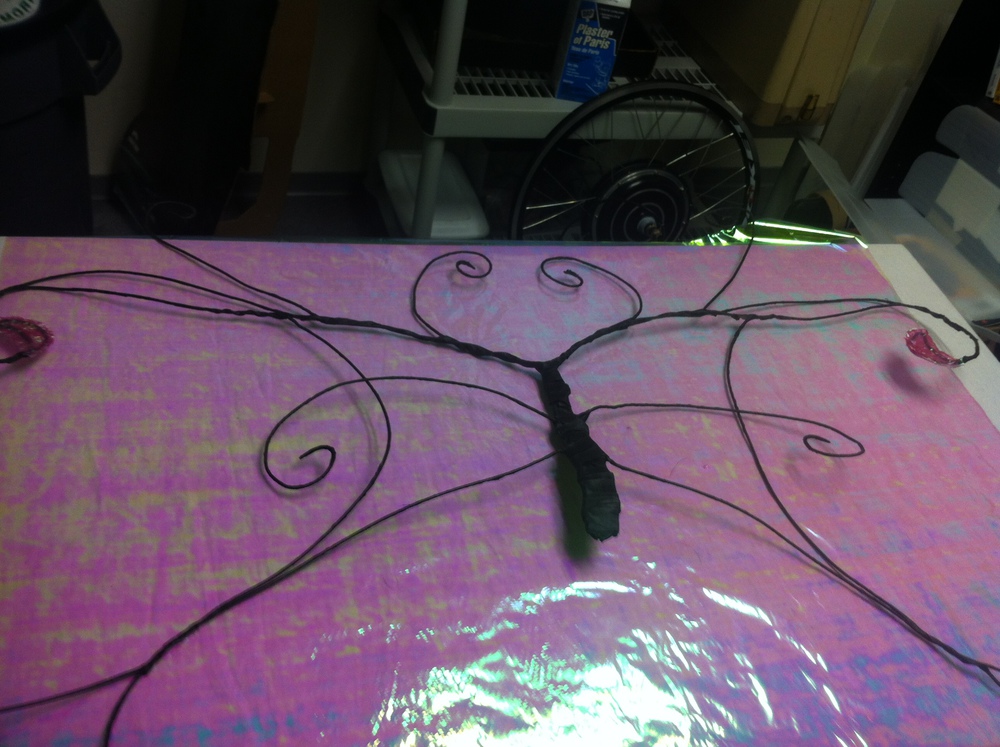
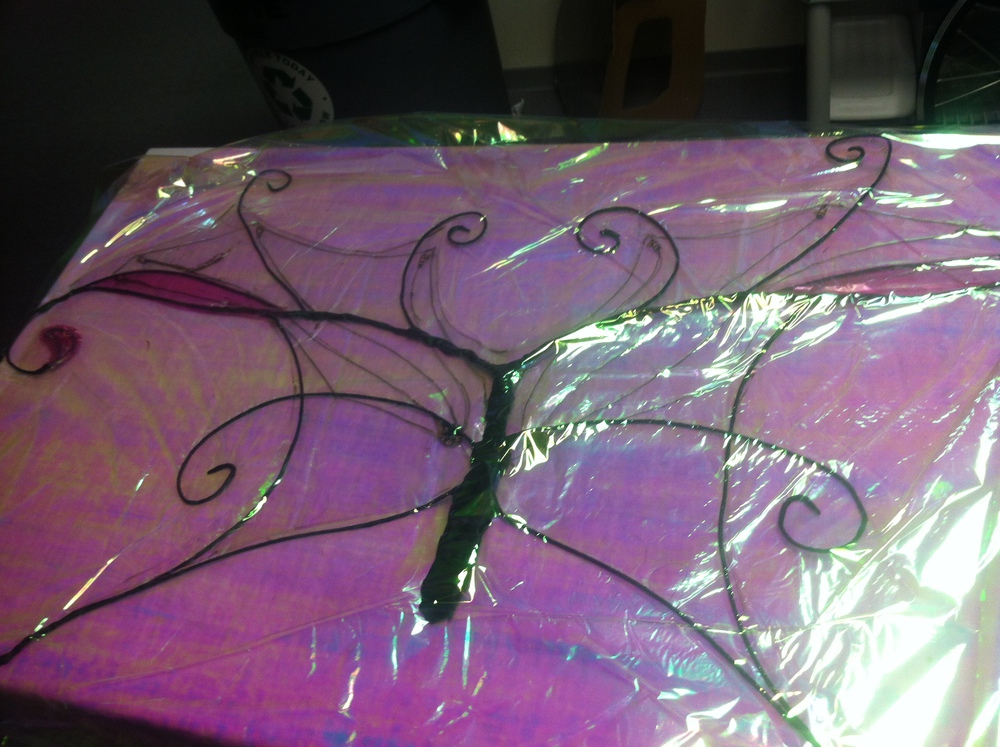
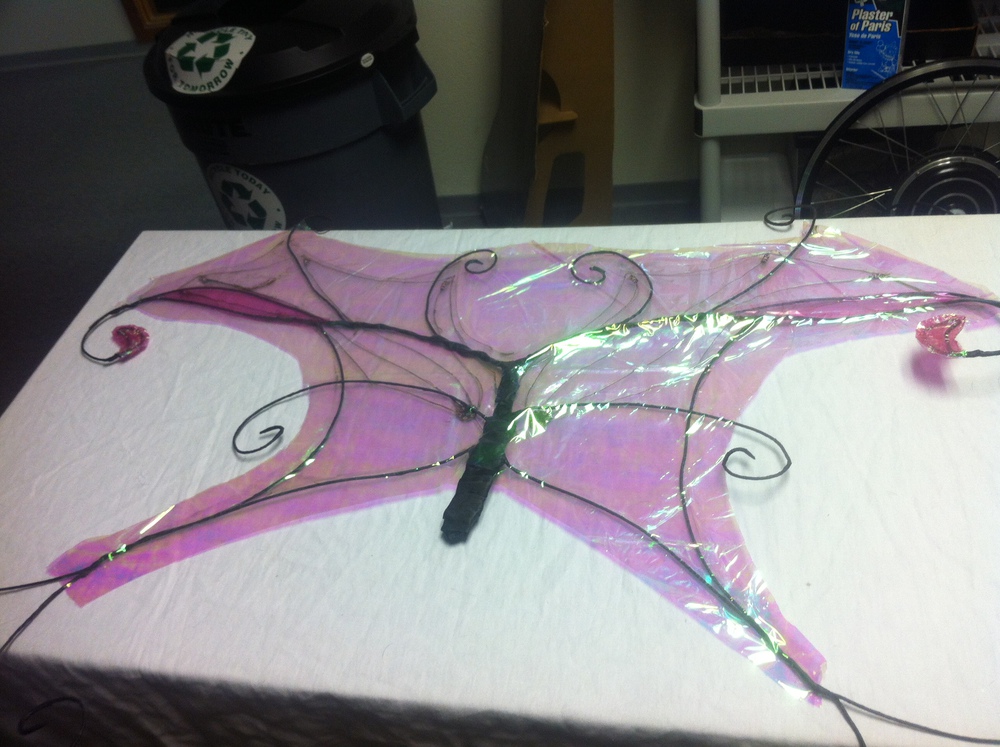
Here is my finished wire shape:

Here's a close-up of the stick at the bottom of mine:
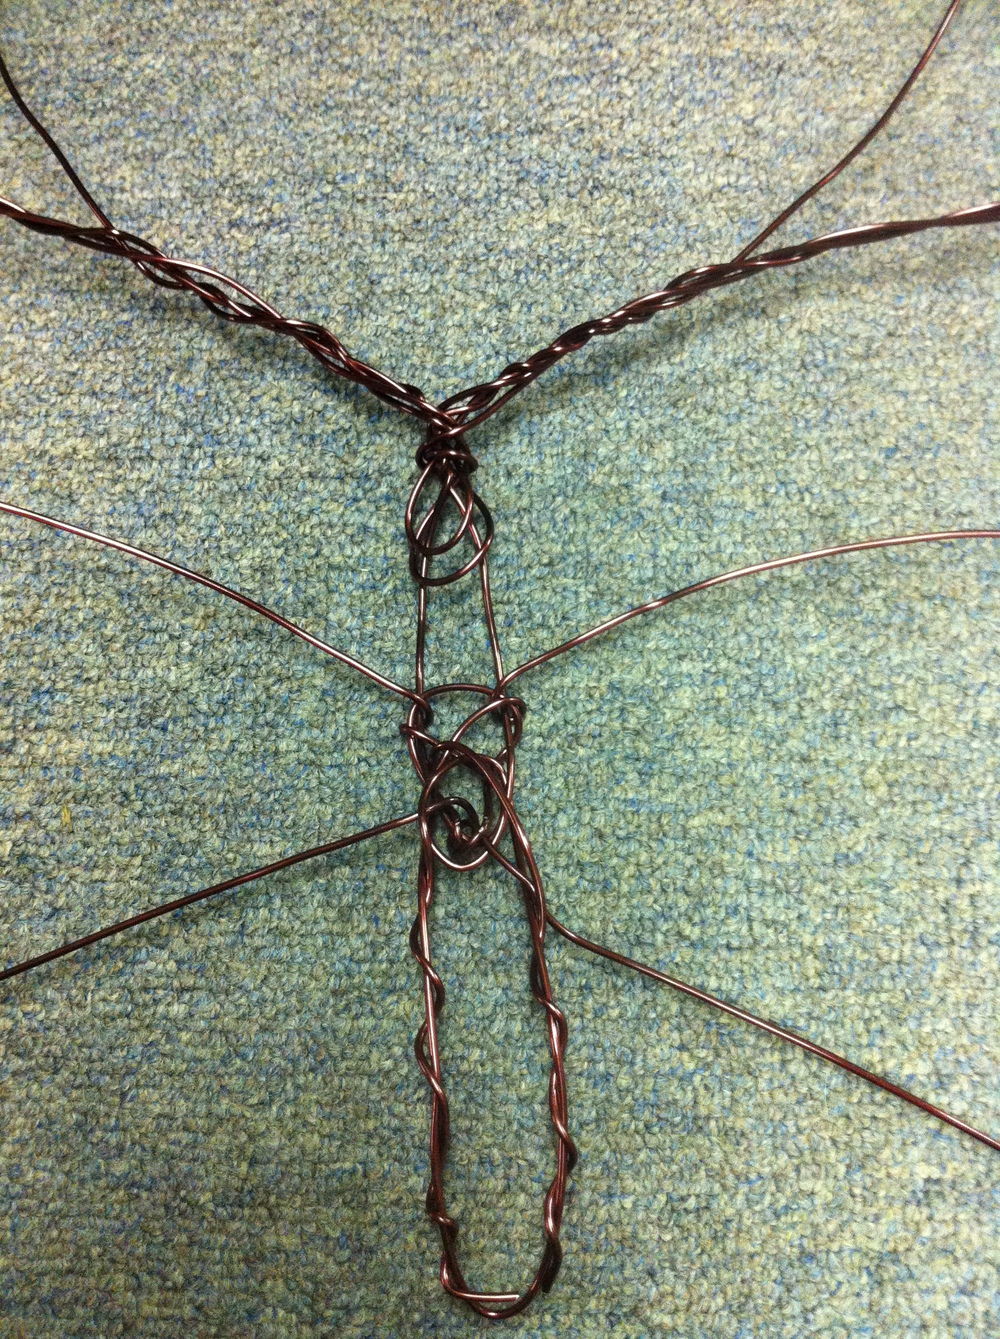
This gives me a place to put a bottom strap, but it can also be slipped into a tight top or a corset to attach the wings without straps, which is nice!
My lines aren't perfectly smooth. There are areas where my symmetry is a little bit off, but that's okay. The floral wire is going to smooth out a lot of the imperfections from my bending, and some small differences between the two sides are unavoidable. As long as they're minimal, they'll just give the wings an organic look.
Next, it's time to wrap the wire frame with floral tape. You want to wrap each piece tightly, covering and smoothing out all joins between multiple pieces of wire. If you've worked with floral tape before, you can skip this next bit; if you haven't, here's some information! Floral tape is sticky on both sides, and sticks primarily to itself, not to the wire you're wrapping it around, so it's important when you're wrapping to make sure you've got lots of overlap. If you look closely, you'll see that the floral tape has a wrinkled, crepe-y texture. That's not just for show! It allows the tape to stretch to fit curves and irregularities in the wire. The best way to take advantage of this is to stretch the tape out while you're wrapping, which will pull the wrinkles open where you need the tape to expand to fit your bumps, bulges, corners, and twists. Also make sure that you're wrapping the ends of your wire well, so that the floral tape will prevent the wearer from getting poked by the pointy cut ends of the wire. Here is my first small section completed:
You can see that the tape has both thickened and smoothed out my lines a bit, and that I've extended my wrapping a bit past the bare end of the wire.
This is not a very fast process. It took me a couple of hours to get all of my wires covered, so be patient, and take breaks when you need to!
When everything is wrapped, you'll see that not only does your frame look a lot smoother and more finished, but it's also sturdier. I've set mine on a table covered with cloth that I don't care about. This is to make the cellophane very visible so that I can see wrinkles, and to protect my table top from the spray adhesive.
I was excited to try out my cellophane (this is a new craft for me), so I started by doing a tiny section up a the top of each wing. I'm opting to do a couple of color accents on my wings, and this spot is one of those. I've cut two squares of iridescent cellophane and two squares of pink cellophane, both significantly larger than the area I want to cover. I want the colored cellophane on the outside, so first I've set one layer of iridescent cellophane underneath the frame. Then, I sprayed it with a quick squirt of spray adhesive.
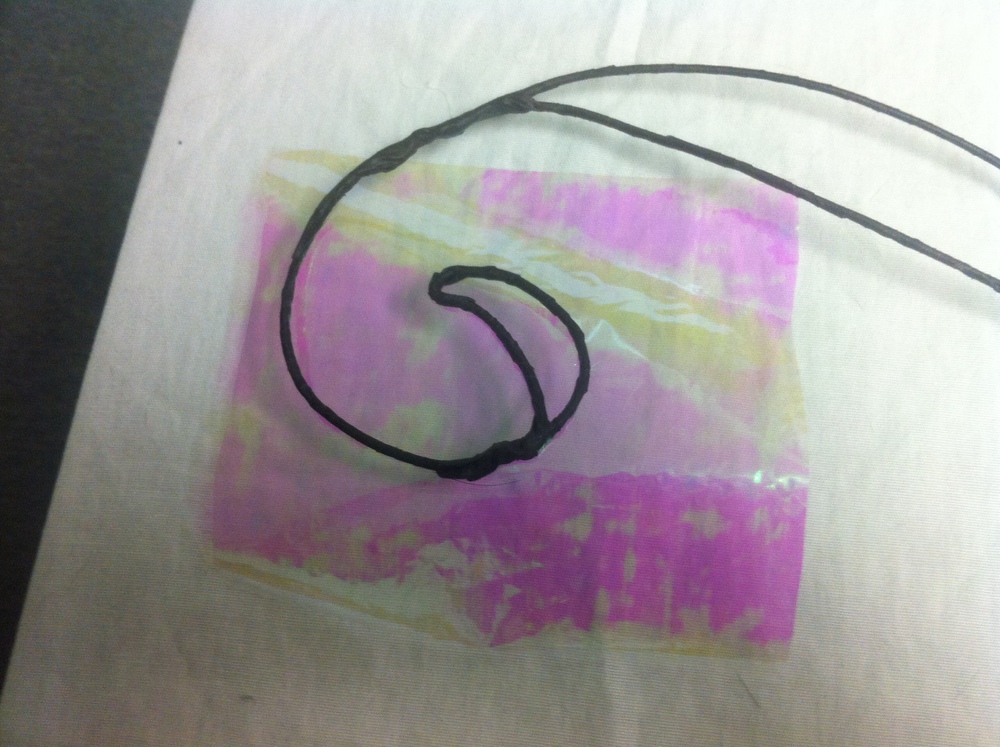
Carefully set the second piece of iridescent cellophane on top of it, so that the adhesive sticks the two pieces of cellophane together with the wing frame inside.

Next, repeat the process with the pink cellophane, so that the previous layer is sandwiched inside of the pink.
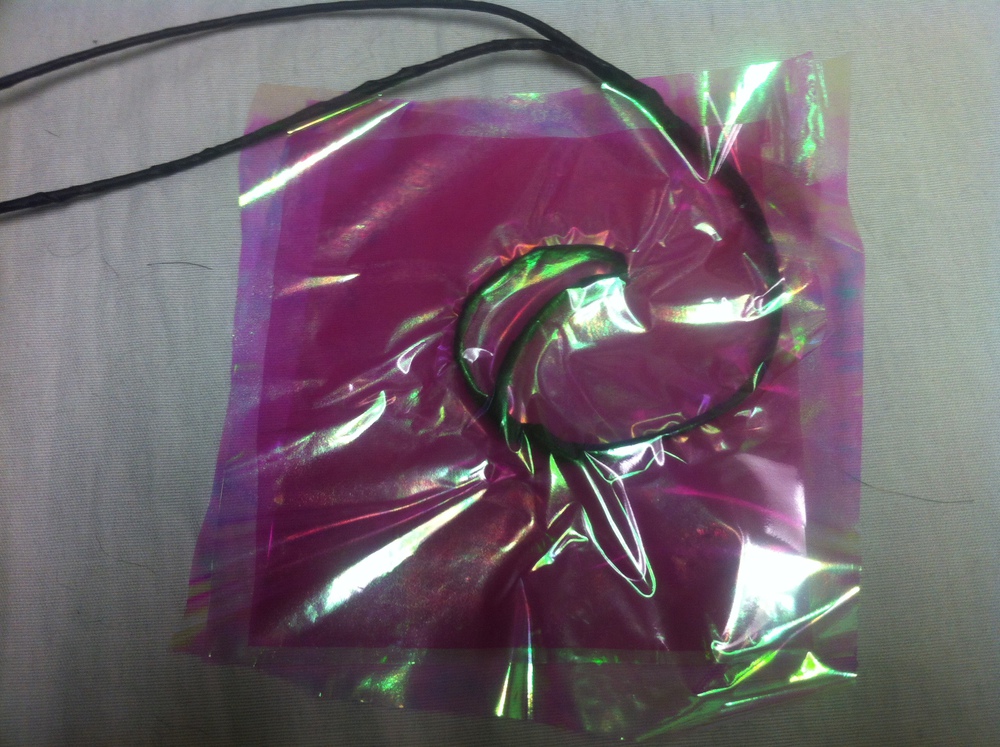
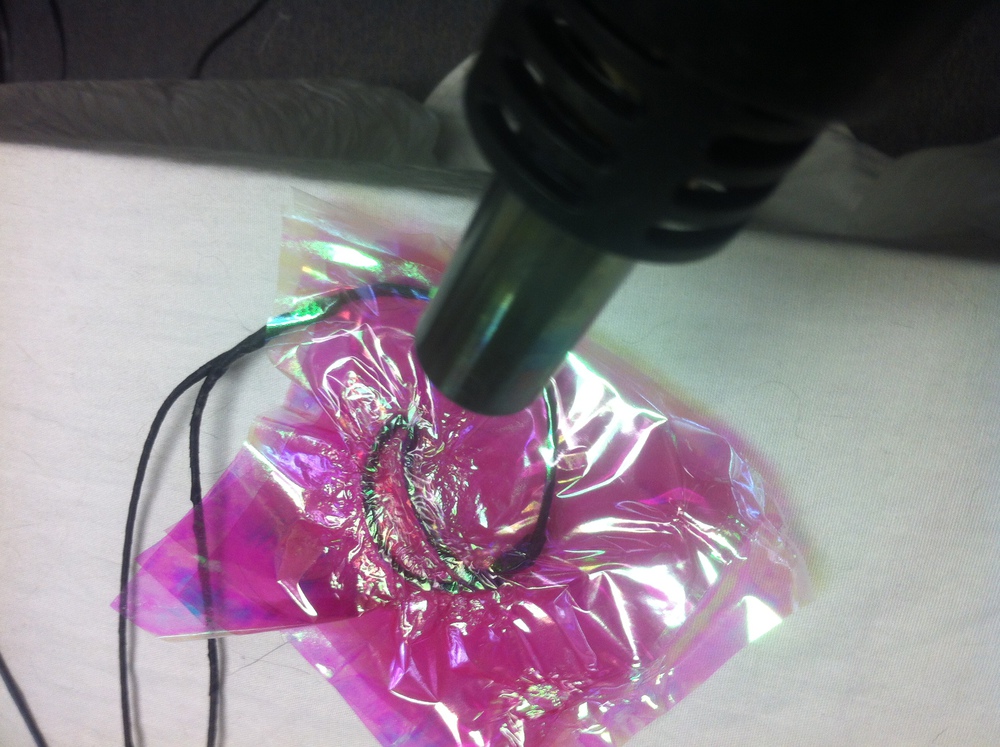
The next step depends on your tools. If you have a heat gun, you can use it to carefully shrink the cellophane over the frame for a nice tight fit. Err on the side of caution, because if the cellophane gets too hot, holes will form! Press the warm cellophane gently, which will flatten it and help it stick together, then turn the frame over and do the same to the back. If you do NOT have a heat gun, you can use an iron on the lowest setting, being very careful not to let the iron sit for too long in any one spot. I recommend putting some cheesecloth or paper between the iron and the cellophane.
Finally, trim the cellophane close to the wire.

These first bits were the roughest for me! The cellophane took a little bit of getting used to, so if you've got some scrap wire you can make a small form out of, some practice might be a good idea! I definitely would have benefited from it.
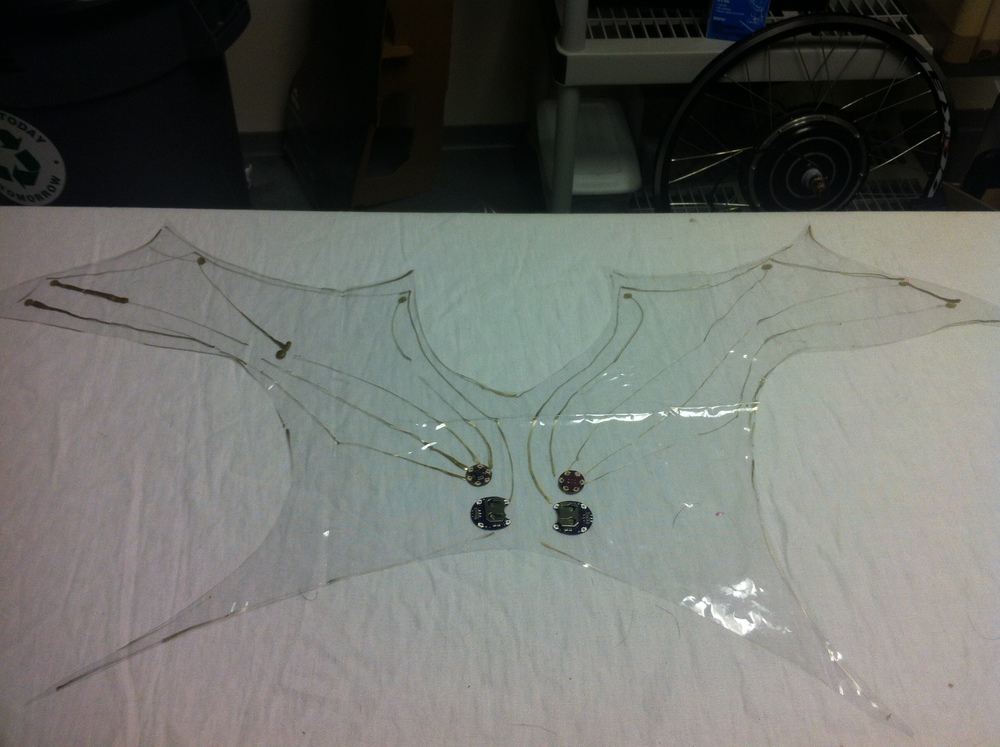
You've probably been wondering where all of the electronics are! I'm going to sew them to the vinyl layer, which will be the middle of the sandwich in the largest section of my wings. First, lay the vinyl out on your workspace and set the wing frame on top of it.
Mark the shape you want the large middle portion of the wings to be on the vinyl, tracing around the frame, making sure to include the area you want your lights. I had to do this with a metallic paint pen that was in my office, because it was the only thing that would dry quickly on the vinyl. I apologize for how difficult this makes it to see the lines in the photo.
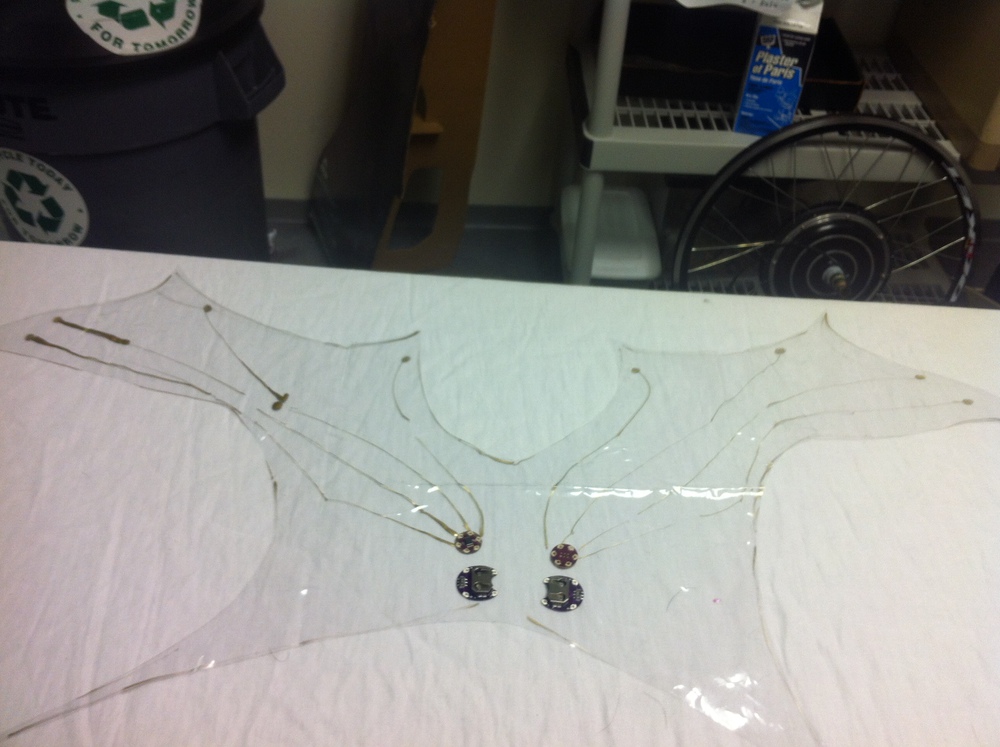
Draw a large dot in each place where you would like an LED, four on each wing, trying to line them up so that each will be able to trace a clear path back to the LilyTwinkle boards by the wing base. You want to make sure none of the traces will have to cross over the others. It's also important to leave room for one large negative trace to connect all four of the negative LED pins to the negative pin on the LilyTwinkle board.

Go ahead and draw the traces- place one LilyTwinkle board on each side of the wing base, and draw a line from each numbered pin to the positive pin of an LED. These lines and the stitches will be visible through the translucent wings, so you'll want to try to keep them aesthetically pleasing. On my wings, I wanted the battery packs to be symmetrical, so I faced them away from each other. Doing this meant that the LilyTwinkle boards also had to be reversed, so I placed one of them face-down. This is completely optional, and it's up to you if you'd rather leave both face-up and place your battery packs facing the same direction.
Draw one long trace that passes the negative pin of every LED and then goes down to the negative pin of the LilyTwinkle board, making sure not to cross or come too close to any positive traces.
Time to sew! If you have one, I encourage you to use a sewing machine for this. Most of our conductive threads work very well in the bobbin of a sewing machine, and machine stitching is very durable. It's also easier than hand-sewing through a finicky material like vinyl.
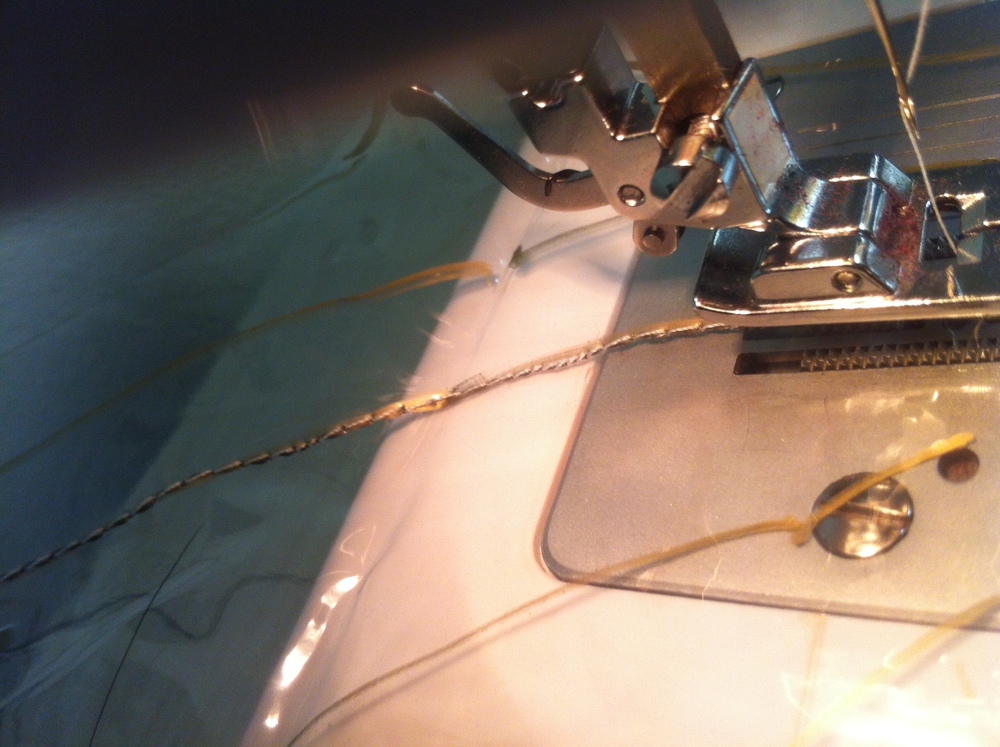
You're going to sew over each drawn trace individually, and it is important that you leave a long section of thread at each end of every trace.
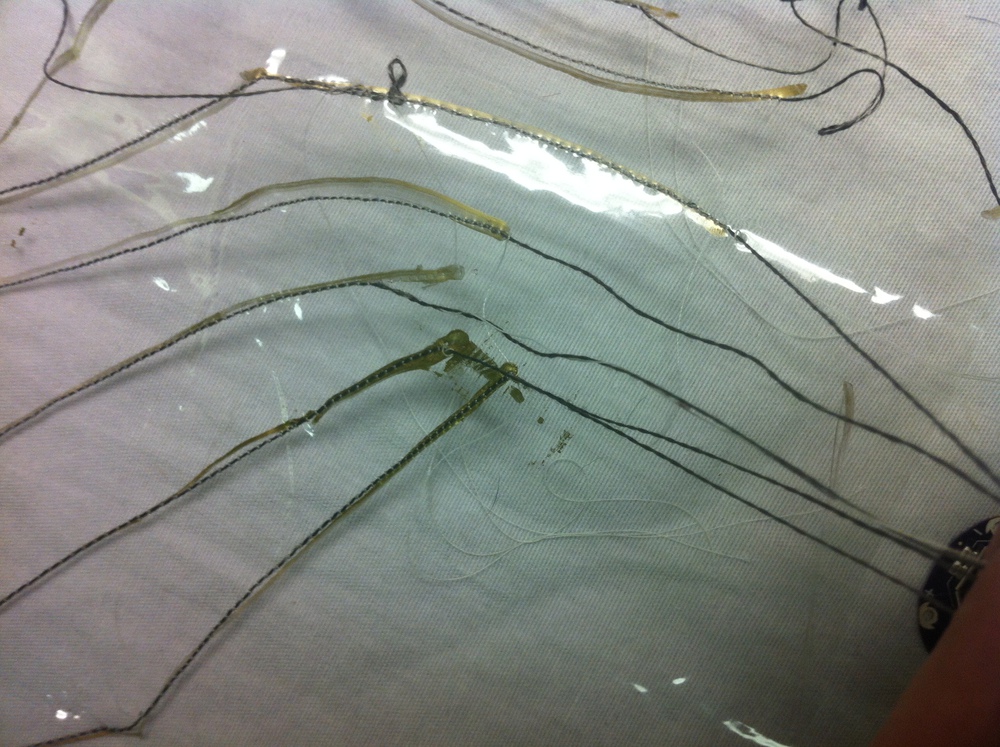
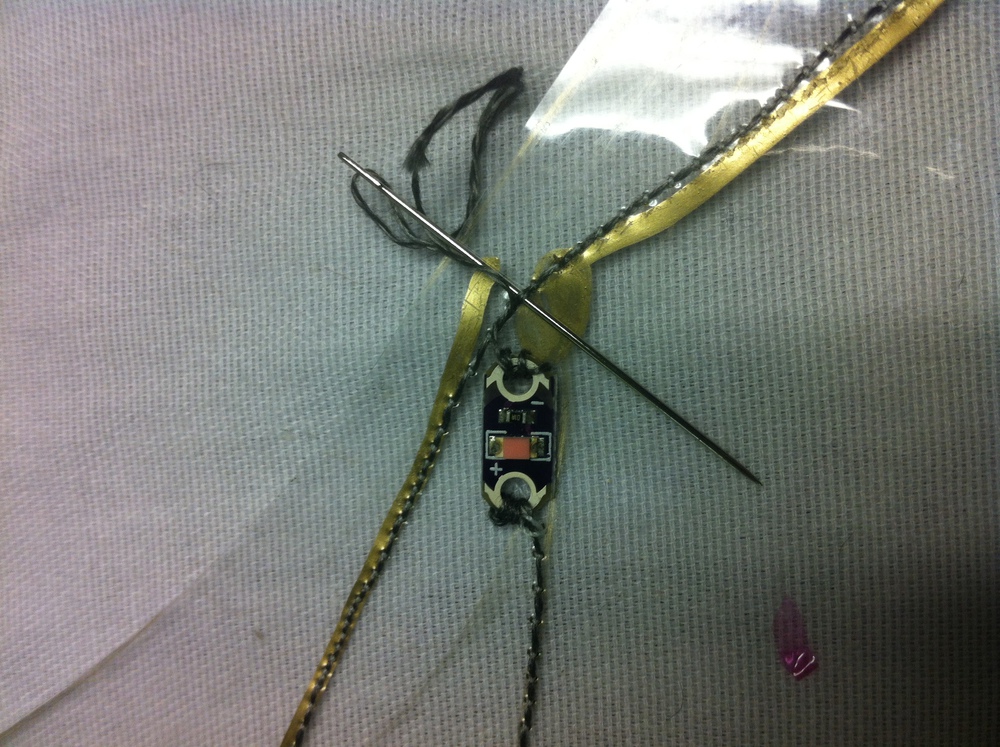
When you have traced all of your traces (see what I did there?) with the sewing machine, it's time to place your LEDs. Pick one of the traces that leads from an LED back to where a numbered pad on the board will be. Pick up the long section of conductive thread that you left on the end of the trace furthest from where you want the LilyTwinkle board to be, and thread it onto a hand sewing needle. Using the needle, wrap the thread through the POSITIVE hole of the LED (marked with a + sign!) several times, and then knot it well, pulling the LED as close to the vinyl as you can. The bumpy side of the LED board should be facing up, away from the vinyl, with the flat side down. After knotting the thread well, so that the positive side of the LED is secure, you can move on to the next LED, repeating these steps with the long tail of conductive thread that leads to another numbered pin on the LilyTwinkle board. Continue this way until all 8 LEDs have been sewn down on the positive side, each ready to be connected to a different numbered LilyTwinkle pin.
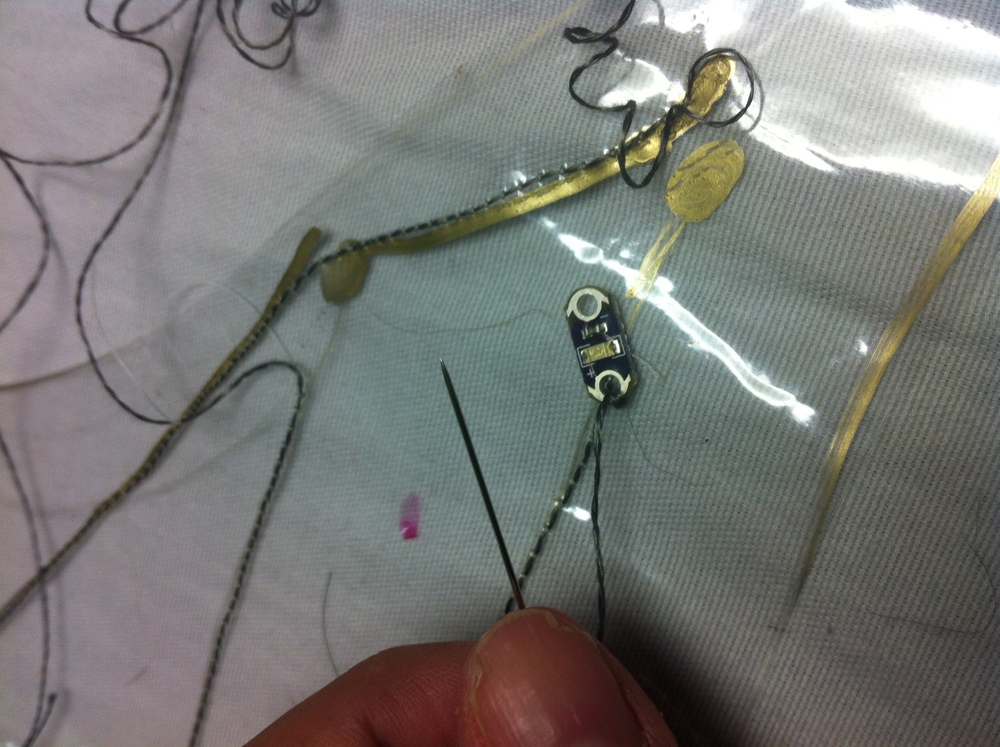
Now, re-thread your needle and sew the negative end of each LED to the long negative trace you built, looping through several of the machine stitches to ensure a strong connection. When all 4 on one side are attached, wrap the long tail of conductive thread at the end of your negative trace closest to the LilyTwinkle board several times around the negative pin, knotting it carefully. Repeat the process on the other wing.
Move down to the opposite end of one of these traces, where you've left a long tail of conductive thread where you want to put the LilyTwinkle board. Thread this on your hand-sewing needle, then wrap and knot it around the appropriate numbered hole on your LilyTwinkle board. Repeat this for each hole until the positive end of each LED is connected by a length of thread to one pin of the LilyTwinkle board.
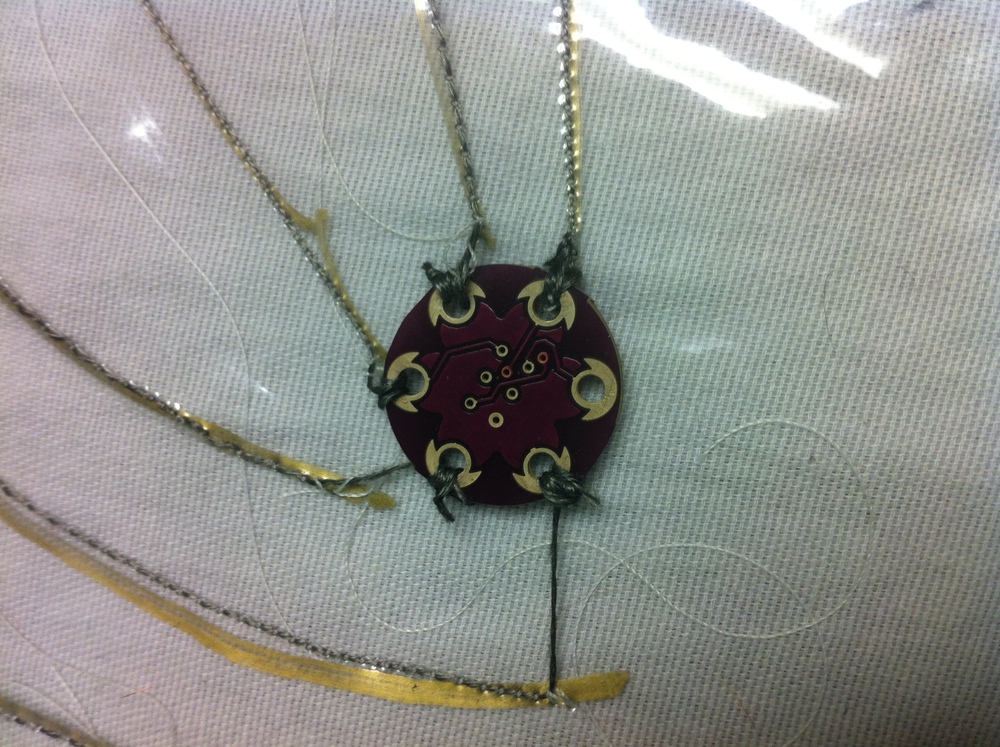
All 8 LEDs should now be sewn to one numbered pin on a LilyTwinkle board on the positive side, and to a single long negative trace on the negative side. The negative trace should be sewn to the negative LilyTwinkle pin. It's important at this point to make sure that any remaining long tails are cut off of your project, and that all discarded thread ends and scraps are picked up and thrown away, so that none are clinging to your project causing trouble. Once you're sure it's all clean, place a battery in your battery holder. Use alligator clips or two pieces of thread to connect a positive terminal of the battery to the positive pin on the LilyTwinkle board and a negative terminal of the battery to the negative pin on the LilyTwinkle board. You should start to see lights turn on and off. Wait long enough to confirm that all 4 lights turn on, then repeat this process on the other wing. We won't actually sew the battery holder down yet. This vinyl will be sandwiched inside of cellophane, so if we want to be able to change the battery in the holder, we'll have to wait and add the battery pack on the top layer.
Lay a large bottom layer of cellophane on your work surface. This should be large enough to cover the entire main area of your wings, so go ahead and factor in some overlap to make sure you've got everything covered. I've laid the frame down to give an idea of the relative size, but you'll want to pick it back up for the next step.
Spray this with adhesive and carefully smooth the vinyl cut-out onto it in the appropriate place. Next, place your frame on top of both layers. I didn't find it necessary to spray another layer of adhesive, but feel free if it will make your frame more secure.
It's important to make sure that everything lines up at this stage, so if you need to bend any adjustments into the frame so that the LEDs fall in the correct place, do so now. I wanted to add another pair of darker-colored accents here, so I cut them to shape and smoothed them onto the frame here. If you're not using any accents, go ahead and skip this step!
Spray one more layer of adhesive over frame, vinyl, cellophane, and all, and set another large sheet of cellophane on top, closing the sandwich. Firmly smooth all of these layers together, getting it as flat as you can. Because of the adhesive, there's not a lot you can do to get out wrinkles. Do the best you can to make them nice and flat, and when you begin heating it up, the wrinkles will blend into the texture you add.
Cut off any excess cellophane that get in the way. Don't trim it all the way, but go ahead and trim it to within a couple of inches of where you want it to end up. Peel it carefully away from areas of the wire you don't want covered. This part feels a little bit like opening a present, so feel free to savor that.
Start heating the cellophane carefully with your air gun or iron. You'll need to do the whole wing, top and bottom, on both sides, so this gets a little bit tedious if your wings are big. This is a GREAT time to be making wings for a kid! Make sure that you heat up all of the little nooks and crannies, and that the cellophane really seals around the wire frame. With the hot air gun, I tried to heat a small area, then press it down firmly with my palm, repeating on each small section. Once you've got one side done, flip the whole thing over and do the back. Again, make sure that you've got a good seal around the frame, pressing the cellophane firmly down against the wire while it's heated. When you're satisfied with the security of the frame inside the cellophane, go ahead and trim it down to a centimeter outside of where you'd like the finished borders of the wings to be.
For the next part, I continued using the heat gun, but if you've been using an iron up until now, a candle flame should also work fine. You want to very carefully melt the edges of the plastic layers all the way around, cellophane, any overlapping vinyl, and all. I melted it as close to the frame as possible, but it's a matter of choice. If you'd like to leave some outside of the frame decoratively, that's certainly up to you. With a stick of incense, you can even carefully burn a lacy pattern into the excess.
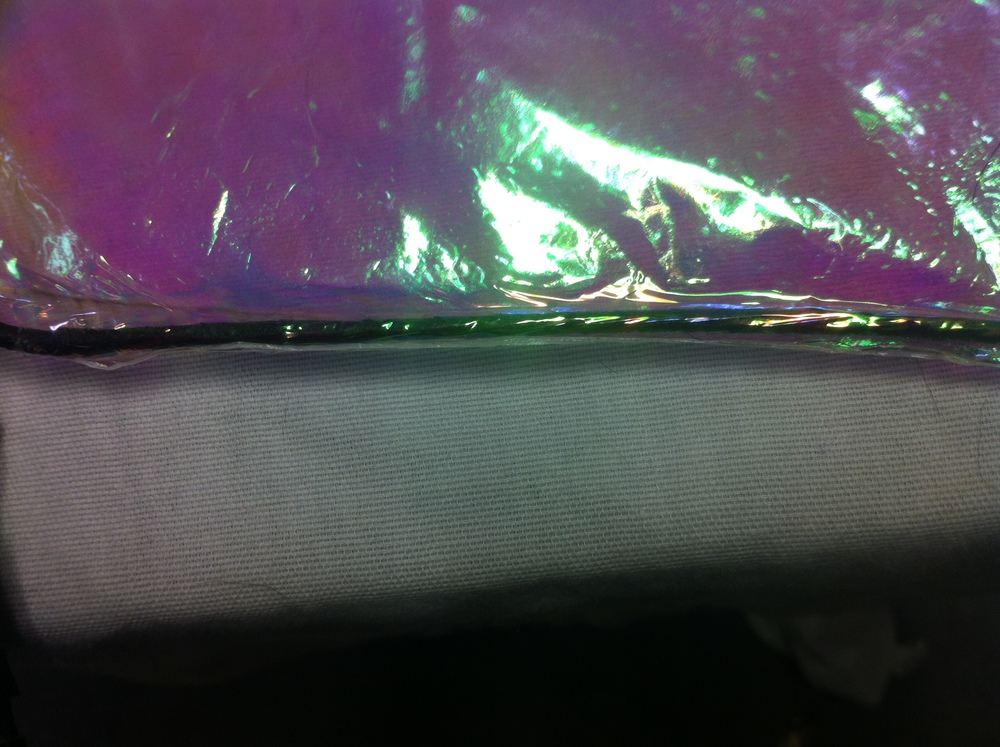
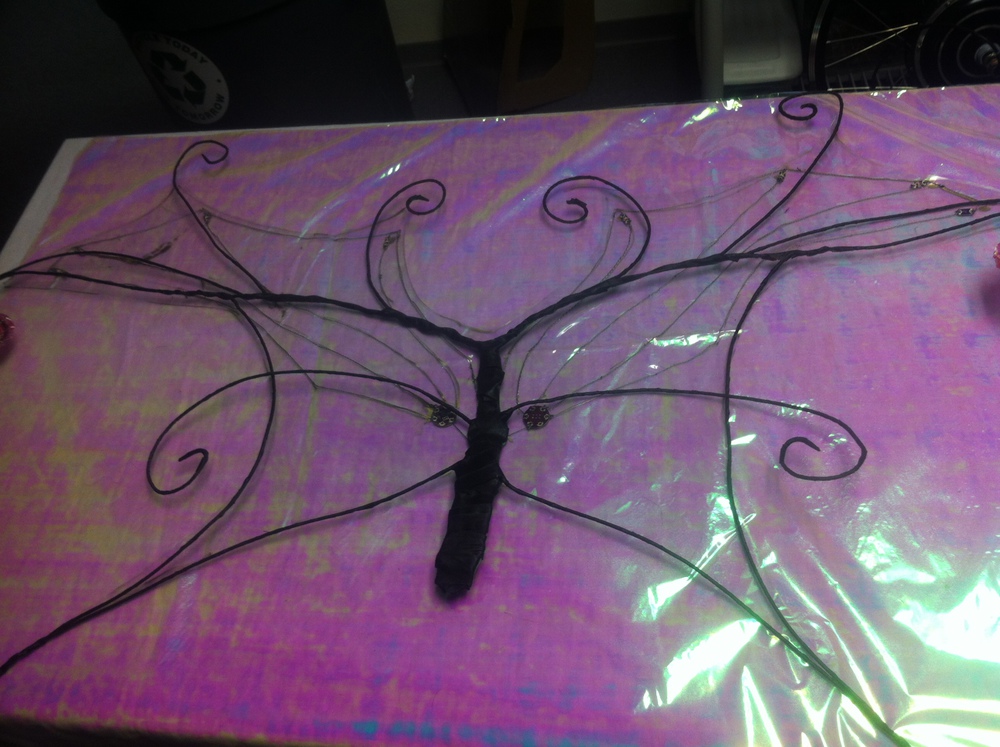
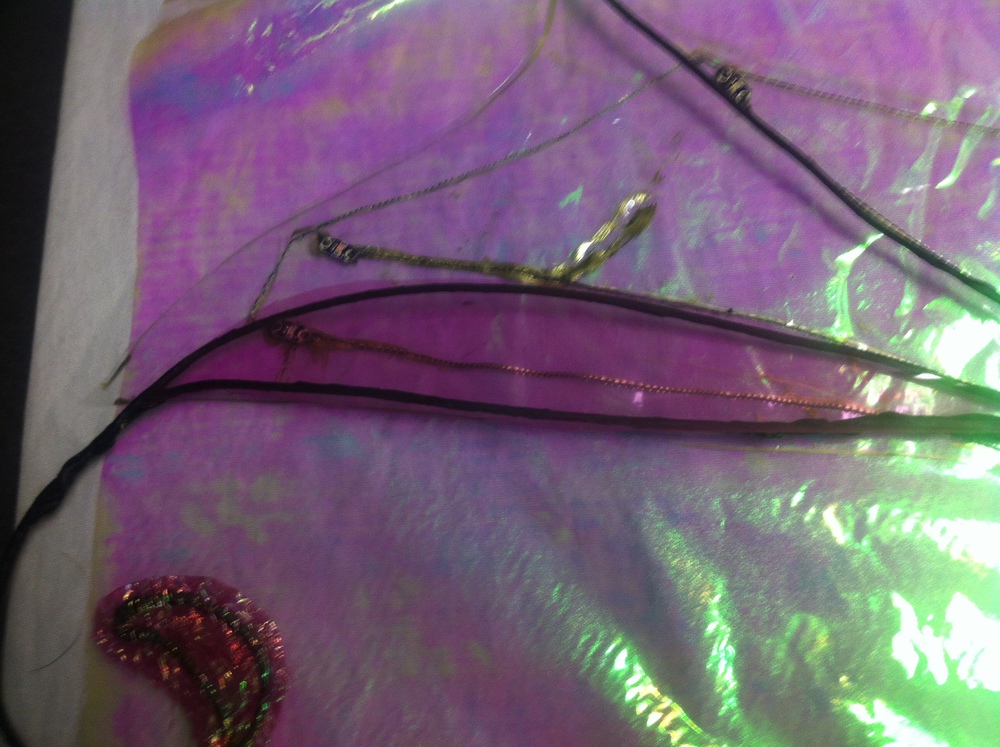
I added another small section of cellophane, but that's just a repeat of the first set of instructions. You can add as much as you need to complete the look of your wings. Here are mine, with all of the cellophane finished.

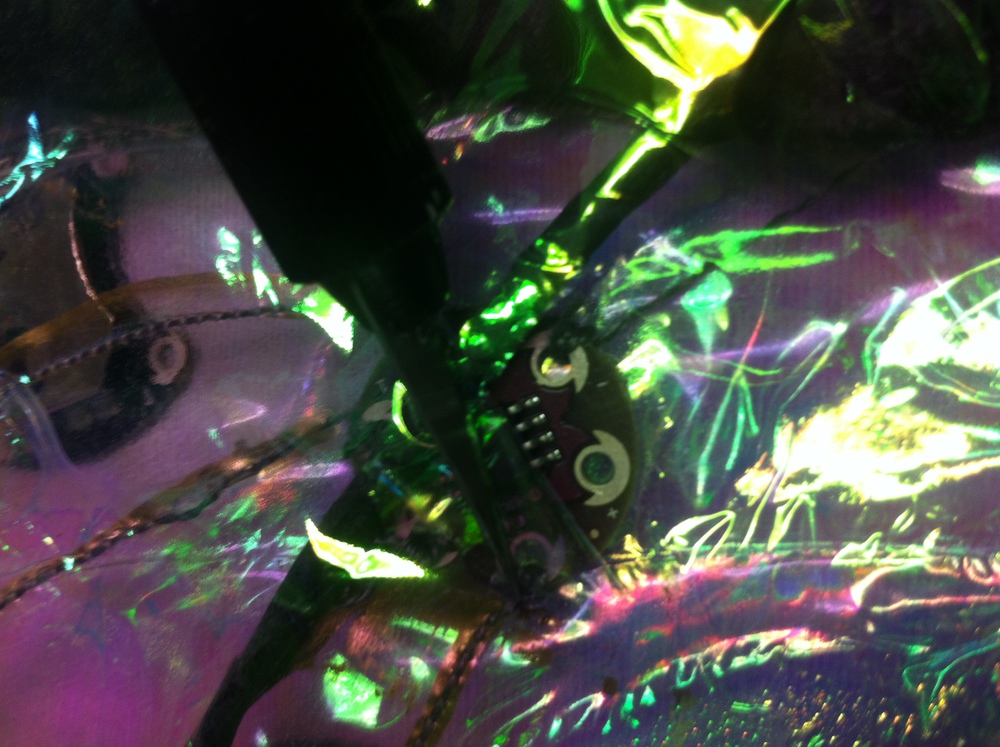
It's time to finish off the electronics by adding the battery packs. Because of the reflective nature of the cellophane, these parts are extremely difficult to photograph, so please be cautious and follow the written instructions carefully. Using a hobby knife, very carefully cut and lift off the section of cellophane covering the bottom of the LilyTwinkle board on one side, exposing the positive and negative pins. Take care that you do not cut any of the threads from your previous traces.
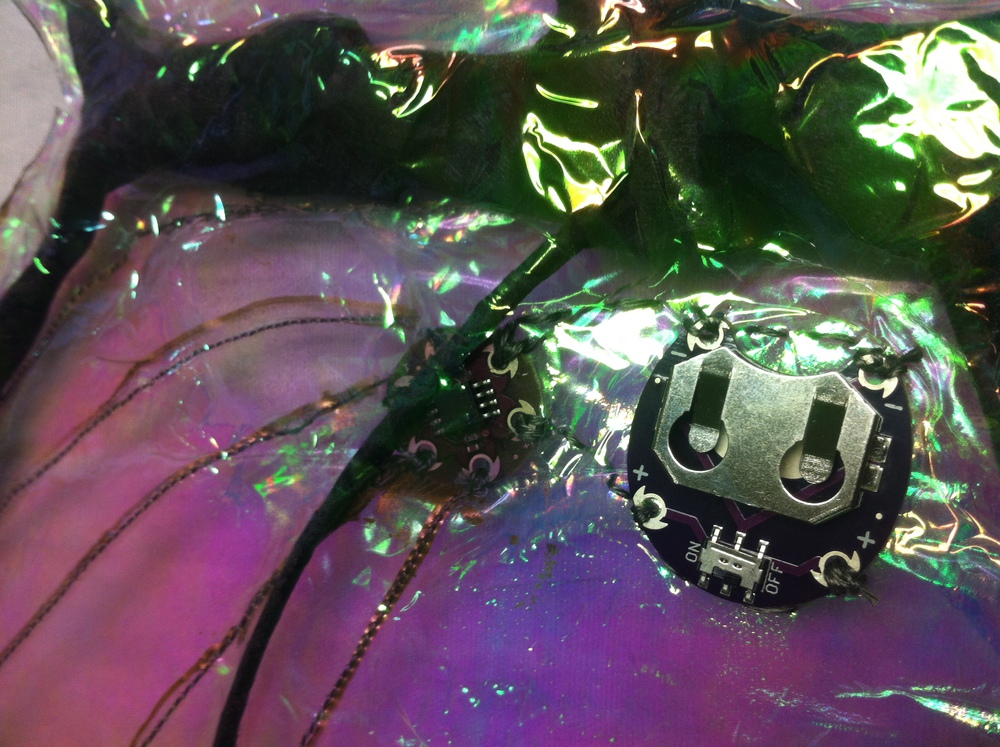
Line a battery pack up with the board so that one negative is directly under the negative on the board and one positive is directly under the positive on the board. With conductive thread, wrap a few stitches around the negative pin on the board, which should already have a few stitches from the negative trace connecting the LEDs. Hand sew a few stitches right through the cellophane and vinyl of the wing to your negative battery pack hole, and sew that down with a few stitches. Continue hand sewing to the other negative battery pack hole, making sure that there are a couple of stitches between the two sides of the battery pack to keep things firmly in place.
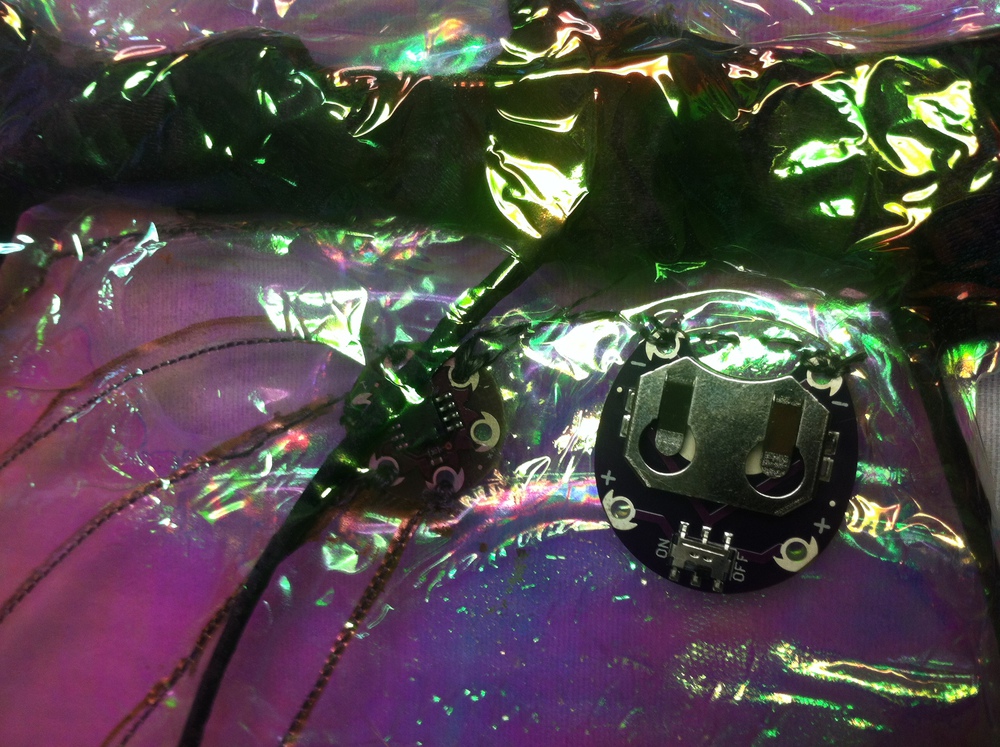
Knot and cut your thread, then connect the positive LilyTwinkle pin to the positive holes of the battery pack in the same manner. Repeat this entire process on the other wing, so that both LilyTwinkle boards are connected on the positive and negative pins to the battery packs.
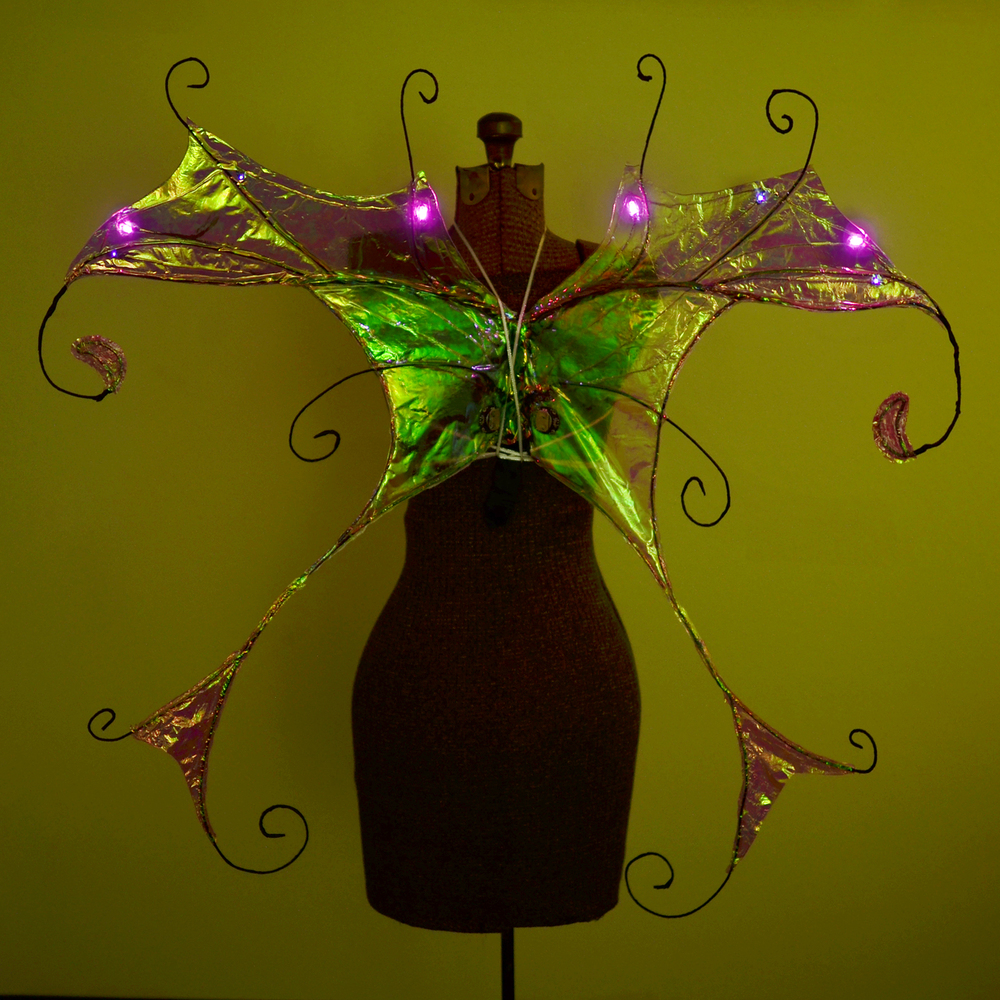
This completes the electronics, so now you can test them out! Go ahead and slide a battery into each battery holder, writing side up. If you are like me, have a small, painful heart flutter because nothing turns on and you've forgotten that the battery holders have switches on them. Now turn on the switches, and watch the lights on the wings start to twinkle. If you're careful to turn both on at the same time, the lights will be symmetrical and coordinated!
This photo was taken in bright light, so if you want to see the LEDs, you'll have to click through to the larger version. In dimmer light, the LEDs are very bright, and in sunlight they're effectively invisible. In making this particular set of wings, I found the pink LEDs to be particularly bright, and the purple LEDs to be dimmer than I would have liked.
All of the electronics are done now, but if you have any other small sections of cellophane you'd like to complete, you can repeat the instructions used for the very first section. The sort of 'stick' you've added to the back brace can be slipped into a tight garment, such a corset, so that the wings can be worn straplessly. If you would rather add straps, You can glue, sew, or tie ribbon or elastic to the brace. I recommend that you not attempt to attach the wings by any portion except the center brace, and that straps be secured to both the top and bottom of the brace. Attaching them thus will secure them better, preventing them from bobbing up and down during wear.
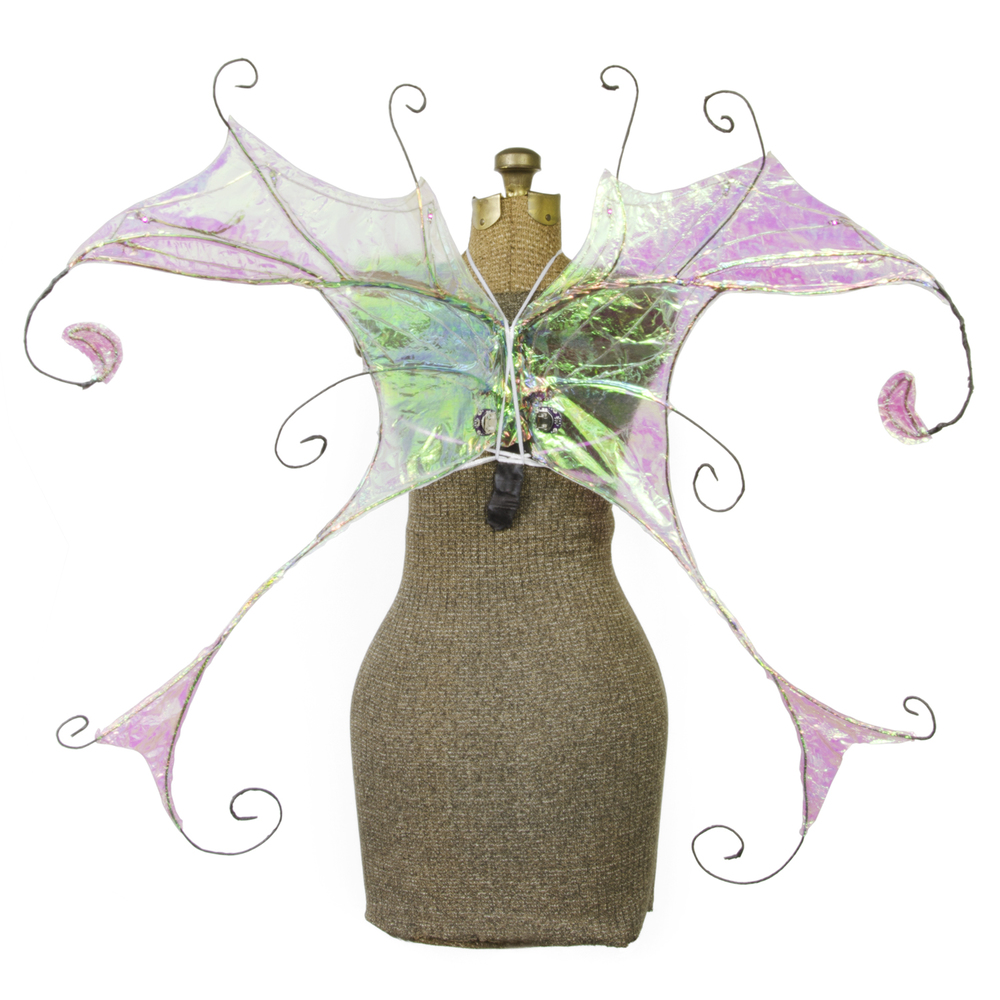
Here is one last photo, of the wings in action in dim light!
Conclusion
I would like to extend my heartfelt thanks to Jennifer at Faerie Muse. This tutorial draws heavily from her construction tutorial for cellophane wings without LEDs, which can be found here. If you have any questions or comments, please drop them in the comments below. Have fun!
No pictures!
Have you an estimated time for this? ... and cost..