Make Your Own Fritzing Parts
 HelloTechie
Create a New Part
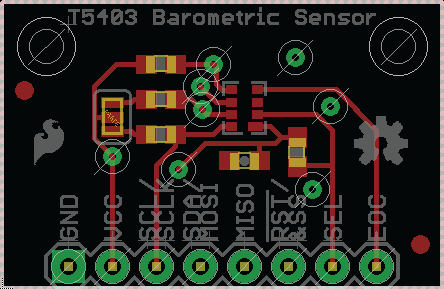
For this tutorial, we are going to create a Fritzing part for the SparkFun T5403 Barometer Breakout.
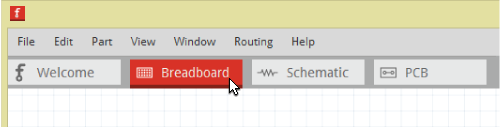
Open the Fritzing application. You should see tabs for Welcome, Breadboard, Schematic, and PCB towards the top of the program. Click on Breadboard button to make sure you are in the Breadboard view.
Check for Pre-made Parts
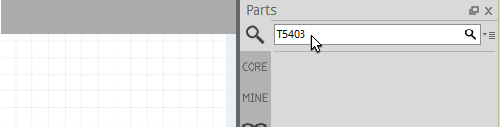
If you are just updating a board in Fritzing, first check to see if there is a part that is closely related to the Fritzing part you are trying to create. You can type the part's name into the search bar.
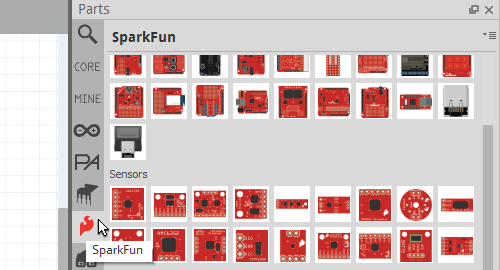
You can also look in the different sections of the Fritzing's Parts window for a similar part.
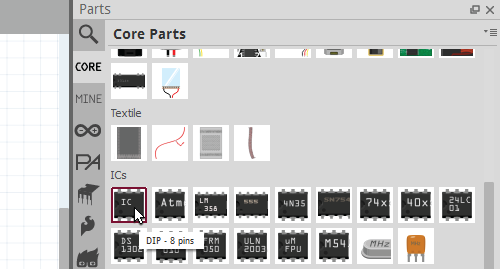
Using an IC as a Starting Point
If there is not a part like the one you are trying to make, using an IC as a base is a great place to start. Click on the CORE tab in the Part Window. Scroll down until you see the ICs. Under the ICs section, click and drag the IC icon onto the Breadboard window.
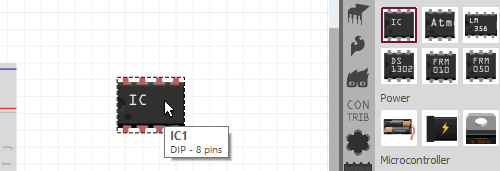
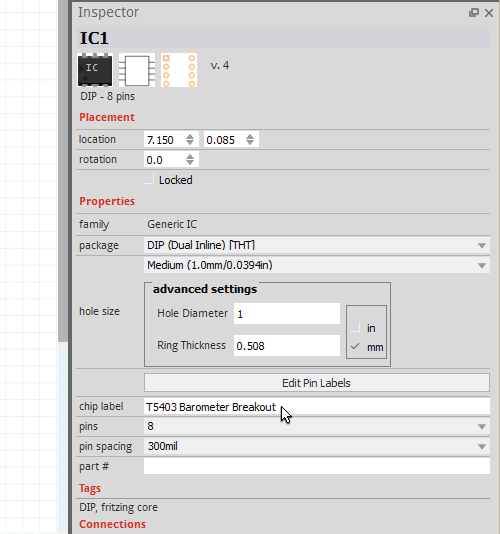
Changing the Name of the IC
Look for the IC properties in the Inspector window on the right. Change the name of the IC to your part's name. Then, change the number of pins needed for the board or part in the pins section. For the SparkFun T5403 Barometer Breakout, we need 8 pins. You will see the IC, in the Breadboard view, change to your part’s name.
Fritzing (New) Parts Editor
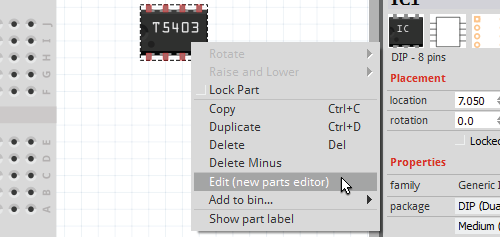
Right-click the IC in the Breadboard window, and select Edit (new parts editor). The Fritzing (New) Parts Editor should pop up.
There are 6 main sections of the Fritzing (New) Parts Editor in which you will need to make changes. Those are:
- Breadboard
- Schematic
- PCB
- Icon
- Metadata
- Connectors
There really isn't an order you need to follow. After making a couple different custom parts you will probably end up starting in one view before the others. In this tutorial, we're just going to go down the list.
Author note: I found, for boards with a large number of pins, that starting off in the Connectors view saves a little bit more time, since you can go down the list to name the connector pins faster.
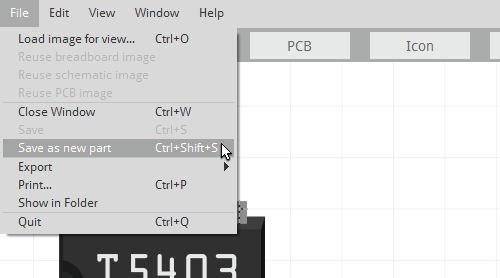
Before you continue on, it is a good idea to save as a new part first. If you need to stop anytime when making the custom part, you can come back to it in the future. Go to File. Then, select Save as new part.
You can choose to name the prefix if you want.
Let's continue on to Breadboard view!