MetaWatch Teardown and Arduino Hookup
 jimblom
Use Tips
Before tearing your watch down, or connecting an Arduino to it, we'd recommend you check out what it can do when interfaced to your phone. There are apps available for both Android and iOS phones.
Play with it. Get a feel for how it functions. Notice how there are four "Idle mode" pages you can cycle through. Check it all out!
Playing with the watch might spawn a new project idea. Whether you want to write your own phone app, customize the watch's firmware, or connect a different Bluetooth device to it, we'd encourage everyone to discover a new, cool way to interact with the watch.
Charging, Connecting the Developer Clip
The Developer Clip is included to serve two purposes: charging and reprogramming. It takes a bit of aiming, but the clip is easy to attach to the watch.
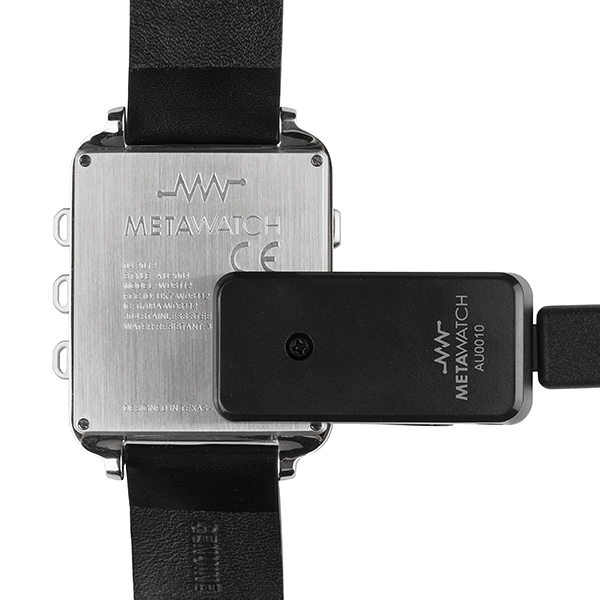
The clip uses a Spy-Bi-Wire JTAG interface to communicate with the watch's MSP430 microcontroller. If you get really into the embedded firmware development side of the MetaWatch, this'll be what you use to upload and debug a program. For more more info on using the Developer Clip as a JTAG interface, check out the JTAG Reflashing documentation.
Button Labels and Gestures
The watch has six buttons, labeled A-F. A is the top-right button (at two o'clock), and they increment clockwise around the watch.
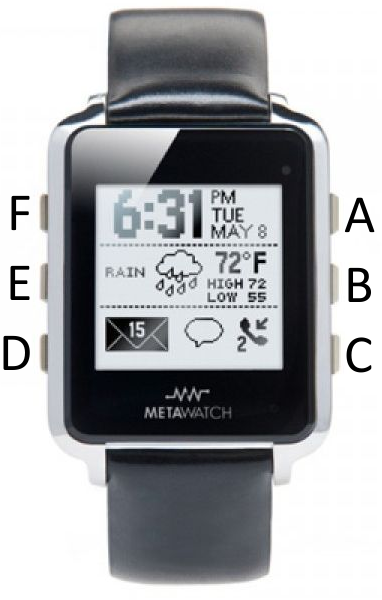
The standard button uses are:
- A: Press to close out of most views.
- B: Cycle Idle mode pages
- C: Call up settings view. Turn on/off bluetooth radio, backlight, seconds display, invert display, etc.
- D: Show info display. Shows charge level, firmware version, bluetooth address, and other stats.
- E: Music display (phone-dependant)
- F: Backlight
On top of that, you can reset the watch by holding down the middle buttons (B and E) down for a few seconds. Alternatively, holding F does the same thing.