Simultaneous RFID Tag Reader Hookup Guide
 Nate
Nate 
Example 1 - Constant Read
Make sure you have set up your SRTR according to the directions in the Hardware Hookup section, and have installed your shield on an Arduino-compatible board.
Be sure the serial selection switch is set to Software. This connects pins 2/3 of the Arduino (for softSerial) to the serial port on the Nano, and allows the shield to work with the following Arduino examples.

Once you've got the shield attached and library installed, open the Example1 Constant Read sketch. You can find it under
File > Examples > SparkFun Simultaneous RFID Tag Reader Library > Examples
Then load it onto your RedBoard. Open your favorite Serial Terminal to see the printed values. The first example demonstrates how to scan constantly and report any tags in the vicinity.
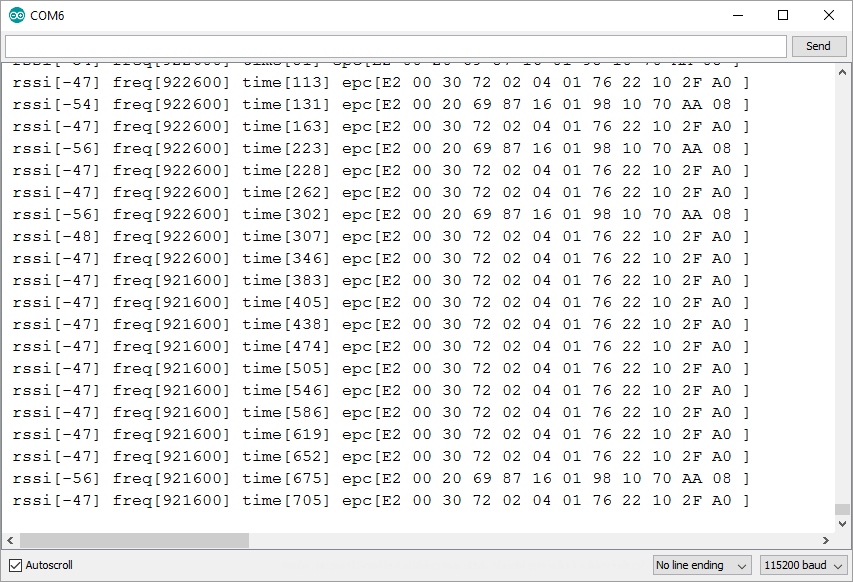
This example outputs the EPC from any tag in the vicinity. Note there are two different tags shown in this list.
Let's look at the setup code:
if (setupNano(38400) == false) //Configure nano to run at 38400bps
{
  Serial.println(F("Module failed to respond. Please check wiring."));
  while (1); //Freeze!
}

nano.setRegion(REGION_NORTHAMERICA); //Set to North America

nano.setReadPower(1500); //15.00 dBm.
//Max Read TX Power is 27.00 dBm and may cause temperature-limit throttling

nano.startReading(); //Begin scanning for tags

Serial.println("Go!");
The Nano communicates over serial at 115200bps at power up. Because we are using software serial on pins 2/3 on the RedBoard we need to slow communication down to 38400bps. setupNano() is a local function that will tell the Nano to go to 38400bps and then verify that communication is open.
nano.setRegion(REGION_NORTHAMERICA); //Set to North America
Because different countries have different regulations for UHF RFID .setRegion() is used to configure the frequencies to operate within. Allowable regions are:
- REGION_INDIA
- REGION_JAPAN
- REGION_CHINA
- REGION_EUROPE
- REGION_KOREA
- REGION_AUSTRALIA
- REGION_NEWZEALAND
- REGION_NORTHAMERICA
- REGION_OPEN
Select the region closest to you or establish which regulations within your country match one of the available regions.
nano.setReadPower(500); //5.00 dBm. Higher values may caues USB port to brown out
//Max Read TX Power is 27.00 dBm and may cause temperature-limit throttling
The module is quite powerful and is capable of outputting 27dBm. By default we .setReadPower() to 5dBm so that the examples can be operated from a USB port without extra power. If you have a good power supply such as a LiPo battery or 2 amp wall supply you can increase the read power. See Power Supply Considerations and Thermal Considerations for more information about pushing the envelope.
nano.startReading(); //Begin scanning for tags
The .startReading() function tells the module to constantly scan for new tags and output any tag detected. Once a tag is detected the various bits of tag information (EPC, RSSI, etc) is parsed out of the response and printed.