SparkFun gator:microphone Hookup Guide
 Englandsaurus
MakeCode Examples
Now that you have added the gator:microphone extension to the Editor, lets start with some example code. Plug the micro:bit into your computer using an USB micro-B cable after you have assembled your hardware with the instructions from the previous section. The micro:bit should appear on your computer as a removable storage device.
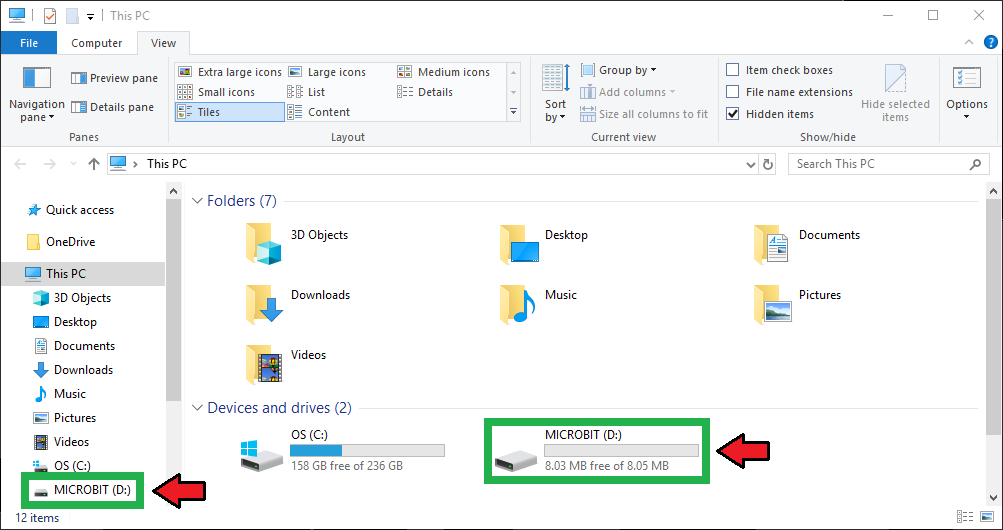
To upload new code, this is where you will be copying the downloaded .hex file to later.
Block Functions

This is a logic block as indicated by the block's shape. The output is either a 1 or 0 to indicate if the gate threshold has been exceeded.
0- Indicates the threshold has yet to be exceeded.1- Indicates the threshold has been exceeded.
Get sound intensity
This is a value block as indicated by the block's shape. The output of the block is the envelope of the audio signal.
0to2047- An 11-bit value for the envelope of the audio signal from the ADS1015 ADC.
change gain to _____
This block allows users to customize the gain of the ADC (ADS1015), which affects the full-scale range (FSR) for the ADC. There is a drop down menu with selectable options to change the gain value. Below is a list of the available menu options; the table is a description for what the options represent:
two thirdsonetwo- Defaultfoureightsixteen
| Gain Options: | 16 | 8 | 4 | 2 | 1 | 2/3 |
|---|---|---|---|---|---|---|
| Resolution (LSB): | 0.125 mV | 0.25 mV | 0.5 mV | 1 mV | 2 mV | 3 mV |
| FSR (12-bit): | ±256 mV | ±512 mV | ±1.024 V | ±2.048 V | ±4.048 V | ±6.144 V |
For more details on the gain functionality of ADS1015 ADC, check out the Hardware Overview section of the Qwiic 12-bit ADC Hookup Guide.
Basic Read
Below, is a simple example of how to take simple measurements from the sensor. To use this example, there are multiple options for accessing the .hex file:
- Replicate the block functions from the display below to copy the example project. Then download the
.hexfile. - Expand the display widow to pull up the example project. Then download the
.hexfile. - Use this link to pull up the example project. Then download the
.hexfile. Download the
.hexfile from the button below or the link on the bottom of the display.
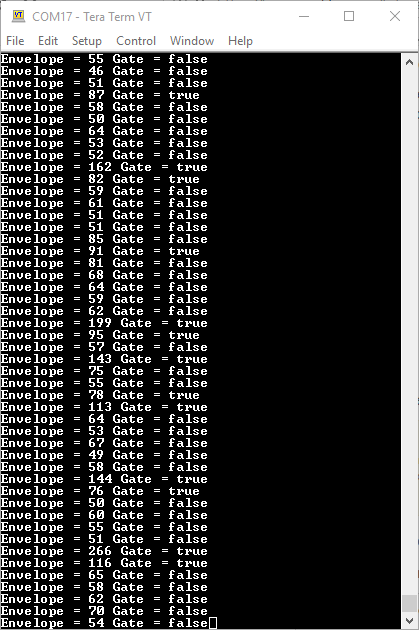
The output is redirected over the serial port to avoid conflicts on pins P0 and P1, which are also used for serial communication. To read the sensor values, pull up your favorite serial terminal emulator. Then, connect to the serial port that the micro:bit is on; the default baud rate is 115200 bps. Below, is an example of the sensor output for the example code.