SparkFun Inventor's Kit for Photon Experiment Guide
 Joel_E_B
 b_e_n
b_e_n HelloTechie
 Knutson
 jimblom
 RBERLIA
Experiment 4: Color Selector
Introduction
In this experiment you'll learn about analog input and output, the difference between analog and digital, and how to incorporate analog inputs and outputs into your project. We will also touch on some more advanced concepts, like using internal pull-up resistors and integrating with Twitter via IFTTT (If This Than That).
Parts Needed
You will need the following parts:
- 1x Breadboard
- 1x Photon RedBoard
- 1x Potentiometer
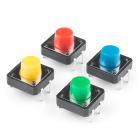
- 3x Pushbuttons (Red, Green, and Blue)
- 11x Jumper Wires


Suggested Reading
There are a variety of core concepts in electronics that we will be touching on in this circuit, but not discussing in depth. However, we do have some great tutorials that go into more detail about what's going on behind the scenes.
- Analog vs. Digital - understanding the difference between analog and digital devices is going to be very helpful for this section.
- Pulse-Width Modulation - pulse-width modulation (or PWM) is the way digital microcontrollers simulate analog output.
- Analog to Digital Conversion - knowing how your microcontroller translates between digital and analog signals will help you understand many of the basics covered here.
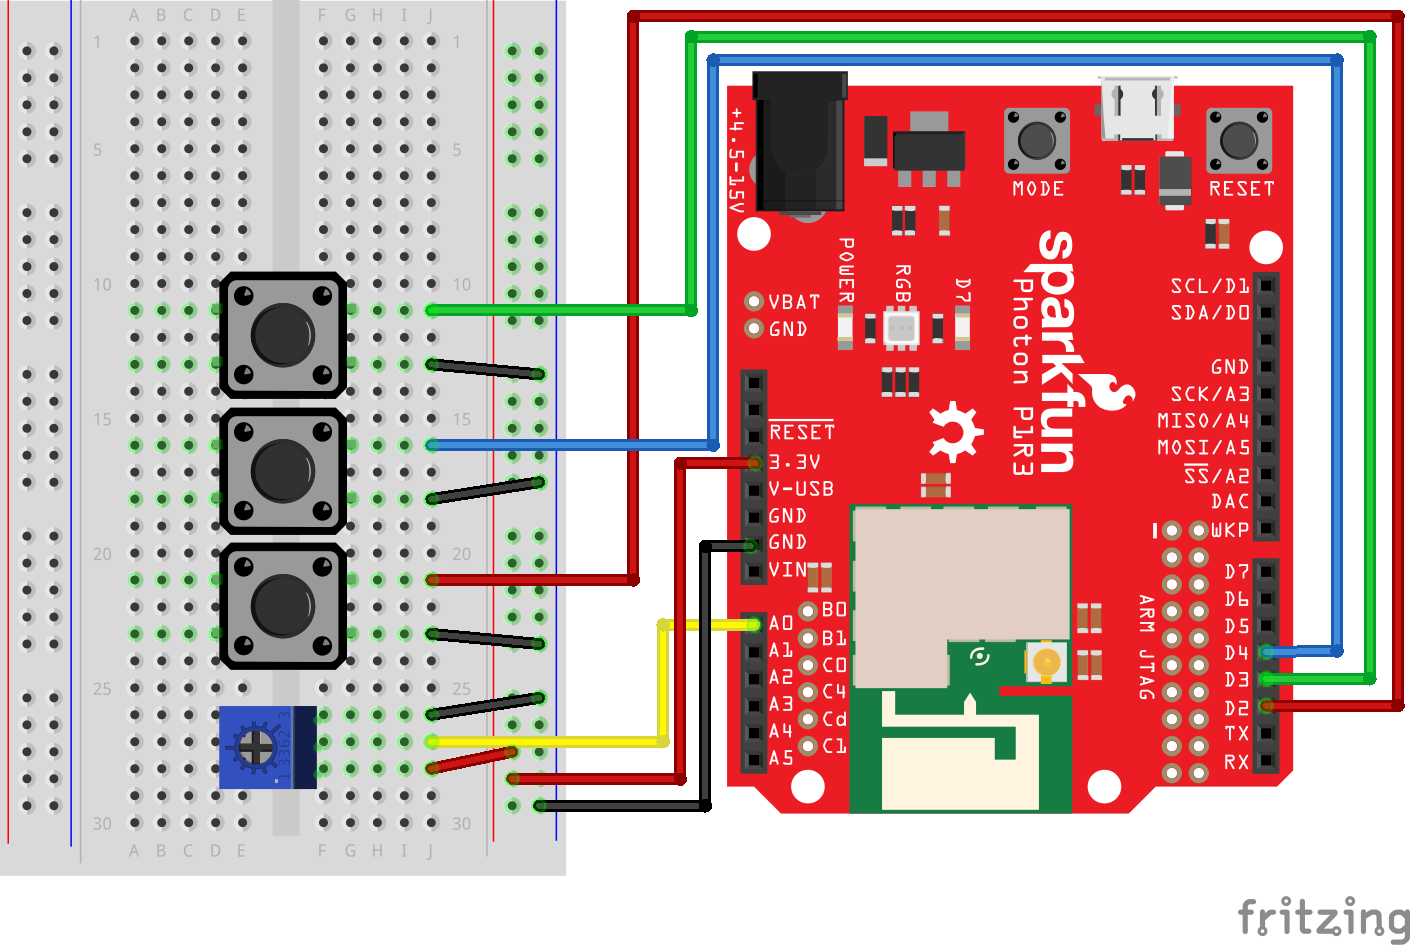
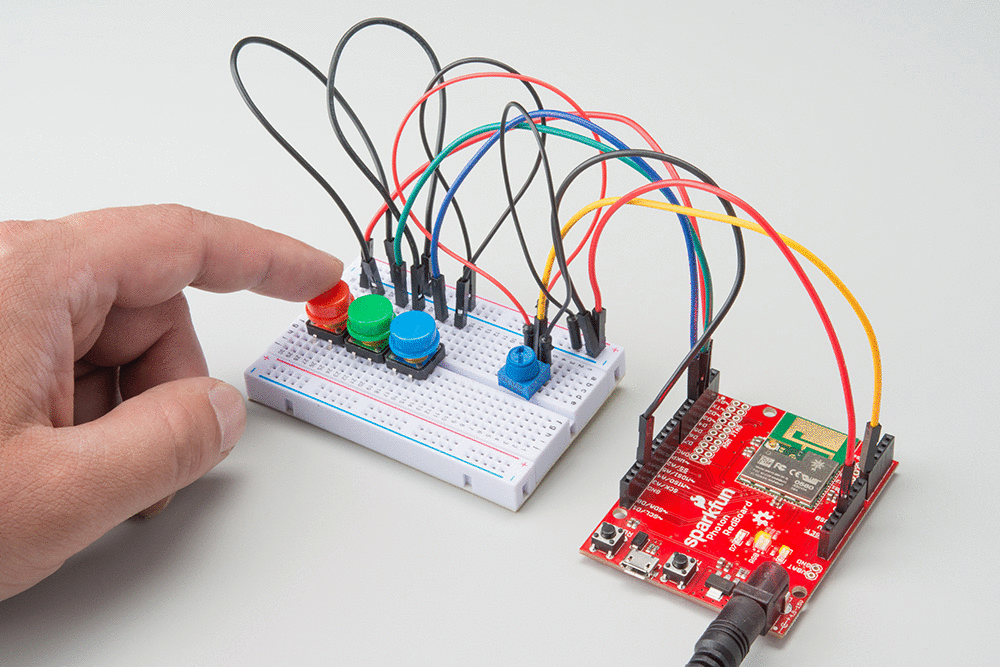
Hardware Hookup
Connect the components on the breadboard and wire them to the Photon RedBoard as shown below. The red button should go to pin D2, the green button to D3, and the blue button to pin D4. The potentiometer should go to pin A0. Don't forget to run power (3.3V) and ground (GND) from your Photon to your breadboard.
Photon Code
Copy and paste this code into the IDE. Then upload.
language:c
/*  SparkFun Inventor's Kit for Photon
    Experiment 4 - Part 1
    This sketch was written by SparkFun Electronics
    Ben Leduc-Mills
    August 31, 2015
    https://github.com/sparkfun

    This is an example sketch using buttons and a potentiometer to change the color and brightness of the Photon RedBoard onboard LED.

    Development environment specifics:
    Particle Build environment (https://www.particle.io/build)
    Particle Photon RedBoard
    Released under the MIT License(http://opensource.org/licenses/MIT)
*/
int redButton = D2; // declare variable for red button
int greenButton = D3; // declare variable for green button
int blueButton = D4; // declare variable for blue button

int potentiometer = A0; // declare variable for potentiometer
int colorMode; // declare variable to keep track of color
int potValue = 0; // // declare variable for the value of the potentiometer

void setup() {

    RGB.control(true); // command to control the RGB led on the Photon
    // buttons need an internal pullup resistor - see below for notes
    pinMode(redButton, INPUT_PULLUP);
    pinMode(greenButton, INPUT_PULLUP);
    pinMode(blueButton, INPUT_PULLUP);
    pinMode(potentiometer, INPUT); // potentiometers are an analog input
    colorMode = 0;

}

void loop() {

    // change colorMode variable depending on which button was pressed
    if(digitalRead(redButton) == LOW) { // double equals checks for equality
        colorMode = 1; // single equals is for assigning a new value to the variable
    }

    if(digitalRead(greenButton) == LOW) {
        colorMode = 2;
    }

    if(digitalRead(blueButton) == LOW) {
        colorMode = 3;
    }

    // read from the potentiometer, divide by 16 to get a number we can use for a color value
    potValue = analogRead(potentiometer)/16;
    changeColor(colorMode, potValue); // call changeColor function

}

// changeColor takes a color mode and a potentiometer value and changes the color and brightness of the Photon RGB LED
void changeColor(int _colorMode, int _potValue) {

    if(_colorMode == 1) {
        RGB.color(_potValue, 0, 0);
    }

    if(_colorMode == 2) {
        RGB.color(0, _potValue, 0);
    }

    if(_colorMode == 3) {
        RGB.color(0, 0, _potValue);
    }

    else if(_colorMode == 0) {
        RGB.color(0,0,0);
    }
}
What You Should See
After the you click 'flash' and the upload process is complete, you should be able to control the color and brightness of the Photon RedBoard's onboard LED. The buttons will turn the LED red, green, or blue, and turning the potentiometer will affect the brightness of the LED.
Switching colors:
Fading:

Pretty neat, huh? Now, let's take this circuit and make it a part of the Internet of Things!
Troubleshooting
- If your buttons aren't working, make sure they are pushed down firmly into the breadboard and that you declared them as
INPUT_PULLUPin your code. - If the LED is still breathing Cyan, double check that you put in the
RGB.control(true);line in yoursetup()function.
Part 2: Turn on an LED with IFTTT (If This Then That)
IFTTT is a website that uses conditional statements and does very useful things with well known applications, such as Gmail, Craigslist, Twitter, or Facebook. For this experiment, we're going to tweet the color of your LED.
Photon Code Part 2
Since we'll be needing IFTTT to communicate with our Photon RedBoard, we'll need to modify our code. Particle.io has created many useful IoT functions for the Photon RedBoard, and we'll be using one of them -- more specifically Particle.function(). In our case, we're going to find a way to 'tweet' an RGB color value, and have the onboard LED of the Photon RedBoard turn that color.
Go ahead and paste this code into the Particle Build IDE. Then upload.
language:c
/*  SparkFun Inventor's Kit for Photon
    Experiment 4 - Part 2
    This sketch was written by SparkFun Electronics
    Ben Leduc-Mills
    August 31, 2015
    https://github.com/sparkfun

    This is an example sketch showing how to change the color of the Photon Redboard onboard LED using Twitter and IFTTT (If this then that).

    Development environment specifics:
    Particle Build environment (https://www.particle.io/build)
    Particle Photon RedBoard
    Released under the MIT License(http://opensource.org/licenses/MIT)
*/
//declare the name of our function (and its parameters) at the top of our program
int rgbColor(String val);

//variables for our colors (red, green, blue)
int r,g,b;


void setup() {
    //take control of the Photon RGB LED
    RGB.control(true);
    //register our function in the Particle cloud
    Particle.function("rgbColor", rgbColor);
}

void loop() {
    //don't need to do anything in the loop
}

//our actual function call
//looking for a string of three numbers that represents an RGB color
//e.g. 200,12,42
int rgbColor(String val) {

    //check if incoming string is empty
    if(val.length() > 0) {

        //if not, use indexOf to find the first comma delimiter
        //this string class has no split command
        //more about indexOf: https://docs.particle.io/reference/firmware/photon/#indexof-
        int i = val.indexOf(",");

        //use substring to get the value from the beginning of the string until the first comma
        //then use toInt to convert from a string to an integer
        //which gets us our first number, the r value
        r = val.substring(0,i).toInt();

        //more string manipulation to get our g and b values
        int j = val.indexOf(",", i+1);

        g = val.substring(i+1, j).toInt();

        b = val.substring(j+1, val.length()).toInt();

        //put it all together and make the LED light up
        RGB.color(r, g, b);

        //if we're successful return 1
        return 1;
    }
    //something went wrong
    else return -1;
}
Setup IFTTT
Now that we've prepped our code to talk with the IFTTT service, we have to actually sign up for it and create our Internet of Things 'recipe'. If you're completing the exercises in order, you will have signed up for IFTTT in the last exercise, if not, go ahead and sign up now.
- Sign up, or log into IFTTT, and activate your account from your email address.
- Create your first recipe:
- Click on the blue lettered: "This"
- Type Twitter into the search bar and click on it
- Connect your Twitter account to IFTTT, hit continue
- On the "Choose a Trigger" page, select "New tweet by @yourtwitter with hashtag"
- For the hashtag, type in #rgb
You should see something like:

- Click on "Create trigger"
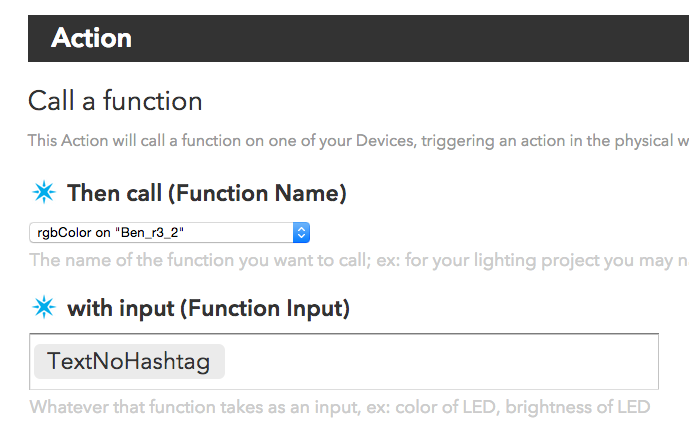
- Click on "That"
- Search for "Particle", click on it
- Choose "Call a function", and select the function we put in our photon code: "rgbColor on (your Photon RedBoard's name)".
In the "with input(Function Input)" field, choose TextNoHashtag
You should see:
- Finally, click on "Create Action" and finally "Create Recipe"
Great! You've just created an IFTTT recipe that calls our rgbColor() function whenever we send a tweet with a specific hashtag.
What You Should See
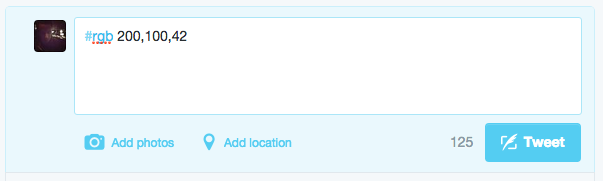
Send a tweet with the hashtag #rgb followed by numbers for red, green, and blue values. You might have to allow the gears of the Internet to churn for a minute or two, but you should eventually see your LED turn on. If you don't feel like waiting, go ahead and click on the refresh-looking icon in the IFTTT dashboard for your recipe, named "Check Recipe now".
Your tweet should look something like:
Code to Note
Particle.function("rgbColor", rgbColor);
Particle.function is a function specifically made for communication with IFTTT. It works as Particle.function("cloudNickname", firmwareFunctionName). The cloud name can be maximum 12 characters long. There's a great write up for this provided by Particle.io, click HERE.
Manipulating groups of words and symbols, or 'strings' is a key component in many programs - so much so that Particle has a String 'class' - which allows us to use several different pre-built methods for dealing with strings. In fact, use four of them just in this exercise: length(), indexOf(), substring(), and toInt(). More info on these and other useful methods for strings can be found in the Particle docs here.
Code to Note
RGB.control(true);
You may have noticed by now that there is no LED on your breadboard. Instead, we're going to take control of the RGB LED on the Photon RedBoard that's usually reserved for showing the status of the board. We do this by using the built-in RGB library and setting control to us, the user.
pinMode(redButton, INPUT_PULLUP);
Push buttons like the ones we're using operate by closing or opening a circuit when you push down the button. The Photon can detect this change and report it to us so we know when someone pushes our buttons. Often, buttons are hooked up to the breadboard with a 'pull-up' resistor (usually 10KΩ) which in essence pulls the voltage reading from the button to HIGH. This means that when we push the button the value goes LOW, which seems to make sense to us logically. Luckily for us, the Photon has internal pull-up resistors that we can turn on through the code - by changing the pinMode type from the usual INPUT to INPUT_PULLUP.
Troubleshooting
- If the LED is still breathing Cyan, double check that you put in the
RGB.control(true);line in yoursetup()function. - If the function name doesn't show up when trying to complete the 'call a function' step (6 of 7), make sure your board is plugged in, and that you've saved your code in the cloud with the
Particle.function("turnOnLED", LEDstate);line in your code. - If the function still doesn't show up, you may have to go into IFTTT, delete your Particle channel (and all your recipes), then reconnect the channel and rebuild your recipe from scratch.