WS2812 Breakout Hookup Guide
 jimblom
Adding Firmware
Note: This example assumes you are using the latest version of the Arduino IDE on your desktop. If this is your first time using Arduino, please review our tutorial on installing the Arduino IDE. If you have not previously installed an Arduino library, please check out our installation guide.
For our example code, we'll be making use of Adafruit's fantastic NeoPixel library. Click below to download a copy of both the example code, as well as the NeoPixel library.
The library is located in the "Adafruit_NeoPixel" folder, and the example code is found in the "WS2812_Breakout_Example" folder.
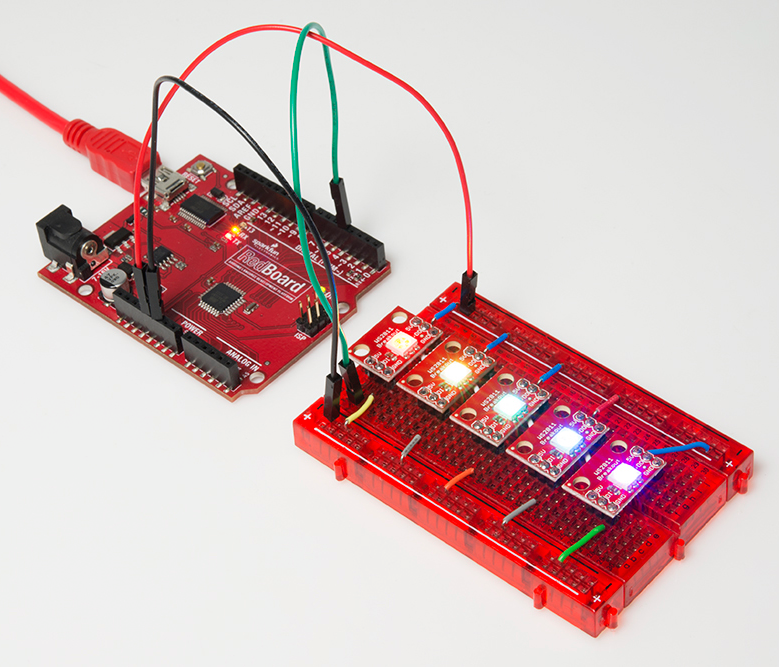
With the library installed, open up WS2812_Breakout_Example.ino within Arduino. Before you upload the code, make sure you adjust the PIN and LED_COUNT definitions near the top of the sketch. These define which pin the first pixel is connected to, and how many total LEDs are linked up. Then upload away and enjoy the show!
Using the NeoPixel Library
Setup
There are a few lines of code required to set up your sketch to use the library. First, call the constructor near the top of your code (before setup(), you'll probably want it to be a global variable).
language:c
#define PIN 4
#define LED_COUNT 8

// Create an instance of the Adafruit_NeoPixel class called "leds".
// That'll be what we refer to from here on...
Adafruit_NeoPixel leds = Adafruit_NeoPixel(LED_COUNT, PIN, NEO_GRB + NEO_KHZ800);
The PIN and LED_COUNT parameters in that function call should be set, respectively, to the Arduino pin you've connected to the first breakout's "DIN" pin and the total number of breakout boards you have linked up.
The rest of the setup is calling the leds.begin() function somewhere near the beginning of the setup() function.
Setting An LED
Setting an LED with the Adafruit NeoPixel library is a two step process. First, you have to set a pixel color using the leds.setPixelColor(position, color) command. The color parameter in that function can either be a 24-bit RGB color-code, or three separate bytes for each color. For example:
language:c
leds.setPixelColor(3, 0xFF00FF);    // Set fourth LED to full red, no green, full blue
leds.setPixelColor(3, 0xFF, 0x00, 0xFF)  // Also set fourth LED to full red, no green, full blue
Setting a pixel's color does not equate to that pixel actually turning on though. For that, you need to call leds.show(). Note that when this function is called any LED that was previously set will turn on.
The Rest of the Code
After you've gotten the hang of using the NeoPixel library, the remaining parts of the sketch are finding ways to maniuplate the pixel colors. There are some fun functions in this example code, which create the classic "cylon" larson scanner, or draw a rainbow. We hope you can adapt them to make even more creative animations.
The included "WS2812_Definitions.h" file defines a huge list of standard colors. In there you'll find anything from navy to saddle brown to ghost white.
Have fun!
FastLED Alternative Library
Looking for an alternative library? Try checking out the FastLED library for more advanced features. The library also supports other LED chipsets.