
Giant Nintendo Controller
It was another one of those moments when I should have kept my mouth shut. But in a moment of weakness, I uttered the words 'wouldn't it be cool if...' Four weeks later, we had to travel out to Maker Faire with an 83 pound, 5 foot Nintendo controller.
From Phillip Torrone's Maker Faire 2007 Flickr
It actually works! We took the electronics for a normal Nintendo controller and built a 5' scaled box. It took a carpenter, a painter, and a electronics geek to pull it off. Oddly enough, the hardest part was not building/painting/wiring, it was getting the giant controller onto a plane to get it to Maker Faire!
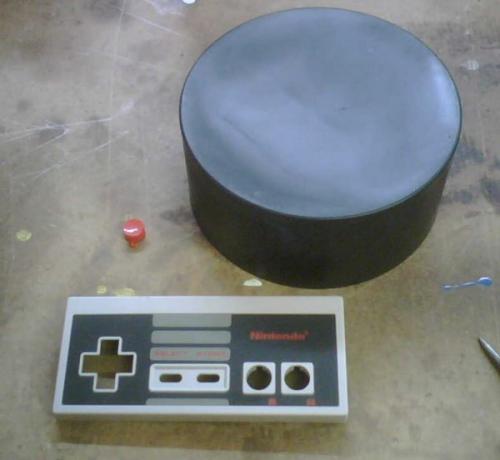
Searching through Home Depot, we found a 4" diameter pipe cap that served nicely as a button so we scaled everything else to this ratio. Here we have the original button next to the new button.
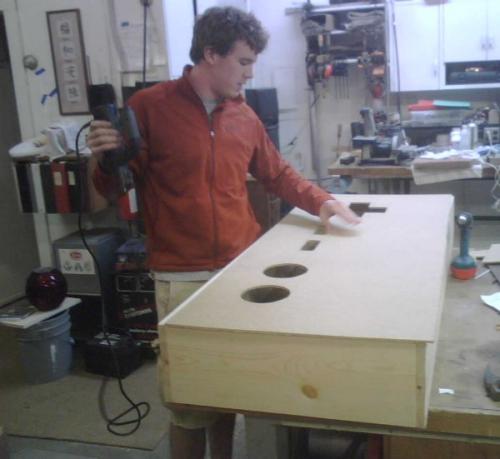
It's amazing. You mention a ridiculous project like this and quite a few friends show up to lend a hand. Mike, the carpenter, had a box whipped up in a matter of minutes. Todd is wielding the RotoZip and cutting out the holes for the face.
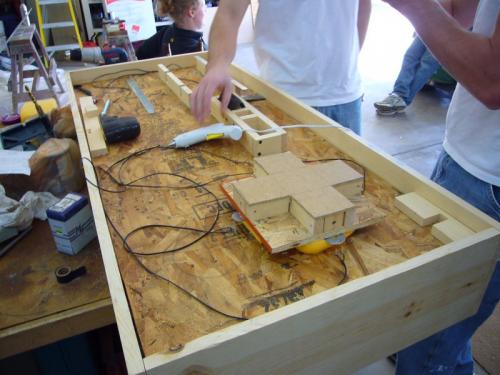
Here you can see how we implemented our own switches. Under the cross-hair we used regular sponges to give tactile feedback. The cross-hair was then bolted down to the lower layer of plywood to hold it in place, but loose enough to be able to rock the cross-hair back and forth. To form the electronics we used two springs soldered to two wires. On the edges of the cross-hair we glued a large washer. When the player jams the cross-hair in a direction, the sponge squishes, the washer comes down making contact with the springs, and the contacts on the original controller electronics (picture later) are shorted together.
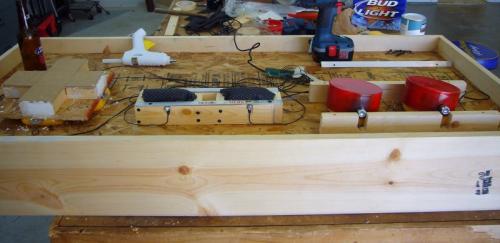
Lots of switches! A total of 8.
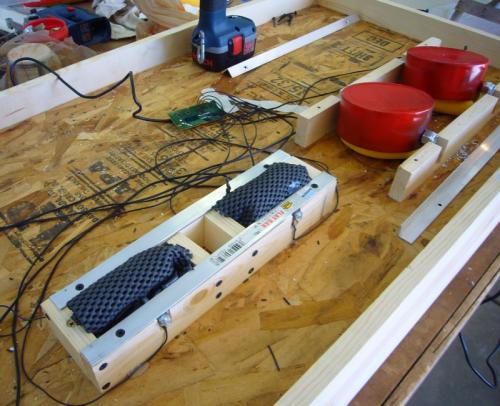
The Start and Select buttons where made from blocks of wood, with sponge underneath, wrapped with black anti-skid material (like you'd find under a place setting or in a silverware drawer) with a bolt through the middle of everything to form half of the switch. Two springs for each button completed the switch.
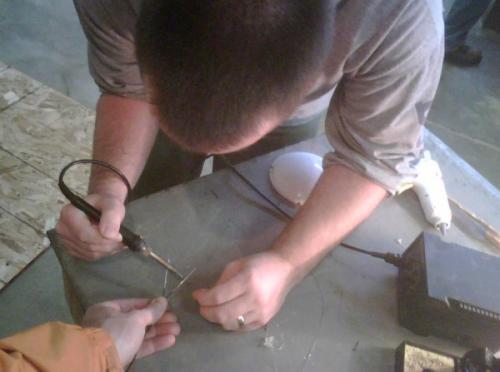
Here's Matt tinning the wires before connecting them to the old Nintendo controller board.
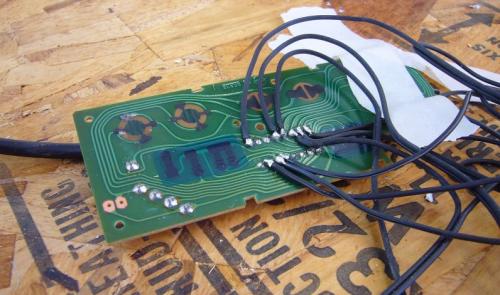
The original PCB found inside the Nintendo controller. This is REALLY cool. Nintendo has improved a lot over the years! It you want to see how complex these controllers have become, checkout the internals of the Wii Controller.
You can learn so much from these old boards. There was just one IC on the board and it was through-hole (old!). The traces are obviously laid out by hand instead of a computer. The board is only one layer. All we had to do was figure out where a common ground was and attach one side of all the switches to this one ground. Then we followed the traces from the various buttons on the controller to the DIP IC and soldered the other side of the switches to the various points on the DIP IC. When you depress one of the big buttons, the washer shorts the two springs together, effectively shorting 1 of 8 pins on the DIP IC to ground. The old board thinks you've hit the button and transmits this info to the Nintendo. I didn't think it would work either!

Oh boy did it. First try too! When the Start button activated the original NES Super Mario, it was intense.
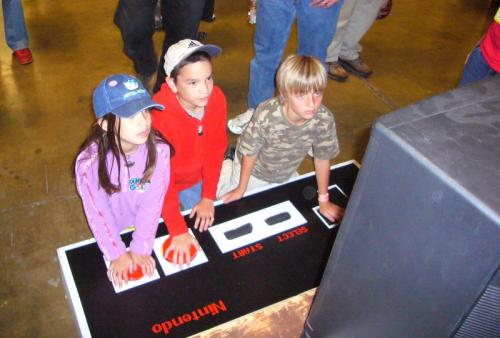
Something very interesting occurred once we started playing. It's very hard to play any game with this controller. Because of the size, two people must play together as a team. Initially, Fasen and Sallie (pictured above) just yelled at each other. Someone was always messing up and blaming the other. After 4-5 minutes, human instinct kicked in and you started to see the team cooperate. It was the same for every team to play. Initial frustration followed by some rudimentary communication to collectively work towards a goal (getting Mario over the green pipe).
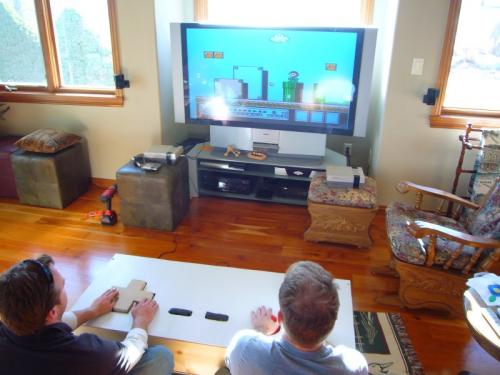
We suddenly had a very large Nintendo controller. What else was there to do? Hook up the Nintendo to a very large flat screen TV of course. Notice the two separate Nintendo boxes. We had multiple people at Maker Faire 2007 comment on how cool the controller was, but how truly impressive it was that we could locate a functioning NES console.
Pre-paint
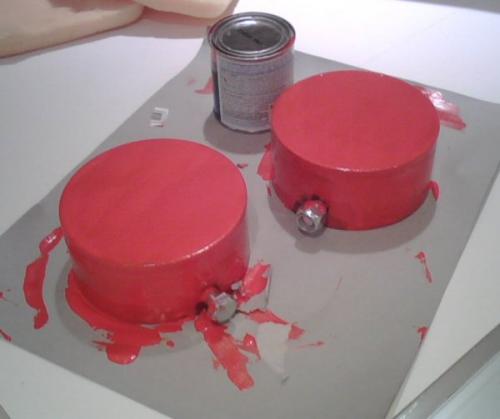
Candy apple red. The paint wouldn't stay on for long...
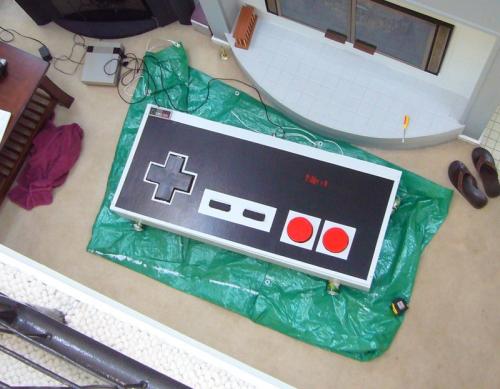
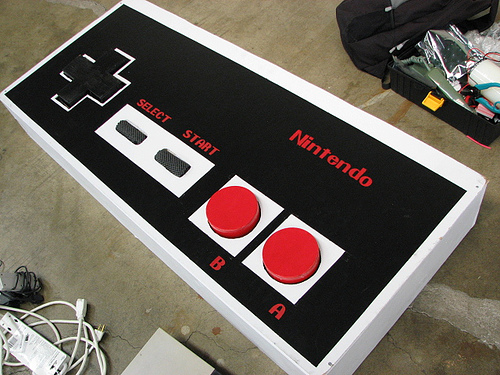
Here's the controller before we got the lettering finished. Of course it's going to rain for 5 days leading up to Maker Faire, so we had to do much of the painting indoors. Pretendo was the font we used for the letters. It looked ok and scaling was easy enough. Notice the original controller in the corner of the giant controller.
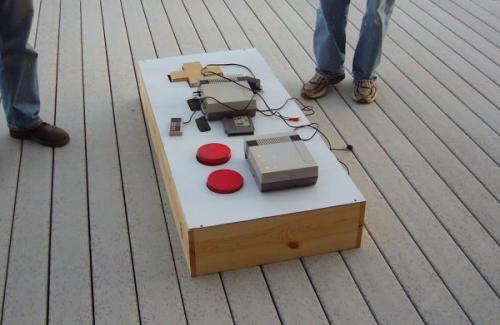
Here is the controller at Maker Faire 2007. James was nice enough to loan us a TV for the weekend! To travel with the giant controller, we built removable wheels onto one end, and screwed in a back panel to the controller frame. This allowed us to carry the Tetris Board, NES console, extension cords, etc. inside the Nintendo controller. Wrap everything up in a couple layers of bubble wrap and this combined weight made the controller-crate 83 lbs. Flying United, the controller was over-weight and over-size making it eligible for a hefty $150 surcharge, each way! I should have bought the controller its own plane ticket.
From Phillip Torrone's Maker Faire 2007 Flickr
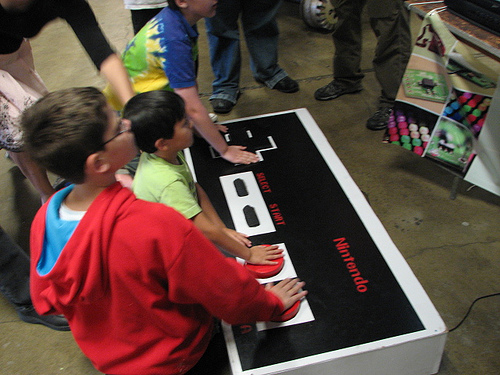
It was amazing how much brutalization the controller went through in 48 hours. We probably had 300 kids come through the SparkFun booth not to mention the adults that were brave enough to play (there was over 20,000 people at Maker Faire!). It was a ton of fun! Very few people made it past level 1 but it was a thrill to watch and play!
It's a bit worse for ware, but I am completely astounded the controller continues to work! Next time we dream up a great idea, I'll have to think twice about just how to get it onto an airplane. We had a great time at Maker Faire 2007. We hope to see everyone again next year!
Haha! Need one of these to play these SNES games! Would be hilarious for one person to control the movement and the other to control the actions of the character your playing.
This is awesome, but I like to do my super-sized gaming on the go, so how about a meter long GameBoy (original "grey brick" of course)?
Any Chance Of Getting FULL Details Of This? I Just Got A NES And Think It Would Be Hilarious To Have (Make) One Of These...
hey,
after seeing the few giant remotes, i decided to make my own but i haveran into a little problem.
i was wondering if you can give me some insight on the wiring? i have all the wires individuals wires ran but can seem to figure out how the ground cable works. when i connect a the ground wire to the individual buttons, nothing works. any ideas or is there something im missing.
thanks,
Gord
So how did you get it to were you where going?
I had to bite the bullet and pay the extra $150 to have it shipped under the plane (it was over weight and over size). That's $150 each way. I actually would have been better off buying the heavy thing its own seat within the plane (tickets for humans were $250).