
BigTime Watch Kit Quickstart Guide
Overview:
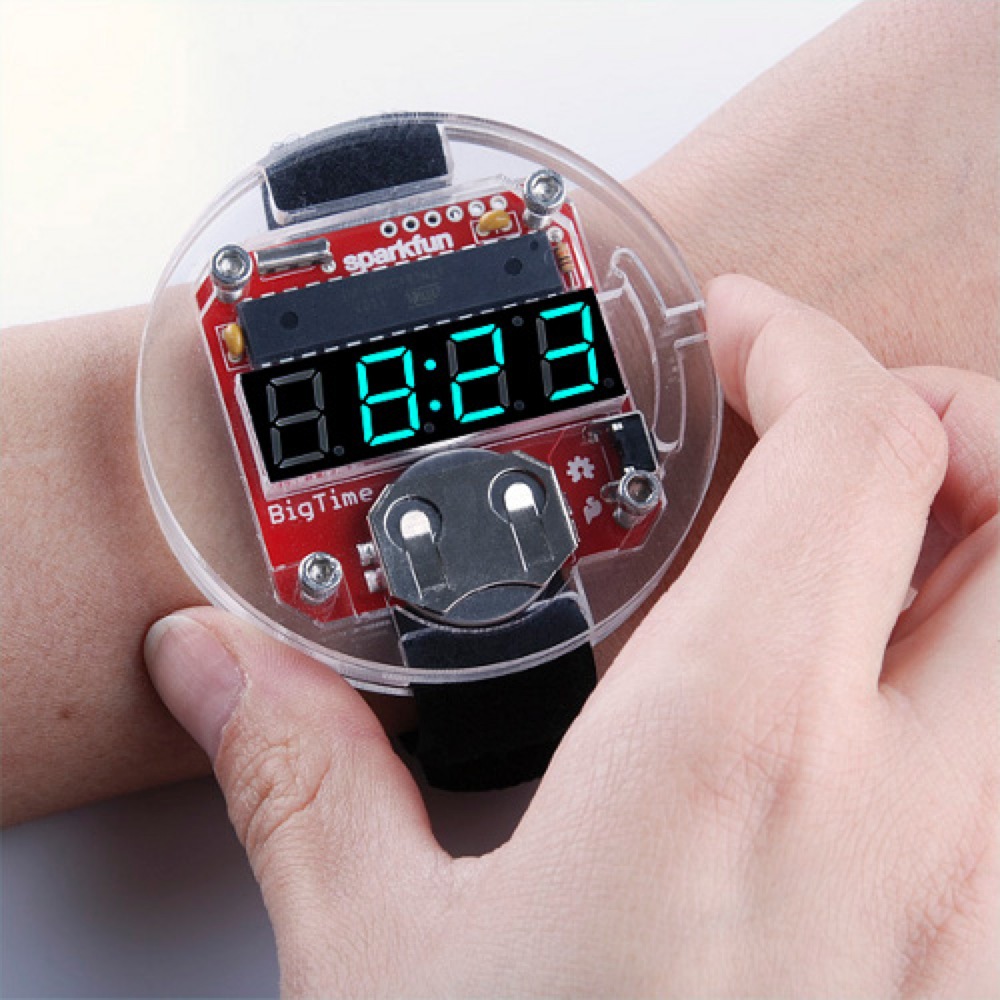
The BigTime Watch is an Arduino-compatible wristwatch kit designed as an introduction to soldering. We've taken pains to make sure it's easy to assemble for even complete beginners, and easily hackable for those with a bit more experience.
If you have the Learn to Solder BigTime kit, it includes everything you need, all in one box. Check out the tutorial and video here!
This guide will give you all the information you need to put your kit together, along with all the information you need to hack it to your heart's content.
Requirements:
Naturally, you need the BigTime Watch Kit- double check and make sure all the parts are present. Lay them out on your workspace as you check them off the list to make the assembly process smoother:
- 1 x Pre-programmed ATMega328 DIP IC
- 1 x 4-Digit 7-Segment Display
- 1 x 32kHz Crystal
- 1 x 10kOhm Resistor
- 2 x 0.1uF Capacitors
- 1 x Right Angle Tactile Button
- 1 x 20mm Coin Cell Battery Holder
- 1 x 20mm Coin Cell Battery
- 4 x 4-40 Screws
- 1 x Allen Wrench
- 1 x Velcro Watch Band
- Acrylic Enclosure Parts
- Assembly Guide
If you find that anything's missing, drop our customer service folks an email and they'll help you out.
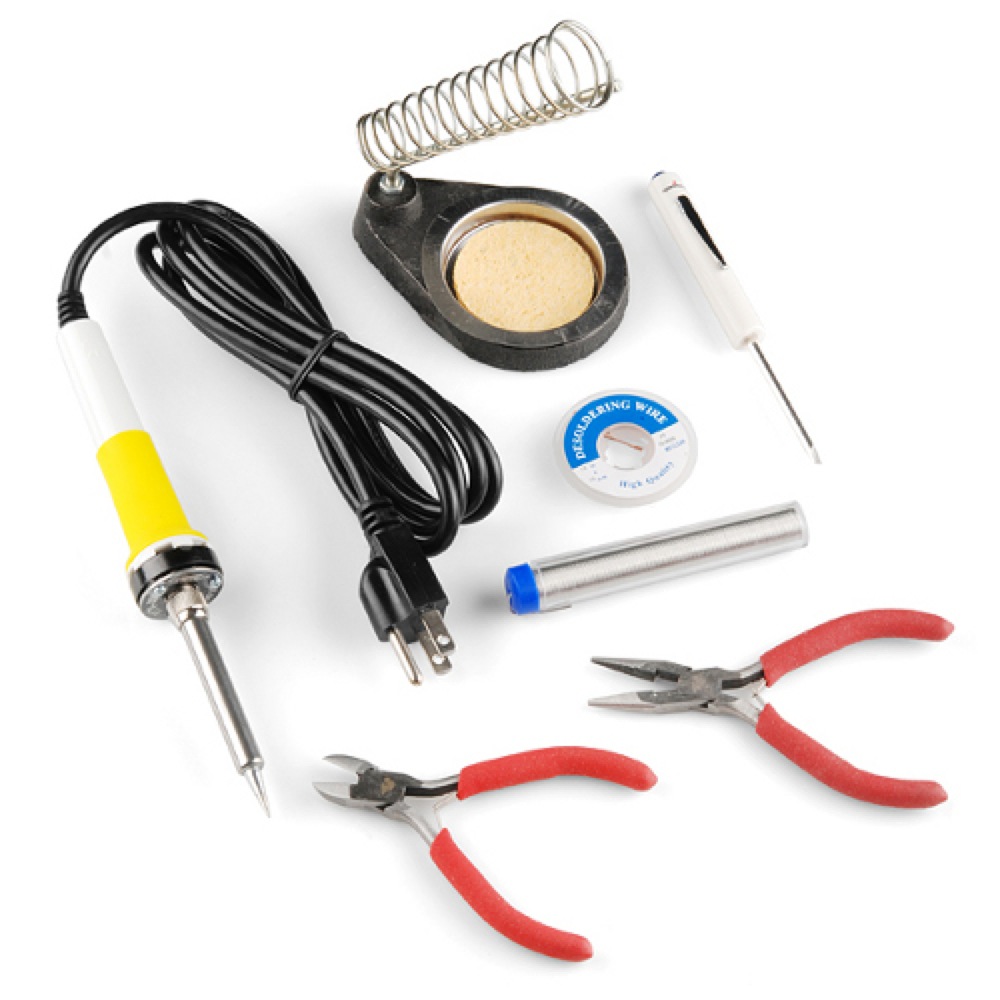
Next, you'll need to pull together the various tools that you need for assembly. The hex wrench needed to install the screws comes with the kit (don't lose it- you'll need it to change the battery later!), so all you need to provide is a cutter, a soldering iron, and some solder. You may find it handy to have a needle nose pliers for inserting parts, and a third hand tool or vise will come in handy to hold the board steady while you solder. Our beginner's tool kit has everything you need in one place.
If you want to hack the watch's programming later, you'll need a programming cable to connect to the board. There are lots of options for this- the easiest two are the FTDI Basic Breakout and the FTDI cable. These cables allow you to communicate with the board via USB, since the board doesn't normally know how to "speak" USBese.
Assembly:
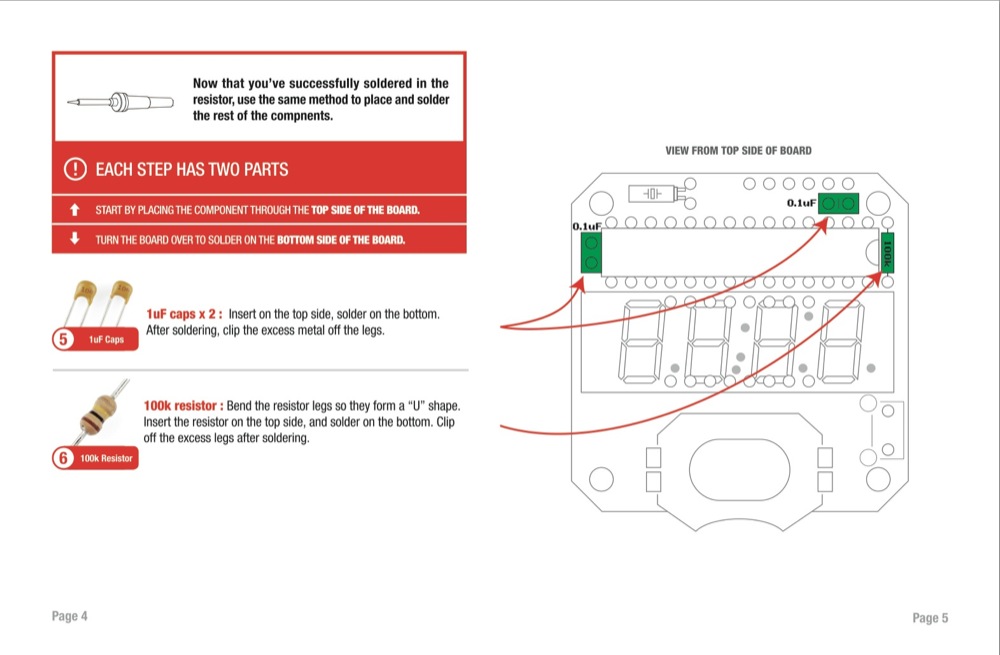
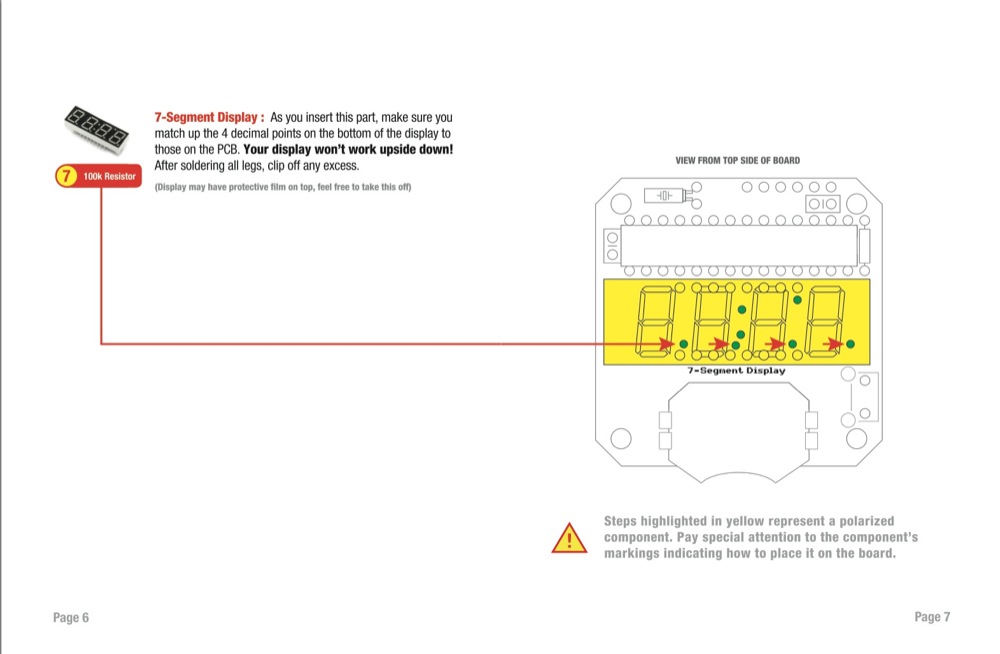
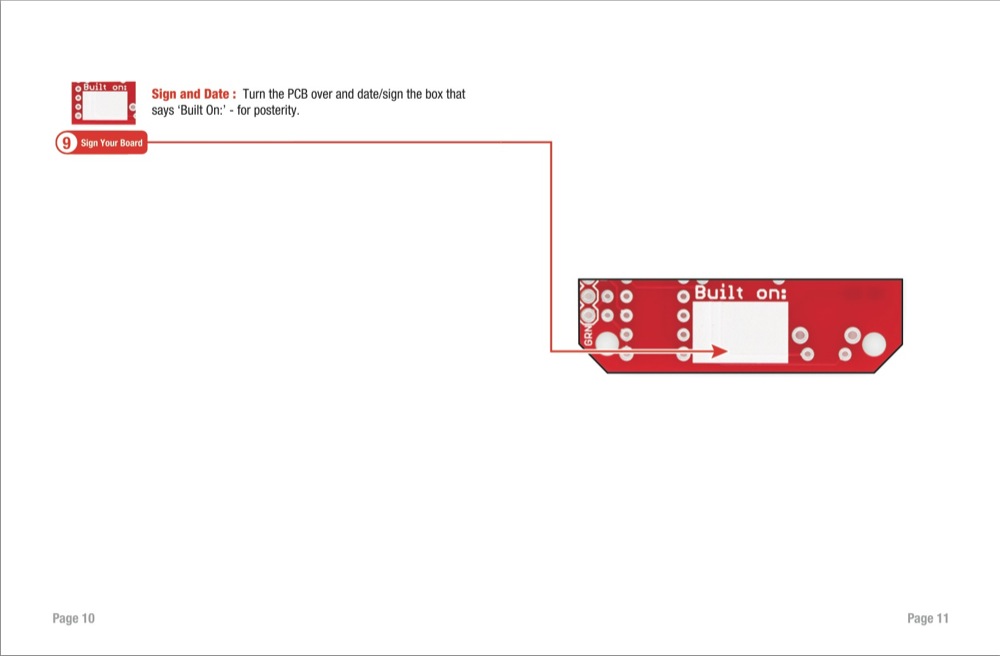
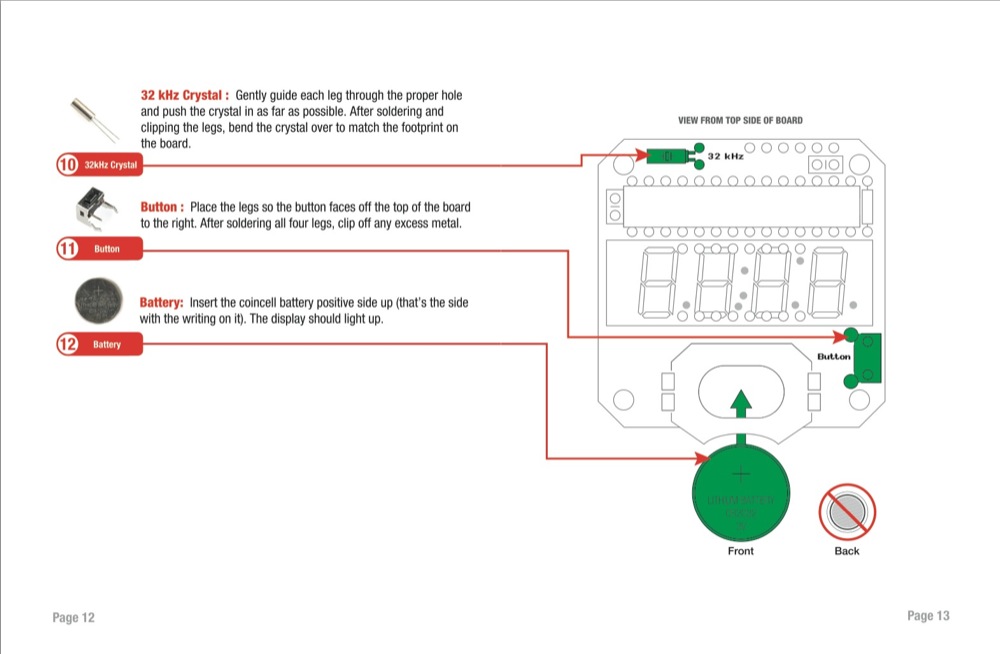
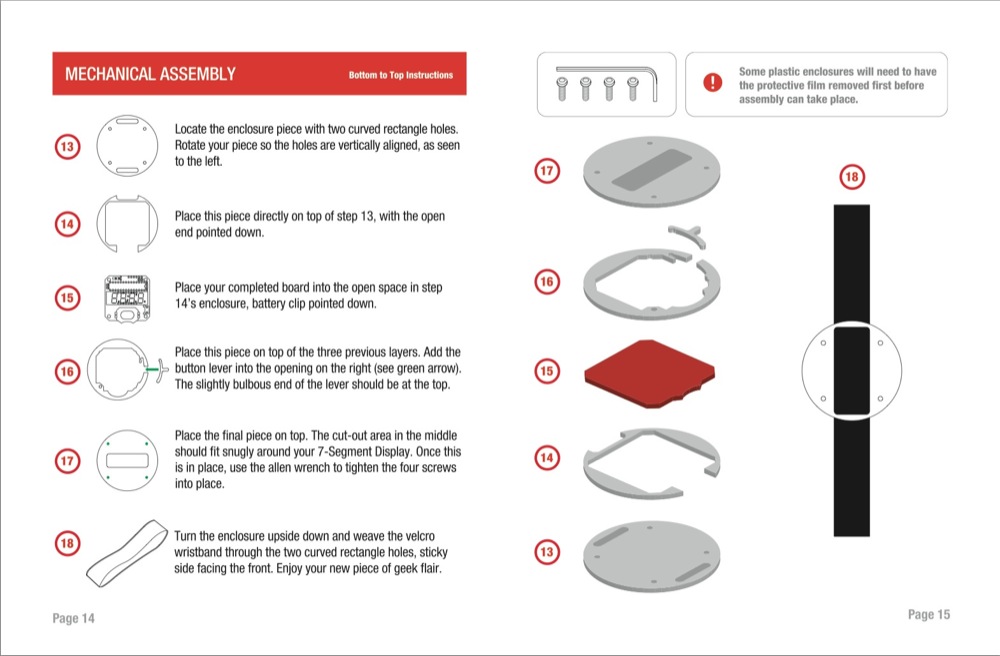
You can follow along with the assembly guide pictured here or you can download the pdf version if you prefer. The guide explains all the necessary steps in detail. Be sure to follow the steps in order, and watch out for polarized parts that have only one correct orientation.


Using the BigTime Watch:
So, now that you've got the thing together, how do you use it?
You'll note that the LED display is not lit up- this is to preserve the battery life, as the LEDs draw a lot of current (relatively speaking) when they are turned on. To activate the display, press in the button on the right side of the watch.
The first time after inserting the battery, the display should come to life and display the word "BLUE", then it'll show a time (the wrong time, obviously), then switch off. To set the time, hold in the button for a couple of heartbeats. The colon will start blinking, and the time will start incrementing in one minute steps. After it's gone through a few steps at one minute intervals, it will start incrementing 10 minutes at a step. When you get close to the desired time, let off the button, then hold it down again to dial in the exact time in one minute steps again.
Share and enjoy!
The BigTime watch makes a great introductory kit for those just learning to solder- we've designed the assembly process to be easy to follow and hard to make mistakes during. It's the perfect gift for people who aren't sure how to get started with electronics!
Please share your stories of gifting or explaining the watch to other people- we've found that it's almost impossible to go out in public with a BigTime on your wrist without getting a lot of attention. Keep an eye on our website for more tutorials about hacking the BigTime in the future!
Comments 0 comments