IOIO-OTG Hookup Guide
 Joel_E_B, Ytai
 Introduction
The IOIO-OTG (pronounced “yo-yo-O-T-G"; the OTG stands for On-The-Go) is a development board specially designed to allow developers to add advanced hardware I/O capabilities to their Android or PC application. It features a PIC microcontroller, which acts like a bridge that connects an app on your PC or Android device to low-level peripherals like GPIO, PWM, ADC, I2C, SPI and UART. An app-level library helps you write control code for these low level peripherals in the same way you’d write any other Java app!
What separates the IOIO-OTG from previous IOIO boards is its ability to leverage the USB On-The-Go specification to connect as a host or an accessory. There are several ways to connect the IOIO to your Java app. If the app is running on your Android device, the IOIO-OTG will act as a USB host and supply charging current to your device (meaning the IOIO-OTG will need its own power source). If your app is running on a Windows, Linux or OSX machine, the IOIO-OTG will assume device mode and present itself as a virtual serial port. When in device mode, the IOIO-OTG can be powered by the host. Connecting a USB Bluetooth® dongle will cause the IOIO-OTG to show up as a Bluetooth serial connection, so you can go wireless!
Required Materials
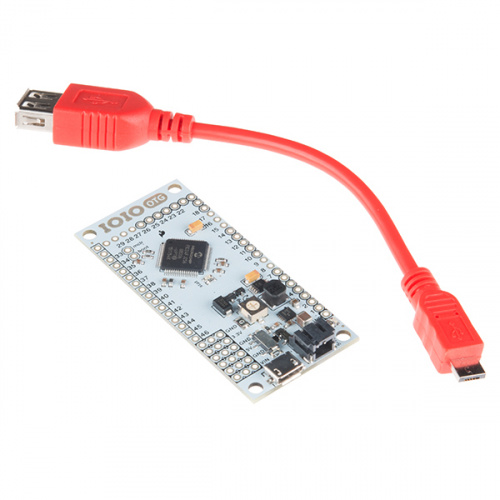
A USB Female A to Micro A OTG Cable should have been included with the purchase of your IOIO-OTG.
In addition to the IOIO and this cable you will need these items to follow along with this tutorial.
Suggested Reading
While not covered in this tutorial directly, the IOIO-OTG is capable of the functions mentioned below. Should you find any of them unfamiliar, take a detour over to that tutorial, then head on back here when finished.
The IOIO Wiki is full of great information that is helpful when read beforehand.
You should have a good understanding of using the Command Line before getting started with the IOIO-OTG.