
Robot Journal - Tim
12/26/2011
Tech Support has decided to collectively work together on a large-scale robotics project, one that should end in robotic bloodshed! We have begun discussing rules and specifications for the combat. This won't be your average battle. The scale is set, and robots must fit within a 6-inch square or smaller. The weight class is planned to be 1.5 pounds.
Our goal is not complete robot carnage. No, rather there will be tact and skill involved in being crowned champion of this duel -- this is a joust, my friends! Each robot will be issued a set of wooden lances. These will be placed on each bot in locations determined by the competitors at the time of the joust. All but one of the lances must be placed within 3 inches of the ground. There is an exception: one wild card lance that can be located at any height or angle.
The battle floor will be a custom arena created out of acrylic and covered in obstacles such as pit falls, spinning floor panels, rough terrain crossings, and flame throwers! Alright, maybe not flame throwers, sorry.
01/06/2012
My initial design is laid out in Google Sketchup. If you haven't played with Sketchup, I highly recommend it. It is very useful for taking your pen and paper designs to the next level. You can quickly and easily design a three-dimensional drawing from scratch. I spent some time just playing with different designs and ideas. The nice thing about a 3D model is that you can change your design a million times without having to waste any real hardware, money, or build time. I decided on this final design.
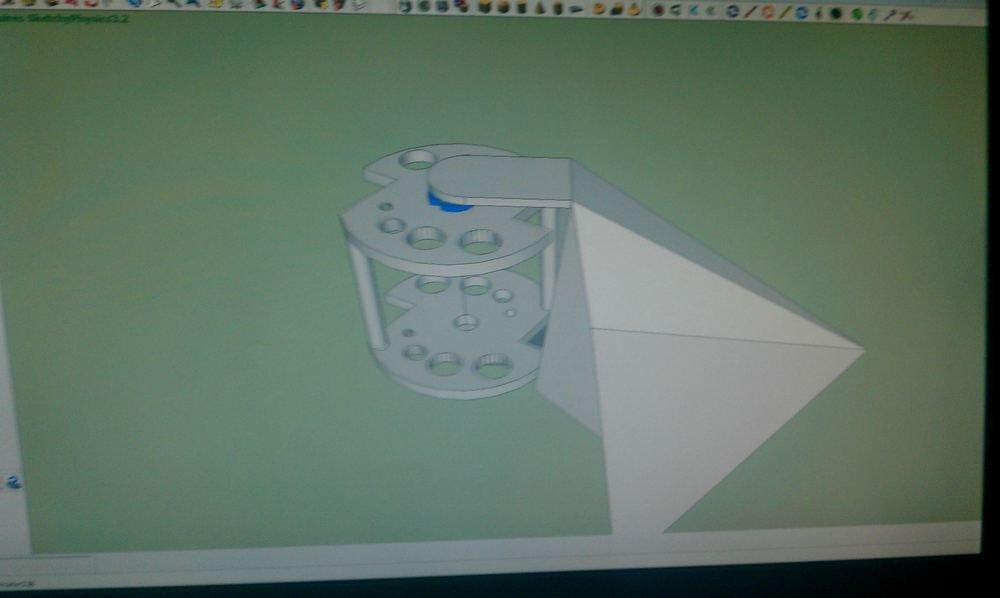
It's low to the ground, and the front has a spinning blade of doom! The angles on the back should make it a good ramming/flipping design. And the stealthy design hopefully will keep all of the parts tight and compact to the body, making it harder to be flipped or pushed around uncontrollably by competitors. Couple that with low-hung weights to bring my bot up to the max weight limit, and you have a solid little design.
01/08/2012
With a decent 3D model and a plan for where I wanted to go with this bot, I headed to the recycle bin for some materials. Believe it or not, empty six-pack boxes make great prototyping material. They're strong enough to hold some form, but thin and light enough to not be bulky or hard to work with. With a little time and creative thinking (and a couple of the beers from the Left Hand Nitro Milk Stout six-pack) I came up with a nice little proto bot model.
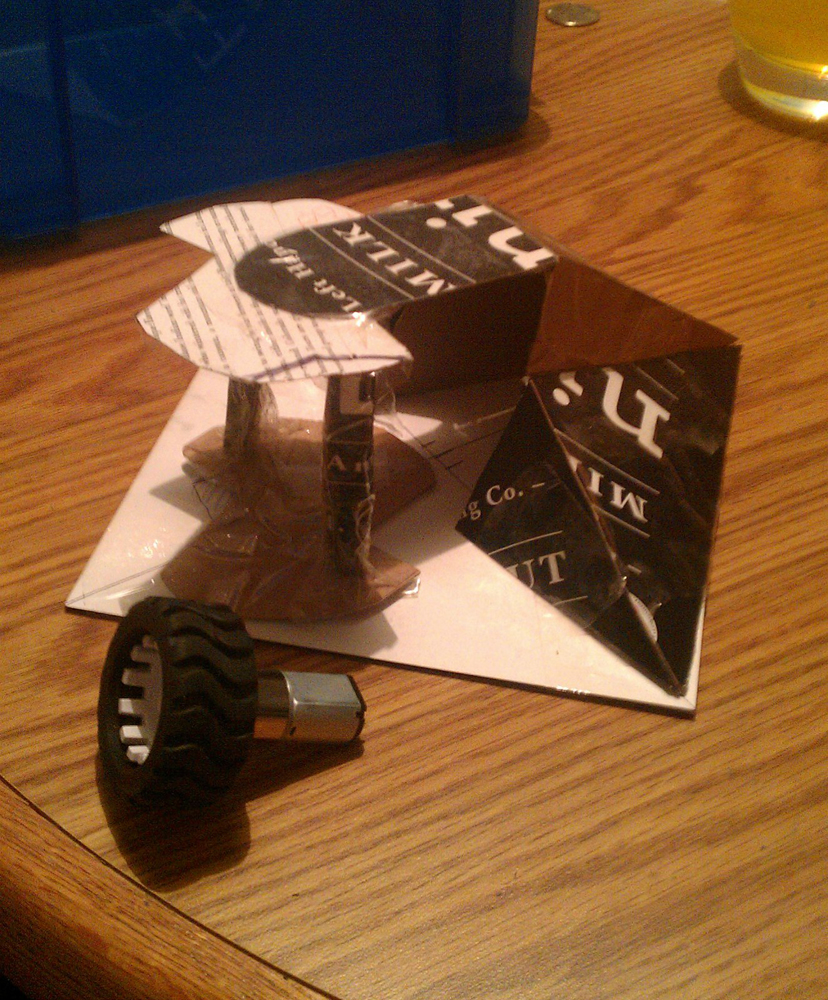
As you can see in the photo, that's the motor and wheel combination that I will be working with. I have had a lot of success with the tires in the past, and would like to continue to use them in this project. However this is the first time that I've used these motors. They don't currently have a very solid mounting solution, so I have avoided them in the past. I was surprised to find out that one of our engineers had a design for a laser-cut mounting tab. I will likely hot glue the motors to these tabs for mounting. I look forward to using these for the first time.
1/12/2012
The design work is not done yet. There has been a lot of planning and brainstorming on how to complete this bot. Also, as a team, we are finding that the competition floor is going to be a fairly large project in itself. Nothing much new to report in the hardware progress, but the plan is coming together nicely so far.

01/10/2012
The six-pack proto went under the digital calipers today. I needed to begin designing my cut files for the laser printer. Using the proto model, I dissected every piece to measure and redraw them in InkScape to eventually cut on the laser cutter. This is a little bit tedious, but any “from scratch” build will take an enormous amount of time fitting, removing, reshaping, and fitting again. Avoid cutting corners, and take your time if you are doing a project like this yourself.
01/12/2012
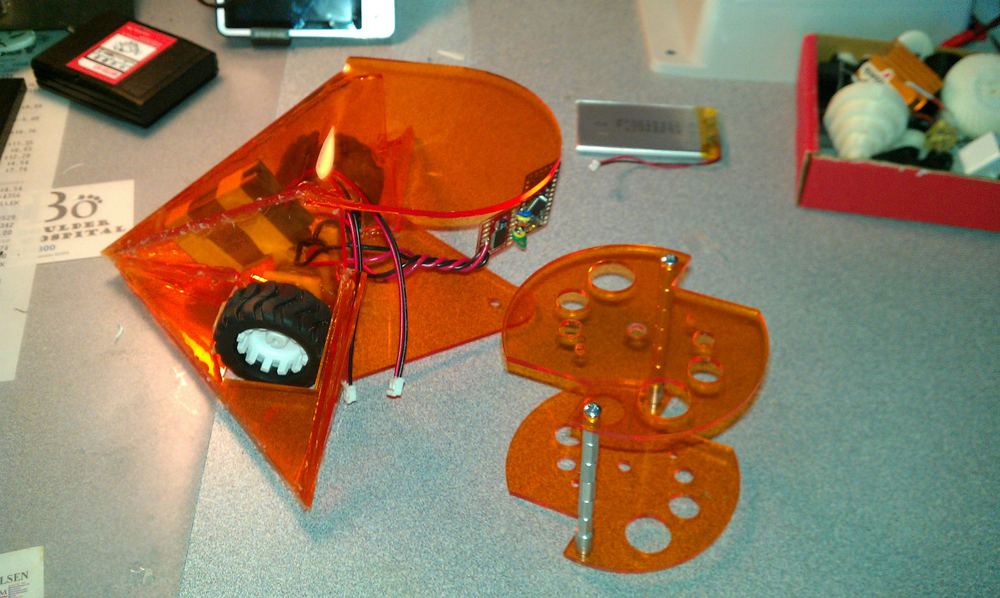
The Inkscape files are complete. I took some time on the laser cutter, and got down to business. It's only a cardboard proto, but it turned out pretty nicely. There are some changes that I will need to make before I'm ready to cut into acrylic, but this is a great start, and proof of concept. In the photo below, the hand cut proto is on the left, and on the right is the first stab at a laser cut proto. I need to spend some time figuring out the wheel well cuts. The current design did not take that into account.

01/15/2012
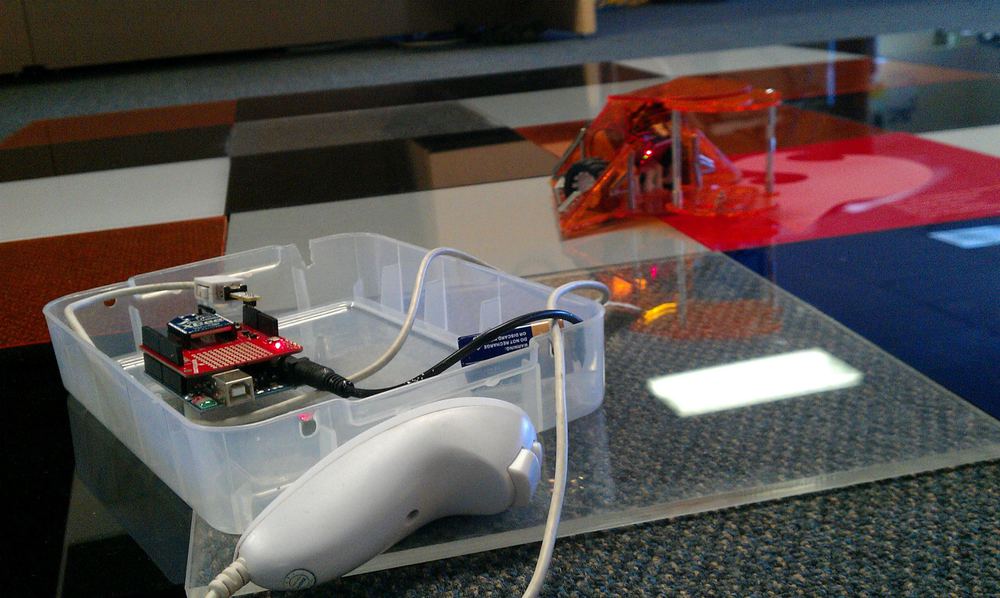
It's been busy. I haven't been able to get as much done these last few days, but I did finally get the changes made to the design and cut into acrylic. On my first attempt I messed up the wheel holes a couple of times. However, for the most part I was happy with all of my other parts. I have begun working on the code and hardware plans. I intend to use a Wii nunchuck for primary control. We have a great little interface board that makes it easy to connect with. The motor driver will be a TB6612FNG dual motor driver. The main processor will be a Arduino Pro mini. Communication will be handled by a pair of Xbees. It should be a fairly stout little bot when all is said and done, complete with spinning wheel of death.
01/31/2012
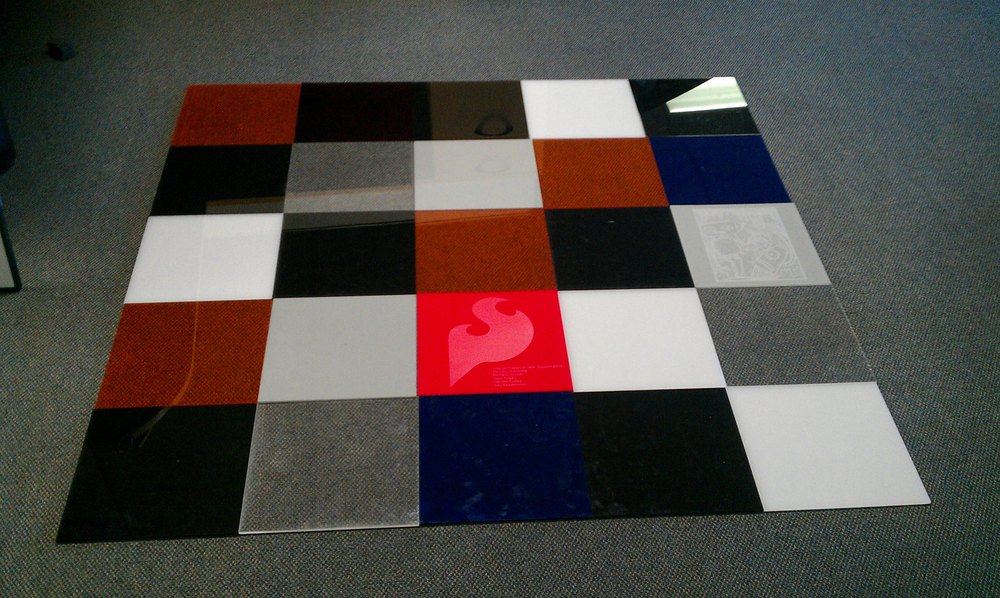
I have talked about it, but I haven't actually shown you guys anything as far as the battle floor yet. There's a reason for this: We needed well over 30 square feet of acrylic. That's a lot of plastic. There is a local plastic shop (Colorado Plastics) that has a 4th Friday remnant sale, when they have amazing deals on this specific day each month. So, we had to wait patiently.
Finally the day came and we loaded up in the Sparkfun Van, headed 30 minutes south, and had a nice little road trip filled with laughs, burgers and plans for world domination. After a number of hours hacking away at the acrylic on the Epilog Laser cutter, we ended up with a nice little set of tiles for our floor.
02/02/2012
The robot is up and running! The control system is complete. I have a few things, such as the front rotating blade, left to complete. But for the most part, I have a running machine that allows me to test my platform and my designs. The controller is an Arduino Duemilanove (I know, what an old timer, but I still love them), an Xbee shield, the Wii adapter board, and a battery.
02/06/2012
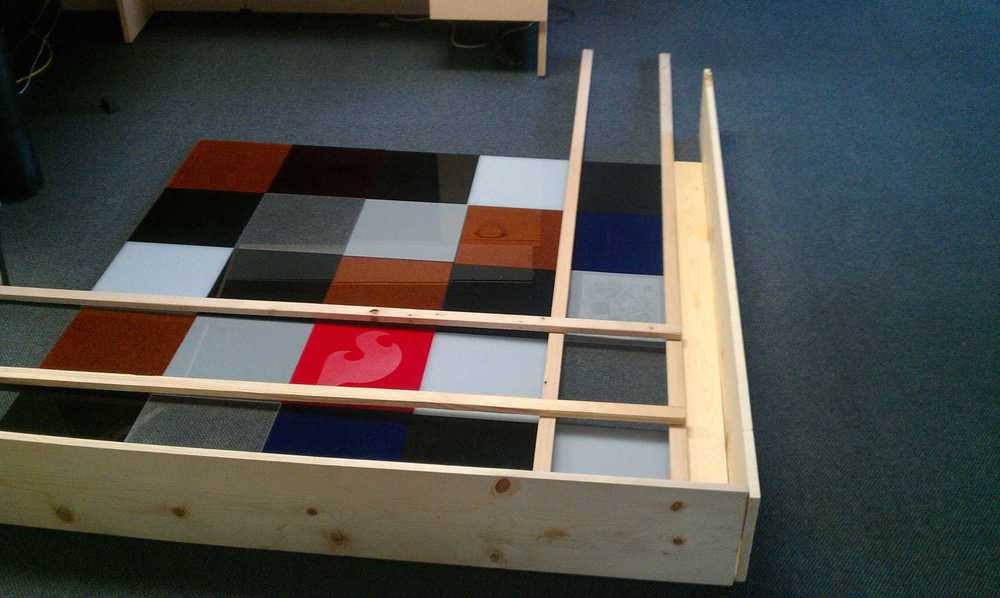
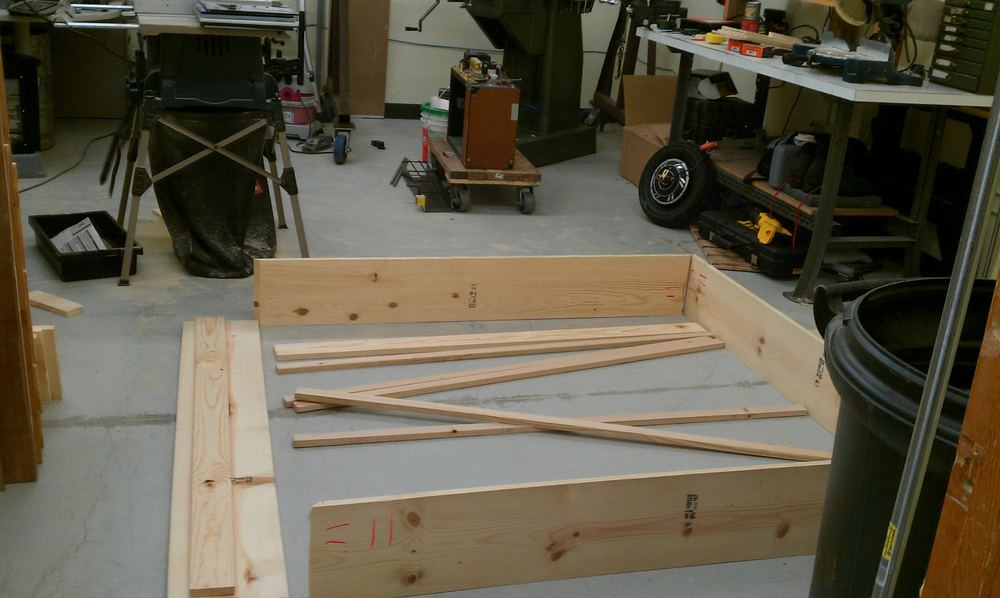
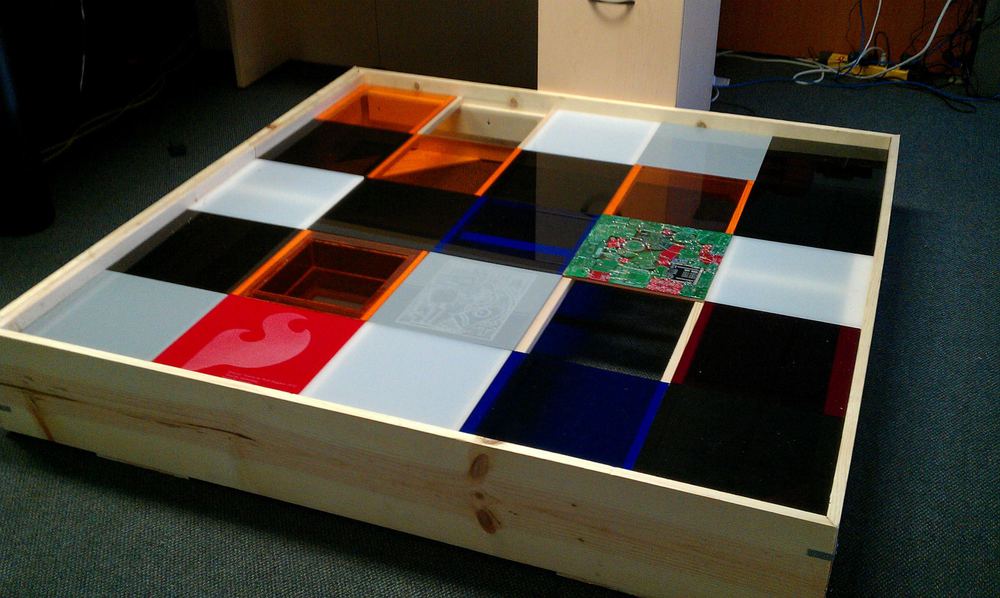
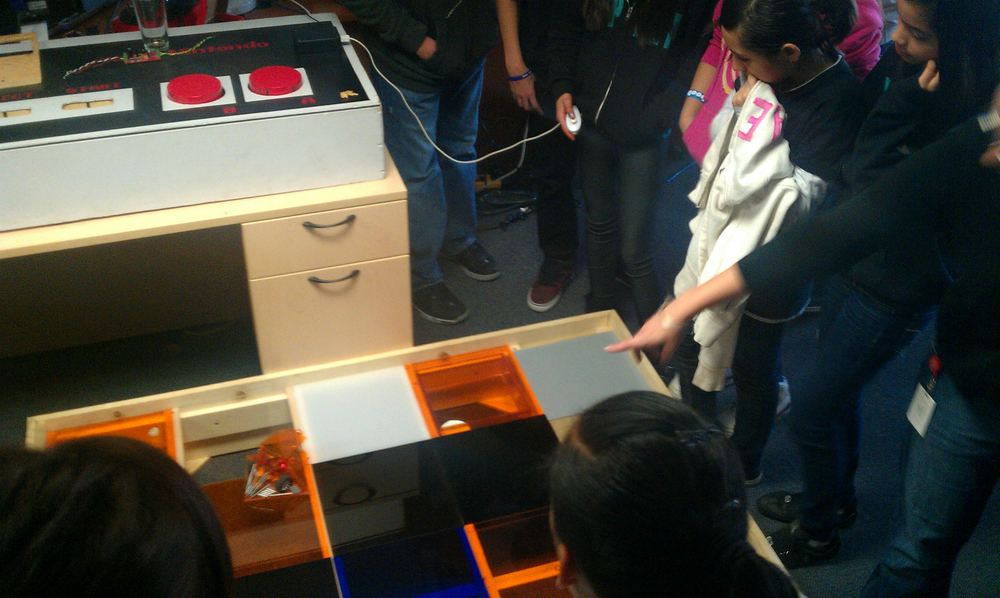
It's time to get down to business on the battle arena. At first, Paul, one of our mechanical engineers, helped me mill out what would have otherwise been a huge, bulky wooden floor. It's a good thing we tried to build a small-scale unit first, because we quickly realized it was a bad design. So we grabbed a bunch of lumber, laid out the boards and began brainstorming the final design. With the input from a number of skilled builders around the building, we came up with this design.
Once Paul and I each had some time to spend in the machine shop, we got down to business and tag-teamed this build. After lots of measuring and marking the boards, we started throwing sawdust, cutting, fitting, measuring, and cutting some more.
Much to our surprise, we didn't do half bad. The design seems to be stable and strong. It's high enough to leave room for the motors and electronics associated with the floor tiles. And the whole thing can be broken down in case we decide to travel with this thing.

2/8/2012
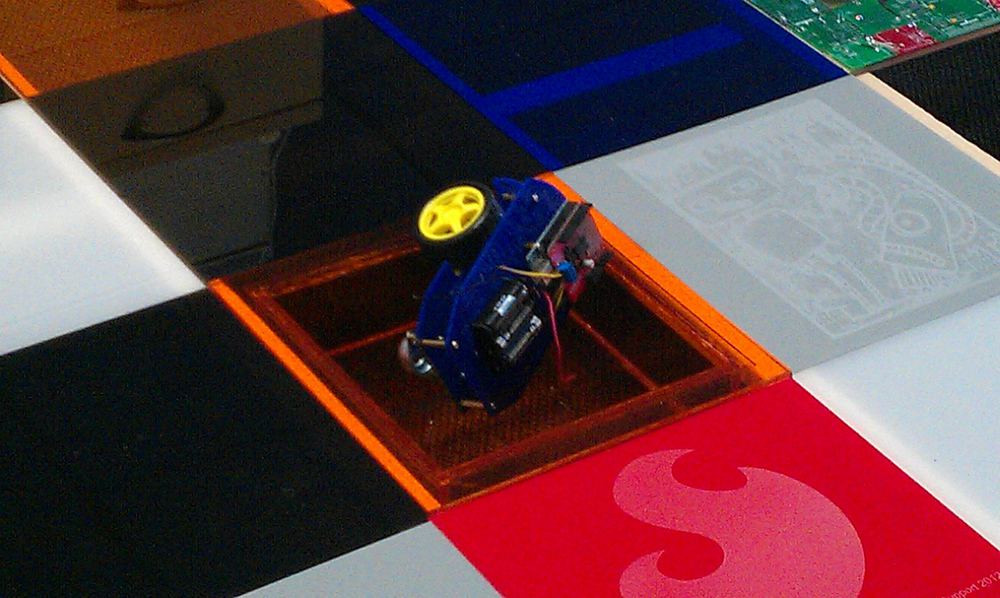
The tiles are all fitted into the frame. I took some time and cut out a pit fall tile for the competition floor. John has begun his rough terrain tile, and the other team members are also working on their passive tiles. The goal is to have one passive tile and one active tile made by each team member. This will give us 10 total tiles to interchange on the battle floor so that every tournament will be different.
02/10/2012
We had a tour group come through from a local school, so I let the little bot flex his muscles and show off. The kids all had a chance at driving him around the arena floor.
02/20/2012
The competition is looming just a few weeks out. We are all starting to feel the crunch. There is a lot of real work to be done, so the robots are on a little break.
03/15/2012
The robots are set to battle in about five weeks. I need to finalize my design. At this point I have the front blade running, but it's being controlled by a spare Lilypad I had around my desk. I need to upgrade to the smaller Pro Mini. I decided to control the Servo on it's own Arduino. This is simply to ensure that the blade is not going to interfere with my motors. It's a little bit of overkill. But in battle, you don't want issues, and you certainly don't want problems with your primary motors.
03/21/2012
Time to tuck everything inside. I am upgrading from a makeshift battery pack to a nice 7.4V 1000mAh battery pack. This battery should work well, but my design is so tightly spaced that I had to track down a battery that would fit. Luckily, we had a slightly smaller 1000mAh battery.
When all's said and done, the robot is looking just like I wanted. It's tight and compact. It takes up a slightly larger footprint than most other designs because I designed it on a angle. It still fits in the 6”x6” square, and it weighs in a little light, but not by more than a couple ounces!
04/20/2012
It's fight night, baby! We're all built and running. I'm so proud of my team for pulling this one off. Looking back over all the work that we had to do, there's a long list of tasks that we accomplished. And now it's time for all that work to pay off: Let the battle begin!

Tim...thanks for the kind words about our 4th Friday Half-Price Remnant Sale. For an email reminder of each month's upcoming sale please sign up for our list at https://app.e2ma.net/app2/audience/signup/33038/19653/?v=a
And if you can't wait for the sale, we sell remnants every day, M-F, 8am-5pm www.coloradoplastics.com
Glad I could throw a good word out for you guys. We come by just about every month for more plastic. You guys rock!
hey how did you hook up an exbee to your arduino pro mini?
I believe he used an Xbee Explorer Regulated.