Bubble Display Hookup Guide
This Tutorial is Retired!
This tutorial covers concepts or technologies that are no longer current. It's still here for you to read and enjoy, but may not be as useful as our newest tutorials.
 Joel_E_B
Hooking it Up
In order to talk to the bubble display, we'll need a microcontroller. This example will use a SparkFun RedBoard to control the display, but you can use whichever you choose. You'll also need some jumper wires, some resistors, and a breadboard.
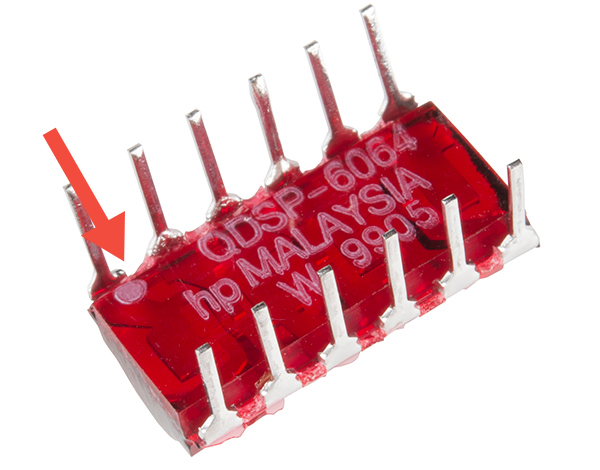
This IC is polarized, so pay attention to which way you stick it in the breadboard! Pin one is indicated by a white dot on the underside of the part.
Once you have the bubble display oriented correctly on the breadboard, hook everything up like the image below shows:
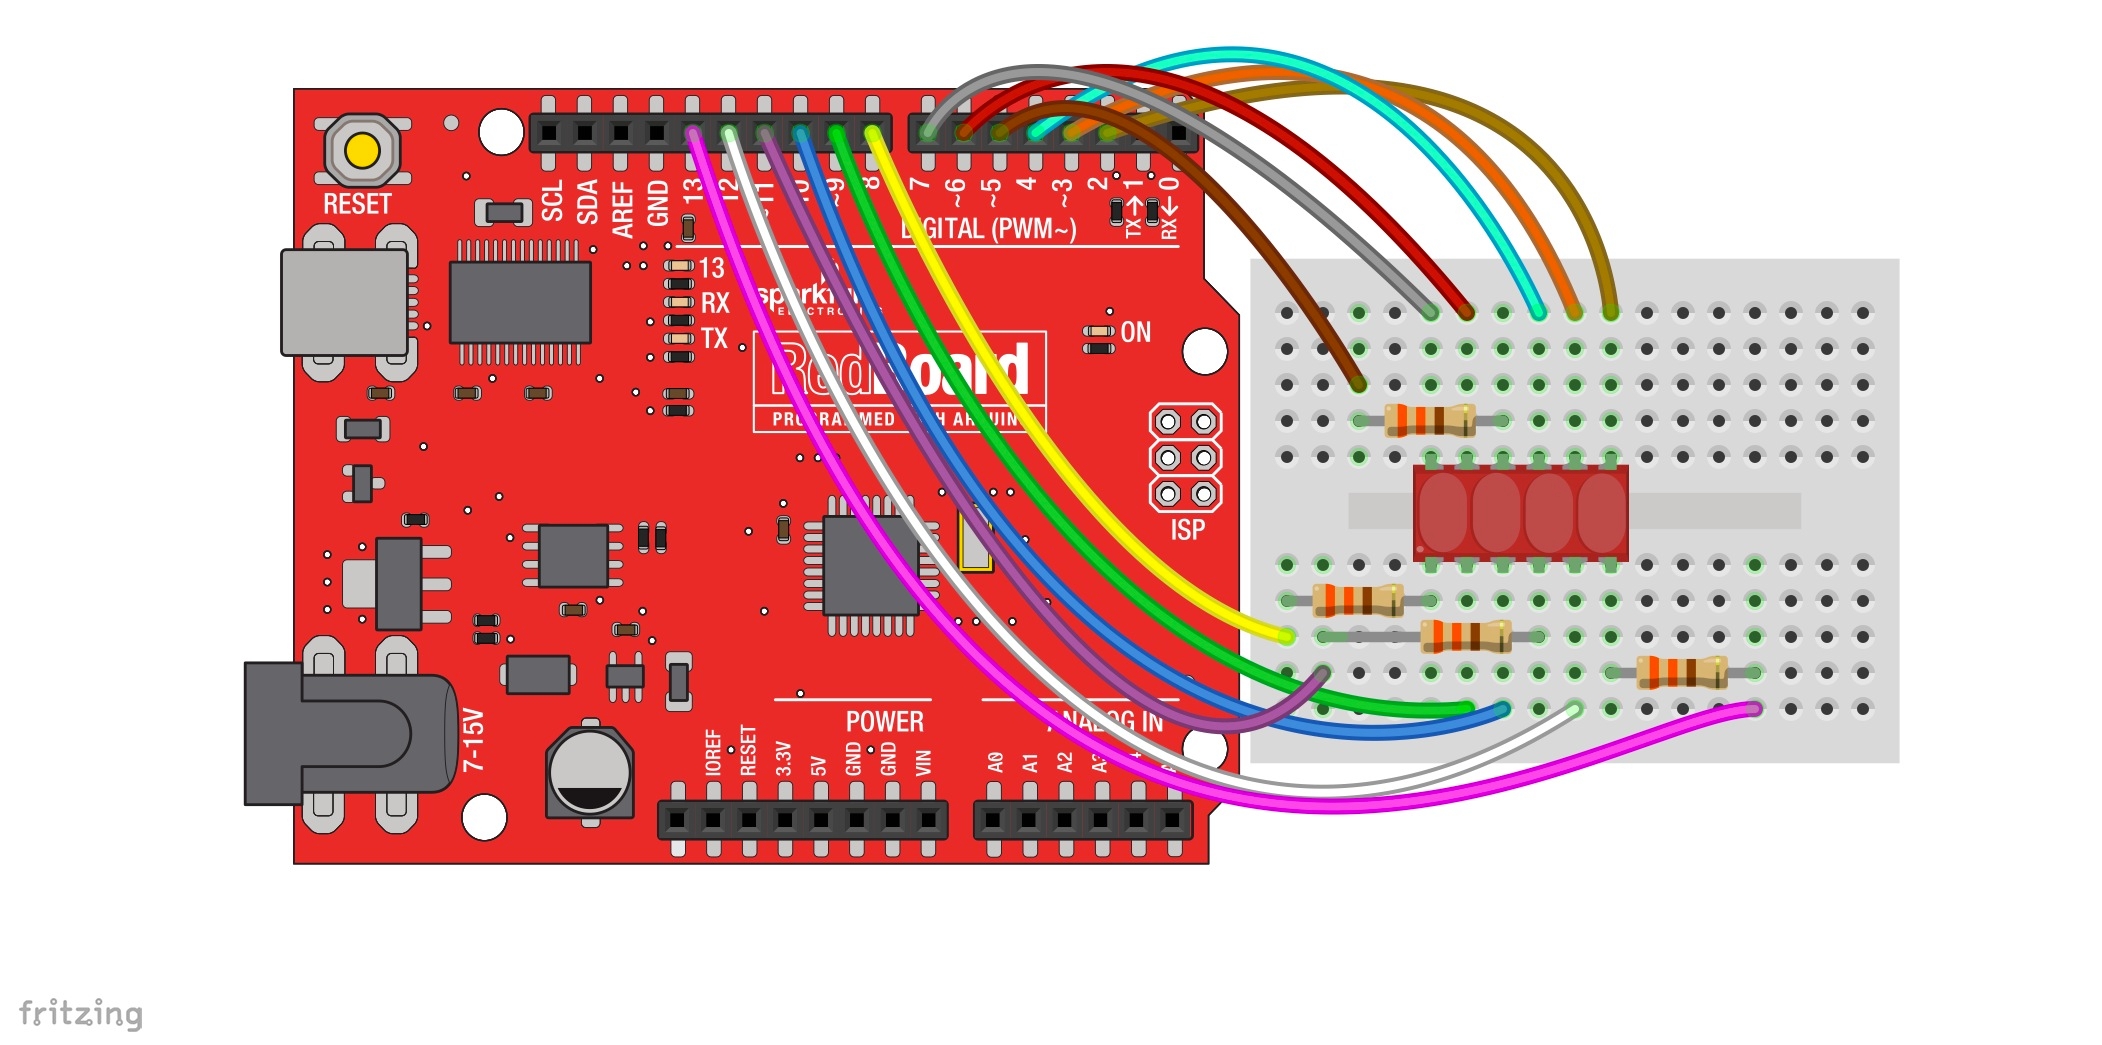
While the display may work without current limiting resistors, it's always a good idea to have them in your circuit to avoid burning out your display. You may also opt to have your resistors on the eight anode pins rather than the four cathode pins. You will need to add a little more hardware, but the result will be a much more balanced brightness in your display no matter which character you're displaying.
Now, it's time to light up the display with some code.