Gram Piano Assembly Guide
This Tutorial is Retired!
This tutorial covers concepts or technologies that are no longer current. It's still here for you to read and enjoy, but may not be as useful as our newest tutorials.
 JordanDee
Assembly
The Gram Piano is a through hole soldering kit. If you have never soldered before, it is strongly advised that you read through SparkFun's soldering tutorial first.
This page will give you a suggested approach to tackling the task of building this kit. In general, it is recommended to solder the smaller components first, then the larger ones. While this method is not absolutely crucial, it is easier to solder the smaller components if larger components are not blocking the way of your soldering iron.
Make sure each component is placed on the top side of the board (the side with white silkscreen that outlines the parts and labels the piano keys), so all the soldering can be done on the back side. Always double check your placement before soldering. It's also good practice to solder one pin, then check your work, before soldering the rest of the pins for any component. That way, if a mistake is made, only one solder joint has to be heated up to take the component back out of the board and replaced correctly.
Step by step
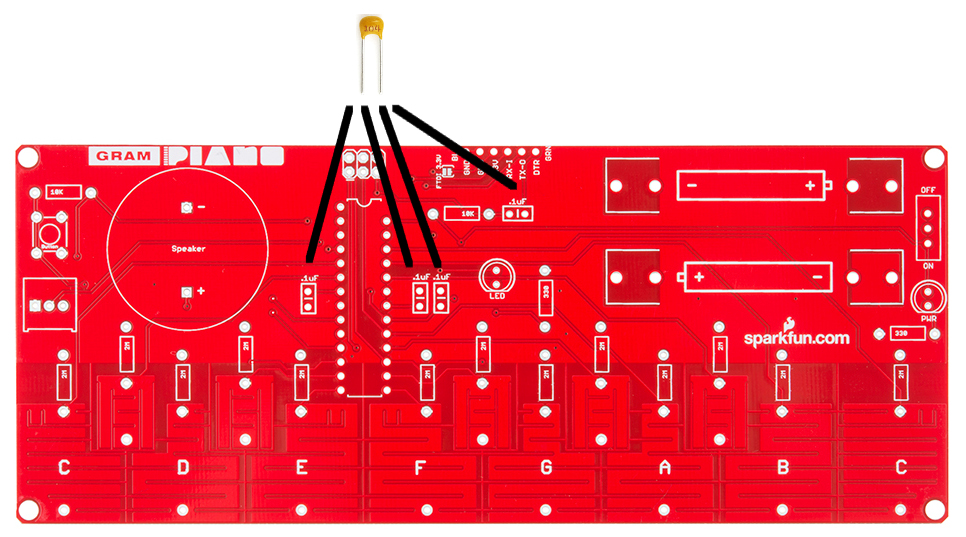
Let's start with the capacitors. Put each one into these four spots. These parts are not polarized, so don't worry about their orientation. You can use the trick of bending the legs on the under side of the board to hold the capacitors in place while you solder. After soldering a component, you can cut its legs with some diagonal cutters.
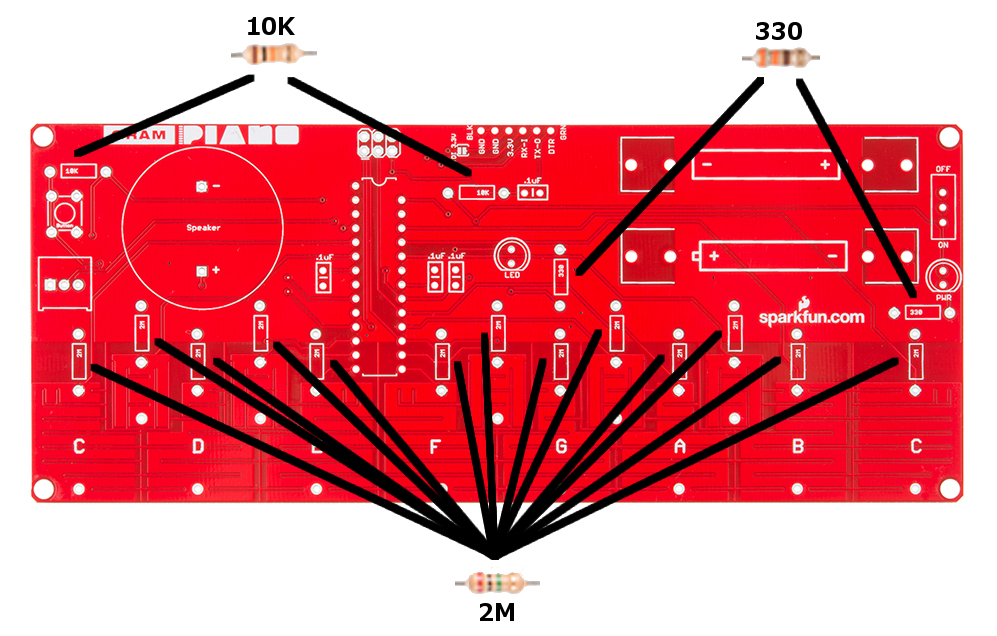
Now, let's solder in the resistors. There are three values, 2M Ohm, 10K Ohm, and 330 Ohm. Make sure you pay attention to the color rings on the resistors to ensure you put the correct value resistor in the correct spot. You can put these in one at a time, and solder each. Or, put them all in at once, and solder all at once.
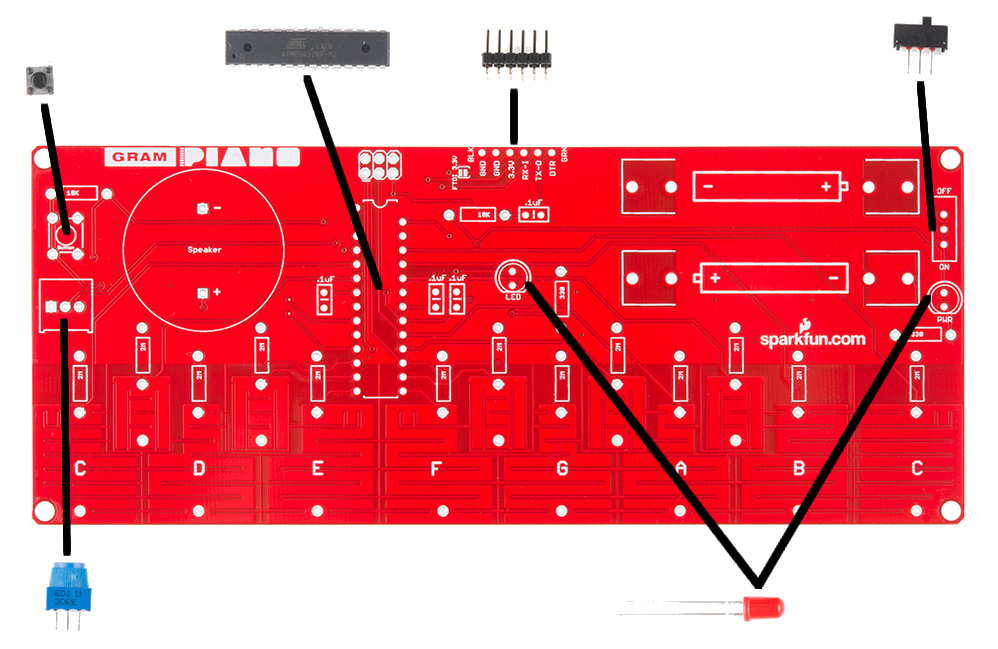
Next, let's solder the medium components: the microprocessor, the switch, the pushbutton, the potentiometer, the header, and the two red LED's. The microprocessor, the LEDs, and potentiometer are all polarized, so pay extra attention when placing them on the board! The microprocessor has a semi-circle marking its polarity. Match up the half-circle on the IC to the one on the PCB. Also, the missing leg of the IC should match the missing hole in the PCB. The LEDs have a flat edge that should be matched with the flat edge on the silkscreen. The potentiometer has two notches on one side and a flat edge on the other. Match this with the silkscreen as well.
Finally, let's solder the large components: the battery clips and the PCB speaker. Both of these components are polarized. Make sure the battery clips are not put in backwards; the two open ends should be facing each other with the metal walls facing out. The PCB speaker also must go in a certain way; the plus and minus symbols on the board must match the same symbols on the speaker.

The very last step is securing the four standoffs to the board with four screws, so that the Gram Piano can sit on a flat surface and be played easily. You may need a screwdriver and/or pliers to help with this step. You can also hand tighten them. Make sure the standoffs are on the underside of the board.
Now that the build is complete, make sure the power switch is in the OFF position, and then you can plug in the two AA batteries (in the correct orientation of course). Your kit will look just like the photo below:
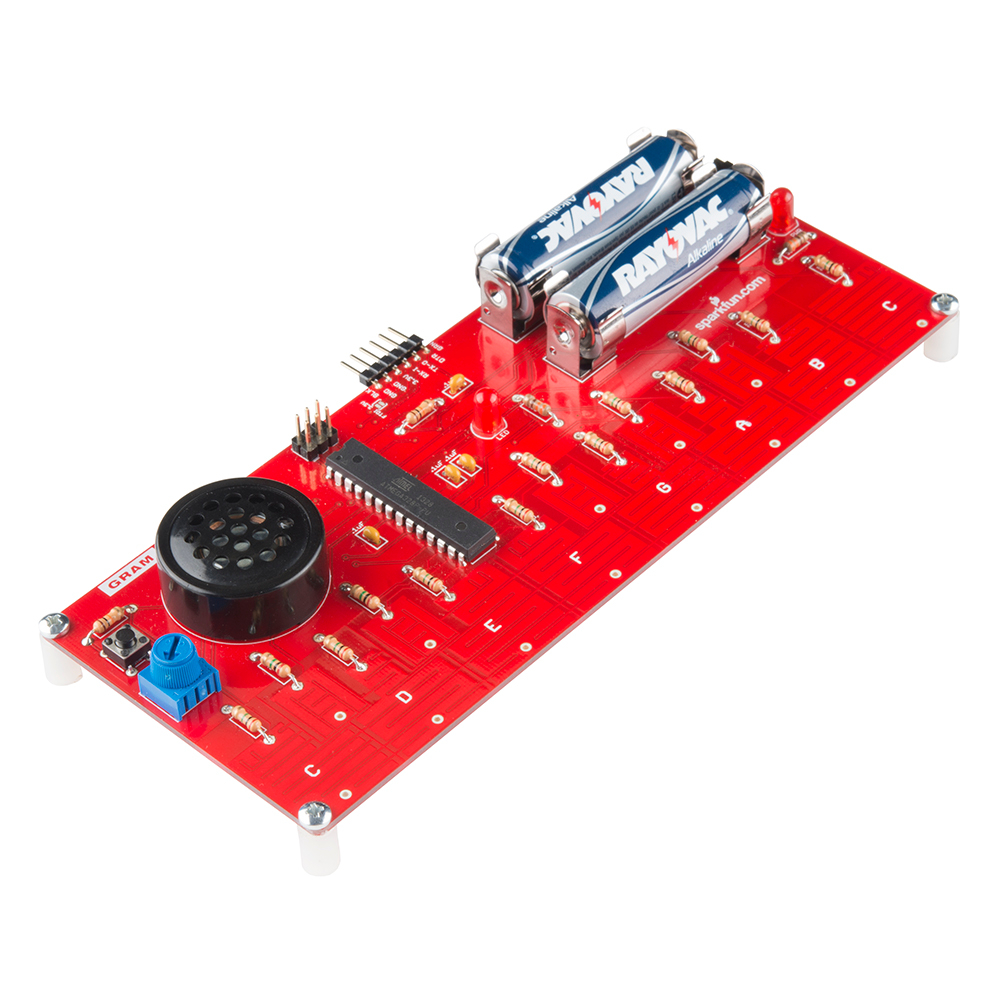
Start playing with your kit now and/or read the next sections about using the default program, how it works, and how to modify the code so that you can tailor the board's functionality to your own desires.