Pushing Data to Data.SparkFun.com
This Tutorial is Retired!
This tutorial covers concepts or technologies that are no longer current. It's still here for you to read and enjoy, but may not be as useful as our newest tutorials.
 jimblom
Arduino & CC3000 Shield
The CC3000 WiFi Shield (or, alternatively, the CC3000 Breakout) is a relatively low-cost WiFi solution for the Arduino. This is a fully-functional wireless networking shield which gives any Arduino-compatible board an easy route to WiFi and the Internet.
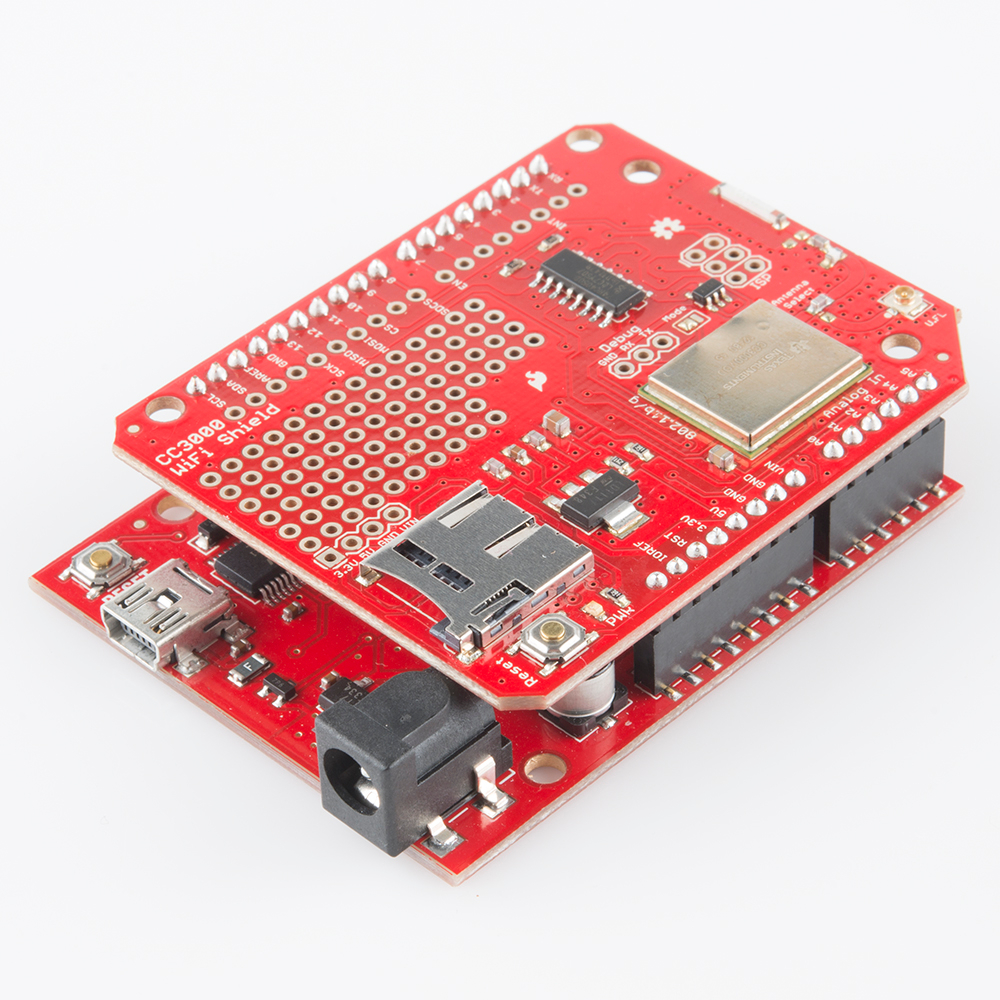
If you haven't already, check out the CC3000 Hookup Guide, which will show you how to install the shield and get started using the library.
Arduino Example Circuit
We'll use the same, exact circuit as that in the Arduino & Ethernet Shield example.

The output of a photocell (voltage divided with a 10kΩ resistor) connects to A0. A momentary push-button is connected to D3 on one end and ground on the other. And a SPDT switch can connect D5 to ground or let it float.
CC3000 Shield Example Code
Before running the sketch, you'll need to download and install the CC3000 Arduino Library. You can grab it from our [GitHub Repository]((https://github.com/sparkfun/SFE_CC3000_Library) or download it directly by clicking here. Check out our CC3000 Library Installation Guide for help installing the library.
Click here to download the example sketch, or, if you'd rather just copy/paste, here it is:
language:c
/*****************************************************************
Phant_CC3000.ino
Post data to SparkFun's data stream server system (phant) using
an Arduino and the CC3000 Shield.
Jim Lindblom @ SparkFun Electronics
Original Creation Date: July 3, 2014

This sketch uses an Arduino Uno to POST sensor readings to
SparkFun's data logging streams (http://data.sparkfun.com). A post
will be initiated whenever pin 3 is connected to ground.

Before uploading this sketch, there are a number of global vars
that need adjusting:
1. WiFi Stuff: Fill in your SSID, WiFi Passkey, and encryption
   setting using three variables available.
2. Phant Stuff: Fill in your data stream's public, private, and
data keys before uploading!

This sketch requires that you install this library:
* SFE_CC3000: https://github.com/sparkfun/SFE_CC3000_Library

Hardware Hookup:
  * These components are connected to the Arduino's I/O pins:
    * D3 - Active-low momentary button (pulled high internally)
    * A0 - Photoresistor (which is combined with a 10k resistor
           to form a voltage divider output to the Arduino).
    * D5 - SPST switch to select either 5V or 0V to this pin.
  * A CC3000 Shield sitting comfortable on top of your Arduino.

Development environment specifics:
    IDE: Arduino 1.0.5
    Hardware Platform: RedBoard & CC3000 Shield (v10)

This code is beerware; if you see me (or any other SparkFun
employee) at the local, and you've found our code helpful, please
buy us a round!

Much of this code is largely based on Shawn Hymel's WebClient
example in the SFE_CC3000 library.

Distributed as-is; no warranty is given.
*****************************************************************/
// SPI and the pair of SFE_CC3000 include statements are required
// for using the CC300 shield as a client device.
#include <SPI.h>
#include <SFE_CC3000.h>
#include <SFE_CC3000_Client.h>
// Progmem allows us to store big strings in flash using F().
// We'll sacrifice some flash for extra DRAM space.
#include <Progmem.h>

////////////////////////////////////
// CC3000 Shield Pins & Variables //
////////////////////////////////////
// Don't change these unless you're using a breakout board.
#define CC3000_INT      2   // Needs to be an interrupt pin (D2/D3)
#define CC3000_EN       7   // Can be any digital pin
#define CC3000_CS       10  // Preferred is pin 10 on Uno
#define IP_ADDR_LEN     4   // Length of IP address in bytes

////////////////////
// WiFi Constants //
////////////////////
char ap_ssid[] = "NETWORK_ID";                // SSID of network
char ap_password[] = "NETWORK_PASS";        // Password of network
unsigned int ap_security = WLAN_SEC_UNSEC; // Security of network
// ap_security can be any of: WLAN_SEC_UNSEC, WLAN_SEC_WEP,
//  WLAN_SEC_WPA, or WLAN_SEC_WPA2
unsigned int timeout = 30000;             // Milliseconds
char server[] = "data.sparkfun.com";      // Remote host site

// Initialize the CC3000 objects (shield and client):
SFE_CC3000 wifi = SFE_CC3000(CC3000_INT, CC3000_EN, CC3000_CS);
SFE_CC3000_Client client = SFE_CC3000_Client(wifi);

/////////////////
// Phant Stuff //
/////////////////
const String publicKey = "6JZbNolApzF4om2l9yYK";
const String privateKey = "Ww0vPW1yrkUNDqWPV9jE";
const byte NUM_FIELDS = 3;
const String fieldNames[NUM_FIELDS] = {"light", "switch", "name"};
String fieldData[NUM_FIELDS];

//////////////////////
// Input Pins, Misc //
//////////////////////
const int triggerPin = 3;
const int lightPin = A0;
const int switchPin = 5;
String name = "Anonymouse";
boolean newName = true;

void setup()
{
  Serial.begin(115200);

  // Setup Input Pins:
  pinMode(triggerPin, INPUT_PULLUP);
  pinMode(switchPin, INPUT_PULLUP);
  pinMode(lightPin, INPUT_PULLUP);

  // Set Up WiFi:
  setupWiFi();

  Serial.println(F("=========== Ready to Stream ==========="));
  Serial.println(F("Press the button (D3) to send an update"));
  Serial.println(F("Type your name, followed by '!' to update name"));
}

void loop()
{
  // If the trigger pin (3) goes low, send the data.
  if (!digitalRead(triggerPin))
  {
    // Gather data:
    fieldData[0] = String(analogRead(lightPin));
    fieldData[1] = String(digitalRead(switchPin));
    fieldData[2] = name;

    // Post data:
    Serial.println("Posting!");
    postData(); // the postData() function does all the work,
                // check it out below.
    delay(1000);
  }

  // Check for a new name input:
  if (Serial.available())
  {
    char c = Serial.read();
    if (c == '!')
    {
      newName = true;
      Serial.print("Your name is ");
      Serial.println(name);
    }
    else if (newName)
    {
      newName = false;
      name = "";
      name += c;
    }
    else
    {
      name += c;
    }
  }
}

void postData()
{

  // Make a TCP connection to remote host
  if ( !client.connect(server, 80) )
  {
    // Error: 4 - Could not make a TCP connection
    Serial.println(F("Error: 4"));
  }

  // Post the data! Request should look a little something like:
  // GET /input/publicKey?private_key=privateKey&light=1024&switch=0&time=5201 HTTP/1.1\n
  // Host: data.sparkfun.com\n
  // Connection: close\n
  // \n
  client.print("GET /input/");
  client.print(publicKey);
  client.print("?private_key=");
  client.print(privateKey);
  for (int i=0; i<NUM_FIELDS; i++)
  {
    client.print("&");
    client.print(fieldNames[i]);
    client.print("=");
    client.print(fieldData[i]);
  }
  client.println(" HTTP/1.1");
  client.print("Host: ");
  client.println(server);
  client.println("Connection: close");
  client.println();

  while (client.connected())
  {
    if ( client.available() )
    {
      char c = client.read();
      Serial.print(c);
    }
  }
  Serial.println();
}

void setupWiFi()
{
  ConnectionInfo connection_info;
  int i;

  // Initialize CC3000 (configure SPI communications)
  if ( wifi.init() )
  {
    Serial.println(F("CC3000 Ready!"));
  }
  else
  {
    // Error: 0 - Something went wrong during CC3000 init!
    Serial.println(F("Error: 0"));
  }

  // Connect using DHCP
  Serial.print(F("Connecting to: "));
  Serial.println(ap_ssid);
  if(!wifi.connect(ap_ssid, ap_security, ap_password, timeout))
  {
    // Error: 1 - Could not connect to AP
    Serial.println(F("Error: 1"));
  }

  // Gather connection details and print IP address
  if ( !wifi.getConnectionInfo(connection_info) )
  {
    // Error: 2 - Could not obtain connection details
    Serial.println(F("Error: 2"));
  }
  else
  {
    Serial.print(F("My IP: "));
    for (i = 0; i < IP_ADDR_LEN; i++)
    {
      Serial.print(connection_info.ip_address[i]);
      if ( i < IP_ADDR_LEN - 1 )
      {
        Serial.print(".");
      }
    }
    Serial.println();
  }
}
Before uploading the sketch there are a few global variables you'll need to adjust. Check out the section below. Most importantly, you need to alter some constants to connect to your WiFI network. The relevant section is under the "WiFi Constants" heading:
language:c
////////////////////
// WiFi Constants //
////////////////////
char ap_ssid[] = "NETWORK_ID";                // SSID of network
char ap_password[] = "NETWORK_PASS";        // Password of network
unsigned int ap_security = WLAN_SEC_UNSEC; // Security of network
// ap_security can be any of: WLAN_SEC_UNSEC, WLAN_SEC_WEP,
//  WLAN_SEC_WPA, or WLAN_SEC_WPA2
unsigned int timeout = 30000;             // Milliseconds
char server[] = "data.sparkfun.com";      // Remote host site
The ap_ssid and ap_password strings should be adjusted to match your WiFi network. If your network is open (no passkey), that second variable should be blank (ap_password[] = "";). Also make sure to adjust the ap_security variable to match the security of your network. See the comments for possible values.
With those correctly set, you can run the sketch. This example sketch should post to our example stream whenever you press the button connected to D3.
Modifying Data.SparkFun.com Settings
Next, you'll want to modify your data stream keys and fields. Those in the example sketch should work, feel free to post to our example stream, at least temporarily. To set it to your data stream, adjust the variables under the "Phant Stuff" heading:
language:c
/////////////////
// Phant Stuff //
/////////////////
const String publicKey = "6JZbNolApzF4om2l9yYK";
const String privateKey = "Ww0vPW1yrkUNDqWPV9jE";
const byte NUM_FIELDS = 3;
const String fieldNames[NUM_FIELDS] = {"light", "switch", "name"};
String fieldData[NUM_FIELDS];
The publicKey and privateKey variables will be given to you when you create your stream. You can also adjust the number of data fields and their names here as well. The values in the fieldNames string array should match exactly what you typed when you created the stream.
Running the Sketch
After you've fixed the WiFi and datastream settings, upload the sketch. Then open the Serial Monitor and set the baud rate to 115200 bps. Some debug messages will flow by at the start. Once you see your IP address printed, your Arduino is connected and you're ready to post some data.

One of the fields in this example pushes a name to the server. If you want to update the name value, type in your name into the Serial Monitor and terminate it with a '!'.
To push your data to the server, simply press the button tied to D3 (or just short that pin to ground). A few serial lines will quickly be printed. Check to make sure HTTP/1.1 200 OK is somewhere among those lines -- that means the server accepted your request.
Going Further
To further customize the sketch, you'll want to mess around with the "gathering data" stage. In this example, a trio of lines load data into the fieldData array, converting each into a string beforehand. Those values from fieldData are later used in the postData() function when the HTTP GET string is formulated.
Most of the importatnt stuff happens in the postData() function. Here you'll find an example for creating an HTTP GET, and routing it out to the server. Check out the comments for a line-by-line dissection of the code.