- Home
- Product Categories
- SMD
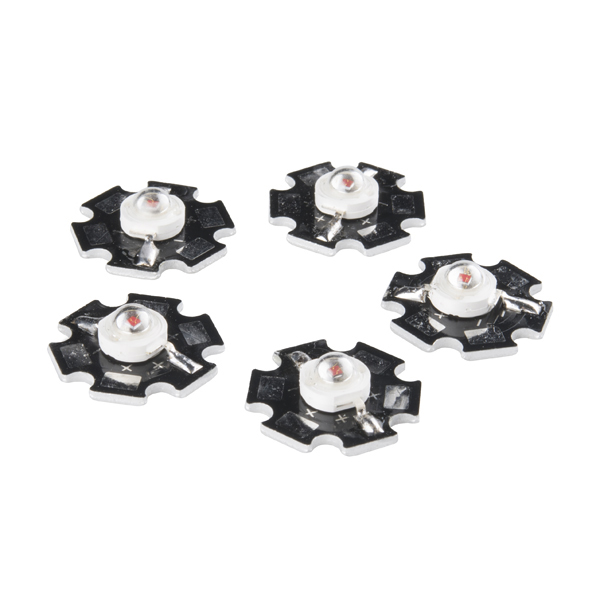
- LED - 3W Aluminum PCB (5 Pack, Red)


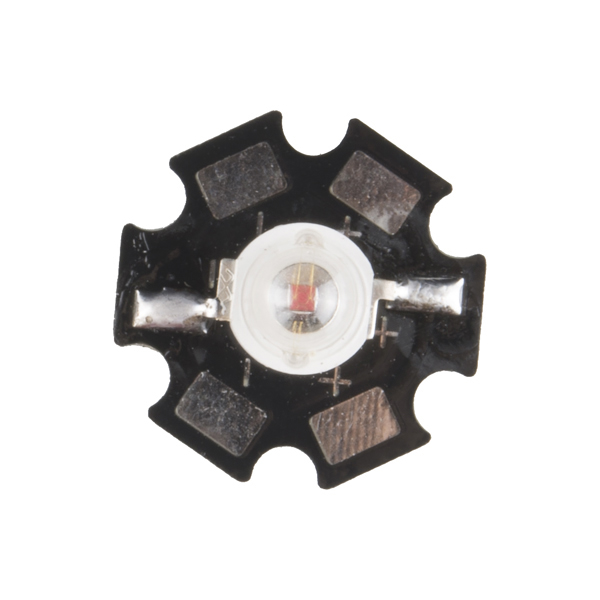
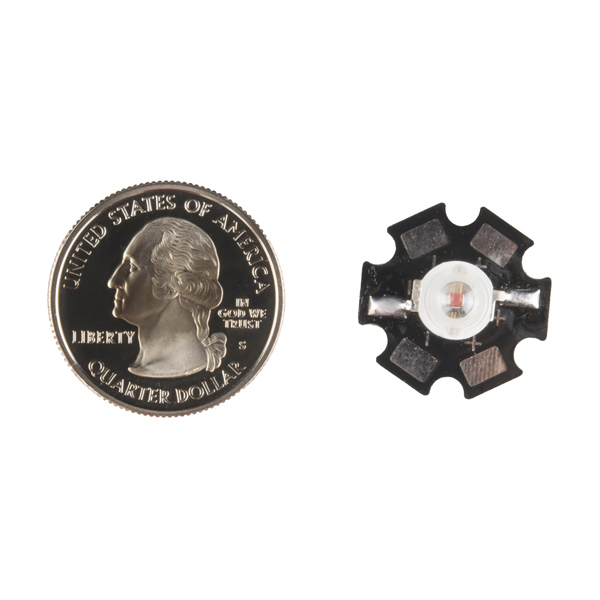
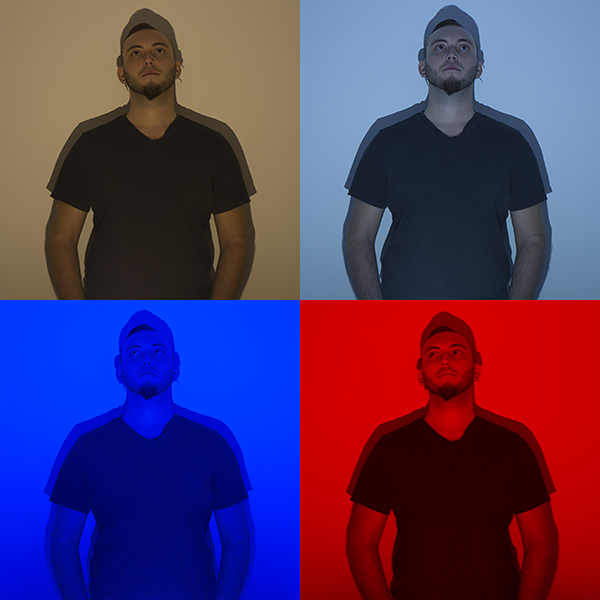
LED - 3W Aluminum PCB (5 Pack, Red)
So much power and light from such a small package. This 5 pack of red 3 Watt aluminum backed PCBs is sure to shed a lot of light on any project you add it to. These LEDs act as any other LED except these little guys require much more power while delivering a light as intense of a thousand suns going super nova (this is an exaggeration but you know what we mean)!
Each LED in the pack sits upon an aluminum backed PCB to help with heat dissipation and emits a vibrant red light. Additionally, each LED requires a forward voltage of 2.0-2.8V at 750mA.
Note: We like to joke around about super novas and all, but seriously, don't look directly into the LED.
- Forward Voltage: 2.0-2.8V
- Forward Current: 750mA
- Viewing angle: 125±5 Degrees
- Luminous Intensity: 75-105LM
- Wavelength: 620-630nm
- Datasheet
- Product Video
- Related Hookup Guides:
LED - 3W Aluminum PCB (5 Pack, Red) Product Help and Resources
Touch Potentiometer Hookup Guide
October 22, 2015
Learn how to use the SparkFun Touch Potentiometer to control lighting, volume or other inputs in your daily life.
PicoBuck Hookup Guide v12
February 18, 2016
The PicoBuck board is a high-efficiency three-channel constant-current LED driver.
FemtoBuck Constant Current LED Driver Hookup Guide v13
December 10, 2015
The FemtoBuck board is a high-efficiency, single-channel constant-current LED driver.
Core Skill: Soldering
This skill defines how difficult the soldering is on a particular product. It might be a couple simple solder joints, or require special reflow tools.
Skill Level: Competent - You will encounter surface mount components and basic SMD soldering techniques are required.
See all skill levels
Core Skill: Electrical Prototyping
If it requires power, you need to know how much, what all the pins do, and how to hook it up. You may need to reference datasheets, schematics, and know the ins and outs of electronics.
Skill Level: Rookie - You may be required to know a bit more about the component, such as orientation, or how to hook it up, in addition to power requirements. You will need to understand polarized components.
See all skill levels
Comments
Looking for answers to technical questions?
We welcome your comments and suggestions below. However, if you are looking for solutions to technical questions please see our Technical Assistance page.
Customer Reviews
4.7 out of 5
Based on 3 ratings:
3 of 4 found this helpful:
I see why they're blowing them out. Not 3W.
Um.. I love you guys at Sparkfun, you have contributed so much to the community and you have the best customer service department ever.
But. The title says 3W, but right underneath that it says 2.0-2.8V at 750mA. Umm.. 2.8*.75 = 2.1Watt.
Perhaps not a big deal, but Not Cool guys.
Interesting catch. Thanks for sharing. We'll try to sort this out and change things to reflect what is correct. The supplier provided that datasheet, so we'll have to check with them for clarification on why the data isn't adding up.
Used 48 of these in a signboard
Work great! I used 48 of these in my Internet Connect Fundraising Signboard with the Femtobuck LED Driver. I wired them in 2 parallel chains of 3 LEDs for each segment of the light. They are really bright -- you can see them in daylight easily. Biggest problem was mounting them. I tried the Theragrip Thermal Tape, but it didn't work well with curved surfaces. I ended up using this thermally conductive epoxy, but it would be great if Sparkfun could sell epoxy like this in smaller quantities.
Don't run them at 3W - you will go blind
These LEDs are insanely bright. They concentrate so much light into such a tiny area they are painful to look at. Awesome.
I picked up two packs of these and they're brilliant, in more than just the literal sense of the word. DO NOT look at these directly, I had bright spots flashing in front of my eyes for a long time when I thought I'd disconnected the batteries and was testing connectivity.
However, I'm a novice at putting together electronic components and while I can find all sorts of tutorials online about how to solder wires, PTH connections etc I'm having real problems getting a soldered connection to stick to these flat plates - solder doesn't seem to want to hold to the flat surface, even leaded solder.
Could someone please point me to a good tutorial so that I can put these to good use? Thanks in advance!
Need a Fritizing Part for this LED? I created one, and it’s available on GitHub.
The manufacturer gives specifications of the LEDs at a reasonable power level, not the maximum power level. These are rated at a test current of 750mA. At that current the forward voltage drop is measured to be 2.0 to 2.8V. This results in power consumption of 1.5W to 2.1W. This is also the current at which the luminous intensity is reported.
If you want to put the full 3W into the LED, then you'll need to pay closer attention to dissipating heat and probably don't want to run the LED at 100% duty cycle.
The 3W indicates that the physical construction of the LED package should allow enough heat to be dissipated with the proper PCB design and heatsinking. Exceeding the maximum will result in the LED overheating and shorten the rated life.
What about making the brightest RGB LED ever by combining one of these, one of the green ones (COM-13185) and one of the blue ones (COM-13107)?
Or better yet, not just one LED of each color, one pack of each color. Just for the hell of it.
Do you know the wavelength of these LED's along with the 3W blue led wavelength?
I'm wondering the same thing as "Member #466922". How can you market this as a 3W LED? Even if we use the upper limit of Vf at 2.4v, it's impossible to get 3W at only 700mA. It only works out to be 1.68W. So Sparkfun, what's up with that? Are we missing something?
3W LEDs at Vf = 2.4V @0.7Amps? Am I missing something?
Forward voltage is basically the minimum voltage to get the LED to turn on. Its basically what the LED 'uses', once its done 'using' that voltage it can use the rest of the voltage to make light. So you probably wouldn't be running this at 2.4V. At 5V/700mA you are at 3.5W (in other words don't run it at that). In other words you can run this at 3V/700mA and run it under 3W, but it is still a 3W LED.
So, let me see if I follow. If it is a 3W LED, to determine what resistor to put in series with it if you want to run it at it's maximum rated power from +5vdc, then do the following? (This assumes you won't be using a PicoBuck modified to run 700mA.) 3W = .700* E, 3W/.7A= 4.3v across the LED, that leaves .7 v across the resistor. .7v/.7A = 1 ohm, correct?
Actually the voltage across the LED is the LED's forward voltage. The rest of the input voltage will be across the resistor. Figure out the current you want the resistor to limit, in this case I'd use 600mA or a bit less (if you are using 5V, then anything more than 600mA will give you more than 3W). Once you know the current running through the circuit and the voltage across the resistor you can calculate the resistor value. Once you have your value calculate the power across the resistor and make sure you get a resistor with that power rating. Remember 3W is the limit of these LEDs, not the amount of power they will use. How much power they use depends how you hook them up.
"Remember 3W is the limit of these LEDs, not the amount of power they will use." WHAT?? Is this some kind of doublespeak?
Sorry about that, looks like I talked myself into a circle. As for that statement it is correct. You can run these at 1.5W, 0.5W, etc. 3W is not the amount of power these use since that depends on your setup, its the maximum that can be run through these (in theory). Back to the original question. 2.4*0.7A = 1.68W not 3W. Yes, even for the other colors which have much higher forward voltages we're not getting 3W at 700mA. So, why do we call them 3W, well that's the manufacture calls them... Not a good enough answer? I agree. I'll see if we can get the datasheet on these guys and post that with more information.
OK, now we are on the same page!
3 Watt is marketing shorthand not a technical specification. As you mention each color of LED has a different forward voltage. Yet all the LEDs with the max forward current of 700mA are put in the 3 Watt category. A data sheet would be nice. But what would be better is if you could take a random sample of LEDs from inventory and plot data points of the actual voltage vs. current characteristics.
I am a bit confused, in the description it says the forward voltage is 3.4 - 3.6v but then in the features section it says 2.2 - 2.4v.
Sorry about that! It is 2.2-2.4V.