
Introduction to using openFrameworks with Arduino
What is openFrameworks?
openFrameworks is a very handy software library written in C++ that is written for the sole purpose of reducing the software development overhead faced by designers and artists that would like to create pieces that use various media (graphics, sound, video, electronics, etc.). On the surface, openFrameworks (we'll refer to it as oF from now on) seems very similar to Processing. So why use oF when Processing is seemingly simpler and just as powerful? Well, because there are some things that oF is well suited for that Processing just can't handle. oF is much better at creating projects that use a lot of 3D Graphics, computer vision libraries like OpenCV or projects that involve the real-time manipulation of video. Also, while Processing requires a Java backend, oF is simply a set of C++ libraries, meaning that developers comfortable with C++ will be right at home.
For some great examples of projects that use Arduino and the oF libraries, be sure to check out the openFrameworks section of the Arduino Blog.
Very impressive fluid dress concept by Charlie Bucket
What will we do in this tutorial?
This tutorial will go step-by-step through the process of installing openFrameworks, getting programs running with it and then using the oF software libraries to communicate over USB with an Arduino UNO.
This tutorial assumes that:
- You know the programming and basic use of Arduino. If you don't, please read through Arduino's Getting Started Guide.
- You know a bit about C++ programming. You have a basic understanding of objects and header files. openFrameworks is exclusively C++, so you're going to need some high-level knowledge. If you don't, or just need a refresher, the openFrameworks Start Up Guide explains some basic C++ as it pertains to oF.
Step 1: Install openFrameworks and Code::Blocks
Installing openFrameworks is relatively simple, but there are some extra steps one must take to get the libraries running properly with a compiler. For this tutorial, we're going to be using Windows, but the steps are similar for Mac and Linux. For a full rundown of setting up with non-Windows operating systems, be sure to read the oF setup guide, and skip to Step 2 of this tutorial.
To use the oF libraries, we're going to need a development environment. For Windows, the recommended environment is called Code::Blocks, because it's a lightweight environment well suited for development with oF.
![]()
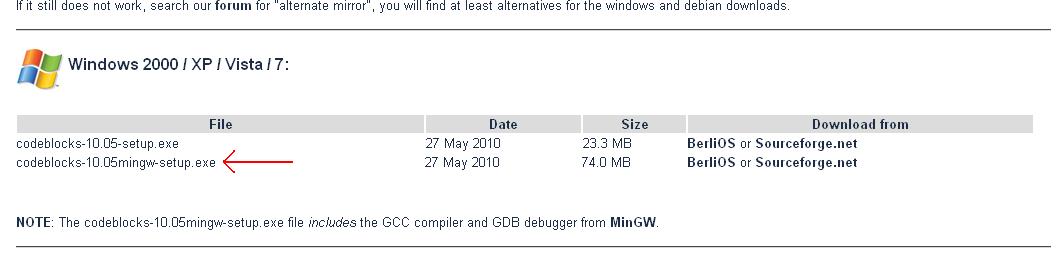
First, download the latest version of Code::Blocks. For this tutorial, we'll be using version 10.05. The compiler we need to use is called MinGW, and comes packaged with the download of the C::B IDE, so be sure to download the binary file that includes MinGW.
Now install Code::Blocks

Click next, and agree to the license (or don't, I'm not your boss)

You don't need to change anything here, just click Next

Pick your install directory, then click Install
When the installation is finished, you don't need to start Code::Blocks just yet, we've got to add some extra bits to the MinGW compiler files in order to compile oF programs properly. The next step is to download the latest version of the oF additions from the oF site. Download the zip file from the link below:
Additions for Code::Blocks to work with oF
Unzip the file and open it. You should see this
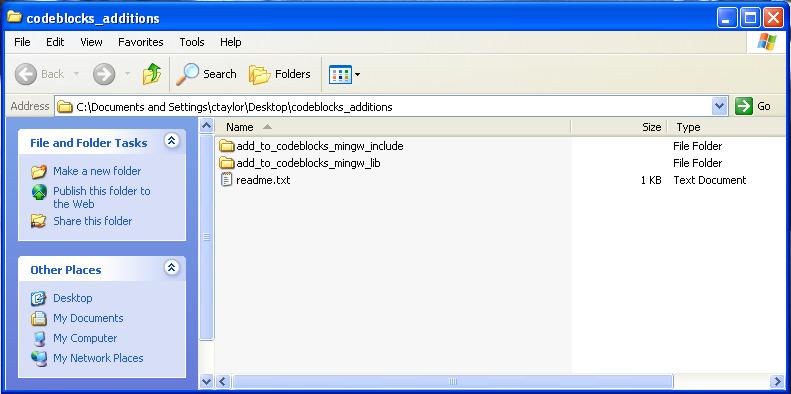
The two folders in this file contain all the additions to the ...\MinGW\include\ and ...\MinGW\lib\ folders necessary for compiling programs using the oF libraries. To properly install these we need to put them in their respective folders in the ...\MinGW library. For example, take the contents of (not the folder itself!)
...\codeblocks_additions\add_to_codeblocks_mingw_include
and copy/paste them into C:\Program Files\CodeBlocks\MinGW\include\
like so

then do the exact same thing with the library files. Take the contents of
...\codeblocks_additions\add_to_codeblocks_mingw_lib
and copy/paste them into C:\Program Files\CodeBlocks\MinGW\lib\
With that done, we have all the configuration necessary to use the openFrameworks libraries, so it's time to download them. The most recent version of the libraries can be found here
For this tutorial, we'll be using v0.07.
Unzip the downloaded file and move the folder to wherever you want to work. Open the folder, and you should be looking at this
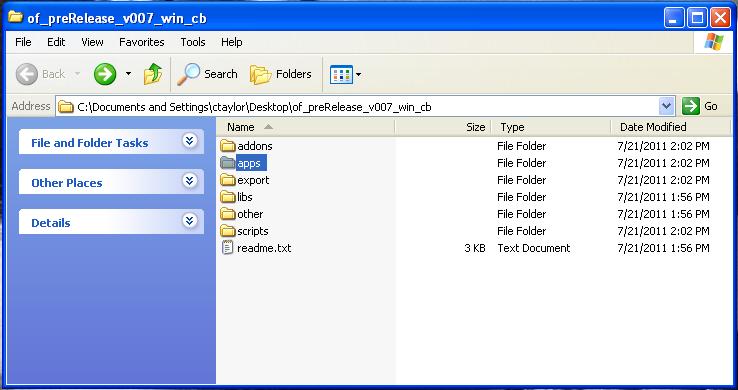
These are essentially the oF libraries. The folder we're interested in right now is "apps". Inside this folder are the examples that we will use to begin developing with oF and eventually oF with Arduino.
Step 2: Running and Writing Programs
With the IDE and libraries installed, now it's time to have a bit of fun. Start Code::Blocks. It may ask you to confirm the compiler auto-detector. If so, just click okay. You should now be looking at an empty workspace in Code::Blocks.
Let's load up an example program from the oF examples folder.
Click File->Open
Navigate to the openFrameworks folder that you downloaded in the previous step.
Navigate to apps->Examples
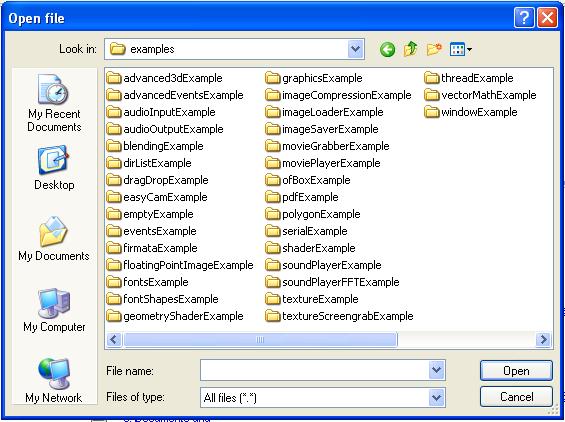
This folder contains several example programs written using the oF libraries to demonstrate the capabilities of oF. For starters, let's open the "advanced3dExample," and open the file advanced3dExample.workspace.
Note: when opening an example, be sure to open the workspace and not the Code::Blocks project (.cbp) file. This will ensure that the oF core libraries (openFrameworksLib) is loaded up along with the example project.
Now we're looking at an open workspace with a file navigator on the left. If we expand some of the folders in the navigator, we can get a loose idea of the file structure of an oF project.
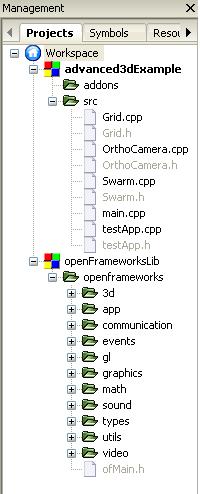
Double click on the file "main.cpp".
Like any C++ program, this is where the program starts executing. However, this file is identical in most oF programs. It simply initializes a window and then run the application that uses the window, in the example cases, this code starts in "testApp.cpp," hence the final line
ofRunApp( new testApp());
Go ahead and open testApp.cpp.
This file contains the real bulk of the program. It has several functions, but there are three functions of note:
-
void testApp::setup()
- This function is similar to the setup function in an Arduino program. It is run once and is used to establish the environment and variables that the rest of the program will use. It does things like setting background colors (oFBackground()) and initializing variables.
-
void testApp::update()
- This function is used to update variables and manipulate "non-visible" objects (i.e. functions not directly drawing to the screen) any heavy computation is done in this function. It is called over and over again, similar to the loop() function in Arduino. In this case, there is very little heavy computation, so the function is just a stem.
-
void testApp::draw()
- This function is used to draw to the screen. Only instructions that directly draw something should be placed in this function. This allows for the smoothest timing when updating what is on the screen. This function is also called over and over similar to the loop() function in Arduino.
Now that we know a bit about the main bits of the program, let's run it and see what it actually does. Click Build->Build and run, or just hit F9. The program will compile and then open a new window that looks like this:
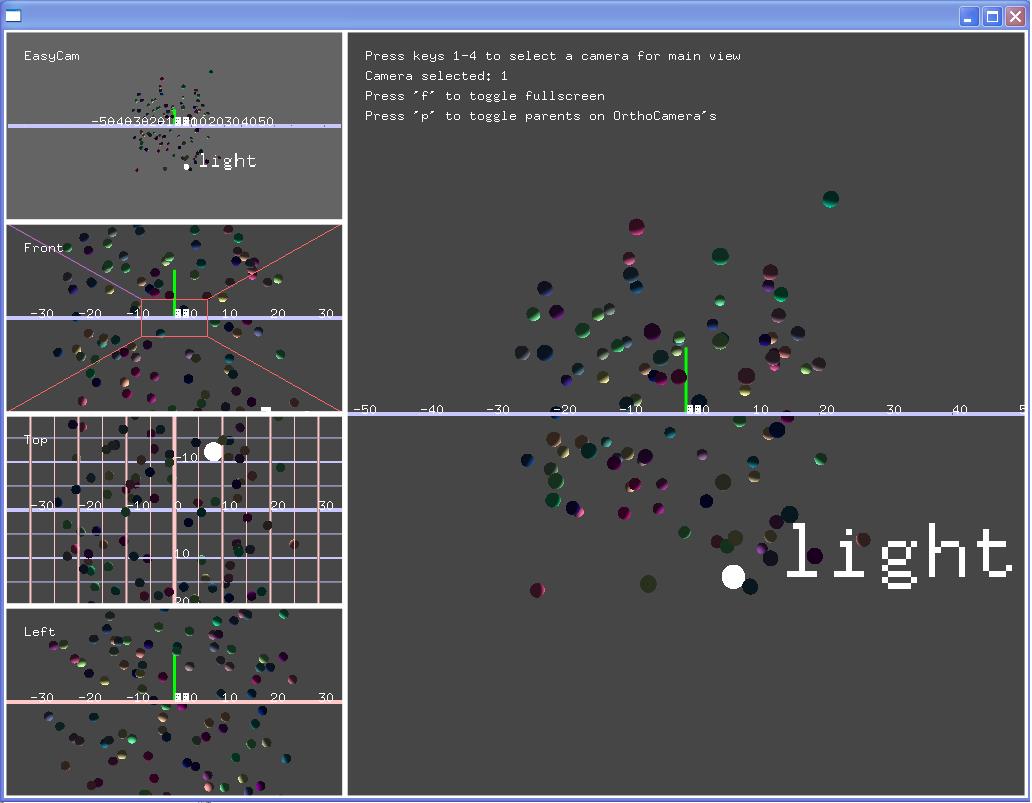
That's just a small example of the capability of the openFrameworks library. You don't need to understand exactly how this particular program works, just understand the basic structure of an oF program and how to run it.
Step 3: Connecting an Arduino
Now we'll move on to the serial example that we'll be using to connect to the Arduino. In the Examples folder open the serialExample workspace. This example is a simple program that attempts to send a character to a device over a COM port, and then receives three characters. Open the file testApp.cpp, and let's have a look at what's going on.
In the setup() function of this program, you can see that we have an object called serial that sets up the parameters of our serial connection the line
serial.setup(1, 9600);
sets up the device at 9600 baud. Also have a look at the line
vector
You may not understand all the syntax of this line, but all you need to know now is that it is used to list all the serial devices in the CMD window when the program initializes. It allows us to know what first parameter to use in the serial.setup line. In this case, the parameter is 1, or the first serial device.
Now have a look at the update() function. This function has a line that sends the character 'a' to the serial device as a handshake:
serial.writeByte('a');
and a while loop that attempts to read three bytes from the device:
while( (nRead = serial.readBytes( bytesReturned, 3)) > 0)
for now, that's all we need to know to program our Arduino. We need to write an Arduino program that simply waits for a character, and then responds with three characters. Open up the Arduino IDE and copy/paste this program into the IDE.
        /*
Ultra-simple sketch to demonstrate the use of Arduino with
openFrameworks.

This sketch is written to be used with the serialExample program
that comes with the openFrameworks library. It initializes a serial
port with a speed of 9600 baud, then waits for serialExample to send
a character ('a' by default), then responds with three dollar signs.

To use this sketch with oF, program your Arduino, make sure the
Arduino is the only vitual COM device in use, and then build and run
the serialExample example
in openFrameworks.

Released under the Creative Commons Share-Alike License 10/2011
*/
void setup()
{
  // start serial port at 9600 bps:
  Serial.begin(9600);
}

void loop()
{
  char inByte = 0;
  // if we get a valid byte, read analog ins:
  if (Serial.available() > 0) {
    // get incoming byte:
    inByte = Serial.read();

    // byte read, send three characters
    Serial.print("$");
    Serial.print("$");
    Serial.print("$");

  }
}
Verify and program this to your Arduino, taking note of which COM port the Arduino is connected to.
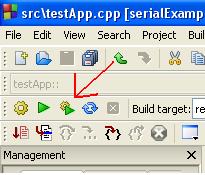
Now it's time to get the Arduino talking to the oF program. Open Code::Blocks and then open the serialExample workspace. Hit F9 to build and run or hit the Build and Run button on the toolbar.
oF will first launch a command prompt, which displays feedback not meant for the main program window. It then launches the main window. To test this program, just click in the main program window, which displays "click to test serial."
Does it work? Great! Mine does not. Why? Because of the line
serial.setup(1, 9600); //open the first device
in serialExample. In my case, I have more than one device, so when serialExample opens the first device, it opens another FTDI connected to my computer, which obviously does not respond properly. To fix this, we need to look at the Command Prompt that oF launches before it opens the main window.
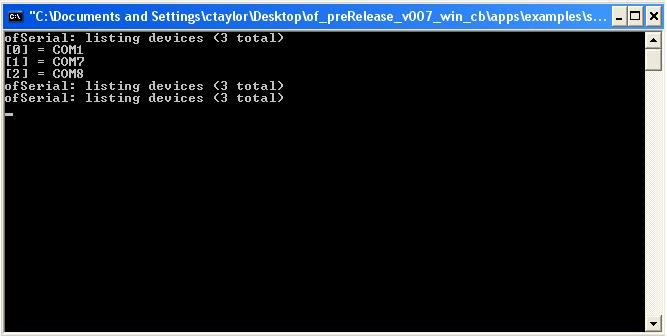
Remember the line
vector deviceList = serial.getDeviceList();
This line is what prints out the serial port list in the command prompt. In this case we see the two devices
[1] = COM7
[2] = COM8
I know from programming my Arduino that it is connected to COM8, meaning that to openFrameworks, it has a device value of [2] in this list, so we need to change the serial setup line to
serial.setup(2, 9600); //open the second device
This tells oF to open device 2 (COM8) for use instead of device 1 (COM7). Make the same change for whichever COM port your Arduino happens to be connected to.
After making this change and hitting Build and Run again, the Arduino should be properly communicating with the program. In the main window, I click a couple times and see this
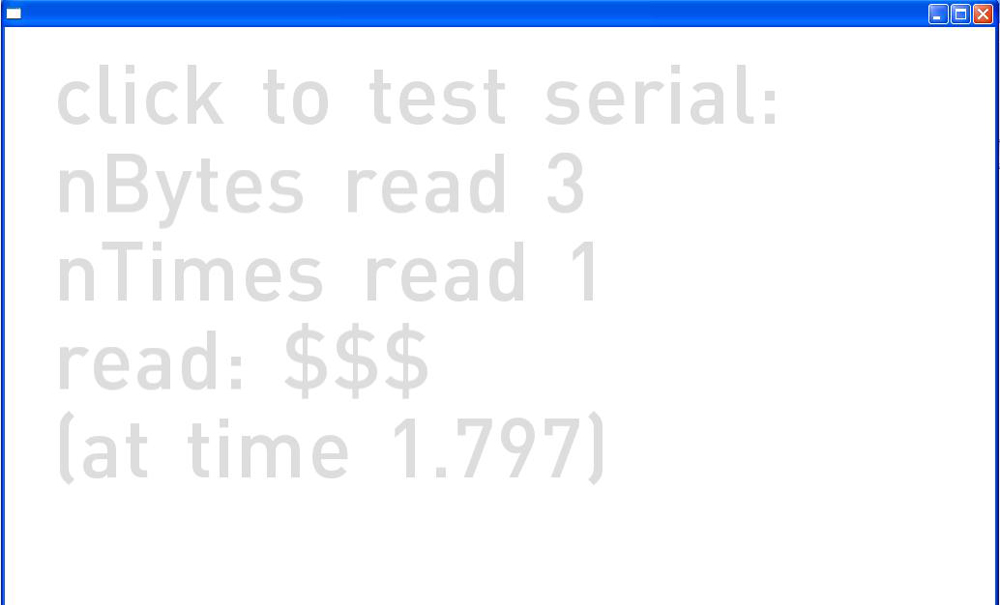
Success! The oF program has received the three '$' characters that the Arduino sent!
Step 4: Where do we go from here?
Now we know the basics of communicating between Arduino and an oF program. From this point we can use the lines found in the serialExample to control other programs and more advanced graphics with an Arduino, or vice versa. Read through testApp.cpp and testApp.h in the serialExample program and make sure you have an idea of how the two files work together. If you need more info, be sure to read through the oF Wiki. I personally recommend this book. It is a very thorough resource for getting started with openFrameworks, Processing, Arduino, and communicating among the three.
With what we've done in this tutorial, you should have everything you need to start to control Arduinos with oF programs and vice versa. Good luck!
Okay so I keep getting a message from the C++/ computer end of things that it is finding the right port and stuff but it is "unable to open port," would this be a conflict with a double use of the serial port? is there a way to fix this? thank you.
You can alternatively use the ofArduino class (included in OF/libs/communication/). See apps/examples/firmataExample for an example of using the ofArduino class. If you are using Arduino 1.0 you should pull the latest OF master branch to use ofArduino since the latest changes are not in the 007 prerelease download.