
Robot Journal - Toni
Getting Started
When I first learned about the bonus goal of designing a tiny, remote-controlled battle bot, I was very excited and immediately started thinking about various design options.
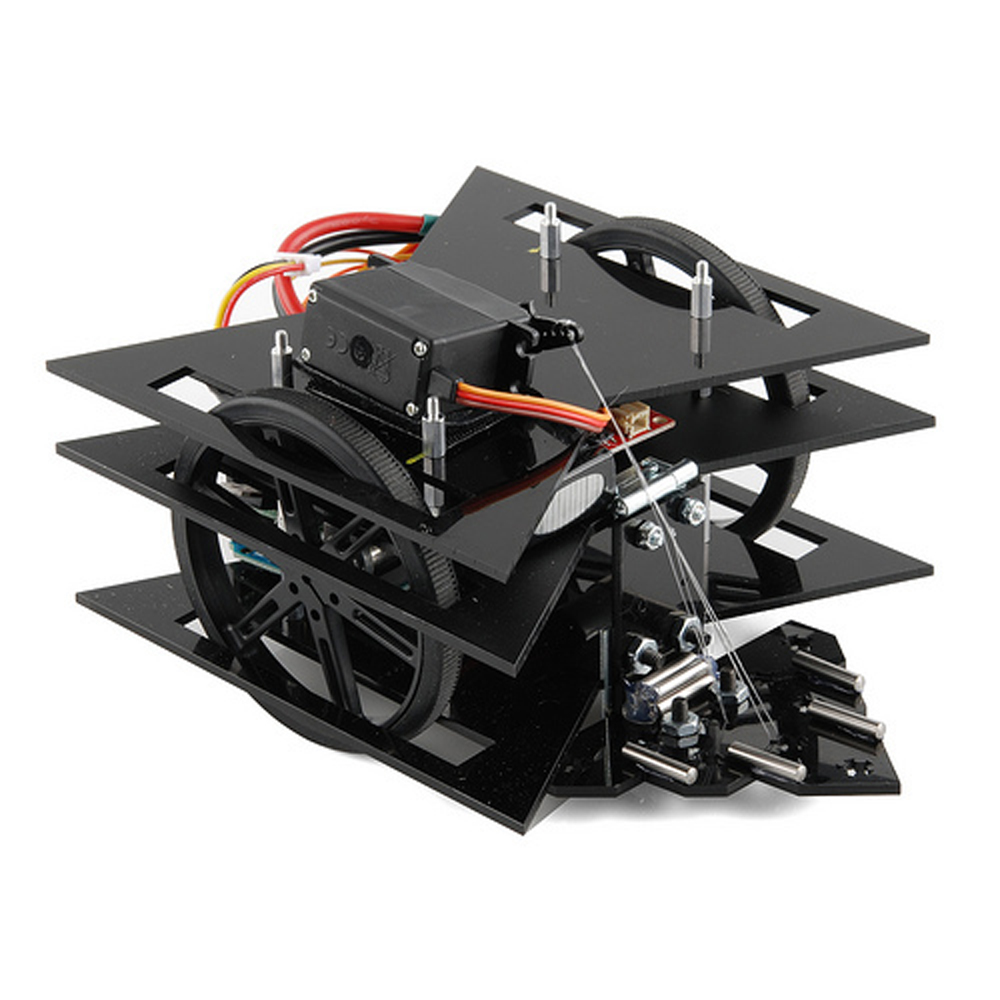
Initially, I considered creating something similar to a three-wheeled motorcycle, which would help with stability. However, after realizing this would be difficult to implement in a 6x6-inch box, with a maximum weight of 1.5 pounds, I began thinking of other ideas. After considering a design based off of a single, central wheel, I decided instead to go with a design similar to the TIE fighter in Star Wars. Obviously, not being able to give my bot space flight abilities was disappointing, but after a few variations and test drawings, I found a design I was happy with. This, of course, required sorting through the various options of motors, motor drivers, controllers, and remote options for bot control in order to accommodate the sizes and wiring requirements into the design. I decided to make my components as lightweight as possible, so I chose the following products:
Bot:
- Motors: Mini Metal Gearmotor
- Motor Driver: Serial Controlled Motor Driver
- Microcontroller/RF unit: Wixel
- Wheels: Wheels 90X10mm
Controller:
- Microcontroller: Arduino Uno
- RF unit: Wixel
- Interface: Wixel Shield
- USB Interface for joystick: USB Host Shield
- Joystick: I managed to find a beast of a joystick for sale in town and purchased it. I figured that even with a tiny bot, perhaps my controller could strike fear into the hearts of my competitors.

Putting it all Together
I chose the Wixel to try out its microcontroller abilities, as well as the RF capabilites, as this is one product that isn’t purchased as often by customers. I wanted to see if this could possibly be due to difficulties using the Wixel, or if the functionality simply wasn’t up to par with other products offered, like the Xbees or RF transmitter/receiver pairs.
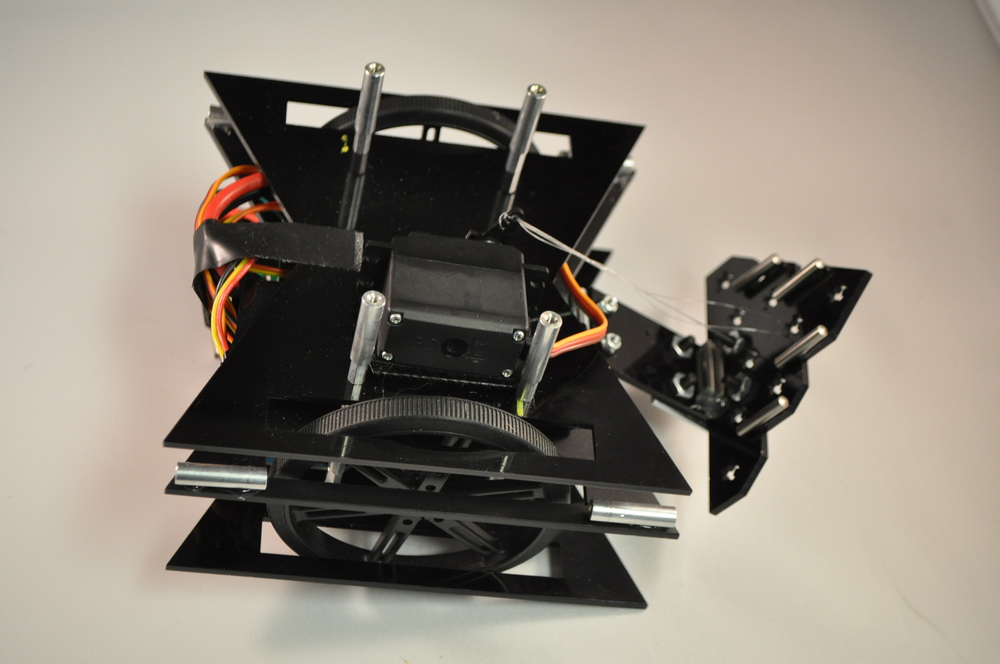
I printed out one prototype using our laser cutter in order to test out the sizing and make sure I was happy with a 3D version of the design.
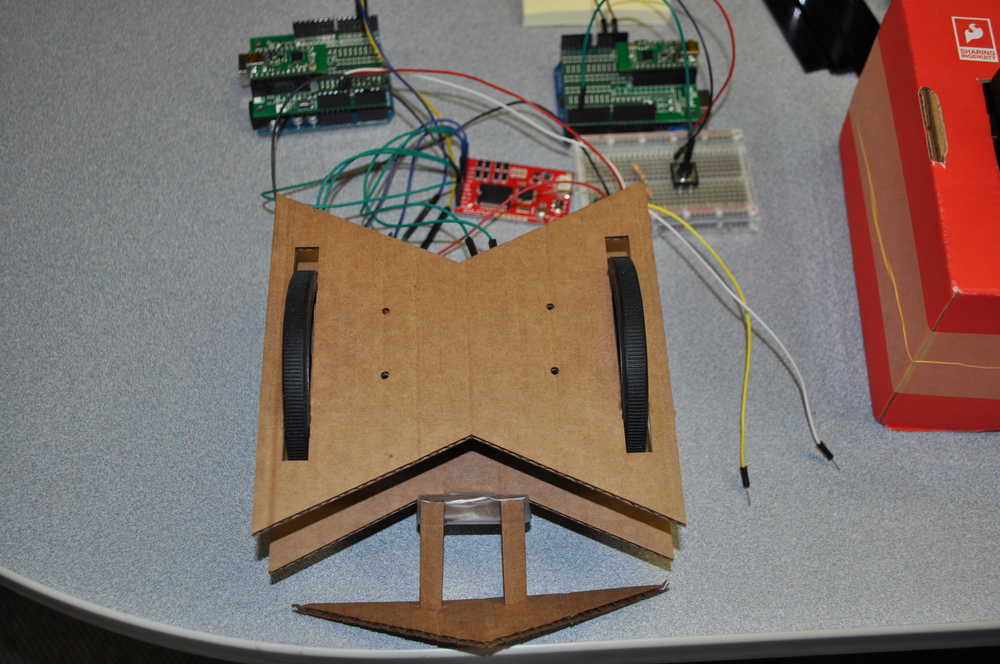
What I found after the prototype print was that a few of my measurements were too small (in other words, my wheels wouldn’t spin), so after a few modifications to the file, I printed off the final copy in acrylic.
After spending a good amount of time trying to hack the output of the joystick, and diving deeply into the USB Host shield libraries, I realized I simply did not have the time or coding ability needed in order to successfully use that for my controller. Unfortunately, that meant that I had to go back to the drawing board and come up with a new idea.
At this point, I decided to scrap using the Wixel as the main controller. There were a lot of difficulties in adapting the code to work well, with one module acting as simply a serial port for the Arduino (on the controller side), and the other acting as a serial port AND microcontroller. While the Wixel’s user interface is very friendly, it is also very front-end completed, and doesn't allow for much in terms of quick and easy re-coding for adaptations. This was frustrating for me, as I like to make small changes in my code and test each step of the way. Because it was so frustrating, I ended up modifying my hardware set so that both the controller and the bot would run off of an Arduino Uno with a Wixel shield. While it was a bit of a disappointment not getting to use the Wixel as the main microcontroller, it was amazing to see how easy they were to use as radio modules.
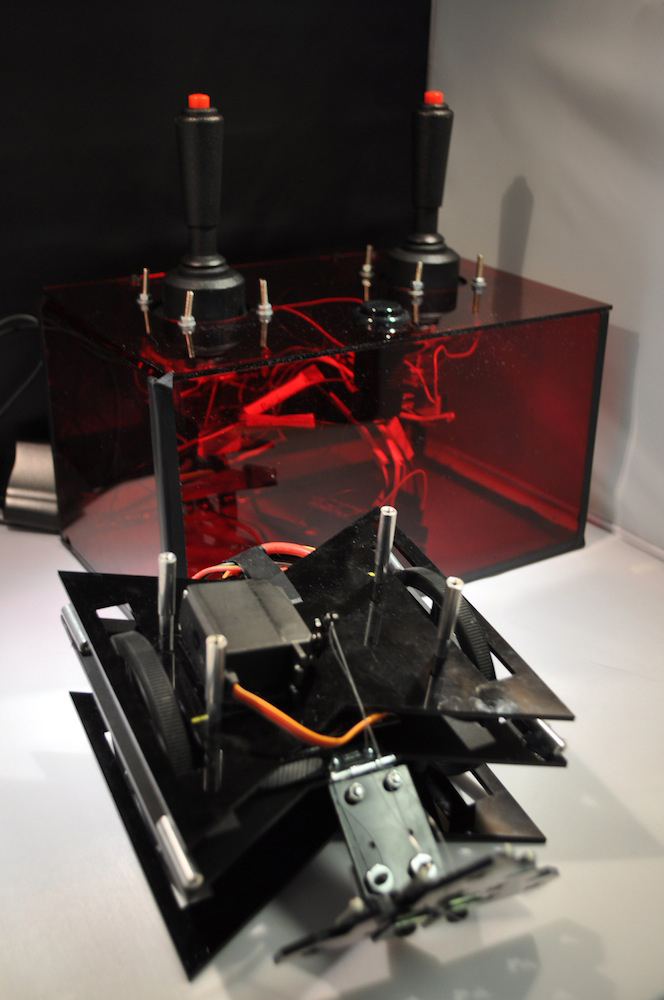
Just because I decided to scrap my epic joystick as a main controller didn’t mean I had to have a boring controller. I ended up deciding to go with our arcade joystick controller, and since I had two wheels, why not use two joysticks? Double the fun, right? Of course, due to the sheer size of the switches on the joysticks, and the sheer number of wiring connections needed for 10 switches on each joystick (20 wire connections total!), this required building a large enclosure to house the controller. Since I wasn’t sure exactly how/what material I wanted to build the enclosure out of first, I took a lesson from our customers and used one of the infamous red boxes for prototyping.
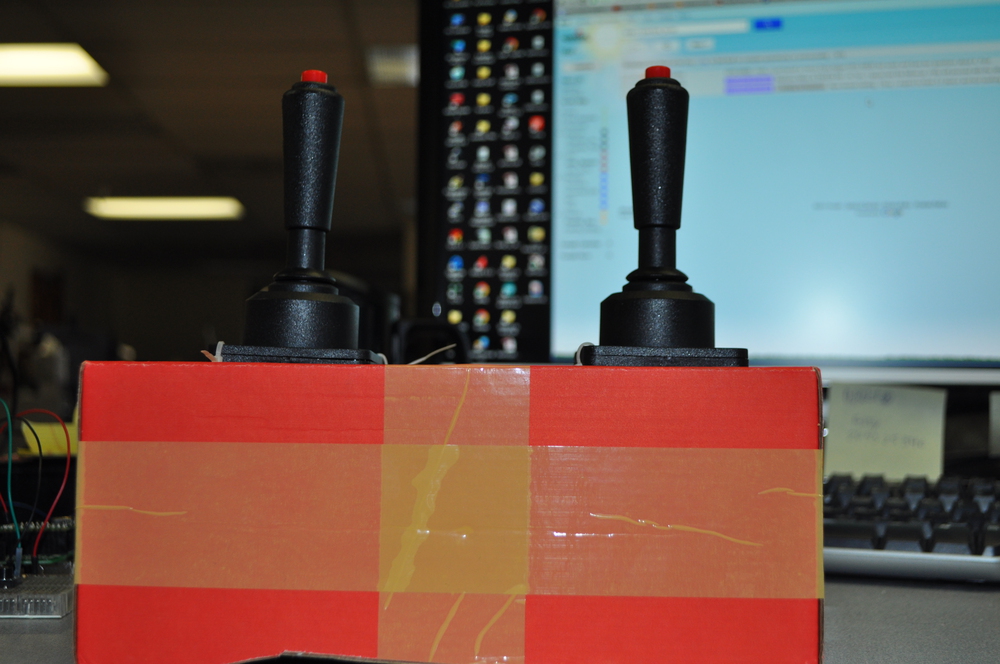
Of course, what controller wouldn’t have a killswitch, just in case the bot decided to go rogue? For that, I wanted something that would be plain and simple, so I used one of our arcade buttons and soldered that up to the shield. Once this was laser cut into lovely red acrylic and connected, the controller was ready to go. I will say, even without a robot, the controller does instill quite a sense of power in the user.

Onto the Bot
With the controller finished, it was time to assemble the bot itself. I didn’t run into too many issues with coding, thanks to the serial-controlled motor driver. With the Wixels sending and receiving serial commands correctly, the only issue left was to wire everything up and get it powered correctly. I decided to use the 7.4v, 2200mAh LiPo Battery to power my entire system. I was a bit nervous about using such a beefy battery, simply because I didn’t know how this was going to affect my bot’s weight, but it ended up working out quite well for the system. It had enough juice to power the motors, motor driver, Arduino/Wixel combo, and the servo I eventually ended up using for my weapon.
While it was nice having a single power supply (and thus only one battery to worry about charging), the single source did lead to its own difficulties. There may or may not have been a fried servo that occurred after a late night stint of bot -building when I plugged it directly into the battery, without any regulation whatsoever. Remember kids, always check your power ratings before connecting everything!
Despite a few minor setbacks (the burned servo, and having to resolder different headers onto my motor driver once I realized it wouldn’t fit in the bot’s innards), I was able to get the bot assembled and driving relatively quickly. However, I did run into the strange issue of only being able to drive my bot in circles. After repeatedly checking the rat’s nest of wires in the controller to make sure I didn’t invert/switch/reverse anything and that it matched up with the code, as well as repeatedly checking to make sure I also didn’t invert my motor hook-ups to the motor driver, I realized that my motors were backward. I had forgotten that the motors I was using can have Vin applied to either pin, which simply reverses the direction of rotation. I had managed to connect the motors to my bot in opposite directions. Once I figured that out, it was a quick fix to get the wheel motions corresponding to the joystick directions.

While I was happy with the way my bot turned out, I actually did terribly at our Robo-joust. Unfortunately, leaving myself only three hours' total time to learn to drive the bot was not nearly enough -- I think it was easier learning how to drive an actual car at 16. I managed to repeatedly drive my bot into the obstacle pits (most often the ones I built) during the competition, disabling my own bot. I guess as far as testing goes, the tiles passed at least!
I am excited to continue tweaking and working on my bot, and learning to drive it properly, and I'm so glad it survived the Joust in one piece. Perhaps one day soon our bots can meet to duke it out!
Cool project, and kudos to all your effort :D
Thanks! It was a lot of work, but definitely worth it!