You are not logged in.

Home | Product Categories | Batteries | PRT-00341

Polymer 
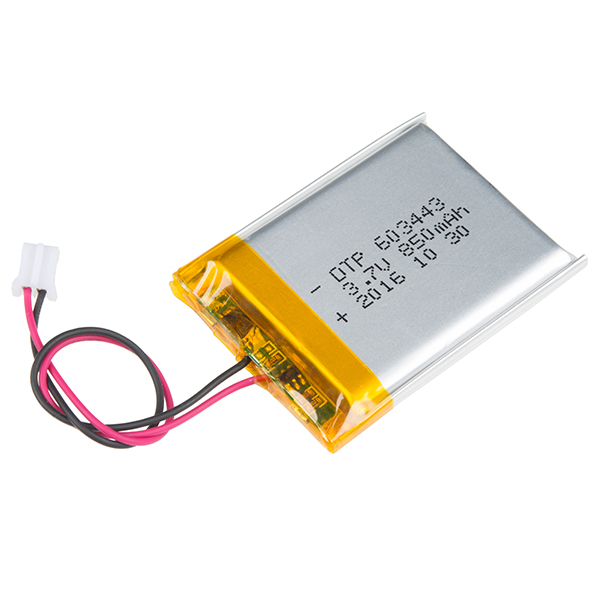
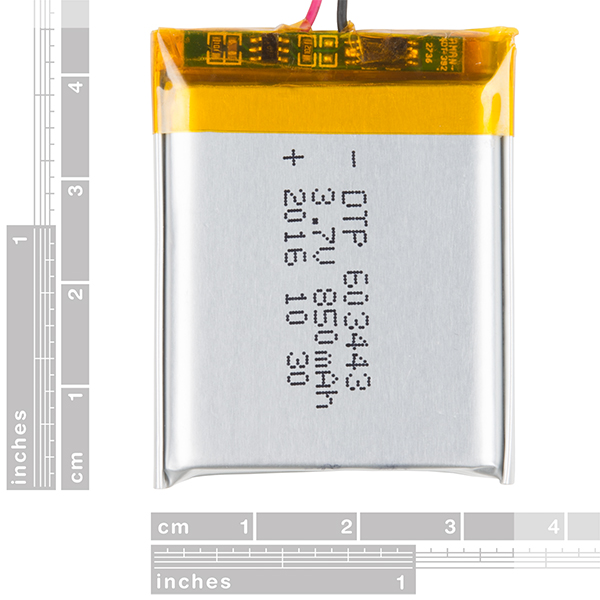
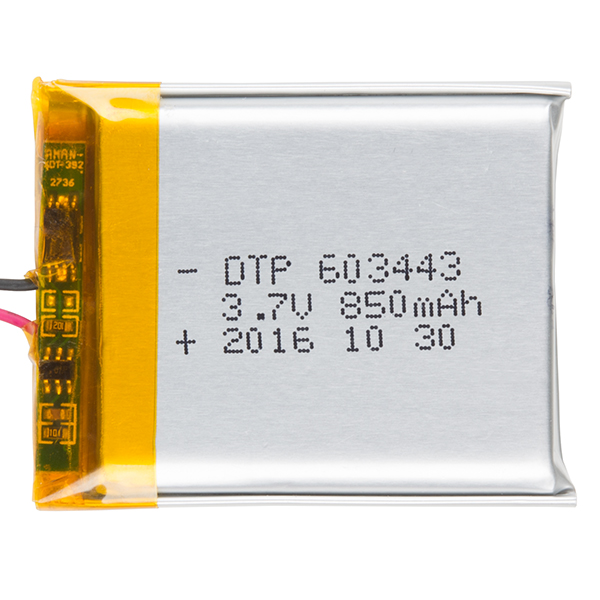
Lithium Ion Battery - 850mAh

sku: PRT-00341 RoHS Compliant

Description: These are very slim, extremely light weight batteries based on the new Polymer Lithium Ion chemistry. This is the highest energy density currently in production. Each cells outputs a nominal 3.7V at 850mAh! Comes terminated with a standard 2-pin JST-PH connector - 2mm spacing between pins. These batteries require special charging. Do not attempt to charge these with anything but a specialized LiPo charger.

Battery includes built-in protection against over voltage, over current, and minimum voltage.

Note: Be careful with the JST connectors. They can stick in pretty good and tugging on them can damage the connector. Check this tutorial for an easy way to remove them safely.

Dimensions: 0.23x1.16x2.0" (5.84x29.5x51mm)

Weight: 18.5g (0.65oz)

Features:

  • 2C continuous discharge
  • Excellent long-term self-discharge rates (<8% per month)
  • Robust power source under extreme conditions (-25 to 60C)

Documents:

Pricing

Out of stock


8.95
8.06
7.16

out of stock
backorder allowed


price
10+ units
100+ units

Backorder

Add to Wish List

Autonotify


Comments 49 comments

  • Any idea when these batteries become available again? They are now already more than a month out of stock.

  • It’s great that is has a protection against over voltage. But how long it will be whenever i use my laptop… Is it cheaper than the old ones….?

  • It might be worth pointing out to newbies that the battery needs charging when it arrives. I mean, I knew it, but others may not.
    I, too, had a battery marked 900mAh (no complaints there!), but also had trouble with the JST connectors. Hmm…Good thing I’m ditching them anyway.

    • ‘Fixed’ the JST by whittling off the two plastic latches on the top of the wire-side connector, then trimmed a SMALL amount off the top guide piece.

  • Anyone know of a good voltage step-up to use this to power an Arduino?

    • the Lilypad line uses this one http://www.sparkfun.com/products/8786 which also allows a charger to be connected too. Sparkfun gives the schematics if you want to make it yourself.

  • The description says “Battery includes built-in protection against over voltage, over current, and minimum voltage.” Is this all the protection that is needed? Is the low-voltage protection meant to be a last resort, or can I rely on it to safely cut off the load, so that I can then recharge the battery?
    Thanks

  • Great battery, mine was actually 900mah.

  • What is the output voltage? Description says “Each cell outputs 3.7 Volts”. Is it a 2 or 3 cell battery? Thx!

  • The only problem I had was using those JST Right Angle Connector.
    When you completely plug the battery in those JST connector, it is very hard to get them unplug! So hard that I pull off the wire out of the battery connectors and made them useless since I rip off the small metal notch! They are literally glued together once snap in.
    I had to use a small screw driver to get them unplug.

    • This is a common misconception about these connectors. To unplug them, you have to yank hard and quickly. If it’s too slow it won’t come out no matter how hard you pull on it.

  • is it possible to charge this through the lilypad LiPower supply board?

    • It appears as though you should be able to connect a LiPo charger to pin C of the LiPower board and charge that way. The only thing standing between you and the positive terminal of the battery is a reverse-polarity protection diode.

  • I had the same problem as robomaniac; the JST connector ‘glued’ itself into the LiPo USB Charger JST connectors.
    Still havent managed to get them apart, but i damaged the battery wires trying :–(
    I’ll have to get some JST connectors elsewhere in order to make this usable.
    (also, my battery says 900mAh as well)

  • Is it possible to charge this baterry with a MAX1811 IC? Have anyone tried this? (The datasheet says it can charge 4.1V or 4.2V Li-Ion baterries… could it charge this one?)

    • Hi,
      Thanks for the question. We have not tried this here in Sparkfun, but I see one major problem with your specs. If it is intended to charge 4.1V or 4.2V Li-Ion batteries, these are 3.7V. I would not recommend that you charge a LiPo with a ic that is not in proper spec. You should take a look at our Max1555 charger
      http://www.sparkfun.com/commerce/product_info.php?products_id=726
      Thanks,
      Tim

    • I disagree with Tim, Im highly confident the MAX1811 would work fine. The 4.2V setting is the maximum voltage the charger will output, or rather the point at which it will enter CV (constant voltage) mode. Based on the datasheet above which lists 4.20?0.03V as the charge cutoff, Id put the MAX1811 in 4.2 mode by tying SELV to IN. The 3.7V rating is the nominal voltage, these Li cells will vary from 4.2V at full charge to 2.75V at full discharge.

  • Does anyone know if the Tyco/AMP 440055-2 (Digikey A100043-ND) is compatible with this connector?
    The drawings look about the same, but the exact locations of the detents aren’t shown.

    • Answering my own question—yes, the AMP is compatible.
      Second question is whether the 2C discharge rate is accurate. The current limiting kicks in when I run a Tamiya motor box of of this, and I can’t imagine that it’s drawing 1.8A.

  • When will these batteries be back in stock ?

  • I don’t suppose I can link, say, four of these together in parallel and charge them from one lipo charger can I? Or can I? Each battery pack has its own charge level circuit built in after all.
    How would I go about using four of these in a project for the purposes of having more mAh?
    Four of these will fit nicely in the enclosure I plan to use, whereas one of the higher mAh battery packs won’t.

  • hi is it possible to make make up 7.4 volts by placing two in series/parallel? or would this blow these up or something?

    • Like any other battery type, you need to be careful when using batteries in parallel or series. Two in series will give you ~7.4V, while in parallel will increase the “drain-time”. A couple quick pointers:
      Always use batteries of the same type and voltage level
      Never mix batteries at different stages of charge level (i.e. one full, one half-full)
      Always use an appropriate charger for the battery type and size
      Never charge batteries in parallel unless you have a charge balancer
      Make sure that you are informed when you are using something potentially dangerous like Lithium-based batteries. Here are a couple quick links:
      Wikipedia: Battery
      Battery University: Serial & Parallel Battery Configurations

  • How can I use a battery like this to power an Arduino? Also would there be a way for the Arduino to determine if the battery needed to be charged?

    • doobie,
      I would suggest researching the Arduino’s Brown-Out Detector. It can be programmed to detect when the input voltage level drops past a certain threshold and resets when it does detect this. Whenever it performs a reset due to brown-out, a special flag (BORF of the MCUSR) is set.
      Something I’ve done with this is always check this flag upon start-up, and if it’s set, disable all other outputs (to save as much power as possible) and output to a red LED (or something similar) to indicate that the batteries need to be charged.

      • That is a great idea. Now, how would one go about setting the BOD? (some code please (: )
        Edit: I need to set the Fuse bits? set them as what??

        • Young Maker,
          This is the website I use to find what my fuse bits should be:
          http://www.engbedded.com/fusecalc
          There is an immense number of option available, I’d really suggest taking some time to wade through them; using custom fuse bits settings can allow for some really intense customization of your Arduino.
          Here is a blog that goes into some detail about to use the website and how to use avrdude to actually modify those bits in the hardware:
          http://www.insidegadgets.com/2011/02/01/building-a-standalone-temperature-logger-part-5/
          The blog post is written with an ATtiny85 in mind, but the same techniques can be applied to any Atmel micro. Some of the later posts on that same blog deal with how to absolutely minimize power consumption of the micros, which is really interesting and useful for certain projects! Good luck.

  • I just received 2 of these batteries, and they are both marked 850 mAh.

  • Estimated time of when these will return would be nice to have. If there’s no hope of return I will just have to search elsewhere.

  • Did these just change from 900mAh to 850mAh? What’s up with that?

    • The manufacturer keeps switching the capacity on us. They’re probably the same thing, with different labels, as the dimensions are identical. They’ve done this before.

  • Will there be stronger lepos in the future? I need more Ah.
    Like 2 aH ?

  • About 827 Farads. Cheaper, but not near as fast to charge.

  • I have successfully used this with an Arduino FIO (MAX1555 IC). A question: How can the setup be used to drive a Servo (Power HD 1900A 9gram)?

  • .

  • Im a noob W/ these type of Bats, im hope a peep can help :) I have a Android tablet, (Archos 32 Icecream sandwch) The battery is just like this. 3.7v 900mah 0.2C . It died, and I took the unit apart to replace the bat. Im wondering 2 things: 1. Do I need to buy the “special charger” mentioned above, or can I just cut off the tips, and attach the wires to tablet, and charge it thru its USB port in the same way the last batry was charged? 1b. EXACTLY what charger do I get? 2. Is the 850/900Mah sort of like the “storage capcity” of the battery? And nothing bad would come of it, if I get a bigger/higher one? THNX!!!

      1. the tablet has the special charger built in, so yes you can swap the batteries

      2. Yes 850mAh is the capacity. It’s fine to attach a higher/lower capacity battery (though the tablet may not be calibrated to it and may possibly show different battery levels)

  • Just an FYI, unlike the old 900mAh batteries they used to offer, these batteries consistently test between 89-92% capacity. So at best are ~780mAh (out of ~40 of these we have tested). The old batteries similar to this over the last few years were much better, i.e., the old 900mAh battery tested at 100-104%.

  • By not re-stocking this, you are killing my creative output. How does singlehandedly holding up production of crazy laser-gloves make you feel, sparkfun!? Just kidding, I subscribed to auto-notify. I hope they’re in stock soon!

  • Hi, I’m using a board with the IC MCP73831, when connected to USB port only thing it does is light the LED every 30 seconds, also if you connect the battery. the supply current is minimal, we note that not charging. know what that means?. thank you very much.