PCA9306 Logic Level Translator Hookup Guide (v2)
 Toni_K
 bboyho
Hardware Hookup
For this example, we are going to use an Arduino Uno to connect to an MMA8452 accelerometer breakout board, which runs at 3.3V and communicates over I2C.
| 3.3V Device (i.e. MMA8452) | PCA9306 (Low Side) | PCA9306 (High Side) | 5V Device (i.e. Arduino Uno w/ ATmega328P) |
|---|---|---|---|
| 3.3V | VREF1 | 3.3V | |
| VREF2 | 5V | ||
| SCL | SCL1 | SCL2 | A5 |
| SDA | SDA1 | SDA2 | A4 |
| GND | GND | GND | GND |
| EN | Any I/O Pin If Jumper is Adjusted |
Here is a Fritizing diagram showing the actual connections between the MMA8452, the PCA9306 breakout and the Arduino Uno.
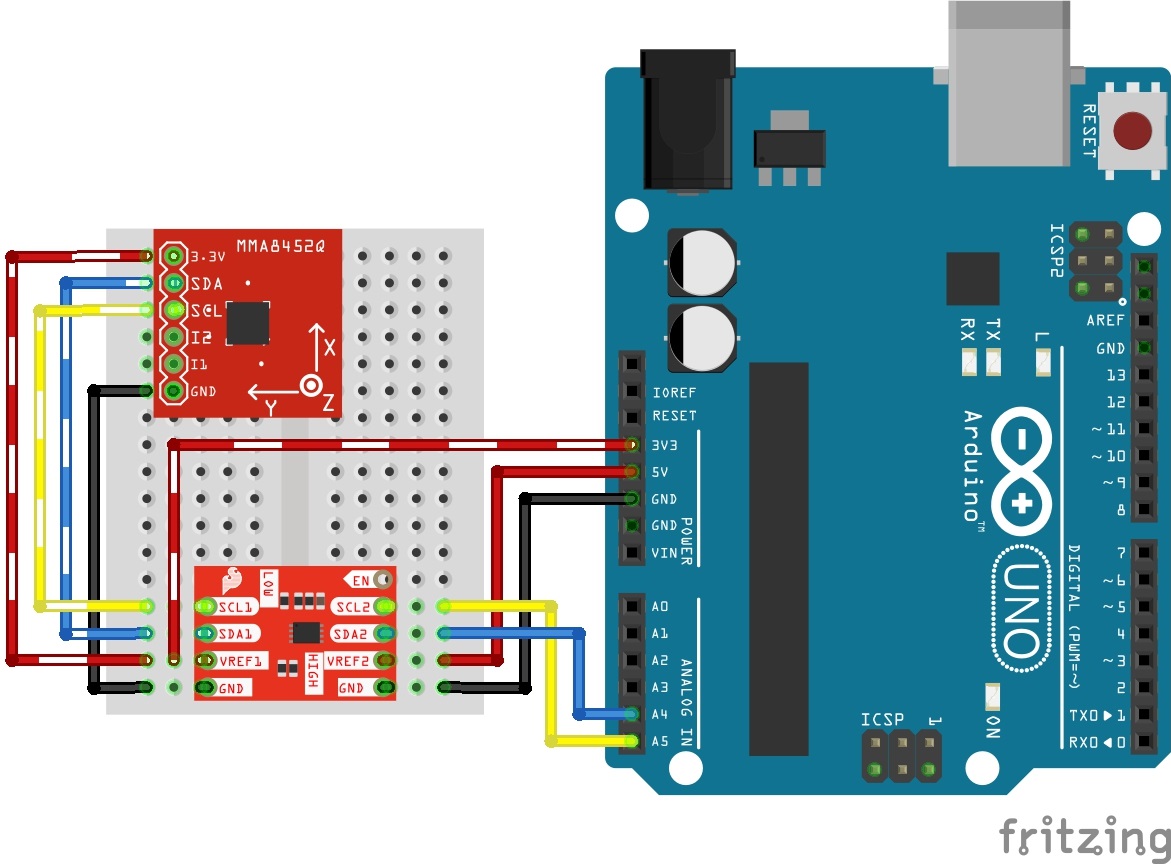
You'll need to connect power for the Arduino via the barrel jack, VIN, or USB connector. In this case, we'll simply use power from the USB cable to provide 5V to the high side. The diagram shows the MMA8452 running off the Arduino Uno's 3.3V rail. Keep in mind your power supplies could be different, but you will still need to have a power supply for the lower voltage side of the system and a separate supply for the higher voltage side.
Once you have the boards physically connected, you are good to go! You don't need to use any special code with the PCA9306 board, and you can simply use any example sketch available for your sensors. In this case, we are using the example MMA8452 from the hookup guide. Head over to the tutorial to finishing programing your Arduino to start using the accelerometer!